10 Essential Pegboard Design Plans for Customization
Share
You're about to reveal the full potential of your pegboard with these 10 essential design plans, carefully curated to help you customize your workspace for maximum efficiency and organization. Start by dividing your pegboard into zones for specific tools and implementing a color-coded organization system. Utilize space-saving solutions like double hooks and incorporate short and long pegs for various tool sizes. Consider customizable hooks and holders, slotted pegboards, and strategically placed storage bins for accessibility. You'll be on your way to creating a workspace that's tailored to your unique needs - and there's even more to discover to make your pegboard truly exceptional.
Key Takeaways
• Divide pegboard into zones for specific tools and implement a color-coded organization system for efficient categorization.
• Utilize space-saving solutions like double hooks, short and long pegs, and angled tool holding for maximizing storage capacity.
• Customize pegboard with hooks, holders, and innovative attachments to tailor to personal style and tool needs.
• Strategically place storage bins, containers, and baskets for accessibility, labeling, and categorization, and position frequently used items in easy-to-reach locations.
• Optimize pegboard layout by allocating dedicated space for each tool category, using adjustable dividers, and conquering clutter for improved productivity.
Simple and Functional Pegboard Layout
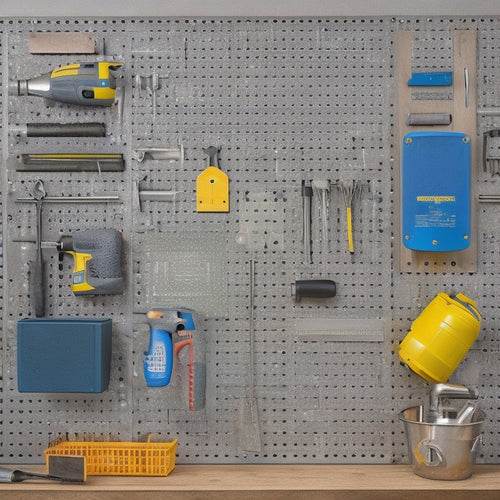
Create a simple and functional pegboard layout by dividing your board into zones, each dedicated to a specific type of tool or accessory, to maximize storage and minimize clutter. This organized approach allows you to quickly find what you need, saving you time and frustration.
To take it a step further, implement a color-coded organization system by grouping similar tools together and assigning a specific color to each category. This visual system makes it easy to identify where each tool belongs, ensuring your pegboard remains tidy.
When designing your layout, consider space-saving solutions such as double hooks or stacked bins to optimize your board's real estate. An efficient layout is key to a functional pegboard, so think creatively about how to customize your space.
For example, you can use a combination of short and long pegs to accommodate tools of varying sizes. By incorporating these strategies, you'll be able to create a pegboard that not only looks great but also boosts your productivity.
With a little planning and creativity, you can craft a pegboard that truly serves you and your needs.
Maximizing Storage With Corner Units
When designing your pegboard, you'll want to make the most of the often-wasted corner space. By incorporating corner units, you'll be able to optimize this area and increase your storage capacity.
Now, let's explore how angled tool holding and strategic corner space optimization can help you create a more efficient and functional pegboard.
Corner Space Optimization
By incorporating corner units into your pegboard design, you'll be able to maximize storage capacity in these often-wasted areas, freeing up valuable space for other essential tools and accessories. Corner shelving is an excellent space-saving solution, allowing you to store items like bins, baskets, or small containers. This not only keeps your workspace organized but also guarantees that frequently used items are within easy reach.
When designing your corner pegboard, consider the types of tools and accessories you need to store. You can install hooks for hanging items like cords, hoses, or accessories, or add bins and baskets for small parts and supplies. Labeling each storage compartment will help you quickly identify what's inside, saving you time and reducing frustration.
Angled Tool Holding
Angled Tool Holding (Maximizing Storage With Corner Units)
With corner units, you can angle tool holders to maximize storage capacity, making the most of your pegboard's often-wasted corners. This design plan allows for customizable angles, ensuring efficient storage and easy access to your tools. By angling your tool holders, you can fit more tools in a smaller space, keeping your workspace organized and clutter-free.
Here's a breakdown of how angled tool holding can benefit your pegboard design:
| Feature | Benefit |
|---|---|
| Customizable angles | Maximizes storage capacity and fits unique tool shapes |
| Efficient storage | Reduces clutter and keeps tools within easy reach |
| Unique displays | Adds visual interest to your pegboard and showcases your tools |
| Tool organization | Keeps tools categorized and easily accessible |
Customizable Hooks and Holders
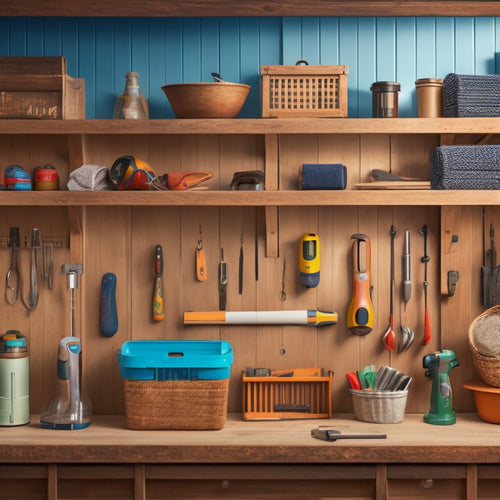
You can choose from a variety of customizable hooks and holders to tailor your pegboard to your specific needs and tools, ensuring a perfect fit for your most frequently used items. This is where colorful customization comes into play, allowing you to add innovative attachments that reflect your personal style. With customizable hooks and holders, you can create a pegboard that's both functional and visually appealing.
For instance, you can opt for hooks with different lengths and angles to accommodate various tools, such as hammers, screwdrivers, and pliers. Holders with different widths and depths can also be used to store items like wrenches, sockets, and even small parts like nuts and bolts.
The creative display of your tools and accessories can be taken to the next level with versatile accessories like bins, trays, and baskets. These can be mounted on the pegboard to keep small items organized and within easy reach.
Incorporating Bins and Containers
When designing your pegboard, you'll want to strategically place storage bins to maximize storage capacity and accessibility. Consider the types of items you'll be storing and the frequency of use to determine the best bin placement.
Storage Bin Placement
Six to eight storage containers, depending on their size, can be strategically positioned along the pegboard's periphery to maximize storage capacity while maintaining easy access to frequently used tools and supplies.
When organizing your bin setup, consider implementing a label system to guarantee you can quickly identify what's inside each container. This will save you time and frustration in the long run.
To take it a step further, use color-coded containers to categorize similar items, such as grouping all fasteners together in blue containers or dedicating green containers to electrical components. This visual system allows for quick access to the items you need, making your workflow more efficient.
As you're deciding on the placement of your containers, think about the items you use most frequently and position them in easy-to-reach locations. Less frequently used items can be stored in containers located higher or lower on the pegboard.
Container Organization Systems
A well-designed container organization system incorporates bins and containers of varying sizes and shapes to categorize and store small parts, tools, and accessories, making it easy to find what you need at a glance.
You'll want to create a labeling system that's easy to read and understand, so you can quickly identify what's inside each bin or container.
Consider using wall-mounted baskets to maximize vertical storage and keep frequently used items within easy reach.
To add visual appeal and make your container organization system more functional, incorporate color coordination.
For example, use bins with different colored lids or labels to categorize similar items, such as tools, fasteners, or hardware.
You can also use hanging baskets to store items like cords, cables, or other long, thin objects. This will keep them organized and prevent tangling.
Slotted Pegboard for Easy Access
You can create a slotted pegboard with horizontal or vertical slots to provide easy access to your tools and accessories. This design allows you to hang items of various sizes and shapes, making it perfect for customization.
When it comes to pegboard customization, you have numerous color options to choose from, ensuring your pegboard blends seamlessly with your surroundings.
Here are some benefits of a slotted pegboard:
-
Increased storage capacity: With horizontal or vertical slots, you can store more items in a smaller space.
-
Easy tool retrieval: Items are easily accessible, saving you time and effort.
-
Flexibility: You can hang items of different sizes, from small hand tools to larger equipment.
- Aesthetics: A slotted pegboard can add a touch of organization and style to your workspace or garage.
Consider using your slotted pegboard to hang plants, adding a touch of greenery to your space. With a pegboard, you can create a functional and visually appealing area that serves your needs.
Tool Organization With Dividers
As you design your pegboard, you'll want to think strategically about tool organization with dividers. By dividing your space effectively, you'll be able to conquer clutter and create a more efficient workspace.
You'll explore adjustable divider options and learn how to maximize storage capacity, ensuring every tool has its dedicated spot.
Divide and Conquer Space
By sectioning off specific areas of your pegboard with dividers, you'll be able to allocate dedicated space for each tool category, keeping them organized and easily accessible. This approach optimizes space utilization, ensuring that every inch of your pegboard is used efficiently. With dividers, you can create distinct zones for different types of tools, making it easier to find what you need when you need it.
Here are some benefits of dividing your pegboard space:
-
Reduced clutter: By separating tools into categories, you'll avoid a cluttered and overwhelming pegboard.
-
Improved visibility: With dividers, you can see at a glance where each tool is located, saving you time and frustration.
-
Enhanced aesthetic appeal: A well-organized pegboard with dividers can add a touch of professionalism to your workspace.
- Increased productivity: By allocating dedicated space for each tool category, you'll be able to work more efficiently and complete tasks faster.
Adjustable Divider Options
Adjustable dividers offer the flexibility to reconfigure your pegboard layout as your tool collection evolves, allowing you to maximize storage capacity and maintain a clutter-free workspace. With adjustable dividers, you can easily move or remove them as your tool collection changes, ensuring your pegboard remains organized and efficient.
Here are some benefits and options to ponder when selecting adjustable dividers for your pegboard:
| Divider Type | Benefits | Customization Options |
|---|---|---|
| Sliding Dividers | Easy to reposition, maximize storage | Adjustable width, customizable spacing |
| Hinged Dividers | Allow for corner storage, foldable | Customizable hinge placement, foldable depth |
| Telescoping Dividers | Extend or retract for varying tool lengths | Adjustable length, customizable slide mechanism |
When choosing adjustable dividers, contemplate the types of tools you'll be storing, the frequency of use, and the available space on your pegboard. By selecting the right dividers for your needs, you'll be able to optimize your space, reduce clutter, and increase productivity.
Maximize Storage Capacity
You can greatly enhance your pegboard's storage capacity by strategically placing dividers to organize your tools, making the most of the available space and reducing clutter. This thoughtful approach to pegboard customization not only boosts storage efficiency but also contributes to an overall aesthetic appeal. By incorporating dividers, you can create separate zones for different tool categories, ensuring that everything has its designated place.
Here are some tips to maximize storage capacity:
-
Categorize tools by type: Group similar tools together, such as hammers, screwdrivers, or pliers, to create a logical and accessible storage system.
-
Optimize vertical space: Use dividers to create vertical compartments, allowing you to store more tools in a smaller footprint.
-
Utilize corner space: Install dividers in corners to make the most of often-wasted space.
- Label each zone: Clearly label each divider section to facilitate quick tool retrieval and maintain organization.
Adding a Shelf for Heavier Items
Designating a dedicated shelf for heavier items guarantees that your pegboard remains organized and functional, while also preventing damage to the board or its hooks. This is especially important when working with heavy duty tools or equipment that require a robust support system. By incorporating a shelf specifically designed for heavier items, you can guarantee that your pegboard can withstand the weight capacity without compromising its structure.
Here's a breakdown of the benefits of adding a shelf for heavier items:
| Shelf Type | Weight Capacity | Space Savings |
|---|---|---|
| Heavy Duty | Up to 50 lbs | Compact design for corner spaces |
| Reinforced | Up to 75 lbs | Sliding shelf for easy access |
| Adjustable | Up to 100 lbs | Customizable height for varying tool sizes |
When installing a shelf, consider the weight capacity of the pegboard and the items you plan to store. Reinforcing the pegboard strength with additional support brackets or a sturdy frame can guarantee that it can handle the weight of the shelf and its contents. By choosing the right shelf type and design, you can create a space-saving solution that meets your specific needs.
Pegboard With Measuring Tape Holder
With your pegboard's heavy-duty shelf in place, it's time to focus on adding smaller storage solutions, like a measuring tape holder, to keep your workspace clutter-free and efficient. A measuring tape holder is a must-have pegboard accessory that'll save you time and frustration when working on projects.
When it comes to designing your measuring tape holder, you've got options. Consider the following innovative designs to customize your holder:
-
Magnetic tape holder: Attach a strong magnet to your pegboard and hang your measuring tape from it.
-
Retractable tape holder: Install a retractable reel that allows you to easily pull out and rewind your tape.
-
Clip-on tape holder: Use a clip or clamp to secure your measuring tape to the pegboard, making it easy to grab and go.
- Hooks and bins: Combine a hook for hanging your tape with a small bin for storing extra batteries, tips, or other accessories.
Incorporating a Utility Knife Block
How do you keep your utility knives organized and within easy reach when working on projects, ensuring they're safely stored yet quickly accessible? A utility knife block integration on your pegboard is a space-saving solution that tackles this problem. By dedicating a section of your pegboard to utility knife storage, you can create a customized hub for your most frequently used tools.
Here are some pegboard customization ideas to ponder:
| Knife Block Style | Number of Knives | Pegboard Space Required |
|---|---|---|
| Vertical Slot | 5-7 | 2x6 inches |
| Horizontal Tray | 3-5 | 4x4 inches |
| Rotating Block | 8-10 | 4x8 inches |
| Magnetic Strip | 2-4 | 1x6 inches |
| Adjustable Holder | 1-3 | 2x4 inches |
When designing your utility knife block, contemplate the type of knives you use most, the frequency of use, and the available space on your pegboard. By incorporating a thoughtfully designed knife block, you'll be able to work more efficiently and safely, with your utility knives organized and within easy reach.
Creating a Pegboard With a Workbench
You can optimize your workspace by integrating a pegboard directly into your workbench, creating a smooth shift between tool storage and work surface. This design plan guarantees efficient tool storage and workspace optimization, allowing you to focus on your tasks without interruptions.
By combining your pegboard with a workbench, you'll have all your essential tools within easy reach, making your work process more streamlined and efficient.
Here are some key considerations to keep in mind when creating a pegboard with a workbench:
-
Measure your workspace: Ensure you have sufficient space for both the pegboard and workbench, considering any obstacles or limitations.
-
Choose the right materials: Select durable materials that can endure heavy use and tool storage.
-
Plan for adjustable hooks: Incorporate adjustable hooks to accommodate tools of different sizes and shapes.
- Consider ergonomic design: Design your workbench and pegboard to promote comfortable working heights and reduce strain on your body.
Frequently Asked Questions
What Is the Ideal Pegboard Size for a Small Workshop?
When determining the ideal pegboard size for your small workshop, consider the space you have available and the tools you need to organize, aiming for a balance between pegboard organization and space efficiency.
Can I Use a Pegboard in a Humid or Outdoor Environment?
'A million times yes, you can use a pegboard in a humid or outdoor environment, but be prepared to take extra precautions to guarantee outdoor pegboard durability, such as sealing and coating, to withstand humid climate considerations.'
How Do I Prevent Pegs From Falling off the Board?
To prevent pegs from falling off, you'll want to focus on pegboard peg security. Use peg locks or clips to keep them in place, and implement Pegboard organization tips like categorizing and grouping similar items together.
Are Pegboards Suitable for Holding Heavy Power Tools?
'As you weigh your options, consider this: a pegboard's weight capacity is only as strong as its material durability. Look for sturdy materials, like heavy-duty steel or aluminum, to guarantee your heavy power tools stay securely in place.'
Can I Install a Pegboard on a Curved or Angled Surface?
You'll face installation challenges on a curved surface, requiring creative problem-solving and specialized fasteners. However, an angled surface offers more customization options, allowing you to adapt your pegboard design to fit your unique space and needs.
Related Posts
-

How to Hang a Pegboard in 5 Easy Steps
You'll hang a pegboard in 5 easy steps by first preparing the wall, ensuring it's sturdy and free of obstructions. Ne...
-

What Tools Do I Need for a DIY Wall Organizer
You'll need a variety of tools to complete a DIY wall organizer project. Essential measuring tools include a tape mea...
-

Top Rolling Tool Box Drawers for Maximum Storage
When it comes to maximizing storage with rolling tool box drawers, you need a solution that combines durability, cust...


