What Tools Do I Need for a DIY Wall Organizer
Share
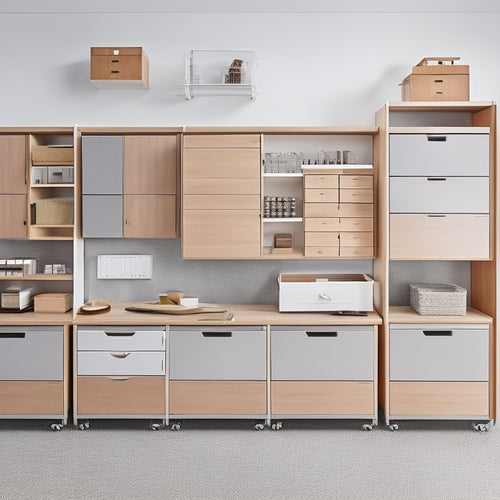
You'll need a variety of tools to complete a DIY wall organizer project. Essential measuring tools include a tape measure and laser level to guarantee accurate measurements and alignment. Cutting and shaping tools like circular saws, jigsaws, and sanders will help you prepare your materials. Drilling and fastening tools, such as drill bits and screws, will secure your shelves and components. Sanding and smoothing tools will refine your surfaces, and painting and finishing tools will add a professional touch. From wall preparation to mounting and installation, having the right tools will make all the difference - and understanding what you need is just the beginning of creating a functional and stylish wall organizer.
Key Takeaways
- For accurate measurements, essential tools include a tape measure, laser level, and thoroughness in double-checking calculations.
- Cutting and shaping tools like circular saws, jigsaws, miter saws, and sanders are necessary for preparing materials.
- Drilling and fastening tools such as drills, bits, and fastening materials like nails, screws, or wall anchors are required for assembly.
- Sanding and smoothing tools like sandpaper, sanding blocks, and orbital sanders help achieve a polished finish.
- Mounting and installation tools including levels, drills, bits, stud finders, and socket sets ensure secure and level installation.
Essential Measuring Tools
Getting accurate measurements is vital to building a functional and aesthetically pleasing wall organizer. You'll need the right tools to guarantee your project turns out as planned. A tape measure is a must-have for any DIY project. It allows you to take precise measurements of your wall, shelves, and other components.
Make certain to choose a high-quality tape measure that's durable and easy to read.
Another vital tool is a laser level. This device projects a level line or dot onto your wall, guaranteeing your shelves and components are perfectly aligned. A laser level is especially useful when working with multiple shelves or complex designs.
It eliminates the need for guesswork, reducing the risk of errors and guaranteeing a professional-looking finish.
When taking measurements, it's imperative to be thorough and double-check your calculations. A small mistake can throw off your entire project, leading to costly mistakes and wasted materials.
Cutting and Shaping Tools
With your measurements in hand, you're ready to start cutting and shaping the components of your wall organizer. This is where the right tools make all the difference. You'll need a variety of saws to cut your materials to size, and shaping techniques to refine the edges and surfaces.
| Tool | Purpose |
|---|---|
| Circular saw | Cutting straight lines in wood or plywood |
| Jigsaw | Curved cuts in wood or metal |
| Miter saw | Precise angled cuts in wood |
| Sander | Smoothing out rough edges and surfaces |
When choosing a saw, consider the type of material you're working with and the level of precision you need. For example, a circular saw is great for ripping plywood, while a jigsaw is better suited for curved cuts in metal. Remember to always follow safety guidelines when operating power tools, and wear protective gear like safety glasses and a dust mask.
Drilling and Fastening Tools
You'll need the right drill bits to get started on your DIY wall organizer project, and that means understanding the essentials of drill bits, including their materials, coatings, and sizes.
Next, you'll have to decide on the fastening options available, such as screws, nails, or wall anchors, depending on the type of wall and the weight of your organizer.
Drill Bits Essentials
Drill bits are the unsung heroes of your DIY wall organizer project, converting your drill into a versatile powerhouse that can tackle a wide range of tasks. With the right drill bits, you'll be able to efficiently and safely complete your project.
When it comes to drill bit types, you'll need a mix of twist bits, spade bits, and hole saws. Twist bits are ideal for drilling small holes in wood, metal, or plastic, while spade bits are better suited for larger holes in wood.
Hole saws, on the other hand, are perfect for making precise, circular cuts.
Drill bit materials also play a significant role. High-speed steel (HSS) bits are durable and suitable for most DIY projects, but they can become dull quickly.
Cobalt steel bits, however, are more heat-resistant and ideal for drilling through harder materials like metal. Carbide-tipped bits are the most expensive option, but they provide exceptional durability and are perfect for heavy-duty projects.
Fastening Options Available
Having selected the right drill bits for your DIY wall organizer project, it's time to focus on the fastening options that will securely hold your storage components in place.
You'll need to take into account the type of fastening materials and techniques that suit your project's requirements. For instance, you may opt for nails, screws, or wall anchors, depending on the weight and type of items you'll be storing. Additionally, you'll need to choose the appropriate fastening tools, such as a drill, impact driver, or screwdriver, to provide a secure and sturdy hold.
When selecting fastening materials, take into account the weight capacity and material of your wall, as well as the type of storage components you're using.
For example, if you're using heavy shelves or storing bulky items, you may need to use stronger fastening materials like wall anchors or lag screws.
It's also essential to follow proper fastening techniques to prevent damage to your wall or storage components.
Screws and Anchors
Get a grip on the right screws and anchors for your DIY wall organizer project, and you'll be well on your way to creating a sturdy and reliable storage system.
When it comes to screw types, you'll want to choose ones that can support the weight of your organizer and its contents. For most DIY wall organizers, you'll need a combination of screws, such as wood screws, drywall screws, or self-drilling screws. Consider the material you're working with and the weight capacity you need.
Anchor materials are just as essential. You'll need anchors that can securely hold your screws in place and distribute the weight evenly. Common anchor materials include plastic, metal, and nylon.
Plastic anchors are ideal for drywall, while metal anchors are better suited for heavier loads. Nylon anchors offer a durable and rust-resistant option. Be certain to choose anchors that are compatible with your screw type and the surface you're working with.
With the right screws and anchors, you can guarantee your DIY wall organizer is safe, secure, and functional.
Sanding and Smoothing Tools
Sanding and smoothing out your DIY wall organizer's surfaces is an essential step in preparing them for finishing touches. You'll need a few key tools to achieve a smooth, even finish. Start with a variety of sandpaper grits, ranging from coarse (80-100) to fine (220-240). This will allow you to progressively smooth out rough spots and achieve a high-gloss finish.
When sanding, use gentle, circular motions to avoid scratching the surface. For tight spaces or intricate designs, consider using a sanding block or an orbital sander.
To further smooth out your finishes, consider using a wood file or a steel wool pad. These tools are particularly effective at removing small imperfections and creating a uniform texture.
Remember to always work in a well-ventilated area, and wear a dust mask to protect yourself from inhaling sanding particles. By mastering various sanding techniques and smoothing finishes, you'll be able to achieve a professional-looking finish on your DIY wall organizer.
Painting and Finishing Tools
You're now ready to add some color and protection to your DIY wall organizer with the right painting and finishing tools.
You'll need to choose from a wide range of paint color options to match your decor, and select the appropriate brush and roller types for a smooth application.
Once you've applied the paint, you'll need to finish it off with the right finishing coat to guarantee durability and a professional-looking finish.
Paint Color Options
With your DIY wall organizer project underway, selecting the perfect paint color options is crucial to achieving a cohesive look that complements your space.
When choosing a paint color, consider the color psychology behind your selection. Different colors can evoke distinct emotions and moods, so think about the atmosphere you want to create in your space. For example, calming colors like blue or green can promote relaxation, while vivid colors like orange or yellow can stimulate energy.
Trendy palettes can also inspire your color selection. Neutral palettes like monochromatic or minimalist designs are popular for their sleek, modern look. Alternatively, bold and bright palettes can add a playful touch to your space.
Consider the natural lighting in your room, as well as the colors of your furniture and decor, when making your decision. Remember to test the paint colors on a small area before committing to a specific shade. This will guarantee the color looks great in your space and meets your expectations.
Brush and Roller Types
Your paint color is chosen, and now it's time to bring it to life with the right painting and finishing tools. When it comes to brushes, you'll want to select the right type for your project. Natural bristle brushes are ideal for oil-based paints, while synthetic brushes work best with water-based paints. You may also consider using foam brushes for a smooth, even finish.
For rollers, the material matters. Microfiber rollers are great for smooth surfaces and create a fine, even finish. Wool rollers are better suited for textured surfaces and can handle thicker paints. Make certain to choose a roller with the correct nap length for your specific project. A longer nap length is better for textured surfaces, while a shorter nap length is better for smooth surfaces.
Remember to always read the label and follow the manufacturer's instructions for the specific brush or roller you choose. This will guarantee a safe and successful painting experience.
Additionally, always wear protective gear, such as gloves and a mask, when painting to prevent injury and exposure to harsh chemicals.
Finishing Coat Applications
Selecting the right brush or roller is just the beginning; now it's time to hone the methods for applying a flawless finishing coat. To achieve a professional-looking finish, you'll need to focus on surface preparation and finishing techniques.
Finishing Coat Application Methods
| Method | Description | Benefits |
|---|---|---|
| Rolling | Use a roller to cover large areas quickly | Fast coverage, ideal for flat surfaces |
| Brushing | Use a brush for detailed work and cutting in | Precise control, ideal for edges and corners |
| Spraying | Use a sprayer for a smooth, even finish | Fast and efficient, ideal for large, complex projects |
When applying a finishing coat, remember to work in a well-ventilated area, and always wear protective gear, including gloves, safety glasses, and a mask. Make sure the surface is clean, dry, and free of dust and debris. Use a primer if necessary, and apply thin, even coats, allowing each coat to dry completely before applying the next. By following these tips and perfecting your finishing techniques, you'll achieve a beautiful, durable finish for your DIY wall organizer.
Wall Preparation Essentials
Before you start mounting your DIY wall organizer tools, take a closer look at the surface you're working with. Different wall surface types require specific preparation techniques to guarantee a secure and durable hold.
For instance, if you have a drywall, you'll need to clean the area thoroughly with a vacuum cleaner or a damp cloth to remove any dust or debris. If you're working with a plaster wall, you may need to apply a coat of primer to create a smooth surface.
For textured or uneven walls, use a wall repair compound to fill in any gaps or holes. Sand the area smooth with a sanding block or an orbital sander, then wipe away any dust with a tack cloth.
If you're dealing with a glossy or painted wall, lightly sand the surface to create a rough texture for better adhesion. Regardless of the wall type, make certain it's dry, clean, and free of old adhesives or debris.
Proper preparation is essential to prevent your wall organizer from falling or damaging the wall.
Mounting and Installation Tools
With your wall surface properly prepared, you're ready to move on to the mounting and installation process. For this, you'll need a few essential tools to guarantee a secure and level installation. A level is a must-have to confirm your wall organizer is straight and even. You can choose between a bubble level or a laser level, depending on your personal preference and the size of your project.
When it comes to mounting techniques, you'll need a drill and bits suitable for the type of wall anchors you're using. Be certain to choose the right drill bit size to avoid damaging the anchors or the wall. A stud finder can also come in handy to locate the wall studs, providing a more secure hold for your wall organizer.
Additionally, consider investing in a socket set or a ratchet and socket combination for tightening and loosening bolts and screws.
Additional Helpful Accessories
Taking your DIY wall organizer project to the next level, you'll want to contemplate a few additional accessories that can make a big difference in the final result.
These organizational accessories can enhance the functionality of your wall organizer, providing more storage solutions and keeping your belongings tidy.
Consider adding hooks for hanging items like bags, hats, or keys. You can also incorporate small baskets or bins to store small items like office supplies, mail, or notifications.
Another useful accessory is a magnetic board, perfect for holding notes, reminders, or even small metal items. Additionally, you can add a small shelf or ledge for displaying decorative items or storing small containers.
These accessories won't only add visual appeal to your wall organizer but also provide extra storage and functionality.
When choosing these accessories, make certain they're compatible with your wall organizer's design and material.
Also, verify they're securely attached to the wall to avoid any accidents or injuries.
Frequently Asked Questions
Can I Use a DIY Wall Organizer for Heavy Objects?
You'll want to guarantee your DIY wall organizer can handle the weight capacity of the heavy objects you plan to hang. Choose material choices that can support the load, and don't be afraid to add extra reinforcements for added safety and peace of mind.
How Do I Ensure My Wall Organizer Is Level?
You're on the level, literally! To guarantee your wall organizer is perfectly horizontal, use a trusty spirit level or a laser level, and employ tried-and-true wall mounting techniques, like marking the wall studs and drilling precise pilot holes, to avoid a wonky installation.
Can I Customize My DIY Wall Organizer Design?
You can totally customize your DIY wall organizer design by finding inspiration online or in home decor magazines, and then choosing from various material options, like reclaimed wood, MDF, or even repurposed pallets, to create a unique and functional space.
Do I Need a Stud Finder for Wall Organizer Installation?
Like a skilled builder, you're wise to question if a stud finder is necessary for a sturdy wall organizer installation. Yes, you do need one, as it guarantees you're drilling into solid wood, not hollow air. Opt for a magnetic or radar-type stud finder for accurate results.
Are DIY Wall Organizers Suitable for Rental Properties?
You'll find that DIY wall organizers are perfect for rental properties since they offer temporary solutions that won't damage the walls, providing renter-friendly options that guarantee your belongings are secure without compromising your lease agreement.
Conclusion
With your DIY wall organizer nearing completion, confidently conquer the final steps! Craft a cohesive creation by carefully considering each vital component. Conveniently, you've collected the essential tools, from measuring to mounting. Now, carefully carry out the culmination of your clever concept, and celebrate the culmination of your creative craftsmanship!
Related Posts
-

Modular Tool Storage Systems for Small Spaces
You can optimize your small workspace by leveraging modular tool storage systems that intelligently employ vertical s...
-

10 Best Tool Boxes for Every Budget and Job
You're looking for a tool box that fits your budget and job requirements. Whether you're a DIY enthusiast, electricia...
-

Top Wrench Tool Box Sets for Every Mechanic
You're looking for high-quality wrench tool box sets that cater to your specific needs as a mechanic. From top-rated ...


