Why Small Spaces Require Intentional Tool Organization
Share
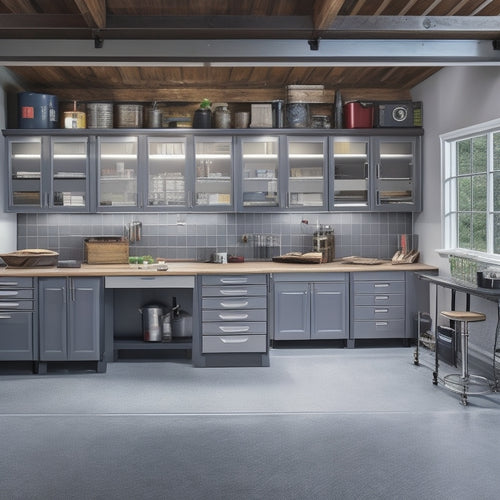
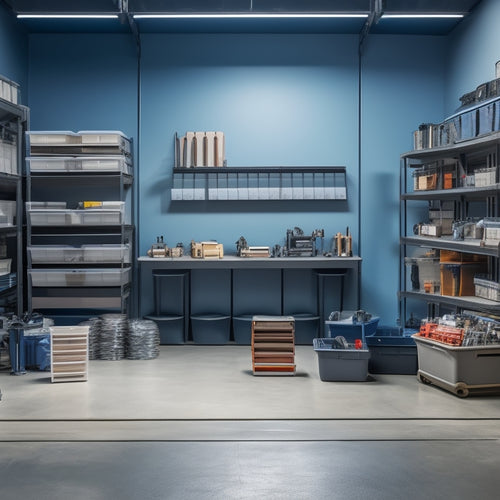
When working in small spaces, intentional tool organization is vital because every square inch counts. Clutter can quickly throttle productivity, making it harder to focus and complete tasks efficiently. By maximizing vertical space, customizing pegboard layouts, and prioritizing essential tools, you can free up floor space and reduce clutter. You'll need to adapt to your unique space, streamlining your workflow and utilizing clever storage solutions to overcome common obstacles. As you optimize your space, you'll discover more opportunities to fine-tune your workflow and boost productivity – and that's just the beginning.
Key Takeaways
• Limited storage capacity in small spaces necessitates creative space-saving solutions to maximize tool organization and accessibility.
• Cluttered workspaces hinder focus and efficiency, making intentional tool organization crucial for a functional work area.
• Intentional tool organization enables essential tool prioritization, ensuring important tools are within easy reach and reducing clutter.
• Streamlining workflow patterns and eliminating unnecessary steps also relies on intentional tool organization in small spaces.
• Adapting to unique spaces requires thinking outside the box and employing space-saving techniques like vertical storage and adjustable shelves.
Maximizing Vertical Space Usage
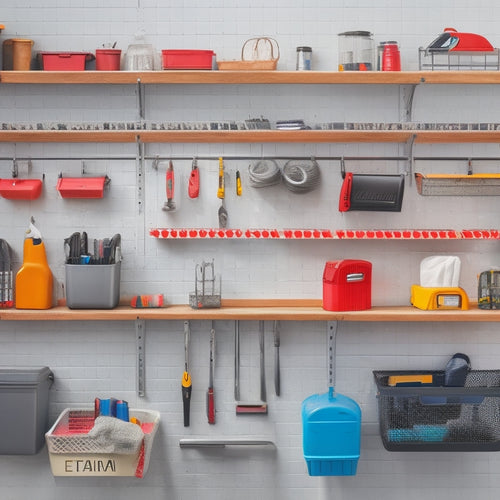
You can greatly increase your tool storage capacity by utilizing wall-mounted shelves, hooks, and bins. These tools allow you to maximize vertical space usage in your small workshop or garage.
This intentional approach to tool organization enables you to make the most of your limited space, keeping your essential tools within easy reach.
Compact tool racks, for instance, can be mounted on walls to store frequently used hand tools, while innovative storage solutions like bins and baskets can be used to store smaller items like nuts and bolts.
By implementing vertical shelving, you can also store less frequently used tools, keeping them organized and out of the way.
These space-saving techniques not only free up floor space but also reduce clutter, making it easier to find what you need when you need it.
Customizing Pegboard Layouts
When customizing your pegboard layout, you'll want to start by developing a tool placement strategy that makes sense for your specific needs and workflow.
From there, you'll need to contemplate pegboard design essentials, such as the size and type of hooks and bins, to guarantee everything fits together seamlessly.
Tool Placement Strategy
Your pegboard's layout should be tailored to your specific toolset and workflow, ensuring that frequently used items are easily accessible and less-used tools are stored out of the way. This customized approach to tool placement strategy is pivotal in small spaces where every inch counts.
By grouping similar tools together, you'll reduce wasted time searching for what you need. For instance, place your most-used hand tools, like hammers and screwdrivers, near the front of the pegboard for quick access. Less frequently used items, like specialized saws or drills, can be stored towards the back or on lower hooks.
In small spaces, tool accessibility is essential to maximizing space efficiency. By thoughtfully organizing your tools, you'll be able to work more efficiently and complete projects faster. Consider the tasks you perform most often and design your pegboard layout around those needs.
Pegboard Design Essentials
With a well-thought-out tool placement strategy in place, it's time to focus on customizing your pegboard layout to further optimize your workspace, starting with the selection of the right pegboard size and style to accommodate your tool collection.
Take into account the color coordination of your tools and pegboard to create a visually appealing space that's easy to navigate. This will also help you quickly identify the tool you need, making your workflow more efficient.
When designing your pegboard layout, prioritize tool accessibility. Place frequently used tools in easy-to-reach locations, and reserve lower or harder-to-reach areas for less frequently used items. This will save you time and energy in the long run.
Don't overlook the pegboard aesthetics; a well-designed pegboard can enhance the overall look and feel of your workspace. Finally, think about space optimization – make the most of your pegboard's real estate by using hooks, bins, and other accessories to maximize storage capacity.
Maximized Storage Potential
By incorporating clever storage solutions, you can reveal the full potential of your pegboard, freeing up precious floor and bench space for more important tasks. One way to do this is by designing a customized layout that incorporates hidden compartments and space-saving solutions. Consider adding creative shelving units or bins to store small parts, tools, and accessories. You can also use baskets or trays to keep similar items together, making them easy to find and access.
To maximize storage potential, think vertically. Install hooks, bins, or shelves that make the most of your pegboard's vertical space. This will help keep your workspace clutter-free and organized.
Additionally, consider using labeling systems or color-coding to categorize your tools and supplies. This will save you time and frustration when searching for specific items.
Essential Tool Prioritization
Prioritize your important tools by identifying the tasks you perform most frequently, ensuring you have the necessary instruments within easy reach to maximize efficiency. This step is vital in small spaces where every inch counts.
By focusing on the tools you use daily, you'll avoid cluttering your workspace with unnecessary items.
In a well-organized space, every tool has its designated spot, making it easy to access what you need when you need it. This intentional approach to tool organization allows you to work more efficiently, saving you time and energy.
Remember, the goal is to optimize your space for maximum productivity. By prioritizing your important tools, you'll create a workflow that's streamlined and effective. This, in turn, will enable you to provide better service to others.
Effective tool organization and space efficiency are key to achieving this goal.
Streamlining Workflow Patterns
You can greatly reduce workflow disruptions by identifying and eliminating unnecessary steps in your daily tasks. This is especially vital in small spaces where every minute counts. By streamlining your workflow patterns, you'll be able to complete tasks more efficiently and make the most of your space.
Start by mapping out your daily tasks and identifying areas where you can simplify or eliminate steps. Ask yourself, 'Is there a way to combine these two tasks?' or 'Can I automate this process?' By doing so, you'll create a more efficient workflow that allows you to focus on what matters most - serving others.
In a small space, every inch counts, and an efficient workflow is essential to space optimization. By streamlining your workflow patterns, you'll be able to free up space and reduce clutter. This, in turn, will allow you to focus on providing better service to those you're serving.
Effective Hook Placement Strategies
At least 75% of your frequently used tools can be hung from hooks, freeing up valuable storage space and saving you time searching for them. By implementing effective hook placement strategies, you can create a visually appealing and functional workspace.
Consider the visual impact of your hook placement, grouping similar tools together and creating a sense of harmony in your space. Strategic placement is key, so think about the tools you use most frequently and position them at eye level or near your primary workstation.
Don't be afraid to get creative with your solutions – use hooks of varying sizes, shapes, and materials to add visual interest and create engaging displays. For example, you could hang a pegboard on a wall or install a hook rail on a cabinet door. By doing so, you'll create a space that's not only functional but also aesthetically pleasing.
With intentional hook placement, you'll be able to quickly find the tools you need, increasing your productivity and efficiency.
Utilizing Corner Storage Space
Now that your frequently used tools are neatly organized on hooks, focus on maximizing the often-wasted corner storage space in your small workspace. Corners are notorious for being dead zones, but with a little creativity, you can harness their potential.
Consider installing a carousel or a Lazy Susan in the corner to create hidden storage for less frequently used items. These innovative solutions will keep your workspace clutter-free and make the most of every available inch.
Look for space-saving, creative solutions that fit your specific needs. For instance, you can use corner shelves or baskets to store small items like screws, nuts, or bolts. Alternatively, you can opt for a corner workstation with built-in storage, providing a dedicated space for tasks that require more concentration.
Overcoming Common Obstacles
As you work to optimize your small space for tool organization, you'll likely encounter a few common hurdles.
You'll need to find ways to overcome limited storage capacity, which can leave you feeling like there's just not enough room for everything.
Limited Storage Capacity
You face a significant challenge when working with small spaces: limited storage capacity restricts your ability to keep all the tools you need within easy reach. This limitation can lead to frustration and inefficiency, making it difficult to complete tasks efficiently.
To overcome this obstacle, you need to think creatively about space-saving solutions and compact organization. Implementing creative storage solutions, such as wall-mounted shelves, hooks, and bins, can help maximize your available space. Consider investing in space-optimized tools, like multi-functional devices or foldable equipment, to reduce clutter and free up storage.
By adopting these strategies, you can optimize your storage capacity, ensuring that essential tools are within easy reach. This, in turn, will enable you to work more efficiently, saving time and energy.
Cluttered Work Surfaces
How can you focus on the task at hand when your work surface is cluttered with tools, materials, and unfinished projects, making it difficult to find what you need when you need it? A cluttered workspace can be overwhelming, leading to wasted time and frustration.
In a small space, prioritizing organization solutions is crucial to maintain a functional and efficient work area.
To tackle this issue, start by categorizing your tools and materials into groups. Designate specific zones for each category, ensuring everything has a designated home.
Implement vertical storage solutions, such as pegboards or shelves, to maximize your small space. Consider investing in tool storage containers or bins that can be easily labeled and accessed.
Adapting to Unique Spaces
In compact workshops, garages, or sheds with irregular shapes or obstructions, optimizing tool storage requires creative problem-solving to overcome these spatial challenges. You'll need to think outside the box to maximize every inch of available space. This is where creative storage solutions come into play.
Consider installing shelves, hooks, or pegboards that can be adjusted to fit your unique space. This will allow you to make the most of your efficient workspace design.
To further optimize your space, employ space-saving techniques like vertical storage or compact tool chests. These will help keep your tools organized and easily accessible, ensuring a functional tool organization system.
Frequently Asked Questions
How Do I Prevent Tools From Getting Dusty in Small Spaces?
To prevent tools from getting dusty in small spaces, you'll want to store them in airtight containers or bags, and regularly clean them with a soft cloth to keep dust at bay.
Can I Use Tool Organization Systems in Rented Spaces?
Can you really afford to waste precious space in your rental? You can use space-saving solutions like portable tool organizers that are easy to install and remove, allowing you to stay organized without making permanent changes.
Are Tool Organization Systems Suitable for Left-Handed Individuals?
You'll be relieved to know that tool organization systems can be tailored to left-handed efficiency, ensuring easy tool accessibility and maximizing your productivity, regardless of your handedness.
How Often Should I Reorganize My Tool Storage Systems?
You should reorganize your tool storage systems every 3-6 months to guarantee tool maintenance and maximum space utilization, allowing you to work efficiently and effectively, while also adapting to changing frequency of tool use.
Can I Use DIY Tool Organization Systems in a Humid Environment?
You can use DIY tool organization systems in a humid environment, but be sure to prioritize rust prevention and moisture control with solutions like waterproof coatings, silica gel packets, and breathable materials to protect your tools.
Related Posts
-

Best Tool Chests for Home Garage Options
When selecting the best tool chest for your home garage, you'll want to evaluate top brands like DeWalt, Milwaukee, a...
-

3 Simple Steps to a Garage Tool Wall You'll Love
To create a garage tool wall you'll love, start by planning the space, taking inventory of your tools, and measuring ...
-

How to Maximize Storage Space With Parts Storage Bins
To maximize storage space with parts storage bins, start by evaluating your available storage space and examining you...


