
What's the Secret to Optimized Tool Storage?
You're likely wasting valuable time and space due to a disorganized tool collection. To optimize your tool storage, start by evaluating your current tool collection, identifying frequently used tools, and determining your storage layout. Categorize tools by type, size, and frequency, and guide your storage solutions based on this inventory. Next, purge and organize your tools, assigning a specific home for each one, and maximize your vertical storage space with shelving and hanging systems. With a well-planned system, you'll be able to access your tools quickly and efficiently. Now, it's time to fine-tune your approach.
Key Takeaways
• Assess and categorize tool collections to identify frequently used tools and optimize storage layouts for efficient access.
• Assign specific homes for each tool, grouping similar tools together and labeling storage spots for easy identification.
• Maximize vertical storage space using shelving, hanging systems, and pegboards to keep infrequently used tools organized and out of the way.
• Implement labeling and signage strategies, such as color-coding and bold fonts, to enhance visibility and reachability of tools.
• Regularly maintain and review tool storage systems to ensure they remain organized, clutter-free, and optimized for productivity.
Assessing Your Tool Storage Needs
Take stock of your current tool collection and identify the types of tools you use most frequently to determine the ideal storage layout. This will help you decide which tools need to be easily accessible and which can be stored away. Make a list of your tools, categorizing them by type, frequency of use, and size. This tool inventory will serve as a guide for designing your storage solutions.
Consider the space available for storage and the types of storage solutions that will work best for your tools. Think about the layout of your workspace and how you can maximize efficiency. Will you need shelving, cabinets, or a pegboard?
Do you have any tools that require special storage, such as sharp objects or hazardous materials?
Purge and Organize Your Tools
With your tool inventory in hand, sort your tools into three piles: keep, donate/sell, and discard, being ruthless about getting rid of tools that are broken, rusty, or no longer useful. This is the perfect opportunity to perform some much-needed tool maintenance, cleaning and lubricating tools as you sort them.
As you categorize your tools, consider grouping similar tools together, such as all your drills or pliers. This will make it easier to find what you need when you need it.
Next, take a closer look at each tool in your 'keep' pile. Are there any tools that need sharpening or calibration? Take care of these tasks now to guarantee your tools are in top working condition.
As you organize your tools, think about how you use them. Do you have a specific project or task that requires a set of tools? Group these tools together, making it easier to grab what you need and get to work.
Assigning a Home for Each Tool
You'll create a logical layout for your tools by assigning a specific location for each item, ensuring everything has a designated spot where it can be easily accessed and returned. This step is pivotal in tool organization, as it enables you to make the most of your space utilization.
Start by grouping similar tools together, like all your screwdrivers or pliers. Then, label each tool and its corresponding storage spot, making tool identification a breeze. This will help you quickly find what you need and prevent tools from getting lost or misplaced.
Consider the frequency of use and store your most-used tools in easy-to-reach locations. Less frequently used tools can be stored in harder-to-reach areas or on higher shelves. By assigning a home for each tool, you'll be able to find what you need in seconds, saving you time and increasing your productivity.
With a well-organized tool storage system, you'll be able to serve others more efficiently and effectively.
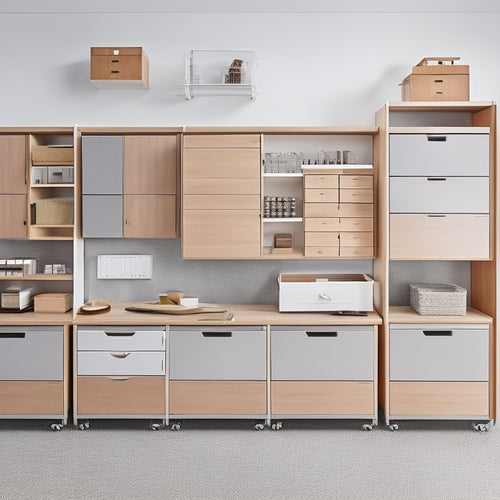
Maximizing Vertical Storage Space
Every available inch of wall and ceiling space can be leveraged to store less frequently used tools, freeing up valuable floor space for more essential items. By utilizing shelving solutions and hanging systems, you can create a more organized and efficient workspace.
Here are some ideas to maximize your vertical storage space:
| Storage Solution | Description |
|---|---|
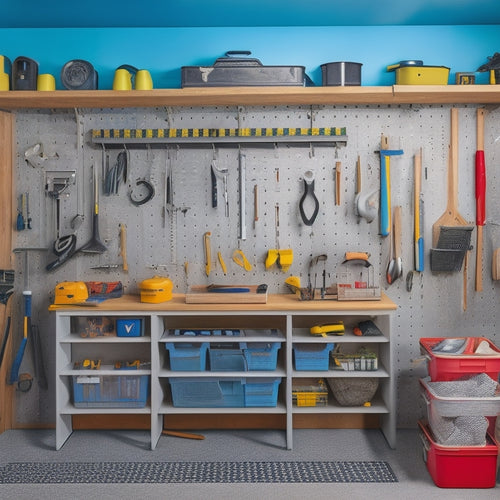
| Pegboard Setup | Install a pegboard on a wall or ceiling and hang tools like hammers, screwdrivers, and pliers using hooks and bins. |
| Tool Rack | Attach a tool rack to a wall or ceiling to store tools like drills, saws, and sanders. |
| Overhead Storage | Use overhead storage bins and baskets to store infrequently used tools, such as seasonal equipment or spare parts. |
Labeling and Signage Strategies
As you plan your labeling and signage strategy, you'll want to contemplate three key elements to guarantee your system is both functional and easy to use.
First, you'll need to design clear labels that effectively communicate the contents of each storage unit.
Next, you'll need to determine the best placement strategy for your labels, taking into consideration factors like visibility and accessibility.
Clear Label Design
Designing clear labels involves carefully selecting fonts, colors, and graphics to guarantee that your tool storage system's labeling and signage effectively communicate important information at a glance. When creating labels, you want to make sure that they're easy to read and understand, even from a distance. This is vital in a fast-paced work environment where every minute counts.
Here are three essential considerations for designing clear labels:
-
Color coding: Use a consistent color scheme to categorize tools, making it easy to identify specific groups. For example, you can use red for power tools, blue for hand tools, and green for measuring tools.
-
Font selection: Choose a font that's clear, bold, and easy to read. Avoid using fonts that are too elaborate or decorative, as they can be challenging to decipher.
-
Contrast: Guarantee that the text and background colors have adequate contrast, making the label easy to read in various lighting conditions.
Label Placement Strategy
With clear labels in place, you can now focus on strategically placing them to maximize the efficiency of your tool storage system. To achieve prime label placement, consider the label visibility and tool accessibility. Place labels at eye level or slightly above to ensure easy readability. This will save you time and effort when searching for a specific tool.
Additionally, position labels near the handle or grip of the tool to facilitate quick identification and retrieval.
For storage optimization, group similar tools together and label them accordingly. This will enable you to locate related tools quickly and effortlessly.
When it comes to label aesthetics, choose a consistent font style and size to maintain a professional look. Avoid cluttering the label with too much information; instead, focus on the essential details, such as the tool's name and category.
Signage Material Options
You have several signage material options available, each with its own set of benefits and drawbacks, depending on your specific tool storage needs and environmental conditions. When selecting a material, take into account factors like durability, visibility, and ease of maintenance.
Here are three popular signage material options to ponder:
-
Vinyl labels: A cost-effective and versatile option, vinyl labels can be tailored to meet your tool storage system's specific needs. They're easy to apply and can withstand moderate wear and tear.
-
Acrylic signs: For a more premium look, contemplate acrylic signs. They're durable, easy to clean, and can be mounted using various methods. Acrylic signs are ideal for high-traffic areas or environments with heavy machinery.
-
Magnetic signs: If you need a flexible and adaptable signage solution, magnetic signs are the way to go. They're easy to move around and can be reused multiple times, making them perfect for temporary or seasonal tool storage setups.
When choosing a signage material, remember to prioritize your specific needs and the environment in which your tool storage system will operate. By selecting the right material, you can create a customized labeling solution that enhances your tool storage system's overall efficiency and effectiveness.
Maintaining Your Organized Space
Every week, dedicate 15 minutes to tidying up your tool storage area, making sure that everything remains in its assigned place and functional order. This habit will help you maintain the space optimization and storage solutions you've implemented, keeping your tools within easy reach and your workflow efficient.
As you tidy, check for any signs of clutter prevention measures failing, and make adjustments as needed.
Regular maintenance is essential to preserving your efficient layout. Take a close look at your tool storage solutions, making sure that they're still meeting your needs. Have you acquired new tools that need to be incorporated into your system? Have your storage needs changed?
Make adjustments to your layout to accommodate these changes, and make sure that your tools are still organized in a logical and accessible way.
Frequently Asked Questions
Can I Use Pegboards for Storing Smaller Items Like Screws and Bolts?
You're a meticulous organizer, and I love that! For storing smaller items like screws and bolts, consider using pegboards with magnetic strips or drawer dividers to keep them tidy and easily accessible, making your life (and others') so much easier!
How Do I Deal With Cords and Cables in My Tool Storage Space?
You'll tackle cord clutter by implementing cable management strategies, such as cord organizers, zip ties, and label makers. Consider tool bags and hanging solutions to keep cables tidy, making it easy to find what you need quickly.
Are There Any Benefits to Using Clear Storage Bins and Containers?
"As you peer into the abyss of your tool storage space, clear storage bins and containers come to the rescue, offering labeling benefits, organization, and visibility, while being space-saving solutions that help you breathe a sigh of relief."
Can I Repurpose Old Furniture for Tool Storage and Organization?
You can breathe new life into old furniture by repurposing it for tool storage, optimizing space and creating a functional system that showcases your creative organization solutions, all while reducing waste and serving others.
How Often Should I Reevaluate and Adjust My Tool Storage System?
You'll want to regularly assess your tool storage system, ideally every 3-6 months, to evaluate efficiency, rotate storage, and maximize space utilization, ensuring your tool organization remains optimized and efficient for serving others.
Related Posts
-
Modular Tool Storage Systems for Small Spaces
You can optimize your small workspace by leveraging modular tool storage systems that intelligently employ vertical s...
-
Advantages of a Pegboard System in Your Garage
You can instantly alter your garage into a more organized, efficient, and productive space by installing a pegboard s...
-

What Size Rolling Storage Bin Do I Need
To determine the ideal size of your rolling storage bin, you'll need to measure your storage space accurately, consid...


