Building a Wall Tool Storage System
Share
You're about to create a customized wall tool storage system that streamlines your workflow. Start by clearing your wall space and taking inventory of your tools, categorizing them by frequency, size, and type. Consider vertical storage solutions, like shelves, bins, and hooks, to maximize space. Choose materials that balance durability, functionality, and aesthetics, such as wood alternatives or metal options. Next, design a wall layout that prioritizes frequently used tools at a comfortable height and allocates space efficiently. As you plunge deeper into the planning process, you'll uncover more secrets to optimizing your workspace.
Key Takeaways
- Plan your storage space by clearing the wall, taking inventory of tools, and allocating frequently used tools at a comfortable height.
- Choose materials based on durability, functionality, and aesthetics, considering cost-effective options like MDF or plywood and strength requirements for heavy tools.
- Select a wall type that suits your storage needs, considering surface suitability, mounting techniques, and support considerations for a safe and functional system.
- Design your wall layout to maximize space, prioritizing accessibility and organization, and grouping similar tools together for efficient workflow.
- Install your storage system securely, checking weight capacity, inspecting the wall, and distributing weight evenly to ensure stability and safety.
Planning Your Storage Space
With your wall space cleared, you're ready to plan your storage system. This phase is essential in ensuring space efficiency and tool accessibility.
Start by taking inventory of your tools and categorizing them by frequency of use, size, and type. This will help you determine the best layout for your storage system. Consider the height and width of your wall and the tools you need to store. Make a sketch or drawing of your wall space, including any obstacles like electrical outlets or windows.
Identify the most frequently used tools and allocate space for them at a comfortable height, usually between 30 and 40 inches from the floor. Less frequently used tools can be stored higher or lower.
Consider installing shelves, bins, or hooks to maximize vertical space and keep tools organized. Leave enough space between storage components for easy access and to prevent clutter buildup.
A well-planned storage system won't only save you time but also reduce the risk of accidents caused by tripping over tools or straining to reach them.
Choosing the Right Materials
You'll need to select materials that meet your specific tool storage needs, considering options like wood, metal, or plastic for your wall storage system.
The type of wall you're working with - whether it's drywall, plywood, or concrete - will also influence your material choices.
Material Options Available
When building a wall tool storage system, selecting the right materials is essential to secure durability, functionality, and aesthetics.
You'll want to take into account wood alternatives, such as medium-density fiberboard (MDF) or plywood, which offer a cost-effective and eco-friendly option.
Metal options, like steel or aluminum, provide strength and durability, making them ideal for heavy tool storage.
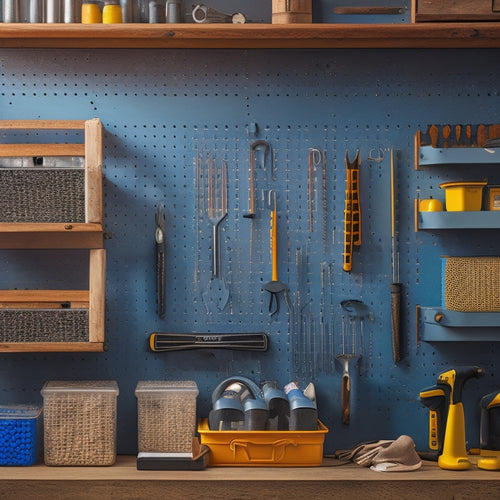
Pegboards, paired with hooks and bins, offer versatility and customization options.
Add magnetic strips to store small metal tools, and plastic bins for organizing small parts and accessories.
Shelving units can be used to store larger items, and durable finishes like powder coating or epoxy guarantee a long-lasting system.
Take into account customization ideas, such as adding a workbench or incorporating a charging station.
Don't forget to weigh cost considerations, balancing your budget with the quality and functionality you need.
Selecting Wall Type
Considering the material options for your wall tool storage system, you now need to select the right wall type to complement your chosen materials. The wall type you choose will affect the overall functionality, durability, and aesthetic appeal of your storage system.
When selecting a wall type, consider the wall textures and mounting options that will work best with your materials. For example, a smooth wall surface is ideal for slatwall panels, while a rougher surface may require a more rugged wall type.
| Wall Type | Mounting Options |
|---|---|
| Plywood | Screws, nails, or adhesive |
| MDF | Screws or adhesive |
| PVC | Adhesive or clips |
| Slatwall | Hooks, bins, or shelves |
Choose a wall type that can support the weight of your tools and materials, and verify it is compatible with your chosen mounting options. By selecting the right wall type, you'll create a safe and functional storage system that meets your needs.
Tool Storage Needs
Frequently, the success of your wall tool storage system hinges on choosing the right materials that cater to your specific tool storage needs. To guarantee you're making the most of your space, consider the accessibility of your tools. You'll want to organize your tools in a way that allows you to quickly and easily retrieve them when needed. This means placing frequently used tools at eye level and reserving higher or lower shelves for less frequently used items.
Next, think about space efficiency. A wall tool storage system should maximize your available wall space while keeping your tools organized. Consider using slatwall panels or pegboards with adjustable hooks and bins to customize your storage layout.
This will enable you to fit more tools in a smaller area, keeping your workspace clutter-free and reducing tripping hazards. By prioritizing tool accessibility and space efficiency, you'll create a wall tool storage system that not only streamlines your workflow but also promotes a safer work environment.
Designing the Wall Layout
You'll need to carefully plan your wall space to maximize storage capacity and accessibility.
Start by identifying the tools you use most frequently and allocating space accordingly, considering factors like size, weight, and frequency of use.
Next, you'll design storage zones that group similar tools together, ensuring a logical and efficient workflow.
Wall Space Planning
Your wall's real estate is precious, and careful planning is vital to maximize its storage potential. To optimize wall utilization strategies, start by evaluating your tool collection and categorizing items by frequency of use, size, and weight. This will help you allocate the most accessible areas for frequently used tools and reserve higher or lower sections for less frequently used or bulkier items.
When designing your wall layout, consider vertical storage solutions to maximize storage capacity. Install shelves, bins, or hooks at varying heights to accommodate different tool sizes and types. Label each storage compartment to guarantee easy identification and retrieval of tools.
Leave sufficient space between storage units to prevent overcrowding and promote smooth workflow. Effective wall space planning also involves considering ergonomic factors, such as keeping frequently used tools within comfortable reach to minimize straining and bending.
Tool Location Priorities
Tool location priorities are essential when designing the wall layout, as they directly impact workflow efficiency and tool accessibility. You'll want to prioritize tools based on frequency of use, making sure that the most frequently used tools are easily accessible and visible. This will save you time and energy in the long run.
Consider grouping similar tools together, such as all hand tools or power tools, to create a logical workflow. This will improve tool visibility and make it easier to find what you need when you need it.
Place heavy or bulky tools at the bottom of the wall to prevent them from falling and causing injury. You should also prioritize tool access by placing tools at a comfortable height, between 30 and 60 inches from the floor, to reduce strain on your back and shoulders.
Storage Zone Design
With tool location priorities established, it's time to design the wall layout, dividing the space into functional storage zones. You'll want to create zones that group similar tools together, making it easy to find what you need when you need it.
Consider the "golden zone" – the area between your shoulders and knees – where you can easily access frequently used tools without straining.
When designing your storage zones, think about storage aesthetics. A visually appealing layout can improve your workspace's overall functionality. Balance the layout to create a sense of harmony, and use vertical space to maximize storage capacity.
Guarantee wall accessibility by leaving enough clearance between zones for comfortable movement.
Assign specific zones for tool categories, such as hand tools, power tools, and accessories. Within each zone, organize tools by frequency of use, with the most frequently used items front and center.
Label each zone and tool to maintain organization and make it easy to return tools to their designated spot. By designing a well-organized wall layout, you'll save time, reduce frustration, and create a safer work environment.
Building the Storage Units
The wall's wooden frame, now erected, awaits the installation of storage units that will house your prized tools.
You'll need to build these units to precise dimensions to guarantee a snug fit and maximum storage capacity. Consider the unit dimensions and shelf height carefully to accommodate your tools. For instance, if you have large power tools, you'll want to allocate more vertical space for those units.
To guarantee stability and safety, keep the following key considerations in mind when building your storage units:
- Use sturdy materials, such as 3/4-inch plywood or MDF, to prevent warping or sagging.
- Design units with a wide base to prevent tipping or toppling.
- Incorporate reinforcement, like corner brackets or screws, to add strength to the units.
- Plan for adequate ventilation to prevent moisture buildup and rust.
- Label each unit clearly to facilitate easy tool identification and retrieval.
Installing the System
Your wall's wooden frame is now ready to receive the storage units, carefully crafted to house your prized tools. It's crucial to confirm that your wall can support the weight of the storage system and its contents. Before installing the system, inspect your wall for any signs of weakness or damage. Check for any cracks, water damage, or structural issues that could compromise wall stability.
| Mounting Techniques | Description |
|---|---|
| Screws | Use screws that are specifically designed for your wall type (drywall, wood, etc.) and the weight of your storage units. |
| Anchors | Use wall anchors to provide extra support and stability, especially for heavier storage units. |
| Hooks | Use heavy-duty hooks that can support the weight of your tools and equipment. |
| Brackets | Use sturdy brackets to distribute the weight of your storage units evenly across the wall. |
| Adhesives | Use industrial-grade adhesives to secure your storage units to the wall, following the manufacturer's instructions. |
When installing the system, use the appropriate mounting techniques to confirm a secure and sturdy connection. Always follow the manufacturer's instructions for the specific mounting hardware you're using. Remember to test the system's stability before loading it with your tools and equipment.
Organizing Your Tools
Sixteen tool-filled storage units now line your wall, awaiting the organization that will turn chaos into efficiency.
It's time to categorize and prioritize your tools to maximize storage efficiency. Start by grouping similar tool types together, such as hand tools, power tools, and fasteners. Within each group, organize tools by frequency of use, with the most frequently used tools easily accessible.
To optimize your storage system, consider the following:
- Label each storage unit clearly, so you can quickly identify what's inside.
- Store heavy tools at the bottom to prevent them from falling and causing injury.
- Keep tools with moving parts, like drills and saws, in separate compartments to reduce damage.
- Designate a specific area for tools that require regular maintenance, like sharpening or cleaning.
- Leave space for future tool additions or upgrades.
Frequently Asked Questions
Can I Use Reclaimed Wood for My Wall Tool Storage System?
You can use reclaimed wood, but make certain it's sourced from safe, dry environments to avoid rot and pests. Reclaimed wood benefits include reduced waste and unique character, but be aware of potential lead paint or asbestos in older sources.
How Do I Prevent Rust on Metal Tool Storage Units?
As you assemble your metal tool storage units, you'll want to shield them from rust's sneaky grasp; employ rust prevention techniques like galvanizing, powder coating, or applying rust-inhibiting sprays, and implement moisture control methods, such as ventilation and desiccant packets, to keep corrosion at bay.
Are Wall-Mounted Storage Systems Suitable for Heavy Tools?
You'll want to verify wall-mounted storage systems can handle the weight of your heavy tools; look for heavy-duty brackets with clear tool weight limits to guarantee a secure and safe storage solution that won't put you or others at risk.
Can I Add Electrical Outlets to My Wall Tool Storage System?
When adding electrical outlets to your system, you'll need to prioritize electrical safety by ensuring proper outlet placement, avoiding overheating risks, and following local electrical codes to prevent shocks, fires, and other hazards.
How Do I Secure Valuable Tools From Theft in My Storage System?
Like a fortress protecting its treasure, you'll want to safeguard your prized tools from sneaky thieves. Implement tool security measures, such as anchor locks, cable locks, or a secure cabinet, to prevent theft and guarantee your tools are safe and sound.
Conclusion
With your wall tool storage system in place, your workshop evolves into a precision machine, humming with efficiency. Every tool has a designated home, waiting to be summoned like a loyal soldier. As you gaze upon your handiwork, the neatly aligned bins and hooks seem to march in sync, a proof of your ingenuity. Your tools, once scattered and rebellious, now stand at attention, ready to serve at a moment's notice.
Related Posts
-

What to Look for in a Pegboard Tool Storage Kit
When shopping for a pegboard tool storage kit, you need a system that combines customized organization, sturdy durabi...
-

Maximum Capacity Tool Boxes for Heavy-Duty Use
You need a maximum capacity tool box that can withstand the rigors of heavy-duty use, protecting your essential tools...
-

Building Garage Shelves in 7 Easy Steps
You're about to convert your garage into a highly functional storage space by building custom shelves in just 7 easy ...


