
What's the Secret to a Clutter-Free Workshop?
You're just a few strategic steps away from transforming your workshop into a clutter-free haven. Start by evaluating your storage needs, purging unnecessary tools and materials, and optimizing your vertical space. Implement a pegboard system, use multi-tiered shelving units, and label everything to avoid confusion. Designate zones for tasks, utilize mobile storage containers, and schedule regular clean-ups to maintain your space. By following these steps, you'll be well on your way to a clutter-free workshop where you can focus on your projects. Now, take the next step to discover the specifics that will make your workshop a masterclass in efficiency.
Key Takeaways
• Evaluate and purge unnecessary tools and materials to declutter the workshop and improve workflow.
• Organize tools and supplies into categories and assign designated storage spaces for easy access.
• Utilize vertical storage space with stackable containers, bins, and pegboards to maximize storage capacity.
• Implement a labeling and organization system to easily identify and locate tools and materials.
• Establish designated task zones and mobile storage containers to optimize workflow and reduce clutter.
Assess Your Workshop Storage Needs
Take stock of your workshop's storage capacity by walking through the space and making a mental note of every area where clutter tends to accumulate. Start by identifying zones where tools and materials tend to pile up, such as workbenches, shelves, and corners. As you walk through your workshop, ask yourself: What tools do I use most frequently? Where do I tend to leave them? What materials do I need to store, and how can I keep them organized?
Next, think about your tool organization strategy. Are there specific tools that you use together frequently? Consider grouping them in a designated area to improve workflow. Do you have storage solutions in place, such as bins, baskets, or cabinets, that can help keep materials off the floor and out of the way? Take note of any areas where you can implement better storage solutions to free up space and reduce clutter.
Purge Unnecessary Tools and Materials
Now it's time to get ruthless - you're going to purge your workshop of unnecessary tools and materials.
Start by identifying items that are broken beyond repair, obsolete, or simply never used, and toss them in the trash.
Next, you'll need to triage your toolbox, sorting tools into categories and evaluating which ones are worth keeping, and then streamline your supplies to make sure you're not holding onto duplicates or unnecessary extras.
Toss the Trash
Your workshop's packed shelves and jumbled workbenches are likely concealing tools and materials that haven't been used in years, so it's time to be decisive and purge everything that's broken, outdated, or simply no longer useful. Start by removing everything from your workshop and sorting items into three piles: keep, donate/sell, and toss. Be honest with yourself - if you haven't utilized it in the past year, you probably won't miss it.
Here are three crucial steps to follow:
-
Identify waste: Damaged tools, corroded materials, and expired chemicals are all candidates for the waste pile. Don't hesitate to discard anything that's beyond repair or no longer serves a function.
-
Organize reusable materials: Separate items like cardboard, metal, and plastic that can be recycled or repurposed. This will help you minimize waste and contribute to a more environmentally friendly workshop.
-
Arrange for disposal: Schedule a bulk pickup or drop-off for your waste and recyclables. This will guarantee efficient junk disposal and a neat workspace.
Toolbox Triage Needed
With your workshop's discarded items and recyclables out of the way, it's time to address the tools and materials that remain, starting with a thorough evaluation of your toolbox contents.
Take everything out and sort items into categories, such as hand tools, power tools, and materials. Be honest with yourself – when was the last time you used that rusty old wrench or that half-empty can of mystery substance? If it's broken, outdated, or no longer serves a purpose, consider letting it go. This will help you focus on the tools that are truly essential to your work.
As you're assessing your tools, take note of what requires maintenance or repair. Make a list of tasks, such as sharpening blades or replacing worn-out bits. This will help you stay on top of tool maintenance and ensure your toolbox remains organized and efficient.
Implementing an inventory tracking system will also help you keep tabs on what you have and what you need to restock. By streamlining your toolbox contents, you'll be able to find what you need quickly and easily, saving you time and frustration in the long run.
Streamline Your Supplies
Streamline Your Supplies
Sort through your workshop's supplies, and be ruthless about purging anything that's no longer useful, redundant, or beyond repair. This is the perfect opportunity to get rid of items that are taking up valuable space and creating clutter. Be honest with yourself – if you haven't used it in the past year, you probably won't miss it.
Next, categorize your remaining supplies into groups, such as fasteners, adhesives, and paints. This will make it easier to find what you need when you need it. Explore implementing a supply organization system, like bins and labels, to keep similar items together.
Here are three essential storage solutions to ponder:
-
Pegboards: Perfect for hanging tools and accessories, keeping them within easy reach.
-
Stackable bins: Ideal for storing small parts and supplies, keeping them organized and visible.
-
Mobile carts: Great for storing larger items, like power tools, and providing additional workspace.
Optimize Vertical Storage Space
Now that you've purged your workshop of unnecessary items, it's time to make the most of your vertical storage space.
You'll want to maximize shelf capacity by using stackable containers and baskets that can hold a lot, while keeping frequently used items within easy reach.
Next, you'll utilize wall space by installing hooks, bins, and pegboards to keep items like tools, accessories, and supplies organized and accessible.
Maximize Shelf Capacity
To optimize your workshop's vertical storage space, start by evaluating the existing shelves and identifying opportunities to add more layers or tiers. This will help you make the most of your shelf organization and space optimization. By doing so, you'll be able to store more items in a smaller footprint, increasing your workshop's efficiency.
Here are three ways to maximize your shelf capacity:
-
Install adjustable shelving: This will allow you to customize the shelf height to fit different sized items, making the most of your vertical space.
-
Use stackable containers: Labelled containers can help keep similar items together and make it easy to find what you need, while also keeping your shelves organized.
-
Add shelf dividers: These can help keep items from getting jumbled together and make it easier to see what's on each shelf, making it simpler to find what you need.
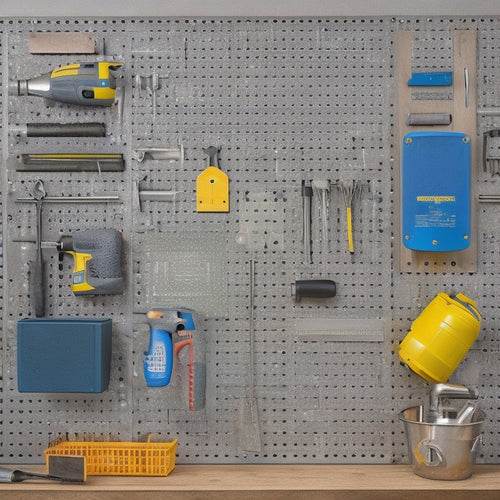
Utilize Wall Space
You can reclaim a significant amount of floor space in your workshop by utilizing wall space for storage, making it an ideal way to optimize your vertical storage space. This DIY organization technique allows you to make the most of your workshop's dimensions, keeping essential tools and materials within easy reach.
Start by evaluating your wall space and identifying areas suitable for storage. Consider installing pegboards, hooks, or shelves to hang items like bikes, tools, or accessories. You can also use wall-mounted bins, baskets, or cabinets to store smaller items like nuts, bolts, or fasteners.
Get creative with your storage solutions by repurposing items like old pallets, crates, or lumber. For instance, you can transform an old pallet into a storage rack for your power tools or create a shelf using reclaimed lumber. By thinking outside the box and exploring innovative solutions, you can maximize your wall space and keep your workshop organized and clutter-free.
With a little creativity and planning, you can create a workshop that's both functional and efficient, allowing you to focus on your projects without distractions.
Label Everything Clearly
With your wall space optimized for storage, it's time to make sure that everything has a designated place and is easily identifiable by labeling each storage unit, shelf, and bin clearly. This step is essential for maintaining organizational aesthetics and ensuring an efficient inventory management system.
To achieve this, follow these simple steps:
-
Use a consistent labeling system: Choose a label maker or stickers that you like and stick to it. Consistent labeling will make it easier for you and others to find what they need quickly.
-
Be specific with labels: Instead of labeling a bin 'Tools,' label it 'Hand Tools' or 'Power Tools' to make it clear what's inside.
-
Label everything, no matter how small: Even small containers or drawers should be labeled to avoid confusion and clutter.
Use Multi-Tiered Shelving Units
Organizing your workshop's storage space becomes more efficient by incorporating multi-tiered shelving units that maximize vertical space and keep frequently used items within easy reach. By doing so, you'll create a more streamlined shelving organization system that saves you time and energy in the long run.
To get started, measure your workshop's available space and choose shelving units that fit comfortably. Consider the height and weight capacity of each shelf to guarantee you're storing items safely and effectively.
Next, categorize your tools and materials into groups, such as power tools, hand tools, and supplies. Assign a specific shelf or section to each group, keeping frequently used items on lower shelves for easy access. This will improve workshop efficiency by reducing the time spent searching for what you need.
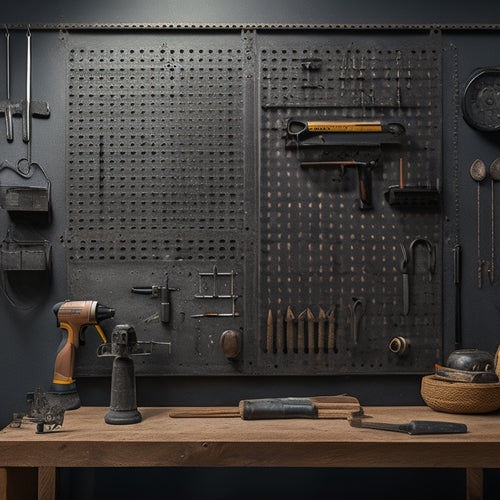
Implement a Pegboard System
By attaching a pegboard to a wall or a freestanding panel, you create a versatile and space-saving storage solution for frequently used tools and accessories. This system allows you to optimize your tool organization and workspace efficiency.
To get started, identify the tools and accessories you use most often and group them by category. For instance, you might have a section for hammers, another for screwdrivers, and one for pliers.
Here are three essential steps when implementing a pegboard system:
-
Choose the right pegboard hooks: Select hooks that fit your tools and accessories, and contemplate using hooks with a rubber coating to prevent scratching.
-
Organize tools by frequency of use: Place your most frequently used tools in easy-to-reach locations, and store less frequently used items towards the bottom or top of the pegboard.
-
Keep the pegboard tidy: Set aside time each week to maintain your pegboard, ensuring that tools are returned to their designated spots and the board remains clutter-free.
Label and Sign Everything
Now that your pegboard system is up and running, it's time to take your workshop organization to the next level by labeling and signing everything, so you can quickly identify what's stored where and maintain your newly organized space. This step is essential in ensuring you can find what you need when you need it, and it's also a key aspect of color coded organization.
Start by labeling each pegboard hook with the specific tool or item it holds, and consider using different colored labels to categorize similar items. This visual inventory will help you track your tools and materials at a glance.
To take it a step further, create signs for each section of your workshop, outlining what's stored in each area. This won't only help you stay organized but also promote maintenance accountability. When you can see what's where, you're more likely to put things back in their place, keeping your workshop clutter-free.
Designate Zones for Tasks
Divide your workshop into distinct zones, each dedicated to a specific task or process, to optimize your workflow and reduce clutter. This task organization strategy will help you stay focused and efficient, as you'll always know where to find the tools and materials you need for a particular task.
Here are three zones to contemplate:
-
Assembly zone: Designate an area for assembling projects, with a workbench, vise, and necessary hand tools within easy reach.
-
Cutting zone: Create a zone for cutting and shaping materials, with a table saw, miter saw, and other power tools.
-
Finishing zone: Set up a zone for finishing and detailing projects, with a workbench, sanders, and other specialized tools.
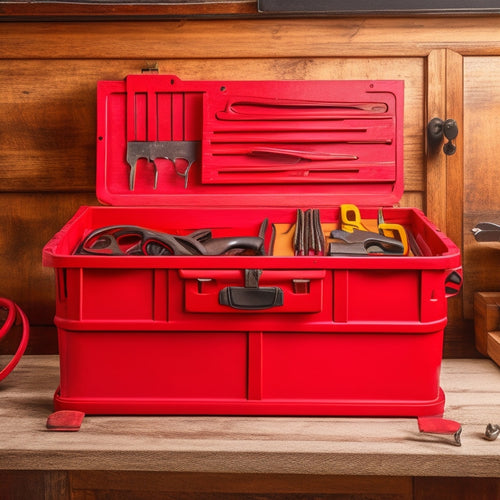
Utilize Mobile Storage Containers
You can keep your workshop organized and clutter-free by placing essential tools and supplies in mobile storage containers that can be easily moved to the zone where they're needed.
This portable organization system allows you to have what you need, when you need it, without cluttering up your workspace. For instance, you can store frequently used hand tools in a compact, on-the-go storage bin that can be wheeled to different areas of the workshop. This way, you'll save time searching for tools and reduce the likelihood of misplacing them.
Consider labeling each container so you can quickly identify what's inside. You can also use mobile storage containers to store materials, such as lumber, pipes, or electrical components, keeping them organized and within reach.
Schedule Regular Clean-Ups
Set aside a specific time each week to tackle clutter and messes, and stick to it, so your workshop stays organized and functional. This will help you maintain a sense of control and make certain that your workspace remains efficient.
To make the most of your clean-up sessions, follow these steps:
-
Set reminders: schedule a recurring event on your calendar to make sure you don't forget to clean up.
-
Enlist help: gather your team or family members to work together to tackle the task. This won't only make the job more manageable but also foster a sense of teamwork and camaraderie.
-
Stay organized: break down the task into smaller, manageable chunks, and prioritize the areas that need the most attention.
Frequently Asked Questions
Can I Customize Storage Solutions for Irregularly-Shaped Tools?
As you're wondering, "can I customize storage for irregularly-shaped tools?", coincidentally, you're already thinking like a pro! Yes, you can create unique storage solutions using DIY options and creative tool organization ideas tailored to your specific needs.
How Do I Prevent Dust Accumulation on Stored Items?
You prevent dust accumulation on stored items by sealing containers, using dust-repelling bags, and storing items off the floor. Regularly cleaning and maintenance of storage areas also helps keep dust at bay, maintaining your organization.
Are There Any Safety Considerations for Workshop Storage Design?
When designing your workshop storage, you'll want to prioritize safety first. Take into account space optimization and tool accessibility while avoiding fire hazards and maintaining proper weight distribution to prevent accidents and keep your workspace secure.
Can I Repurpose Old Furniture for Workshop Storage?
You'll save a fortune upcycling old furniture for workshop storage, and it's easier than you think! Start by repurposing a sturdy bookshelf into a storage unit, maximizing space by adding bins and hooks for tools and supplies.
How Often Should I Reorganize My Workshop Storage System?
You should reorganize your workshop storage system every 2-3 months to maintain efficiency. Set a schedule, assess your workflow, and adjust storage layouts accordingly to optimize your workshop organization and reduce clutter.
Related Posts
-
Heavy-Duty Pegboard Hooks for Industrial Use
You need heavy-duty pegboard hooks that can withstand the rigors of industrial use, providing a reliable and efficien...
-
Portable Tool Chest Essentials
When stocking your portable tool chest, you'll want to prioritize essential hand tools like hammers, tape measures, a...
-
How to Hang a Pegboard in 5 Easy Steps
You'll hang a pegboard in 5 easy steps by first preparing the wall, ensuring it's sturdy and free of obstructions. Ne...


