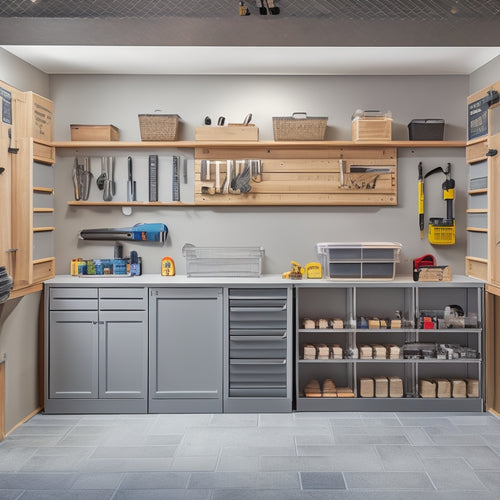
Hanging Garage Shelves A 10 Step Installation Guide
Share
You'll start by preparing your garage for installation, clearing the workspace, and taking necessary safety measures to guarantee a smooth 10-step process for hanging your garage shelves. Measure the wall and shelves to determine ideal placement, calculating weight capacity and selecting hardware that can support the load. Assemble the shelf frame, attach slats, and prepare the back panel before hanging it securely to the wall. Conduct a final inspection to verify everything is level, secure, and ready for use. With these essential steps completed, you'll be ready to organize your garage and maximize storage - now, let's get started and fine-tune the details.
Key Takeaways
- Clear the workspace by covering floors and surfaces with drop cloths and turning off power to nearby outlets and lighting fixtures for safety.
- Measure the wall accurately to determine ideal shelf placement, taking into account wall material thickness and stud locations.
- Select hardware with a weight capacity of at least 1.5 times the expected load, ensuring compatibility with wall material and moisture resistance.
- Assemble the shelf frame according to the manufacturer's instructions, ensuring it is level and plumb, and attach slats for even weight distribution.
- Conduct a final inspection to verify weight limits, leveling, and secure fastening of all screws, bolts, and anchors.
Prepare the Garage for Installation
As you begin preparing your garage for hanging shelf installation, clear the area around the walls where you plan to install the shelves. Remove any clutter, tools, or storage bins to guarantee a safe and obstacle-free workspace. This is an essential garage organization tip to prevent accidents and make the installation process smoother.
Next, cover the floor and any surrounding surfaces with drop cloths or old sheets to protect them from dust, debris, and potential damage. This will also make cleanup easier once the project is complete.
Take this opportunity to assess your tool storage solutions and consider how you can optimize them. You may want to designate a specific area for frequently used tools or invest in a pegboard for hanging items like bikes, hoses, or accessories. By doing so, you'll create a more organized and functional garage space.
Remember to turn off the power to any nearby outlets and lighting fixtures to prevent electrical shocks or injuries.
With a clear and prepared workspace, you're ready to move on to the next step in the installation process.
Measure the Wall and Shelves
Since you've prepared your garage for installation, you're now ready to measure the wall and shelves. This vital step guarantees your shelves are securely attached to the wall, supporting the intended shelf weight.
Measure the width and length of the wall where you plan to install the shelves. Record the measurements to determine the ideal shelf placement. Next, measure the thickness of the wall materials, such as drywall, plywood, or concrete, to choose the correct anchors or screws.
Measure the dimensions of each shelf, including the thickness, to calculate the combined weight of the shelves and the items you'll be storing. This will help you determine the maximum weight capacity required for the hardware.
Consider the weight distribution on each shelf, making sure it's evenly balanced to prevent the shelf from collapsing or the wall anchors from failing.
Take precise measurements to guarantee a safe and secure installation. Don't assume the wall or shelves are standard sizes – always measure twice to avoid mistakes.
Choose the Right Hardware
By this point, you've taken precise measurements of the wall and shelves, guaranteeing a secure installation.
Now, it's essential to choose the right hardware to support the shelf weight and maintain safety. You'll need to select hardware that can handle the weight of the shelves and the items you'll be storing.
Consider the following factors when choosing hardware:
-
Weight capacity: Select hardware that can support at least 1.5 times the weight of the shelves and items.
-
Hardware types: Choose from wall anchors, screws, brackets, or hangers, depending on the type of wall and shelf material.
-
Material compatibility: Verify the hardware is compatible with the wall material (e.g., drywall, concrete, or wood).
- Corrosion resistance: Opt for hardware with a corrosion-resistant coating to withstand moisture and humidity.
Assemble the Shelf Frame
You've selected the right hardware for your hanging garage shelves, now it's time to bring your shelf frame to life. Begin by gathering all the necessary shelf materials, including the uprights, beams, and connectors. Lay out the components on a flat surface to verify everything is accounted for and undamaged.
Next, follow the manufacturer's instructions to assemble the frame design. Typically, this involves attaching the beams to the uprights using the connectors. Make certain to tighten all screws and bolts securely to prevent the frame from shifting or collapsing under weight.
As you assemble the frame, double-check that it's level and plumb. This is essential to guarantee the shelf remains stable and secure when installed.
If you're unsure about any part of the process, consult the manufacturer's instructions or consider seeking assistance from a professional. Remember, safety should always be your top priority when working with power tools and heavy materials.
Attach the Shelf Slats
With the shelf frame assembled, turn your attention to attaching the shelf slats. This step is vital in guaranteeing the stability and weight distribution of your hanging garage shelves.
You'll need to choose the right shelf materials that can support the weight of the items you plan to store.
To attach the shelf slats, follow these steps:
-
Measure and cut the slats: Measure the shelf frame's width and cut the slats to fit snugly. Use a miter saw or a circular saw to make precise cuts.
-
Space the slats evenly: Space the slats 1-2 inches apart to guarantee even weight distribution and prevent sagging.
-
Attach the slats to the frame: Use screws or nails to attach the slats to the shelf frame. Make sure they're securely fastened to prevent accidents.
- Check the shelf's levelness: Double-check the shelf's levelness to guarantee it's even and plumb.
Remember to choose shelf materials that can support the weight of your stored items, and always prioritize safety when working with power tools and heavy materials.
Install the Shelf Support
Now that your shelf slats are securely in place, it's time to focus on installing the shelf support, which will provide additional stability and weight distribution to your hanging garage shelves. This step is essential in guaranteeing the safety and durability of your shelves, especially when handling heavy loads.
Begin by identifying the designated support bracket locations on your shelf frame. Typically, these are marked with a "support bracket" label or a small indentation. Hold the support bracket against the shelf frame, confirming it's aligned with the designated location. Use a level to verify the bracket is straight, then mark the screw holes with a pencil.
Drill pilot holes into the marked areas, taking care not to drill into any electrical wires or plumbing. Secure the support bracket to the shelf frame using the provided screws.
Repeat this process for each support bracket, spacing them evenly apart to distribute the shelf weight evenly. By doing so, you'll create a sturdy foundation for your hanging garage shelves, capable of withstanding significant weight without compromising safety.
Hang the Shelf Frame
Hang the Shelf Frame
Secure the shelf frame to the garage ceiling by locating the designated mounting points on the frame. These points are specifically designed to provide maximum shelf stability, so be certain to identify them correctly. Typically, they're marked with a label or indicator on the frame materials.
Next, lift the shelf frame into position, guaranteeing it's level and aligned with the mounting points. You may need to adjust the frame slightly to fit snugly against the ceiling. Once in place, use the provided hardware to secure the frame to the ceiling. Make certain the screws or bolts are tightened firmly to prevent the frame from shifting or falling.
To guarantee a sturdy installation, remember to:
- Check the weight capacity of the shelf frame and ensure it can support the intended load.
- Verify the frame materials can withstand the garage's environmental conditions (e.g., temperature, humidity).
- Tighten all screws and bolts firmly to prevent the frame from loosening over time.
- Double-check the frame's levelness to ensure even weight distribution and prevent shelf sagging.
Add the Back Panel Support
You're ready to add the back panel support to your hanging garage shelves. This essential step guarantees your shelves remain stable and secure.
Begin by selecting the appropriate back panel type, such as plywood, MDF, or oriented strand board (OSB). Choose a material that matches your shelf frame's durability and load capacity.
Next, cut the back panel to fit the shelf frame's dimensions. Use a saw or a utility knife to make precise cuts. Sand the edges to smooth out any rough spots.
Now, prepare the support materials, including 2x4 lumber or metal brackets, depending on your shelf design. Cut these materials to the required length, confirming they fit snugly between the shelf frame and the wall.
Install the support materials between the shelf frame and the wall, making certain they're level and securely attached. This will provide a solid foundation for your back panel.
With the support in place, you're ready to move on to the next step: installing the shelf back panel.
Install the Shelf Back Panel
You're now ready to install the shelf back panel, an essential step in creating a sturdy and reliable storage system.
Before you begin, make certain you've prepared the panel according to the manufacturer's instructions and take precise measurements to guarantee a correct fit.
Next, you'll mount the panel to the back panel support, securing it firmly in place.
Panel Preparation Tips
With the wall anchors in place, your shelf's backbone awaits installation - the back panel. This essential component provides structural support and stability to your garage shelving system.
To guarantee a safe and secure installation, you must prepare the panel correctly. When selecting a material for your back panel, choose one that complements the shelf's design and load capacity.
Consider factors such as durability, weight, and resistance to moisture and pests. For a standard garage shelving system, a 3/4-inch thick panel is recommended.
Before installation, inspect the panel for any defects or damage. Check for:
-
Warped or bowed surfaces: Confirm the panel lies flat to prevent uneven weight distribution.
-
Cracks or splits: Avoid panels with cracks or splits, as they can compromise the shelf's structural integrity.
-
Moisture damage: Inspect for signs of water damage, rot, or mold.
- Manufacturing defects: Verify the panel meets the manufacturer's quality standards.
Measuring for Accuracy
Now that you've selected and prepared the back panel, it's time to confirm accurate measurements for a secure installation. Measure the shelf height, considering the thickness of the panel and any additional components, such as brackets or supports. Verify the measurement is level and plumb to avoid any unevenness.
Next, locate the wall studs behind the drywall using a stud finder. Mark their positions to determine the ideal placement for the back panel. Typically, wall studs are spaced 16 inches on center, but this may vary depending on the construction of your garage.
Measure the width of the back panel and compare it to the distance between the wall studs. Adjust the panel's position as needed to guarantee it's securely fastened to at least two studs. This is essential for maintaining the structural integrity of the shelf and preventing it from collapsing under weight.
Double-check your measurements to avoid errors and confirm a safe installation.
Mounting the Panel
Two screws per stud are typically recommended for securely fastening the back panel to the wall. This guarantees the shelf remains stable and can hold the desired weight.
When selecting panel materials, consider durable options like plywood or MDF, which can withstand the weight of stored items. Panel finishes, such as melamine or laminate, provide a smooth surface and can be easily cleaned.
Before mounting the panel, confirm the wall is level and the studs are marked. Hold the panel against the wall, aligning it with the marks, and use a pencil to mark the screw locations. Drill pilot holes, then screw the panel into place using 2-3 inch screws.
- Verify the panel is level before screwing it into place.
- Use a stud finder to locate the wall studs.
- Drill pilot holes to avoid splitting the panel or wall.
- Tighten screws firmly to guarantee a secure hold.
Final Check and Adjustments
You're now in the final stretch of the installation process, and it's crucial to perform a thorough inspection to guarantee everything is in place and secure.
Check the entire shelf system for any signs of wear, damage, or misalignment, making certain all components are properly attached and level.
If you find any loose screws, tighten them to complete the installation.
Final Inspections Needed
After completing the installation of your hanging garage shelves, take a step back to conduct a thorough final inspection.
This vital step guarantees your shelves are securely installed, and you've taken all necessary safety precautions.
Review the following aspects of your installation:
-
Weight limits: Verify that you haven't exceeded the recommended weight capacity for each shelf. Overloading can lead to accidents and damage.
-
Leveling: Double-check that all shelves are level and plumb to prevent items from falling or the shelves from collapsing.
-
Secure fastening: Confirm that all screws, bolts, and anchors are tightened properly to prevent the shelves from detaching from the wall or ceiling.
- Stability: Test the shelves by applying gentle pressure to verify they're stable and won't topple over.
Tighten Loose Screws
Having verified the integrity of your hanging garage shelves through a thorough final inspection, focus on making any necessary adjustments to confirm a rock-solid installation.
Now, it's time to tighten any loose screws that could compromise the stability of your shelves.
Check every screw, bolt, and nut to confirm they're securely fastened. Pay particular attention to areas where weight will be concentrated, such as shelf brackets and support beams.
Use the appropriate screw types for the job, such as lag screws for heavy loads and drywall anchors for lighter loads.
When tightening screws, use proper techniques to avoid stripping or damaging surrounding materials. For example, use a screwdriver with a rubber grip to maintain traction and apply consistent pressure.
Avoid over-tightening, as this can cause screws to strip or materials to crack.
Frequently Asked Questions
Can I Use Hanging Garage Shelves for Storing Heavy Machinery?
You can use hanging garage shelves for storing heavy machinery if you guarantee the weight capacity exceeds the machinery's weight, and follow safety guidelines to avoid structural damage or collapse.
How Do I Clean and Maintain Hanging Garage Shelves?
You'll guarantee safe storage by regularly cleaning your shelves with gentle techniques, like dusting and spot-cleaning, and following maintenance tips, such as tightening screws and checking for wear, to prevent damage and accidents.
Are Hanging Garage Shelves Suitable for Uneven Garage Ceilings?
"Visualize a puzzle with mismatched pieces - that's your uneven garage ceiling. You'll face installation challenges, but don't worry, you can adjust the shelves' mounting system to fit your ceiling's unique terrain, ensuring a secure and level installation that's safe for you and your belongings.
Can I Install Hanging Garage Shelves in a Rented Garage?
Before you install hanging garage shelves, you'll need to check your rental agreement for installation restrictions and obtain renter permissions to guarantee you're allowed to make changes to the garage structure, confirming a safe and compliant installation.
Do Hanging Garage Shelves Come With a Warranty or Guarantee?
You're ridiculously optimistic to think you'll never need a safety net, but lucky for you, many manufacturers offer warranty types like limited lifetime or 5-year warranties, plus installation guarantees to protect your investment and, more importantly, your skull.
Conclusion
You've made it! Your garage shelves are now standing tall, ready to hold a ton of weight - literally! With these 10 steps, you've converted your garage from cluttered chaos to organized oasis. Take a step back, admire your handiwork, and bask in the glory of your newly installed shelves. You've earned it! Now, go forth and fill those shelves with all your gear, knowing they're secure and sturdy.
Related Posts
-

Open Storage Bins for Shelving Units
You need open storage bins that integrate seamlessly with your shelving units to boost your organization, productivit...
-

Essential Steps for Garage Storage System Design
You're about to change your cluttered garage into an organized haven by following a structured approach to garage sto...
-

What Tools Do I Need for a DIY Wall Organizer
You'll need a variety of tools to complete a DIY wall organizer project. Essential measuring tools include a tape mea...


