Designing Custom Pegboards for Ultimate Storage Efficiency
Share
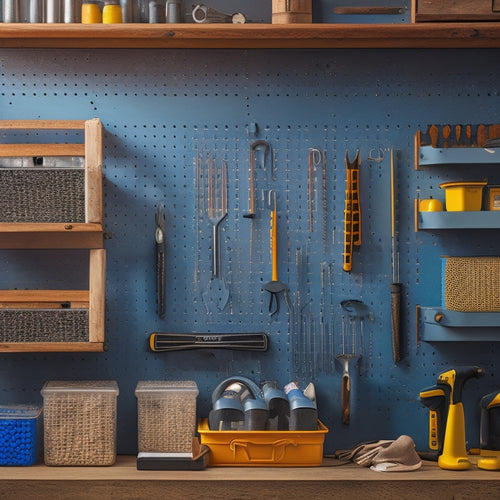
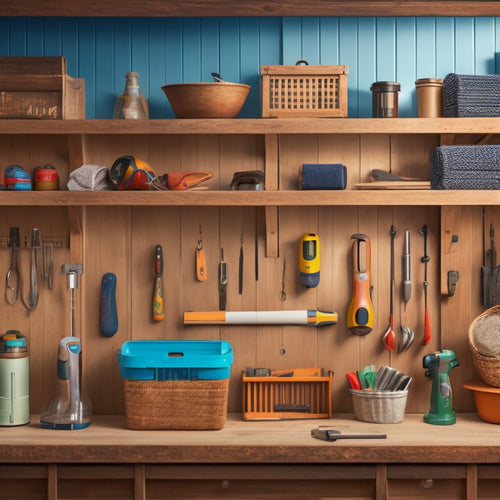
You're already taking the first step towards maximizing your workspace efficiency by recognizing the importance of customizing your pegboard for ultimate storage efficiency. To get started, consider the weight and size of your tools when selecting hook materials, and opt for sturdy metal hooks for heavier items. Customize bins with clear plastic and labeling for visibility and categorization. Next, think about maximizing your storage space by optimizing shelf heights and utilizing corner space. By incorporating essential tool organization accessories and designing for ergonomic efficiency, you'll be well on your way to a highly functional workspace that streamlines your workflow and boosts productivity - and that's just the beginning.
Key Takeaways
• Customize pegboard hooks and bins to fit every tool and item, considering weight, size, and material selection for optimal storage.
• Optimize shelf heights and corner space to maximize storage capacity and accessibility, incorporating shelf configurations for different items.
• Design a pegboard layout with zones for logical and accessible storage, categorizing tools and supplies, and prioritizing high-priority items.
• Implement a labeling and signage system with clear and concise language, using contrasting colors and a font hierarchy for quick identification.
• Incorporate custom shelves, trays, and corner storage solutions to maximize vertical space, separate small items, and prevent clutter buildup.
Customizing Pegboard Hooks and Bins
Customize your pegboard's hooks and bins to mirror your workflow and storage needs, ensuring that every tool and item has a designated home. When choosing hook materials, consider the weight and size of the items you'll be storing. For heavier tools, opt for sturdy metal hooks with a durable coating to prevent rust. For smaller items, like screwdrivers or pliers, use lighter-weight hooks made of aluminum or nylon.
When it comes to bin customization, think about the types of items you need to store. Do you need small compartments for tiny parts or larger bins for bulky equipment? Consider using clear plastic bins to keep items visible and easy to find. You can also label each bin to further categorize your storage.
Maximizing Vertical Storage Space
When designing your custom pegboard, you'll want to make the most of your wall space by optimizing shelf heights to fit your specific storage needs. By doing so, you'll be able to store more items within easy reach, freeing up floor space and reducing clutter.
Next, you'll want to utilize corner space, often a wasted area, to further maximize your pegboard's storage capacity.
Optimize Shelf Height
How can you squeeze every last inch of storage out of your pegboard by optimizing shelf height to maximize vertical storage space? The answer lies in creating a Shelf Configuration that caters to your specific storage needs. By incorporating a Height Variety, you can guarantee that each shelf is tailored to the items you need to store.
| Shelf Height | Ideal Storage Items |
|---|---|
| 12 inches | Hand tools, pliers, and screwdrivers |
| 18 inches | Power tools, drills, and saws |
| 24 inches | Large equipment, compressors, and generators |
| 30 inches | Infrequently used items, seasonal decorations |
| 36 inches | Heavy machinery, equipment, and supplies |
Utilize Corner Space
By cleverly designing your pegboard to incorporate corner-mounted bins, baskets, or shelves, you can tap into the often-wasted vertical space in these areas, adding a surprising amount of storage capacity to your overall setup. This strategic move allows you to reclaim the often-neglected corners of your workspace, making the most of every available inch.
To guarantee a seamless integration, consider installing Corner Protectors to prevent scratches and damage to your walls or pegboard. Additionally, opt for Curved Corners to create a smooth, rounded edge that makes it easy to slide items in and out of storage.
When selecting your corner-mounted solutions, think about the types of items you need to store and choose bins, baskets, or shelves that cater to those specific needs. By doing so, you'll create a tailored storage system that not only maximizes vertical space but also streamlines your workflow.
With a little creativity and planning, you can turn those once-wasted corners into highly functional and efficient storage zones.
Essential Tool Organization Accessories
Optimize your pegboard's functionality with carefully selected accessories that cater to your specific tool collection, ensuring every item has a designated place and is easily accessible. This thoughtful approach enables you to maintain a thorough tool inventory, making it easier to identify what you have and what you need.
| Accessory | Purpose |
|---|---|
| Tool Holders | Store and organize tools of various sizes and shapes |
| Baskets and Trays | Keep small parts and accessories within reach |
| Hooks and Hangers | Hang items like cords, hoses, and accessories |
| Label Holders | Identify tool locations and categories for quick retrieval |
Designing for Ergonomic Efficiency
You can greatly reduce fatigue and discomfort while working on projects by strategically designing your pegboard to minimize stretching, bending, and reaching. A well-designed pegboard should prioritize workstation comfort, ensuring that your body alignment is maintained throughout your work session.
To achieve this, consider the height and distance of your pegboard from your workstation. Ideally, the pegboard should be positioned at a comfortable arm's length, allowing you to access tools without straining your back or shoulders.
When designing your pegboard, keep in mind the frequency of tool use and the weight of the tools themselves. Heavier tools should be placed at a lower level, reducing the need for excessive lifting. Frequently used tools should be placed at eye level or slightly below, minimizing stretching and bending.
Optimizing Pegboard Layout Strategy
Now that you've designed your pegboard for ergonomic efficiency, it's time to optimize its layout strategy.
You'll want to allocate zones on your pegboard, strategically place pegs to maximize storage, and make the most of your hook usage.
Pegboard Zone Allocation
Carefully dividing your pegboard into specific zones helps to create a logical and accessible storage system, ensuring that frequently used tools and supplies are always within easy reach. This process, known as board segmentation, allows you to categorize your tools and supplies into distinct groups, making it easier to find what you need when you need it.
When allocating zones on your pegboard, prioritize the tools and supplies you use most frequently. These high-priority items should be placed in easy-to-access zones, such as the center or top sections of the board. Less frequently used items can be placed in lower-priority zones, like the bottom or corners of the board.
As you segment your board, consider the workflow and tasks you perform most often. For example, if you're a woodworker, you may want to dedicate a zone to your hand saws, another to your drill bits, and another to your sanding tools.
Peg Placement Strategy
To maximize the efficiency of your pegboard, pinpoint the best placement of pegs by considering the size, shape, and frequency of use of each tool or supply. This guarantees that the most accessible areas of the board are reserved for the most essential items.
This strategic approach will help you optimize your pegboard layout, making it easier to find what you need when you need it.
When planning your peg placement, consider the peg density of your board. Aim for a balanced distribution to avoid clutter and ensure easy access to all tools.
Analyze your tool usage patterns to identify the most frequently used items and place them in prime positions. This pattern analysis will help you create a logical and efficient layout.
Maximizing Hook Usage
By strategically assigning hooks to specific tools and supplies, you can harness the full potential of your pegboard, freeing up valuable space and streamlining your workflow. To maximize hook usage, it's crucial to assess your hook capacity and optimize hook placement.
Start by identifying the tools and supplies you use most frequently and assigning them to hooks that are easily accessible. Consider the weight and size of each item to make sure you're not overcrowding your pegboard.
Next, group similar items together to create a logical workflow. For instance, place all your hand tools near each other, followed by your power tools and then your accessories. This will save you time and effort when switching between tasks.
Don't forget to leave some buffer space between hooks to prevent clutter and make it easier to add or remove items as needed. By optimizing your hook placement and capacity, you'll be able to store more items in a smaller space, making your pegboard a highly efficient and valuable asset in your workspace.
Adding Custom Shelves and Trays
How do you maximize the vertical space on your pegboard while keeping frequently used items within easy reach? By adding custom shelves and trays, you can create a more organized and efficient storage system.
Start by identifying the items you need to store and the space available on your pegboard. Then, design custom shelves that fit snugly onto your pegboard, making the most of the vertical space.
To further optimize your storage, consider adding tray dividers to separate small items like screws, nuts, and bolts. This will prevent them from getting jumbled and make it easier to find what you need quickly.
You can also use shelf inserts to create separate compartments for larger items, keeping them organized and preventing clutter from building up.
Incorporating Labeling and Signage
When designing your custom pegboard, you'll want to explore how to effectively incorporate labeling and signage to maximize storage efficiency.
You'll need to develop clear labeling strategies that help you quickly identify what's stored in each spot.
Clear Labeling Strategies
You'll maximize the effectiveness of your custom pegboard by incorporating clear labeling strategies that enable you to quickly identify the tools and accessories stored on it. A well-designed labeling system helps you locate what you need in seconds, saving you time and frustration.
To get started, consider the label color scheme. Choose a palette that contrasts with the pegboard's background, making the labels easy to read. For instance, use bright colors like yellow or orange on a dark background.
Next, establish a font hierarchy to differentiate between categories and subcategories. Use bold fonts for main categories, such as 'Hand Tools' or 'Power Tools,' and smaller, regular fonts for subcategories like 'Wrenches' or 'Drills.' This visual hierarchy helps you scan the pegboard quickly and efficiently.
Additionally, use clear and concise language on your labels, avoiding abbreviations or acronyms that might confuse you or others. By implementing these labeling strategies, you'll create a pegboard that's both functional and easy to navigate.
Signage Best Practices
To guarantee your custom pegboard to the next level, incorporate signage that complements your labeling system, providing a clear visual language that guides you and others to the tools and accessories they need.
When designing your signage, consider the label design: choose a font that's easy to read, even from a distance, and select a color scheme that contrasts with the pegboard's background. This guarantees your signs are highly visible and quickly understood.
For sign fabrication, opt for durable materials that can withstand the wear and tear of your workspace. Acrylic or PVC signs are great options, as they're resistant to scratches and fading. Consider adding a UV coating to protect your signs from the elements.
When deciding on the sign's size, ensure it's proportional to the pegboard and the labels you've created. You want your signs to be noticeable, but not overwhelming. By incorporating well-designed signage, you'll create a seamless storage system that's both functional and visually appealing.
With clear labels and signs, you'll be able to quickly identify the tools you need, saving you time and increasing your productivity.
Visual Organization Systems
By integrating labeling and signage into your custom pegboard design, you're creating a visual organization system that streamlines tool retrieval and boosts efficiency. This system helps you quickly identify where each tool is stored, reducing the time spent searching for misplaced items.
To take it to the next level, consider implementing color coding to categorize your tools. For instance, you can use red labels for power tools, blue for hand tools, and green for measuring instruments. This visual cue helps your brain process information faster, making it easier to find what you need in a snap.
When designing your visual organization system, think about spatial flow. Arrange your labels and signage in a logical order that mirrors the workflow of your tasks. This ensures that the tools you need are easily accessible and in the correct sequence. By doing so, you'll reduce clutter, minimize distractions, and maximize your productivity.
With a well-designed visual organization system, you'll be able to focus on the task at hand, rather than wasting time searching for misplaced tools.
Utilizing Corner Storage Solutions
Corner pegboards, cleverly designed to fit snugly into the often-wasted space where two walls meet, can greatly enhance your storage capacity. By incorporating corner storage solutions into your custom pegboard design, you'll be amazed at how much more organized and efficient your workspace becomes.
When designing your corner pegboard, don't forget to include Corner Protectors. These clever inserts prevent tools and accessories from getting scratched or damaged when stored in the corner. Plus, they keep the corner area clean and tidy, ensuring that your workspace remains clutter-free.
Angled Inserts are another essential component worth taking into account. These inserts allow you to store items at an angle, maximizing the use of corner space and making it easy to access your tools and accessories.
Creating Zones for Task Segregation
As you divvy up your workspace into distinct zones, you're creating a visual hierarchy that streamlines your workflow and boosts productivity. By categorizing tasks into specific zones, you're able to focus on one task at a time, reducing mental clutter and increasing efficiency.
This segregation of tasks also helps you identify which tools and materials are needed for each task, making it easier to access what you need when you need it.
Imagine your workspace divided into zones, each dedicated to a specific task category:
-
Assembly Zone: where you'll find all the tools and materials needed for building and assembling projects
-
Finishing Zone: where you'll store sandpaper, paint, and other finishing tools
-
Measurement Zone: where you'll keep your measuring tapes, levels, and other precision tools
Integrating Power Tool Stations
You'll maximize your pegboard's potential by incorporating power tool stations, strategically placing them within each zone to minimize walking distances and optimize your workflow. This thoughtful approach guarantees that you're always within arm's reach of the tools you need, reducing fatigue and increasing productivity.
When designing your power tool stations, consider the types of tasks you'll be performing in each zone. For instance, if you have a woodworking zone, you may want to integrate a station with a built-in drill press or router. In a metalworking zone, a station with a grinder or sanding wheel might be more suitable.
By incorporating power integration into your pegboard design, you'll streamline your workflow and free up valuable floor space. Remember to leave enough clearance around each station to accommodate cords and hoses, ensuring a safe and efficient working environment.
With careful planning, your custom pegboard will become a powerhouse of productivity, allowing you to tackle projects with ease and confidence.
Frequently Asked Questions
Can I Use a Pegboard in a Humid or Outdoor Environment?
You're wondering if your pegboard can thrive in a humid or outdoor environment, like a flower in the desert. Yes, you can, but you'll need to prioritize weather resistance and moisture protection to prevent damage and guarantee longevity.
How Do I Secure Pegboards to a Wall or Prevent Them From Falling?
You'll want to secure your pegboard to a wall using wall anchors, ensuring a sturdy hold. First, use a stud finder to locate the wall studs, then drill anchors into place, and finally, hang your pegboard with confidence.
Are Pegboards Suitable for Heavy-Duty or Industrial Storage Needs?
"You think pegboards are just for DIY enthusiasts, but trust us, they can handle the big leagues. With load capacities that'll make your jaw drop and material strength that's off the charts, pegboards are more than suitable for heavy-duty or industrial storage needs."
Can I Customize a Pegboard to Fit a Specific Room or Corner Shape?
You can customize a pegboard to fit any room or corner shape, achieving corner optimization and space flexibility. By measuring your space, you'll create a tailored solution that maximizes storage in even the most unusual areas.
Are Pegboards Compatible With Existing Shelving or Storage Systems?
You'll be happy to know that pegboards can seamlessly integrate with your existing shelving or storage systems, thanks to their modular design, allowing you to easily mix and match components for a tailored system integration.
Related Posts
-

What to Look for in a Pegboard Tool Storage Kit
When shopping for a pegboard tool storage kit, you need a system that combines customized organization, sturdy durabi...
-

Tool Storage Chests for a More Organized Workspace
You're looking to enhance productivity and reduce stress in your workspace by getting your tools organized, and that'...
-

What Tools Do I Need for a DIY Wall Organizer
You'll need a variety of tools to complete a DIY wall organizer project. Essential measuring tools include a tape mea...


