
Designing a Safe and Efficient Workshop Layout
You're tasked with designing a safe and efficient workshop layout that streamlines your workflow, reduces hazards, and boosts productivity. Start by evaluating your space and needs, then identify hazard zones and risks, prioritizing electrical safety, tripping hazard management, and chemical storage protocols. Position heavy machinery safely, optimize workbench and counter space, and allocate storage for tools and materials. Designate zones for specific tasks, improve lighting and visibility, and manage electrical and air supply. By following these steps, you'll be well on your way to creating a maintenance-friendly layout that enhances productivity and safety; now, let's get into the finer details.
Key Takeaways
• Measure the workshop's square footage accurately to optimize space utilization and plan workflow efficiently.
• Identify and mitigate hazards such as electrical, tripping, and chemical risks to ensure a safe working environment.
• Position machinery, workbenches, and tools strategically to minimize risks, improve ergonomics, and boost productivity.
• Implement a tool organization system, including tool clusters and portable stations, for quick retrieval and convenience.
• Design clear pathways with a radius on corners, and ensure logical flow and sufficient clearance between workstations for safe movement.
Assessing Workshop Space and Needs
Determine the square footage of your workshop space by measuring its length, width, and any obstructions, such as pillars or alcoves, to get an accurate sense of the area you have to work with. This will give you a clear understanding of the space you're dealing with, helping you make informed decisions about your workshop layout.
Next, take stock of your tools, equipment, and materials. Make a list of the essential items you need to have within easy reach, and those that can be stored away. Consider the tasks you'll be performing most frequently, and how you can optimize your space utilization to minimize walking distances and maximize productivity.
Think about the workflow you want to create – will you need a dedicated area for assembly, or a station for testing and quality control? By carefully evaluating your workshop space and needs, you'll be able to create a layout that's tailored to your specific requirements, ensuring a safe and efficient working environment.
Identifying Hazard Zones and Risks
As you map out your workshop layout, you'll need to pinpoint areas that pose potential risks to safety. You'll want to identify zones where electrical shock is a possibility, such as near outlets and wiring, and mark areas where tripping hazards exist, like uneven flooring or cluttered walkways.
Additionally, you'll need to assess the risks associated with chemical storage, ensuring you're meeting safety protocols and regulations.
Electrical Shock Areas
When designing a workshop layout, you need to identify areas where electrical shock hazards exist, as these zones can pose a significant risk to workers' safety. Electrical shock can be deadly, and it's important to take proactive measures to mitigate this risk.
To guarantee a safe workshop environment, you should pinpoint areas prone to electrical shock.
Here are 3 key areas to focus on:
-
Electrical panels and switchgear: These areas are high-risk zones where electrical shock can occur due to faulty grounding systems or inadequate maintenance. Make sure that all panels and switchgear are properly installed, maintained, and labeled.
-
Arc flash zones: Identify areas where electrical equipment is prone to arcing faults, which can cause severe burns and electrical shock. Implement safety protocols, such as personal protective equipment (PPE) and arc-rated clothing, to minimize the risk of injury.
-
Wet or humid areas: Water and electricity are a deadly combination. Identify areas where water or moisture may accumulate, such as near sinks or in humid environments, and take steps to ensure that electrical equipment is safely installed and maintained.
Tripping Hazards Identified
What hidden obstacles are lurking in your workshop, waiting to send you or your coworkers tumbling to the ground? As you assess your workshop's layout, it's important to identify tripping hazards that can cause accidents and disrupt productivity.
Floor obstacles are a common culprit, so take a closer look at your workspace. Are there loose cords, wires, or hoses scattered across the floor? Are there uneven surfaces, slippery areas, or unevenly placed rugs that can catch your feet off guard?
Effective cable management is vital in preventing tripping hazards. Consider investing in cable ties, cable organizers, or cord concealers to keep your workshop's floor clear. Additionally, make sure that all cords and wires are securely fastened to walls or ceilings to prevent them from becoming tangled or strewn about.
Chemical Storage Risks
Identify the areas in your workshop where chemicals are stored, handled, or used, and scrutinize these zones for potential risks, such as inadequate ventilation, incompatible chemical proximity, or insufficient spill containment measures. These areas can be potential hazards, waiting to create a hazardous situation.
To mitigate these risks, you should:
-
Implement segregation protocols: Guarantee chemicals are stored in separate areas based on their compatibility, reducing the risk of accidental mixing or reactions.
-
Enforce chemical labeling: Clearly label each container with the chemical name, date, and hazard warnings, making it easy to identify and handle chemicals safely.
-
Conduct regular inventory checks: Regularly inspect chemical storage areas to detect and address any potential issues before they escalate into major problems.
Positioning Heavy Machinery Safely
You'll need to strategically position heavy machinery in your workshop to prevent accidents and optimize workflow, taking into account its size, weight, and operational requirements. Improper machine placement can lead to congestion, tripping hazards, and even equipment damage. To guarantee a safe and efficient workshop layout, follow these guidelines:
| Machine Placement | Anchor Points | Considerations |
|---|---|---|
| Against walls or in corners | Floor or wall anchors | Prevents movement during operation |
| Away from aisles and walkways | Overhead anchors | Ensures clear pathways |
| Near power sources | Weight distribution | Reduces cord clutter and tripping hazards |
When positioning heavy machinery, consider the anchor points that will secure it in place. Anchor points can include floor or wall anchors, or even overhead anchors to suspend equipment from the ceiling. Additionally, think about the operational requirements of each machine, such as power source proximity and ventilation needs. By carefully planning machine placement and anchor points, you can establish a safe and efficient workshop layout that minimizes risks and maximizes productivity.
Optimizing Workbench and Counter Space
By positioning heavy machinery safely, you've created a solid foundation for your workshop layout, and now it's time to optimize your workbench and counter space to maximize productivity and efficiency. This is where the real magic happens, as a well-designed workbench and counter space can make all the difference in your workflow.
To get the most out of your workbench and counter space, consider the following:
-
Ergonomic Design: Design your workbench to fit your body, not the other way around. Guarantee the height, distance, and layout of your tools and materials are tailored to your comfort and workflow.
-
Task Segregation: Divide your workbench into separate zones for different tasks, such as assembly, measurement, and finishing. This will help you stay focused and avoid clutter.
-
Workflow Optimization: Arrange your tools and materials in a logical sequence to minimize movement and maximize efficiency. This will help you complete tasks quickly and reduce fatigue.
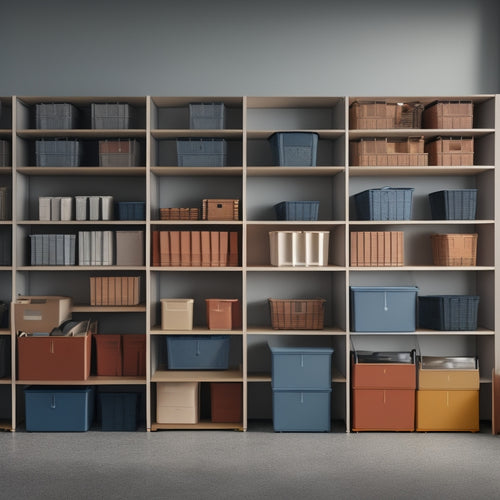
Allocating Storage for Tools and Materials
Carefully allocating storage for your tools and materials is essential to maintaining a clutter-free workshop and streamlining your workflow. When designing your workshop layout, it's important to think strategically about where and how you'll store your tools and materials. Start by taking a tool inventory, making a list of every item you have and grouping similar tools together. This will help you identify patterns and determine the most efficient storage solutions.
Next, categorize your materials based on frequency of use, size, and type. This will enable you to store frequently used items in easy-to-access locations and reserve less accessible areas for less frequently used materials. Consider investing in shelving units, cabinets, and bins to keep your materials organized and out of the way.
Labeling each storage unit will also help you quickly locate the items you need. By allocating storage thoughtfully, you'll be able to find what you need when you need it, reducing downtime and increasing productivity. A well-organized workshop is a safe and efficient workshop, so take the time to get it right.
Implementing Traffic Flow and Routing
When planning your workshop layout, you'll need to take into account how to direct traffic flow and routing to maximize efficiency and safety.
You'll want to identify areas that require segregation to prevent collisions and minimize distractions, ensuring workers can focus on their tasks.
Work Zone Segregation
You'll need to divide your workshop into separate work zones to implement efficient traffic flow and routing, thereby minimizing congestion and hazards. This is where work zone segregation comes in – an essential step in designing a safe and efficient workshop layout.
By segregating your workshop into distinct areas, you can reduce the risk of accidents, improve productivity, and enhance overall workflow.
Here are three segregation strategies to take into account:
-
Production Cells: Group similar tasks or processes together to create designated production cells. This allows workers to focus on specific tasks without interruptions or distractions.
-
Departmental Segregation: Divide your workshop into separate departments, such as fabrication, assembly, and quality control. This helps to reduce cross-traffic and minimize the risk of accidents.
-
Task-Oriented Zones: Create zones dedicated to specific tasks, like welding, cutting, or finishing. This segregation strategy ensures that workers have the necessary resources and equipment to complete their tasks efficiently and safely.
Pathway Clearance Priority
Efficient traffic flow and routing rely on prioritizing pathway clearance, ensuring that materials, equipment, and personnel can move safely and freely throughout the workshop. As you design your workshop layout, you'll want to establish clearance standards that guarantee unobstructed pathways. This means considering the width and height of aisles, as well as the space around workstations and equipment. You'll need to balance the need for efficient traffic flow with the need for adequate workspace and storage.
Pathway optimization is vital in achieving this balance. You'll want to identify the most frequently used routes and make sure they're clear of obstacles. This might involve rearranging equipment, relocating storage areas, or installing dividers to direct foot and vehicle traffic.
By prioritizing pathway clearance, you'll reduce congestion, minimize the risk of accidents, and increase productivity. Remember, a well-designed pathway clearance system is essential to a safe and efficient workshop operation.
Optimized Route Planning
As you design your workshop layout, optimized route planning is essential to guarantee a safe and efficient workflow. Frequently, optimized route planning involves mapping out the most direct paths for materials, equipment, and personnel to reach their destinations, thereby minimizing travel time and reducing the risk of accidents.
To achieve this, consider the following strategies:
-
Identify bottlenecks: Pinpoint areas where congestion tends to occur and reconfigure your layout to alleviate these chokepoints.
-
Implement one-way traffic flow: Designate specific paths for materials and equipment to move through the workshop, reducing the risk of collisions and near-misses.
-
Designate material flow zones: Allocate specific areas for receiving, storing, and shipping materials, streamlining your material flow and reducing travel distances.
Designating Zones for Specific Tasks
Divide your workshop space into distinct zones, each dedicated to a specific task or process, to maximize productivity and minimize workflow disruptions. By doing so, you'll be able to implement task segregation, ensuring that similar tasks are grouped together, and reducing the likelihood of mistakes and accidents.
Zone prioritization is also essential, as it allows you to allocate the most space and resources to the most critical tasks. For instance, if you're a woodworker, you may want to designate a zone for cutting and another for assembly. This will enable you to focus on one task at a time, without having to navigate through a cluttered workspace.
Additionally, consider the workflow and sequence of tasks when designing your zones. By placing zones in a logical order, you'll be able to move efficiently from one task to the next, saving time and energy.
A well-designed zone layout will help you stay organized, efficient, and productive, ultimately leading to a safer and more successful workshop.
Improving Lighting and Visibility
You can greatly enhance your workshop's functionality by ensuring that each zone has a well-designed lighting system that provides adequate illumination, reducing eye strain and improving your ability to focus on the task at hand.
Proper lighting is essential for task illumination, allowing you to see details clearly and work efficiently.
Here are three essential considerations for improving lighting and visibility in your workshop:
-
Task Illumination: Install task-specific lighting, such as under-cabinet lighting or pendant lights, to focus illumination exactly where you need it.
-
Ambient Lighting: Use general lighting, like overhead LED lights or ceiling fixtures, to create a comfortable and well-lit environment.
-
Lighting Placement: Strategically position lights to minimize shadows and glare, ensuring that your workspace is evenly illuminated.
Managing Electrical and Air Supply
Properly managing electrical and air supply systems is crucial to guaranteeing a safe, efficient, and reliable workshop operation. You'll want to strategically position electrical outlets to minimize cord clutter and reduce tripping hazards. Contemplate installing outlets with built-in USB ports to keep your devices charged. Make sure that outlets are easily accessible and not obstructed by equipment or workbenches.
When it comes to air supply, you'll need to take into account the placement of air compressors. These machines can be noisy and generate heat, so it's best to locate them in a well-ventilated area away from workstations. You should also ensure that air hoses are long enough to reach all areas of the workshop without causing tripping hazards. Additionally, contemplate installing air drops or reels to keep hoses organized and out of the way.
Creating a Maintenance-Friendly Layout
When designing a maintenance-friendly workshop layout, you'll want to prioritize ease of access, organization, and clear pathways.
By creating easy access zones, you'll be able to quickly identify and address issues, while a well-thought-out tool organization system will make certain that everything has its designated place.
Clear pathways will further facilitate movement and reduce the risk of accidents, making your workshop a more efficient and safer space.
Easy Access Zones
By strategically designating easy access zones within your workshop, maintenance tasks become much less cumbersome and time-consuming. This allows you to focus on the tasks at hand, rather than wasting time searching for the right tools or struggling to reach equipment.
To create an efficient easy access zone, consider the following:
-
Personalized Stations: Designate specific areas for each task or project, making sure that all necessary tools and materials are within reach.
-
Flexible Layout: Plan your workshop layout to accommodate different projects and tasks, allowing for easy rearrangement of equipment and tools as needed.
-
Clear Aisles: Make certain that walkways and aisles are clear of clutter and obstructions, providing a safe and efficient path to each workstation.
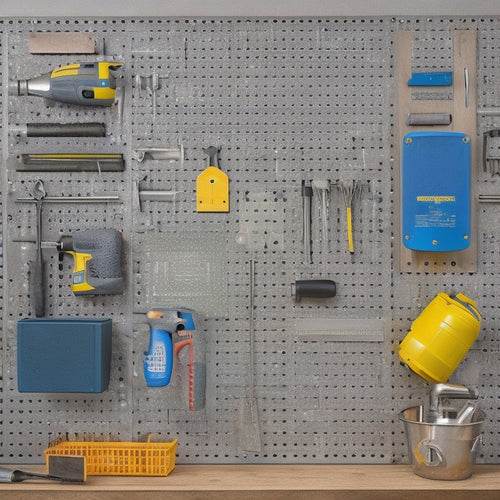
Tool Organization Systems
You'll want to implement a tool organization system that complements your easy access zones, ensuring that every tool has a designated home and can be quickly retrieved when needed. This will save you time and frustration in the long run.
A well-designed tool organization system should include Tool Clusters, where similar tools are grouped together, making it easy to find what you need at a glance. For instance, you could have a cluster for woodworking tools, another for metalworking, and so on.
Portable Stations are also a great addition to your tool organization system. These stations can be moved around the workshop as needed, providing a convenient workspace for specific tasks. For example, you could have a portable station for drilling, with all the necessary tools and accessories within easy reach.
Clear Pathways Design
Effective workshop layout design involves crafting clear pathways that facilitate easy movement and maintenance, allowing you to navigate the space with purpose and efficiency. A well-designed pathway system guarantees that you can quickly move around the workshop, access tools and equipment, and perform tasks without obstacles. This, in turn, boosts productivity, reduces fatigue, and minimizes the risk of accidents.
To create a maintenance-friendly layout, consider the following key elements:
-
Corner Radius: Design corners with a radius to prevent sharp turns and allow for smooth navigation. This is particularly important when moving large or heavy objects around the workshop.
-
Path Flow: Ensure that pathways have a logical flow, guiding you through the workshop in an efficient and organized manner. Avoid narrow or winding paths that can cause congestion or confusion.
-
Clearance: Leave sufficient clearance between workstations, tools, and equipment to accommodate comfortable movement and easy access. This will help you stay focused on your tasks and avoid feeling claustrophobic or restricted.
Frequently Asked Questions
How Often Should I Reorganize My Workshop Layout to Stay Efficient?
You should reassess your space every 3-6 months for a Seasonal Refresh, and conduct a thorough Space Audit annually to guarantee your workflow remains efficient and clutter-free, adapting to your evolving needs and projects.
Can I Customize My Workshop Layout to Fit My Personal Work Style?
You're a master of your domain, and your workshop layout should be tailored to your every whim! With countless personalization options, you'll find the perfect blend of ergonomic considerations to maximize your productivity and comfort.
What Are the Benefits of a U-Shaped Workshop Layout Versus an L-Shape?
When choosing between a U-shaped and L-shaped layout, you'll find the former excels in workzone optimization, allowing you to move efficiently between tasks, while the latter makes better use of corner utilization, reducing wasted space.
How Do I Handle Workshop Layout Changes When New Equipment Is Added?
When new equipment arrives, you'll need to reassess your space, prioritizing equipment integration and space optimization. You'll have to measure, adjust, and reconfigure your layout to guarantee a seamless workflow, minimizing disruptions and maximizing productivity.
Can a Well-Designed Workshop Layout Reduce Worker Fatigue and Stress?
You might think fatigue and stress are inevitable, but a well-designed workshop layout can actually reduce them. By creating ergonomic stations and a productive workflow, you'll optimize your movements, conserve energy, and enjoy a more comfortable work experience.
Related Posts
-
Choosing the Right Stacked Storage Bins
When choosing the right stacked storage bins, you'll want to evaluate your storage needs, considering inventory types...
-
How to Hang a Pegboard in 5 Easy Steps
You'll hang a pegboard in 5 easy steps by first preparing the wall, ensuring it's sturdy and free of obstructions. Ne...
-

Top 7 Parts Tray Organizers for Productivity
You can optimize your workspace and enhance productivity with the right parts tray organizer, which can help you cate...


