Designing a Pegboard for Small Workshop Spaces
Share
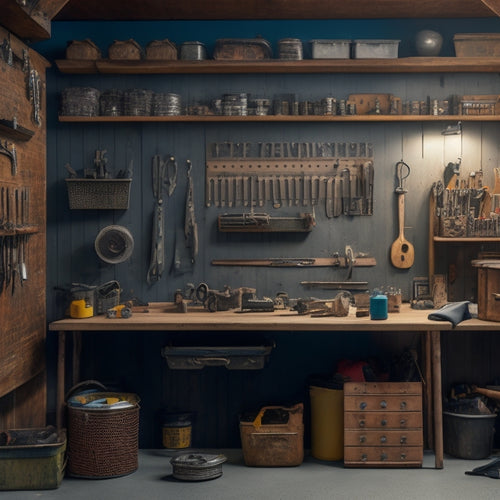
When designing a pegboard for your small workshop space, prioritize vertical storage to maximize available wall space. Customize your pegboard hook layout by grouping tools into categories and placing hooks strategically based on frequency of use and tool size. Choose a durable pegboard material, like steel or aluminum, and measure your workshop's constraints to determine the perfect size. By creating zones for tool categories and incorporating additional storage features, like bins and baskets, you'll optimize your pegboard's accessibility. Now, take the next step and discover how to fine-tune your design for ultimate efficiency.
Key Takeaways
• Determine the optimal pegboard size based on available space and wall dimensions in your small workshop.
• Strategically place hooks considering frequency of use and tool size to maximize storage efficiency.
• Group tools into zones on the pegboard for better organization, assigning dedicated storage areas for different tool categories.
• Incorporate bins, baskets, and hooks to maximize space and utilize tool holder options for efficient organization.
• Position the pegboard at a comfortable height and angle for easy access, prioritizing frequently used items for quick retrieval.
Maximizing Vertical Storage Space
To optimize your small workshop space, start by utilizing the walls to maximize vertical storage space, as this will help keep frequently used tools and accessories within easy reach while keeping the floor clear.
A well-planned pegboard layout is essential for space saving in a compact workshop. By installing a pegboard on a wall, you can hang frequently used items, freeing up floor space for larger equipment or workbenches. Consider the layout carefully, grouping similar items together and placing the most frequently used tools at eye level. This will save you time and effort when searching for specific tools.
When designing your workshop, prioritize vertical storage to make the most of your available space. Install shelves, cabinets, or bins to store less frequently used items, keeping them out of the way but still accessible. By maximizing your vertical storage space, you'll be able to work more efficiently and stay organized, even in a small workshop.
Customizing Pegboard Hook Layout
As you start customizing your pegboard hook layout, you'll need to develop a hook placement strategy that makes sense for your specific workshop needs.
This involves thinking about the tools you use most frequently and grouping them into categories.
Hook Placement Strategy
You'll get the most out of your pegboard by strategically placing hooks to maximize storage and convenience, making it important to develop a customized hook layout that suits your specific workshop needs.
When organizing tools on your pegboard, consider the frequency of use and the size of each tool. Place frequently used tools at eye level or near the front of the board for easy access. Less frequently used tools can be stored towards the top or bottom of the board.
Accessibility considerations are also essential when determining hook placement. Make sure that the hooks are spaced far enough apart to accommodate the size of your tools and hands. You don't want to struggle to remove or hang tools due to overcrowding.
Effective hook placement also involves space utilization. Make the most of your pegboard's real estate by using double hooks, bins, and baskets to store smaller items.
Tool Organization System
Tool Organization System
By applying the hook placement strategy, you can now build a customized tool organization system that mirrors your workflow and maximizes your pegboard's storage capacity. This involves grouping similar tools together, using color coding to distinguish between categories, and implementing tool shadowing to guarantee each tool has its designated spot.
Here's a sample layout to get you started:
| Tool Category | Hook Type | Storage Solution |
|---|---|---|
| Hand tools | Standard hooks | Tool pouches |
| Power tools | Heavy-duty hooks | Magnetic tool holders |
| Measuring tools | Small hooks | Tool trays |
| Fasteners | Bin hooks | Small storage bins |
This layout allows you to store frequently used tools within easy reach, while less frequently used items are stored in designated areas. By incorporating tool pouches, magnetic tool holders, and small storage bins, you can optimize your pegboard's storage capacity and reduce clutter. Remember to regularly assess and adjust your tool organization system as your needs and workflow evolve.
Choosing the Right Pegboard Material
Selecting the appropriate pegboard material is crucial, since it directly affects the durability, weight capacity, and overall functionality of your well-organized workspace. You want a material that can withstand the weight of your tools and accessories, while also being easy to clean and maintain.
When selecting a pegboard material, consider the following factors:
-
Material durability: Look for materials that are resistant to scratches, dents, and corrosion. Steel and aluminum pegboards are popular choices due to their high durability and cost-effective prices.
-
Sustainability: If you're concerned about the environmental impact of your pegboard, consider eco-friendly options like reclaimed wood or bamboo. These materials aren't only sustainable but also add a distinctive aesthetic to your workshop.
-
Weight capacity: Calculate the total weight of the tools and accessories you plan to hang on your pegboard and choose a material that can support that weight. A sturdy pegboard material will guarantee your tools stay organized and within reach.
Measuring Your Workshop's Constraints
Measure your workshop's available space to determine the maximum size of your pegboard, considering any obstacles like electrical outlets, windows, or existing shelving units. This will help you optimize your workshop layout and ensure your pegboard seamlessly integrates into your storage solutions. Make a list of the dimensions of your available wall space, including any areas that are unusable due to obstacles.
| Workshop Area | Dimensions |
|---|---|
| Wall 1 | 4ft x 6ft |
| Wall 2 | 3ft x 4ft |
| Wall 3 | 2ft x 8ft |
| Wall 4 | 5ft x 3ft |
| Window area | 2ft x 2ft (unusable) |
Consider the space utilization of your workshop and pinpoint areas where you can enhance organization techniques. Ponder the tools and accessories you need to store and how you can maximize your pegboard's storage capacity. By investing time in measuring your workshop's constraints, you'll be able to design a pegboard that fits your unique space and meets your specific needs.
Creating Zones for Tool Categories
When designing your pegboard, you'll want to create zones for different tool categories to keep your workspace organized and efficient.
You can group similar tools together, such as hand tools, power tools, and accessories, and assign dedicated storage areas for each category.
Tool Category Grouping
You'll want to divide your pegboard into distinct zones, each dedicated to a specific tool category, such as hand tools, power tools, or accessories. This will help you maintain an organized workshop layout and make sure that your tool storage is efficient.
By grouping similar tools together, you'll be able to quickly find what you need, saving you time and reducing frustration.
Here are some benefits of tool category grouping:
- Improved visibility: With similar tools grouped together, you'll be able to see at a glance what you have available.
- Easier access: Tools are more accessible when they're stored in a dedicated zone, reducing the time spent searching for them.
- Better maintenance: Grouping tools by category makes it easier to perform routine maintenance, such as cleaning and lubricating, on similar tools at the same time.
Dedicated Storage Areas
Create dedicated storage areas on your pegboard by dividing it into zones, each allocated to a specific tool category, ensuring that similar tools are stored together in a logical and accessible way. This approach allows you to quickly find the tools you need, saving time and reducing frustration.
Within each zone, consider incorporating wall mounted shelves or hanging baskets to maximize storage capacity. For example, designate a zone for hand tools and use wall mounted shelves to store screwdrivers, pliers, and wrenches.
Another zone can be allocated for power tools, with hanging baskets storing cords, batteries, and accessories.
Efficient Workflow Paths
Organize your pegboard into distinct workflow paths by categorizing tools into zones, enabling you to move efficiently from one task to another. This layout design strategy boosts workflow efficiency and optimizes space utilization.
By grouping similar tools together, you'll reduce walking distances and minimize time spent searching for the right tool.
Here are some key zones to take into account:
-
Power tools: Store drills, saws, and sanders in one area for easy access when working on projects that require heavy machinery.
-
Hand tools: Designate a zone for pliers, wrenches, and screwdrivers, making it easy to grab what you need for smaller tasks.
-
Measuring and testing: Group calipers, levels, and multimeters together for quick reference when measuring or testing materials.
Incorporating Additional Storage Features
By integrating clever storage solutions, such as bins, baskets, and hooks, into your pegboard design, you can maximize the limited space in your small workshop. This is where tool holder options come in handy. Consider incorporating innovative shelving solutions, like multi-tiered shelves or foldable shelves, to store items like power tools, hand tools, and materials. These space-saving designs will keep your tools organized and within reach.
To further optimize your pegboard's storage capacity, think creatively about how you can utilize the available space. For instance, you can attach bins and baskets to store small parts, nuts, and bolts. You can also hang hooks for items like cables, hoses, or accessories. By doing so, you'll create a clutter-free workspace that allows you to focus on your projects.
Optimizing Pegboard Accessibility
To guarantee easy access to your tools and materials, position your pegboard at a comfortable height and angle, considering your own stature and the types of tasks you'll be performing in your small workshop. This will ensure that you can quickly and easily retrieve the items you need, without straining or reaching.
When optimizing pegboard accessibility, keep the following tips in mind:
-
Prioritize frequently used items: Place your most-utilized tools and materials in easy-to-reach locations, saving time and effort.
-
Group similar items together: Organize related tools and materials into categories, making it simpler to find what you need.
-
Leave space for growth: Don't overcrowd your pegboard – leave some empty space for future additions or changes.
Frequently Asked Questions
Can I Attach a Pegboard to a Drywall Without Studs?
You can attach a pegboard to drywall without studs using alternative materials like anchors or molly bolts, ensuring proper installation techniques for weight distribution and durability factors to support your pegboard's weight.
How Do I Prevent Pegboard Hooks From Falling off Over Time?
Like Atlas holding up the sky, you want your pegboard hooks to stay put. To prevent them from falling off, maintain pegboard hook durability by using high-quality hooks and screw them in securely to prevent hook slippage over time.
Are Pegboards Suitable for Heavy Machinery and Equipment?
When considering pegboards for heavy machinery and equipment, you'll want to prioritize weight capacity and durability. Guarantee a stable installation by choosing a sturdy material and securing it firmly to a wall or floor to prevent accidents.
Can I Use a Pegboard in a Humid or Outdoor Environment?
You're wondering if you can use a pegboard in a humid or outdoor environment? Yes, you can, but be prepared for extra maintenance and choose materials with humidity resistance, ensuring outdoor durability.
Are Pegboards Compatible With Different Types of Workshop Lighting?
When selecting lighting for your pegboard, you'll want to think about lighting placement for the best pegboard visibility. Avoid placing light fixtures directly above, as they can cast pegboard shadows, reducing visibility; instead, place them at an angle for ideal illumination.
Related Posts
-

Design Considerations for a Custom Pegboard
When designing a custom pegboard, you'll want to start by evaluating your storage needs, considering factors like too...
-

10 Essential Steps for Small Parts Bin Storage
To optimize your small parts bin storage, start by defining your storage needs and goals, considering factors like av...
-

What Tools Do I Need for a DIY Wall Organizer
You'll need a variety of tools to complete a DIY wall organizer project. Essential measuring tools include a tape mea...


