Craft Your Custom Pegboard Organizer Today
Share
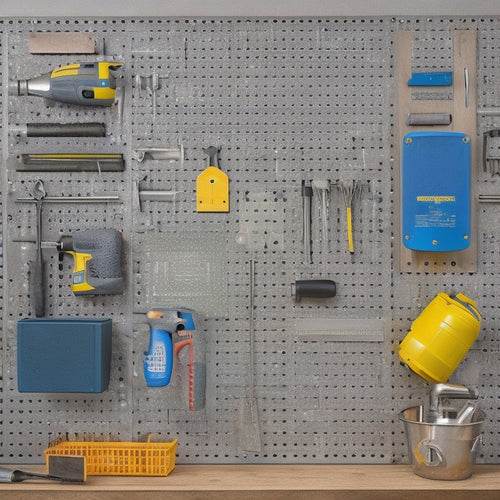
Craft a custom pegboard organizer that elevates your workspace's functionality and style. Begin by designing a thoughtful layout, balancing aesthetics and functionality to maximize storage capacity. Optimize space with carefully planned hook arrangements and categorized items. Next, drill and cut components with precision, employing efficient techniques and customizing shelf depths. Sand and finish components for a smooth, refined surface. Assemble and attach shelves with attention to detail, and finally, style and organize your space with color-coordinated storage solutions and visually appealing displays. With careful planning and execution, create a tailored system that streamlines your workflow and reflects your unique needs.
Key Takeaways
• Design a functional layout by categorizing tools, optimizing space, and allocating vertical space for frequently used items.
• Drill holes every 6 inches using a drill guide and employ efficient techniques for a sturdy pegboard.
• Sand and finish components for a smooth surface, and consider painting or adding decorative accents for a personalized look.
• Assemble shelves to specific dimensions, mark holes for ideal spacing, and attach them using wood screws or anchors.
• Style and organize your space by implementing the 'zone' concept, utilizing DIY hacks, and achieving color coordination with storage solutions.
Designing Your Pegboard Layout
What is the most efficient way to maximize your pegboard's storage potential, and how can you tailor its layout to meet your specific organizational needs?
To achieve peak storage, consider color coordination and functional accessories that enhance your pegboard's functionality. Space optimization is essential, so carefully plan the arrangement of customized hooks to accommodate your tools and supplies. Begin by categorizing your items and grouping similar tools together.
Then, visualize the layout and allocate space accordingly. Use vertical space by installing hooks at varying heights, and reserve prime real estate for frequently used items. By thoughtfully designing your pegboard layout, you'll create a highly efficient and organized workspace that streamlines your workflow and boosts productivity.
Drilling and Cutting Components
With your pegboard layout designed and categorized, the next step is to bring your organizational vision to life by drilling precise holes and cutting custom components that fit your specific needs.
To guarantee accuracy, use a drill guide and mark holes every 6 inches, verifying spacing before drilling. Employ efficient drilling techniques, taking your time and elevating the board for stability.
When cutting shelves, customize depth and width to suit your requirements, and vary lengths for visual appeal. Customizing brackets involves cutting dowels to the desired length, considering shelf depth and tool hanging needs.
Sanding and Finishing Touches
Regularly, to guarantee a smooth and durable finish, sand all components of your custom pegboard organizer, employing a sanding block or electric sander to achieve an even, refined surface. This essential step prepares your project for the staining process or refinishing techniques, ensuring a flawless appearance.
Once sanded, consider applying a paint color that complements your workshop's aesthetic, or add decorative accents to give your organizer a personalized touch. A well-executed finish not only enhances the overall look but also increases the durability of your custom pegboard.
Assembling and Attaching Shelves
Two shelves, each carefully crafted to specific dimensions, are now ready to be assembled and attached to the pegboard, bringing your custom organizer one step closer to completion.
To guarantee ideal shelf spacing, carefully measure and mark the holes on the pegboard, taking into consideration the desired shelf arrangement.
Next, attach the shelves to the pegboard using mounting options such as wood screws or anchors, guaranteeing stability and preventing tipping or falling.
Consider adjustable mounting options to accommodate varying shelf lengths and depths.
Finally, double-check the shelf spacing and alignment to guarantee a seamless and functional organizer.
With careful attention to detail, your custom pegboard organizer is taking shape, ready to be styled and organized to your liking.
Styling and Organizing Your Space
Now that the shelves are securely attached to the pegboard, the focus shifts to transforming this functional organizer into a visually appealing and highly efficient space that reflects your personal style and meets your specific needs. Achieve color coordination by selecting storage solutions that complement your workshop's aesthetic.
Implement DIY hacks, such as repurposing old containers or adding decorative labels, to add personality to your space. Create creative displays by arranging tools and accessories in a visually appealing manner. Consider the 'zone' concept, where frequently used items are placed within easy reach.
Frequently Asked Questions
Can I Use MDF Instead of 3/4 Plywood for the Pegboard?
When considering MDF as an alternative to 3/4 plywood for the pegboard, weigh the benefits of MDF's smooth surface and cost-effectiveness against the potential drawbacks of lower durability and moisture sensitivity, making a cost comparison essential for an informed decision.
How Do I Prevent Warping or Bending of the Plywood?
To prevent warping or bending of the plywood, employ moisture control measures, such as storing the wood in a dry environment, and wood conditioning techniques, like acclimating the wood to the workshop's humidity, to guarantee stability and flatness.
Are There Any Specific Safety Precautions for Drilling and Sawing?
When drilling and sawing, prioritize safety by wearing Safety Goggles to protect eyes from debris. Utilize a Drill Press for precise control, and maintain a stable work environment to prevent accidents and guarantee a successful project.
Can I Add a Back Panel to My Pegboard for Extra Storage?
When incorporating a back panel, consider innovative Panel Design elements, such as Hidden Compartments, to maximize storage potential. This clever addition can conceal valuable tools or supplies, enhancing organization and functionality while maintaining a sleek aesthetic.
How Do I Clean and Maintain My Pegboard Over Time?
To maintain your pegboard, regularly dust with a soft cloth to guarantee dust resistance. Perform a seasonal refresh by rearranging tools and accessories, and consider applying a new polyurethane coat to preserve the finish and prevent wear.
Related Posts
-

Choosing the Right Stacked Storage Bins
When choosing the right stacked storage bins, you'll want to evaluate your storage needs, considering inventory types...
-

How to Hang a Pegboard in 5 Easy Steps
You'll hang a pegboard in 5 easy steps by first preparing the wall, ensuring it's sturdy and free of obstructions. Ne...
-

Bin Garage Storage Ideas for Maximizing Space
You can greatly maximize your garage's storage space by utilizing vertical space with ceiling storage bins, stacking ...


