Building a Custom Pegboard and Hook System
Share
You're building a custom pegboard and hook system to boost productivity! First, assess your tool storage needs by evaluating your current collection and usage. Identify frequently used and bulky tools to optimize space and reduce clutter. Choose the right pegboard material that fits your workspace aesthetics and can support tool weight. Next, design a hook system that fits your workflow, grouping similar items together and prioritizing frequently used tools. Build a sturdy frame, assemble the pegboard structure, and install hooks and accessories for efficiency. Now, get ready to maximize your storage capacity and organization – and discover more ways to fine-tune your system.
Key Takeaways
• Evaluate your tool collection and usage to determine the most frequently used and bulky tools that require optimal storage.
• Choose a pegboard material that fits your workspace aesthetics, budget, and can support the weight of your tools, considering thickness and durability.
• Design a customized hook system that prioritizes frequently used tools, groups similar items together, and leaves space for future additions.
• Ensure a sturdy pegboard structure by assembling a frame, cutting board pieces accurately, and using high-quality materials and drilling pilot holes.
• Install hooks and accessories efficiently by planning organization, using heavy-duty hooks for bulky items, and utilizing small hooks for accessories.
Assessing Your Tool Storage Needs
Take stock of your current tool collection and think about how you use each item, as this will help you determine the types of pegs and hooks you'll need for your custom pegboard.
Identify the tools you use most frequently and the ones that are bulky or hard to store. This will give you an idea of the types of pegs and hooks you'll need to prioritize.
Consider the space where you'll be installing your pegboard and think about how you can optimize it for maximum tool organization and space efficiency.
Think about the tools that are currently cluttering your workspace and how custom storage solutions can help reduce clutter.
Make a list of the tools you need to store and the types of pegs and hooks that will best accommodate them.
Choosing the Right Pegboard Material
You'll want to select a pegboard material that's durable, easy to work with, and fits your budget, as it will serve as the backbone of your custom storage system. The right material will guarantee that your pegboard can hold the weight of your tools and withstand regular use.
Here are some factors to take into account when choosing a pegboard material:
-
Thickness and weight capacity: A thicker material can hold more weight, but may be heavier and more expensive. Think about the weight of the tools you'll be storing and choose a material that can support them.
-
Material durability: Look for materials that are resistant to scratches, dents, and fading. A durable material will ensure your pegboard remains functional and looks great over time.
-
Cost: Pegboard materials vary in price, from affordable options like MDF to more expensive options like aluminum. Set a budget and choose a material that fits within it.
- Aesthetics: Take into consideration the style and color of your workspace and choose a pegboard material that fits with your aesthetic. A visually appealing pegboard can enhance the overall look of your workspace.
Designing Your Custom Hook System
Now that you've chosen your pegboard material, it's time to focus on designing a custom hook system that meets your specific needs. You'll need to decide on a hook placement strategy that maximizes storage and efficiency, considering factors like tool frequency and accessibility.
As you design your system, think about how you can customize it to fit your unique workflow and preferences.
Hook Placement Strategies
Determine the types of items you plan to hang on your pegboard, as this will greatly influence the placement and selection of hooks in your custom system. This will help you decide on the hook arrangement that works best for you. For instance, if you have a lot of long-handled tools, you'll want to leave enough space between hooks to accommodate them.
Here are some strategies to keep in mind when placing your hooks:
-
Group similar items together: Keep all your gardening tools in one area, and your woodworking tools in another.
-
Prioritize frequently used items: Place the items you use most often in easy-to-reach locations.
-
Take into account the weight of items: Place heavier items near the bottom of the pegboard to prevent the board from tipping.
- Leave space for future additions: Don't overcrowd your pegboard – leave some space for new tools or items you might acquire later.
Designing for Efficiency
With your hook placement strategies in place, it's time to create a custom hook system that streamlines your workflow and maximizes storage efficiency. To achieve this, focus on designing a system that optimizes space and promotes easy tool accessibility.
| Design Consideration | Benefits |
|---|---|
| Group similar tools together | Reduces searching time and increases workflow efficiency |
| Place frequently used tools at eye level | Saves time and reduces strain from bending or reaching |
| Designate specific areas for specific tasks | Enhances organization and reduces clutter |
| Incorporate dual-purpose hooks | Maximizes storage space and reduces hook count |
Customization Options
You'll want to start by assessing your tool collection and identifying the types of hooks and accessories you'll need to create a customized system that caters to your specific requirements. This will help you determine the size and type of hooks, as well as any additional features you may need, such as bins or trays.
Some customization options to assess include:
-
Color options: Choose from a variety of colors to match your workshop or personal style
-
Size variations: Select from different hook sizes to accommodate tools of various lengths and weights
-
Personalization ideas: Add a personal touch with engraved labels or custom-designed hooks
- Attachment methods: Decide on the type of attachment method that works best for you, such as screws, adhesive, or magnets
Building the Pegboard Structure
Now it's time to build the pegboard structure.
You'll start by assembling the frame, which will provide a solid foundation for your pegboard.
Next, you'll cut the board pieces to the correct size, making sure they fit snugly within the frame.
Pegboard Frame Assembly
Assemble the frame by attaching the top and bottom horizontal rails to the vertical side rails using 2.5-inch wood screws, making sure they're square and the corners are secure. This step is critical in building a sturdy pegboard structure that can hold your tools and other items.
Next, verify the frame is level and plumb. You can use a level tool to double-check the frame's alignment. This is essential for a well-organized tool organization system and storage solutions.
Here are some key considerations to keep in mind during the frame assembly process:
- Use high-quality wood and materials to guarantee durability and longevity.
- Measure twice, cut once to avoid errors and mistakes.
- Drill pilot holes for screws to prevent splitting the wood.
- Use clamps to hold the frame together while you screw the parts in place.
Cutting the Board Pieces
Cutting the board pieces to the correct size is an important step in constructing the pegboard structure, requiring precision and attention to measurement. You'll need to measure and cut the 1x4 or 1x6 boards to the desired length for the top, bottom, and side frames. Take your time to ensure measuring accuracy, as incorrect cuts can impact the entire structure.
Before cutting, make sure to wear safety precautions such as safety glasses, ear protection, and a dust mask. Use a miter saw or a circular saw to make clean cuts. If you're using a miter saw, set the angle to 0° for straight cuts.
Here's a sample cutting list for a 4x4 pegboard:
| Piece | Quantity | Length |
|---|---|---|
| Top frame | 2 | 48' |
| Bottom frame | 2 | 48' |
| Side frame | 2 | 45' |
| Back panel | 1 | 45' x 45' |
Remember to double-check your measurements before cutting each piece. Once you've cut all the pieces, you're prepared to assemble the pegboard structure.
Installing Hooks and Accessories
Hang your pegboard on the wall, ensuring it's level and secure, before proceeding to install hooks and accessories. This is where your custom pegboard starts to take shape, and you get to see your storage solutions come to life.
Start by planning your hook organization. Think about the items you want to store and the frequency of use. This will help you determine the type and placement of hooks. For example:
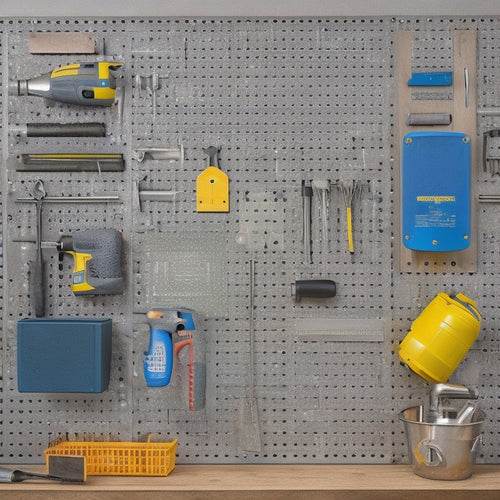
- Heavy-duty hooks for bulky items like tools or equipment
- Small hooks for accessories like cords or small parts
- Adjustable hooks for items of varying sizes
- Double hooks for hanging multiple items, like bikes or luggage
When installing hooks, make sure to follow the manufacturer's instructions and consider the weight capacity of each hook.
Accessory placement is also essential, so think about the flow of your workspace and how you want to access your items.
Maximizing Storage and Organization
Now that your hooks and accessories are in place, focus on maximizing storage and organization by identifying areas where you can optimize your pegboard's layout to accommodate more items or improve workflow efficiency.
Start by analyzing your pegboard's space utilization, considering the size and shape of each item you want to store. Look for opportunities to group similar items together, making it easier to find what you need when you need it.
To enhance aesthetic appeal, balance the layout by distributing items evenly across the board. Consider the flexibility of your system, ensuring that it can adapt to changing needs over time.
For example, use adjustable hooks or bins that can be easily rearranged or swapped out as needed. Durability is also key, so choose high-quality materials and construction methods that can withstand heavy use.
Frequently Asked Questions
Can I Use a Pegboard in a Humid or Outdoor Environment?
If you plan to use a pegboard in a humid or outdoor environment, you'll need to prioritize outdoor durability and humidity resistance. Choose materials like rust-resistant hooks and weatherproof pegboards, and maintain them regularly to guarantee longevity.
How Do I Keep My Pegboard Clean and Dust-Free?
"Get a grip on pegboard maintenance! You'll be on top of things by regularly wiping down your board with a damp cloth, dusting hooks, and rearranging tools to prevent dust accumulation, keeping your space squeaky clean and organized."
Can I Move My Pegboard to a Different Location Later?
You can move your pegboard to a different location later, but consider the installation process beforehand to guarantee easy pegboard relocation, choosing a wall anchor that allows for portability and hassle-free relocation.
Are Pegboards Suitable for Heavy Tools and Equipment?
When choosing a pegboard, you'll want to assess the weight capacity and durability to make sure it can hold your heavy tools and equipment. Look for sturdy materials, stable installation techniques, and a robust design to guarantee a reliable hold.
Can I Customize My Pegboard With Non-Standard Hook Sizes?
"Did you know 80% of workers waste time searching for tools daily? You can break free from standard hook sizes and create custom hook designs that fit your unique needs, incorporating non-traditional accessories for maximum efficiency."
Related Posts
-

7 Essential Foldable Workbenches for Garages
When selecting a foldable workbench for your garage, you'll want to contemplate factors such as space-saving design, ...
-

How to Hang a Pegboard in 5 Easy Steps
You'll hang a pegboard in 5 easy steps by first preparing the wall, ensuring it's sturdy and free of obstructions. Ne...
-

What Are the Advantages of a Wooden Tool Box
You choose a wooden tool box, you're not only getting a reliable storage solution, but also a long list of benefits t...


