5 Steps to a Functional Pegboard Setup
Share
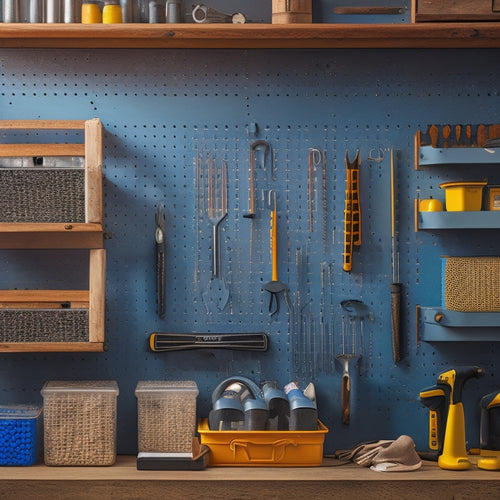
You're about to change your workspace into a productivity powerhouse by designing a functional pegboard setup that maximizes efficiency, safety, and accessibility. To get started, assess your workspace needs by identifying frequently accessed tools and optimizing your layout. Next, choose the right pegboard that fits your style and needs. Then, select essential accessories like hooks and bins to enhance organization. Plan your pegboard layout by grouping tools by category and allocating space based on frequency of use. Finally, install and customize your setup to guarantee a safe and functional workspace that's customized to your needs - and that's just the beginning of your path to a more efficient workspace.
Key Takeaways
- Assess your workspace needs by identifying frequently used tools and optimizing the layout for efficiency and safety.
- Choose the right pegboard material, design style, and mounting option that fits your workspace theme and tool organization needs.
- Select essential accessories like hooks, labeled storage bins, and functional items that enhance visual order and optimize space.
- Plan a logical pegboard layout by grouping tools by category or frequency of use, allocating space based on usage, and designating areas for small parts and measuring tools.
- Install and customize your pegboard by following manufacturer instructions, prioritizing safety precautions, and leaving space for future additions or adjustments.
Assess Your Workspace Needs
As you prepare to create your functional pegboard setup, take a step back to assess your workspace needs. Consider the types of projects you'll be working on and the tools you'll need to access frequently.
Think about the layout of your workspace and how you can optimize it for efficiency. A well-planned pegboard setup is essential for effective workspace organization. It will help you keep your tools within easy reach, reducing the risk of accidents caused by cluttered workspaces.
Imagine being able to quickly grab the screwdriver or wrench you need without having to dig through a messy toolbox. Tool accessibility is a vital aspect of a functional pegboard setup. You want to make certain that your most-used tools are easy to access, reducing fatigue and increasing productivity.
Take note of the tools you use most frequently and prioritize their placement on your pegboard. With a clear understanding of your workspace needs, you'll be able to create a pegboard setup that streamlines your workflow and promotes a safe working environment.
Choose the Right Pegboard
With your workspace needs assessed, you're now ready to select the right pegboard for your functional setup.
Reflect on the materials selection: pegboards come in various materials, such as wood, metal, or plastic. Wooden pegboards are a popular choice for their rustic look and durability, while metal pegboards offer strength and versatility. Plastic pegboards are lightweight and easy to clean.
Design styles also play an important role in your pegboard selection. Do you prefer a modern, sleek design or a more traditional, rustic look? Pegboard colors can also match your workspace aesthetic, ranging from neutral tones to bold colors.
Mounting options are another vital factor to keep in mind. You can choose from wall-mounted, freestanding, or mobile pegboards, depending on your available space and workflow.
Finally, think about tool organization: how will you arrange your tools and accessories on the pegboard to maximize efficiency and accessibility?
Select Essential Accessories
Beyond the pegboard itself, a well-curated selection of accessories is essential to creating a functional setup that streamlines your workflow. To start, consider the hook types you'll need. You'll want a mix of small, medium, and large hooks to accommodate various tool sizes. Invest in a set that includes S-hooks, L-hooks, and J-hooks to maximize versatility.
When it comes to organization tips, think about color schemes. Assigning specific colors to different tool categories (e.g., red for power tools, blue for hand tools) helps maintain visual order and speeds up tool retrieval. This also applies to tool storage bins, which should be labeled and easily accessible.
To optimize space, look for accessories with dual purposes, like a pegboard-mounted shelf with built-in bins. This will help keep frequently used items within easy reach while keeping the floor clear.
For DIY projects, consider adding a pegboard-mounted worklight or a built-in measuring tape to enhance convenience. By selecting the right accessories, you'll create a pegboard setup that's both functional and efficient.
Plan Your Pegboard Layout
Your pegboard's layout is essential to its functionality, and a well-thought-out plan will help you maximize its potential. A good design will guarantee that your tools are within easy reach, reducing fatigue and increasing productivity. To get started, take inventory of your tools and accessories, and group them by category or frequency of use. This will give you a sense of how much space you need to allocate for each type of tool.
Consider the following design inspiration for your pegboard layout:
| Zone | Tool Organization |
|---|---|
| Top row | Infrequently used tools, like specialty bits or seasonal items |
| Middle row | Frequently used hand tools, like hammers and screwdrivers |
| Bottom row | Heavy or bulky items, like power tools or equipment |
| Left side | Small parts and accessories, like nuts and bolts |
| Right side | Measuring and testing tools, like levels and multimeters |
Install and Customize
Now that you've planned your pegboard layout, it's time to bring it to life. Start by selecting the right installation techniques for your pegboard. You can choose from various methods, including screwing, nailing, or adhering it to your wall or workbench.
Be certain to follow the manufacturer's instructions and take necessary safety precautions to avoid accidents.
Once your pegboard is installed, it's time to customize it to fit your specific needs. Investigate customization options such as adding hooks, bins, and accessories to maximize storage and efficiency.
Consider the weight capacity of your pegboard and the items you plan to hang to guarantee a safe and functional setup.
When customizing, think about the frequency of use and the ease of access you need for each item. This will help you create a logical and organized layout that streamlines your workflow.
Remember to leave some space for future additions or changes, making it easier to adapt your pegboard as your needs evolve.
Frequently Asked Questions
Can I Use a Pegboard in a Small or Cramped Workspace?
You can definitely use a pegboard in a small or cramped workspace; just focus on space optimization by choosing compact hooks and accessories, and employ vertical storage to maximize your wall space, ensuring a safe and efficient work area.
Are Pegboards Compatible With All Types of Wall Materials?
You're as ready as a well-oiled machine to tackle pegboard installation, but first, confirm compatibility with your wall material. You'll find pegboards work seamlessly with drywall, plywood, and MDF, but may require special anchors for concrete, brick, or plaster, so choose your installation technique wisely.
How Do I Prevent Pegboard Hooks From Falling or Detaching?
To prevent pegboard hooks from falling or detaching, you'll want to choose the right pegboard hook types for your needs and finesse strategic hook placement techniques, such as spacing them evenly and avoiding overcrowding, to guarantee a secure hold.
Can I Customize My Pegboard With Non-Standard Accessories?
You can definitely customize your pegboard with non-standard accessories, exploring creative pegboard designs that cater to your specific needs. Look for pegboard accessory options that prioritize safety, like sturdy hooks and reinforced attachments, to guarantee a secure and functional setup.
Are Pegboards Suitable for Heavy or Industrial Use?
You wonder if pegboards can handle the big stuff, right? Well, rest assured, you can find heavy duty options designed for industrial applications, built to withstand the rigors of demanding tasks, ensuring your safety and efficiency.
Conclusion
You've got the blueprint for a pegboard setup that's customized to your workspace needs, and now it's time to bring it to life. Think of your pegboard as a conductor's baton, expertly guiding your tools and supplies into harmony. With these 5 steps, you'll be orchestrating a more efficient workflow in no time.
Related Posts
-

What to Look for in a Pegboard Tool Storage Kit
When shopping for a pegboard tool storage kit, you need a system that combines customized organization, sturdy durabi...
-

How to Maximize Storage Space With Parts Storage Bins
To maximize storage space with parts storage bins, start by evaluating your available storage space and examining you...
-

Modular Garage Organizers for Clutter-Free Spaces
You're likely wasting precious space in your garage due to inefficient storage and poor organization, but modular gar...


