
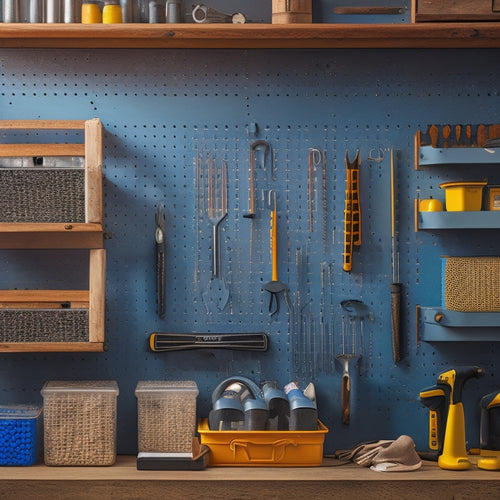
5 Essential Tips for a Custom Pegboard System
To create a custom pegboard system that maximizes your space, start by evaluating your storage needs and conducting a workload analysis. Choose a pegboard material and size that fits your requirements, and select hooks and accessories that suit your tools. Design a functional layout that prioritizes frequently used items, groups similar tools together, and leaves negative space to avoid clutter. Install your pegboard securely, using anchors or screws suitable for your wall type, and consider cord management to keep your workspace organized. By following these essential tips, you'll be well on your way to creating a productive and efficient workspace that meets your unique needs - and that's just the starting point.
Key Takeaways
• Assess storage needs by evaluating tools, conducting a workload analysis, and measuring available wall space to optimize pegboard design.
• Choose the right pegboard material, size, and mounting style that aligns with your workspace vision and meets specific needs.
• Select hooks and accessories based on material suitability, functionality, and aesthetic considerations to ensure a tailored system.
• Design a functional layout that prioritizes ergonomic benefits, task zones, and negative space to streamline workflow and enhance visual appeal.
• Install the pegboard system with ease and flexibility by preparing the mounting surface, locating wall studs, and implementing cord management.
Assessing Your Storage Needs
Evaluating Your Storage Needs
Determine how much storage space you need by evaluating the tools and accessories you currently have, as well as those you plan to acquire in the near future. This will give you a clear idea of the storage capacity you require.
Conduct a workload analysis to identify the frequency of use for each tool and accessory. This will help you prioritize the most essential items and allocate storage space accordingly.
Consider the space constraints in your workshop or garage. Measure the available wall space, taking into account any obstructions or limitations.
Think about the layout and workflow of your workspace – do you need to access certain tools quickly, or can they be stored out of the way? By taking these factors into account, you'll be able to design a custom pegboard system that meets your specific needs and maximizes your available space.
Choosing the Right Pegboard
With your storage needs evaluated, you can now focus on selecting a pegboard that fits your requirements, taking into account factors such as material, size, and mounting style. This is an important step in creating a custom pegboard system that meets your specific needs.
When it comes to Pegboard Materials, you have several options to choose from. Here are a few to think about:
- Wood: A cost-effective and eco-friendly option that can add a touch of warmth to your workspace.
- Metal: A durable and industrial-strength option that's perfect for heavy-duty use.
- Plastic: A lightweight and easy-to-clean option that's ideal for smaller workspaces.
- Composite: A hybrid material that combines the benefits of wood and plastic for a durable and affordable option.
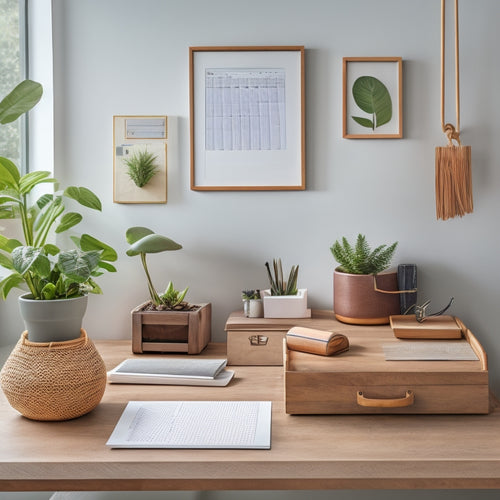
In addition to material, consider Aesthetic Considerations such as color, texture, and design. Think about the overall look and feel you want to achieve in your workspace and choose a pegboard that fits with your vision.
Selecting Hooks and Accessories
You'll need to select the right hooks and accessories to optimize your pegboard's functionality and guarantee it meets your specific storage needs.
When it comes to hooks, contemplate the materials that'll best suit your items. For instance, stainless steel hooks are ideal for heavy-duty tools, while nylon or plastic hooks are better suited for lighter loads. You may also want to think about hooks with a rubberized coating to prevent scratching or marring.
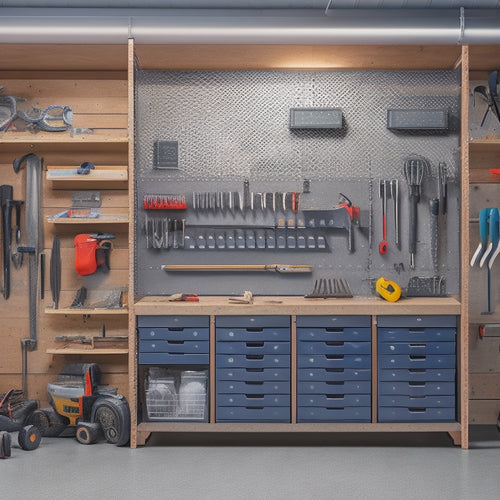
Accessory types are just as crucial. You'll want to ponder the types of items you'll be storing and the best way to organize them. For example, bins and baskets can help keep small parts and supplies organized, while tool holders and trays can keep frequently used items within easy reach.
Contemplate adding a pegboard-mounted shelf or cabinet to store larger items or keep sensitive tools out of sight. By selecting the right hooks and accessories, you'll be able to create a customized storage system that streamlines your workflow and boosts productivity.
Designing a Functional Layout
Your pegboard's layout is essential to its functionality, so take the time to plan a configuration that efficiently allocates space and streamlines your workflow. A well-designed layout will save you time, reduce frustration, and make your work more enjoyable.
To create a functional layout, consider the following:
-
Ergonomic Considerations: Place frequently used tools and accessories at a comfortable height to reduce strain on your back and shoulders.
-
Aesthetic Balance: Distribute items evenly to create a visually appealing board that's easy to navigate.
-
Task Zones: Group similar tools and accessories together to create zones for specific tasks, such as a 'drilling zone' or 'measuring zone'.
- Negative Space: Leave some empty space on the board to avoid clutter and make it easier to find what you need.
Installing With Ease and Flexibility
Installing With Ease and Flexibility
To guarantee a hassle-free installation, start by preparing the mounting surface, whether it's a wall, workbench, or cabinet, by cleaning it thoroughly and checking for any obstacles or unevenness. This step secures a smooth and secure installation.
Next, locate the wall studs to securely attach your pegboard. You can use a stud finder or knock gently on the wall to identify the studs. When drilling, use anchors or screws specifically designed for your wall type to prevent damage.
Consider cord management when installing your pegboard. Route cords and wires behind the board or use cable ties to keep them organized. This will create a clutter-free workspace and make it easier to access your tools.
Frequently Asked Questions
Can I Mix and Match Pegboard Brands and Accessories?
You can definitely mix and match pegboard brands and accessories, but make sure to check brand compatibility and accessory universality to avoid headaches. Check the hook style, hole spacing, and material for seamless integration.
How Often Should I Clean and Maintain My Pegboard?
You should clean your pegboard regularly to prevent dust accumulation, which can compromise tool organization. Aim to wipe it down every week, and give it a deep clean every 3-6 months to keep your tools accessible and organized.
Are Pegboards Suitable for Outdoor or Garage Use?
You can use pegboards outdoors or in your garage, but make sure to choose weather-resistant materials and apply rust protection to the hooks and brackets to guarantee they withstand the elements.
Can I Add a Pegboard to an Existing Wall or Cabinet?
"You can easily add a pegboard to an existing wall or cabinet by using wall anchors to secure it or attaching it to cabinet frames, ensuring a sturdy and reliable installation that holds your tools and accessories."
Are Pegboards Available in Custom or Non-Standard Sizes?
"Imagine Leonardo da Vinci's workshop, where every tool had its place. You're not limited to standard sizes; you can create a pegboard that fits your unique requirements, pushing size limitations aside, and crafting a space that's truly yours."
Related Posts
-
What to Look for in a Pegboard Tool Storage Kit
When shopping for a pegboard tool storage kit, you need a system that combines customized organization, sturdy durabi...
-
Best Organizing Tools for a Clutter-Free Space
You're on a mission to change your cluttered space into a peaceful oasis, and you're looking for the best organizing ...
-
Building a Wall Tool Storage System
You're about to create a customized wall tool storage system that streamlines your workflow. Start by clearing your w...


