
10 Best Practices for a Highly Functional Workshop
You want to create a highly functional workshop that boosts your productivity and efficiency. Start by prioritizing tool organization systems, dividing tools into categories and assigning designated spaces. Designate zones for specific tasks, like woodworking or metalworking, to maximize workflow. Optimize workbench ergonomics for comfort and efficiency, and implement efficient storage solutions to reduce clutter. Utilize vertical space, establish a maintenance routine, and invest in quality lighting fixtures. Create a functional layout flow that minimizes walking distances and reduces congestion. By following these best practices, you'll be well on your way to a highly functional workshop that helps you get the job done quickly and effectively - and there's even more to explore to take your workshop to the next level.
Key Takeaways
• Designate specific zones for tasks like woodworking, metalworking, and assembly to maximize efficiency and streamline workflow.
• Implement a tool organization system with categorized tools, designated spaces, and easy-to-reach locations for frequently used tools.
• Optimize workbench ergonomics by considering proper posture, comfort, and accessibility to reduce strain and enhance productivity.
• Establish a regular maintenance routine to inspect, clean, and maintain tools, ensuring they are in good working condition.
• Invest in quality lighting fixtures and design a functional layout that minimizes walking distances, reduces congestion, and promotes comfort and productivity.
Prioritize Tool Organization Systems
To maximize efficiency and reduce frustration, prioritize tool organization systems that enable you to quickly locate and access the tools you need. This means implementing a system that categorizes your tools in a logical and intuitive way. Tool categorization is key to a functional workshop.
Divide your tools into categories, such as hand tools, power tools, and measuring tools, and assign a designated space for each category. This will save you time and energy when searching for a specific tool.
System integration is also vital. Make sure that your tool organization system integrates seamlessly with your workshop layout. For instance, place frequently used tools near your workbench or in easy-to-reach locations. This will streamline your workflow and reduce distractions.
Designate Zones for Specific Tasks
With your tools organized and within easy reach, you can now focus on designating zones for specific tasks, creating a workflow that flows smoothly from one task to the next. This process, known as Task Segregation, helps to maximize efficiency and minimize distractions. By allocating specific zones for each task, you'll be able to complete projects quickly and effectively.
Here's an example of how you can allocate zones in your workshop:
| Zone | Task |
|---|---|
| Zone 1 | Woodworking |
| Zone 2 | Metalworking |
| Zone 3 | Assembly and Finishing |
Optimize Workbench Ergonomics
You'll spend a significant amount of time at your workbench, so optimizing its ergonomics is crucial to avoid fatigue and prevent injuries. A well-designed workbench can make all the difference in your productivity and overall well-being.
Start by ensuring your workbench is at a comfortable height that allows you to maintain proper posture. You should be able to stand with your feet shoulder-width apart, with your elbows at a 90-degree angle and your wrists straight. This will help reduce strain on your back, neck, and shoulders.
Next, consider the layout of your tools and materials. Keep frequently used items within easy reach to minimize stretching and bending. You can also invest in ergonomic accessories like anti-fatigue mats, wrist rests, and tool holders to enhance your comfort and efficiency.
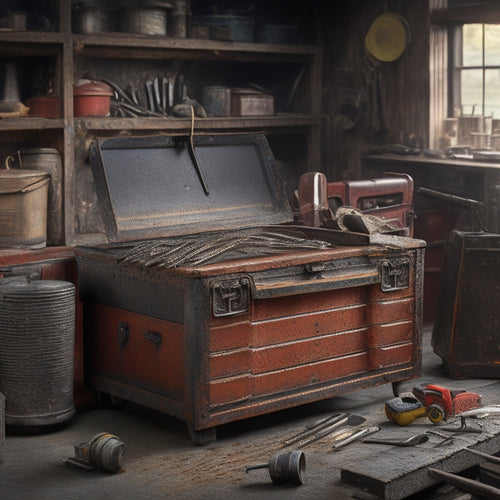
Implement Efficient Storage Solutions
Now that you've optimized your workbench ergonomics, it's time to turn your attention to implementing efficient storage solutions.
You'll want to start by organizing your tool stations, making sure everything has a designated spot and is easily accessible.
Organize Tool Stations
Here's the output:
Set up dedicated tool stations by assigning a specific area for each type of tool or task, guaranteeing everything has a designated home and is easily accessible. This will help you stay organized, reduce clutter, and increase productivity.
Create a toolbox inventory to identify the tools you need to store and the space required for each station. This will help you plan your layout and make sure you have enough space for everything.
Here's an example of what your tool stations might look like:
| Station | Tools/Supplies |
|---|---|
| Drill Press | Drill press, drill bits, safety glasses |
| Hand Tools | Hammers, screwdrivers, pliers, wrenches |
| Measuring | Tape measures, levels, squares, calipers |
| Fasteners | Nails, screws, bolts, nuts, washers |
Use station signage to label each area, making it easy to find what you need at a glance. This will also help you maintain your organization and prevent clutter from building up again. By setting up dedicated tool stations, you'll be able to work more efficiently and effectively in your workshop.
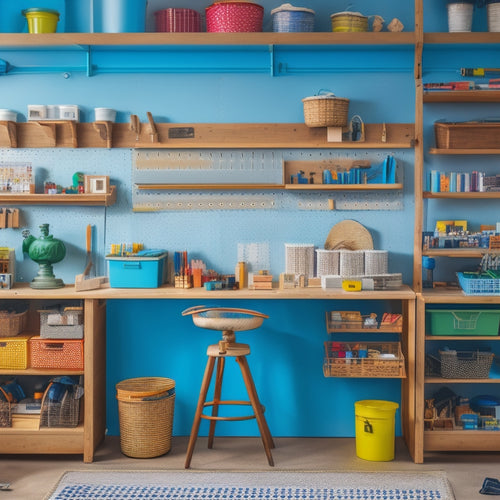
Utilize Vertical Space
By maximizing your workshop's vertical space, you can create more room for your tool stations and reduce clutter on the floor. This is especially important in smaller workshops where floor space is limited.
One effective way to utilize vertical space is by installing mezzanine levels. These elevated platforms provide additional storage and working areas, keeping your tools and materials organized and within reach.
Another option is to install overhead racks, which are perfect for storing infrequently used items or seasonal equipment. This will free up valuable floor space and keep your workshop tidy.
Consider investing in wall-mounted shelves, hooks, and bins to store smaller items like nuts, bolts, and hand tools. Don't forget to label each storage location so you can easily find what you need.
Label Storage Containers
You'll save time and reduce frustration by labeling each storage container with its contents, making it easy to identify what's inside without having to dig through everything. This simple step guarantees that you can quickly find what you need, when you need it.
When it comes to container aesthetics, choose a consistent design and color scheme to create a visually pleasing environment. This will also help you to easily distinguish between different types of containers.
Label psychology also plays an important role in effective labeling. Use clear, concise language and avoid using abbreviations or jargon that might confuse you or others in the future. Consider using labels with icons or images to help you quickly identify the contents.
Additionally, make sure to label the containers in a way that's easy to read, even from a distance. By implementing these strategies, you'll be able to efficiently store and retrieve your tools and materials, freeing up more time for you to focus on your projects.
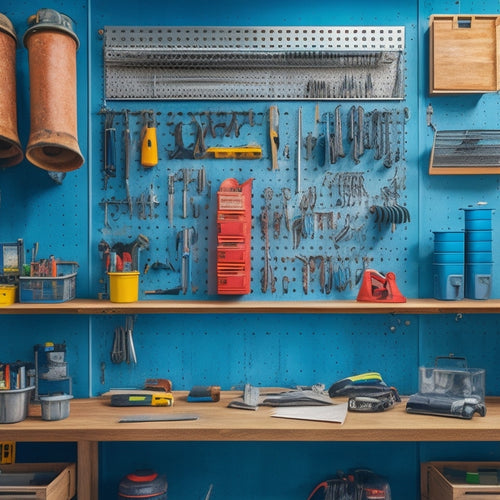
Utilize Vertical Space Effectively
Maximize your workshop's storage capacity by installing shelves, hooks, and bins that take advantage of the often-wasted vertical space above your workbenches and countertops. This will help keep your tools and materials organized, making it easier to find what you need when you need it.
Here are some tips to help you utilize vertical space effectively:
-
Optimize your pegboard: Make the most of your pegboard by grouping similar tools together and using hooks, bins, and baskets to store small items.
-
Install vertical shelving: Add shelves above your workbenches to store less frequently used items, such as seasonal decorations or infrequently used tools.
-
Use wall-mounted bins: Hang bins and containers on the wall to store items like nuts, bolts, and screws, keeping them organized and out of the way.
- Hang your bikes or equipment: If you have limited floor space, consider hanging your bikes or equipment from the ceiling, freeing up space for more important things.
Minimize Distractions and Clutter
To create a highly functional workshop, you'll want to minimize distractions and clutter that can hinder your productivity. You'll achieve this by clearing the workspace of unnecessary items, eliminating digital noise that can sidetrack you, and organizing essential tools in a way that makes sense for your workflow.
Clear the Workspace
Start by clearing everything off your work surface, including papers, tools, and any other items that aren't essential to the task at hand. This will help you create a clean slate, allowing you to focus on the task at hand without distractions. Clutter psychology suggests that a cluttered workspace can lead to a cluttered mind, making it difficult to stay focused and productive.
To maintain workspace efficiency, follow these simple steps:
-
Designate a home for each item, making it easy to find what you need when you need it.
-
Use storage containers to keep items off the floor and out of sight.
-
Label everything, so you can quickly identify what's inside a container or on a shelf.
- Schedule regular cleanups, to prevent clutter from building up again.
Eliminate Digital Noise
You're constantly bombarded with digital notifications, emails, and social media updates, making it important to eliminate these distractions and create a conducive work environment. It's time to take a digital detox and set some serious tech boundaries.
Start by turning off notifications on your phone or putting it on silent mode during work hours. Consider implementing a 'no meeting day' or setting specific times for checking emails. This will help you stay focused and avoid multitasking, which can decrease productivity by up to 40%.
Next, remove any digital clutter from your workshop. Unsubscribe from unnecessary newsletters, delete unused apps, and organize your computer files. This will help you quickly find the resources you need and avoid wasting time searching for them.
Organize Essential Tools
Now that your digital space is organized, turn your attention to the physical tools and materials that clutter your workshop, and identify the essential ones that will help you achieve your goals. It's time for a tool audit!
Go through your workshop and separate the tools you use regularly from those that collect dust. Be honest with yourself – if you haven't used it in the past year, it's probably safe to let it go.
Here are some steps to help you organize your essential tools:
-
Categorize and group similar tools together, such as all your hand tools or power tools.
-
Designate a home for each tool, so you can easily find what you need when you need it.
-
Implement an inventory management system, so you can keep track of what you have and what you need to restock.
- Regularly maintain and clean your tools, to make sure they're in good working condition and prolong their lifespan.
Establish a Maintenance Routine
Every three months, set aside a few hours to inspect and maintain your workshop tools and equipment. This scheduled downtime will help you identify potential issues before they become major problems. Regular inspections will also give you a chance to clean and lubricate your tools, ensuring they're running smoothly and efficiently.
Make a checklist of tasks to tackle during this maintenance routine. Check for worn or damaged parts, and replace them as needed. Sharpen blades, clean filters, and inspect electrical cords for frays or damage.
Don't forget to check your workshop's ventilation system, ensuring it's working properly to remove dust and debris.
Invest in Quality Lighting Fixtures
When setting up your workshop, you'll want to invest in quality lighting fixtures that cater to your specific needs. By doing so, you'll be able to create a task-oriented lighting design that helps you focus on the task at hand.
This will also help illuminate dark corners and reduce eye strain, making your workshop a more comfortable and efficient space.
Task-Oriented Lighting Design
By incorporating task-oriented lighting design into your workshop setup, you'll be able to focus on specific tasks with precision and efficiency, thanks to the strategic placement of quality lighting fixtures.
To achieve this, consider the following essential elements:
-
Color Temperature: Choose lighting fixtures with a color temperature that suits your tasks. For example, a cooler color temperature (5000K-6500K) is ideal for tasks that require high concentration, while a warmer temperature (2700K-3000K) is better suited for tasks that create a more relaxed atmosphere.
-
Light Layering: Use a combination of light sources to create a layered lighting effect. This can include overhead lighting, task lighting, and ambient lighting to create a balanced and functional lighting environment.
-
Task-Specific Lighting: Position lighting fixtures to illuminate specific work areas, such as a workbench or a drafting table. This will help reduce eye strain and enhance your overall work experience.
- Flexibility: Consider installing lighting fixtures that can be adjusted or moved to accommodate different tasks and work areas. This will make certain that your lighting design remains functional and efficient, even as your workshop evolves.
Illuminate Dark Corners
You'll be amazed at how much of a difference it makes to invest in quality lighting fixtures that can effectively illuminate dark corners and recesses in your workshop, casting a bright spotlight on often-overlooked areas. By doing so, you'll be able to identify and eliminate pesky shadows that can hinder your productivity.
Conduct a thorough shadow analysis to pinpoint areas where corner lighting can make the most impact. This will help you determine the type and placement of lighting fixtures needed to create a well-lit workspace.
Consider installing LED strips or puck lights in corners and recesses to create a seamless, shadow-free environment.
Reduce Eye Strain
Invest in quality lighting fixtures that reduce eye strain, allowing you to focus on your projects without fatigue. You'll be amazed at how much of a difference it can make. Harsh lighting can lead to headaches, blurred vision, and dry eyes, making it difficult to concentrate on your work.
To reduce eye strain, consider the following:
-
Screen protectors: Apply a screen protector with a built-in blue light filter to reduce glare and reflections on your devices.
-
Blue blockers: Wear blue blocker glasses or goggles when working on projects that involve prolonged screen time.
-
Task lighting: Use task lighting to focus light exactly where you need it, reducing overall ambient lighting.
- Adjustable lighting: Install adjustable lighting fixtures that allow you to customize the brightness and direction of the light to suit your needs.
Create a Functional Layout Flow
Designing a functional layout flow starts with identifying the primary tasks and activities that will take place in your workshop. This will help you determine the most efficient layout strategy. Consider the flow of your work process and how you can minimize walking distances, reduce congestion, and optimize your workspace.
Think about the psychological impact of your layout on your productivity and comfort. For instance, placing your most frequently used tools and materials within easy reach can boost your efficiency and reduce fatigue.
As you plan your layout, group similar tasks and activities together to create zones or stations. This will help you stay focused and avoid distractions. Consider the 'work triangle' concept, where you position your most critical tools and equipment in a triangular formation to reduce movement and increase accessibility.
Incorporate Multifunctional Tools
By strategically incorporating multifunctional tools into your workshop, you can further optimize your layout flow and reduce clutter, freeing up space and resources for more important tasks. This approach not only streamlines your workflow but also showcases your resourcefulness and ability to adapt to changing project demands.
To get the most out of your multifunctional tools, consider the following benefits:
-
Tool versatility: Having tools that can perform multiple tasks reduces the need for multiple single-purpose tools, saving you space and money.
-
Space adaptability: Multifunctional tools can be easily moved or rearranged to accommodate different projects, making your workshop more agile and responsive to changing needs.
-
Efficient storage: With fewer tools to store, you can allocate more space for project materials, reducing clutter and improving overall workshop organization.
- Cost-effective: Investing in multifunctional tools can be more cost-effective than purchasing separate tools for each task, making it a smart investment for your workshop.
Frequently Asked Questions
How Do I Handle Hazardous Materials in My Workshop?
When handling hazardous materials in your workshop, you'll want to prioritize safety by storing them in well-ventilated areas with clear labels, and develop strict safety protocols, like wearing PPE and having a spill response plan, to minimize risks.
Can I Customize My Workshop for Left-Handed Users?
You can easily customize your workshop for left-handed users by incorporating ergonomic design principles and adaptive tools, ensuring a comfortable and efficient work environment that caters to their unique needs.
What Are the OSHA Regulations for Workshop Safety?
"You're surrounded by a sea of hazards, but don't panic! OSHA's got your back. Conduct a thorough Risk Assessment and regular Safety Audits to identify potential dangers, and you'll be well on your way to a safe and compliant workshop."
How Often Should I Update My Workshop's Technology?
You should regularly update your workshop's technology to avoid tech debt and guarantee futureproofing. Set a quarterly review to assess outdated tools, prioritize upgrades, and implement new solutions to stay efficient and competitive.
Can a Workshop Be Too Big to Be Functional?
You're wondering if your workshop can be too big to be functional? Yes, when space constraints and efficiency limits kick in, a large workshop can become overwhelming, hindering productivity and causing disorganization.
Related Posts
-
Maximum Capacity Tool Boxes for Heavy-Duty Use
You need a maximum capacity tool box that can withstand the rigors of heavy-duty use, protecting your essential tools...
-
Creative Workshop Storage Solutions and Ideas
You can revolutionize your workshop's storage by maximizing vertical space with wall-mounted racks, utilizing hidden ...
-
Custom Pegboard Storage for Your Workshop
You're looking to create a custom pegboard storage system that maximizes your workshop's space, enhances productivity...


