Wood Pegboard Wall Installation in 10 Easy Steps
Share
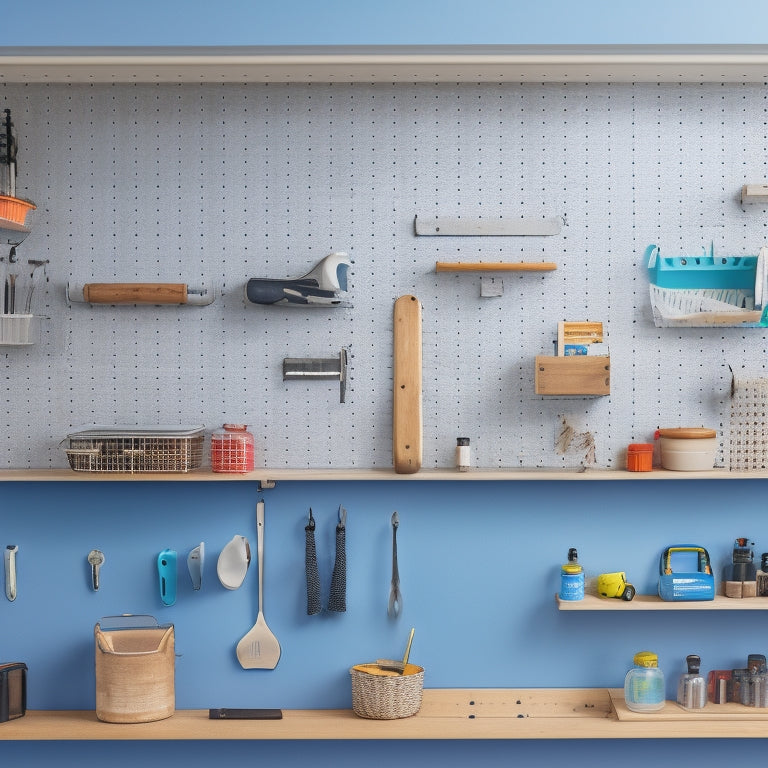
You're about to alter your workspace with a wood pegboard wall installation that's both functional and visually appealing. Start by preparing your wall, inspecting for cracks and holes, and cleaning it thoroughly. Take precise measurements and mark the center point, then cut the pegboard to size using a circular saw or jigsaw. Assemble the frame, attach it to the wall, and mount the pegboard. Add hooks and accessories, organize your tools, and customize the layout. Finally, review your installation for safety and optimization. With these 10 easy steps, you'll be well on your way to creating a clutter-free workspace that increases productivity - and you're just getting started!
Key Takeaways
- Inspect the wall for cracks, holes, or uneven surfaces and clean it with gentle detergent and warm water before installation.
- Take precise measurements of the wall and pegboard, considering obstructions, to ensure a proper fit and secure attachment.
- Assemble the frame using wooden strips and corner brackets, and attach hooks based on storage needs and tool organization requirements.
- Mount the pegboard to the frame using appropriate screws, ensuring the frame can support the pegboard's weight and accessories.
- Organize tools and accessories by categorizing, utilizing bins and hooks, and placing frequently used items in easily reachable locations.
Prepare the Wall for Installation
Most walls aren't ready for a pegboard installation out of the box. You'll need to prepare the surface to guarantee a safe and secure installation.
Start by inspecting the wall for any cracks, holes, or uneven surfaces. If you find any, fill them with spackling compound and sand smooth.
Next, remove any switch plates, outlet covers, and light fixtures to prevent damage during installation.
Clean the wall surface using a gentle detergent and warm water to remove dirt, grime, and old adhesive residue. Use a soft-bristled brush or non-abrasive scrubber to scrub the area, then dry with a clean towel.
This will guarantee a strong bond between the pegboard and the wall. Finally, wipe down the wall with a tack cloth or damp cloth to remove any dust or debris.
Measure and Mark the Area
As you're ready to move forward with your pegboard installation, measuring and marking the area is an essential step to guarantee accurate placement. Take precise measurements of the wall dimensions, including the length, width, and any obstructions, such as electrical outlets or switches. Record these measurements to refer to later.
To mark the area, gather your marking tools, including a level, tape measure, and pencil. Begin by marking the center point of the wall, using a level to verify it's straight. Then, measure and mark the edges of the pegboard, considering any obstructions.
Here's a sample measurement and marking guide:
| Measurement | Marking Tool | Description |
|---|---|---|
| Wall length | Tape measure | Measure from corner to corner |
| Wall width | Tape measure | Measure from top to bottom |
| Center point | Level and pencil | Mark the center of the wall |
| Pegboard edges | Tape measure and pencil | Mark the edges of the pegboard |
| Obstacles | Tape measure and pencil | Mark any obstructions, such as outlets |
Remember to double-check your measurements and markings to verify accuracy and safety during the installation process.
Cut the Pegboard to Size
With your marked area in hand, cutting the pegboard to size is the next essential step in your installation process. You'll need to use your installation tools, such as a circular saw or a jigsaw, to accurately cut the pegboard materials to the desired dimensions.
Before making the cut, double-check your measurements to guarantee a precise fit. Wear safety goggles and a dust mask to protect yourself from debris and dust.
Place the pegboard on a stable surface, and use a straightedge or ruler to guide your saw. Apply gentle, consistent pressure, and make a smooth, steady cut. Avoid applying too much pressure, which can cause the pegboard to splinter or crack.
If you're using a jigsaw, use a slow, back-and-forth motion to make the cut. Once you've completed the cut, inspect the edge for any rough spots and sand them down to a smooth finish.
With your pegboard cut to size, you're ready to move on to the next step in the installation process.
Assemble the Frame and Hooks
You've successfully cut your pegboard to size, now it's time to focus on building the frame that will hold it in place. Start by gathering your frame materials, which typically include wooden strips, screws, and corner brackets.
Cut the wooden strips to the required length, guaranteeing they're slightly larger than the pegboard's dimensions. Assemble the frame by screwing the strips together, using corner brackets to reinforce the joints.
Next, attach the hooks to the frame. Choose hook styles that suit your storage needs, such as bin hooks, screw hooks, or J-hooks.
Space them evenly, leaving enough room for your tools and accessories. Make certain the hooks are securely attached to the frame to prevent them from falling or getting damaged. Use screws or nails that match the frame materials to guarantee a sturdy hold.
Double-check the frame's stability and make any necessary adjustments before moving on to the next step.
Remember to handle the frame and hooks with care to avoid injuries or damage.
Attach the Frame to the Wall
Hang your frame on the wall by locating the wall studs first. Use a stud finder to identify the studs behind the drywall. Mark the spot where you want to install the frame, confirming it aligns with the studs.
Hold the frame against the wall, and use a level to verify it's straight. Check the frame materials and wall compatibility to guarantee a secure installation. If your frame is made of heavy wood, you may need to use wall anchors or screws specifically designed for your wall type (drywall, plaster, or concrete).
Drill pilot holes in the wall and frame, then screw the frame into place. Make sure the screws are long enough to reach the wall studs.
Double-check the frame's levelness and plumbness. If necessary, adjust the frame slightly to achieve a perfect fit. Use a torque wrench to tighten the screws, but avoid overtightening, which can damage the wall or frame.
With the frame securely attached, you're ready to move on to the next step.
Mount the Pegboard to Frame
You'll need to complete a frame preparation checklist to guarantee it's ready for the pegboard, which includes verifying the frame's levelness, secure attachment to the wall, and proper spacing of the horizontal slats.
Next, select the appropriate mounting hardware, considering factors like screw type, length, and head style to guarantee a secure and level pegboard installation.
With these vital steps out of the way, you'll be ready to mount the pegboard to the frame.
Frame Preparation Checklist
With your wall studs marked and your frame assembled, it's time to prep it for the pegboard. Now, you'll need to confirm your frame is ready for the pegboard installation.
- Check frame materials: Verify that your frame is made of sturdy materials that can support the weight of the pegboard and the items you'll be hanging.
Consider using solid wood or metal frames for added durability.
- Inspect frame styles: Make sure your frame style is compatible with the pegboard design.
For example, a simple rectangular frame works well with a standard pegboard, while a decorative frame may require a custom pegboard design.
- Verify frame dimensions: Double-check that your frame dimensions match the pegboard size to confirm a snug fit.
Mounting Hardware Selection
Now that your frame is prepared and confirmed, it's time to select the mounting hardware that will firmly attach the pegboard to the frame. You'll want to choose hardware that's sturdy enough to hold the weight of the pegboard and any items you plan to hang on it.
There are several mounting hardware types to evaluate, including screws, nails, and clips. When it comes to mounting hardware materials, you'll typically find options made from steel, aluminum, or plastic.
For a wood pegboard, steel screws are a popular choice due to their strength and durability. Make certain to select screws that are specifically designed for wood and are long enough to penetrate the frame and pegboard.
If you're using a thicker pegboard, you may need to use longer screws or additional hardware like washers or spacers to guarantee a secure fit. Always follow the manufacturer's instructions for the specific mounting hardware you choose, and take necessary safety precautions like wearing gloves and safety glasses when drilling or hammering.
With the right mounting hardware, you'll be able to create a sturdy and reliable pegboard installation.
Add Hooks and Accessories
You'll now add hooks and accessories to your pegboard, which will bring functionality and organization to your space.
You'll need to decide on hook placement options, considering factors like tool size and frequency of use.
Next, you'll accessorize your board with bins, baskets, and other components to customize your space and maximize storage efficiency.
Hook Placement Options
Your pegboard wall is taking shape, and it's time to customize it with hooks and accessories that cater to your specific needs. When it comes to hook placement, you'll want to take into account a few key factors to guarantee your setup is both functional and visually appealing.
Here are three essential considerations for hook placement:
-
Weight limits: Make certain you choose hooks that can support the weight of the items you plan to hang. Check the manufacturer's recommendations for weight limits and spacing guidelines to avoid overloading your pegboard.
-
Spacing strategies: Reflect on the size and shape of the items you'll be hanging, and space your hooks accordingly. You may want to group similar items together or create separate zones for different types of tools or accessories.
-
Aesthetic choices: Think about the overall design and aesthetic you want to achieve. Choose hook types and material options that complement your pegboard's style and color scheme. For example, if you have a rustic wood pegboard, you may want to opt for metal hooks with a distressed finish.
Accessorize Your Board
The tool organization process reaches its most exciting stage as you begin accessorizing your pegboard with hooks and accessories customized to your specific needs. This is where you get to add functional accessories that not only provide space efficiency but also enhance the aesthetic appeal of your DIY decor.
When choosing accessories, contemplate your design ideas and the overall style you want to achieve. For a minimalist style, opt for hooks and bins in a single color scheme. For a more playful look, incorporate seasonal themes or color coordination.
Here's a breakdown of accessories to reflect upon:
| Accessory | Description |
|---|---|
| Hooks | Versatile uses, from hanging tools to bags |
| Bins | Creative storage for small items like screws or nails |
| Trays | Perfect for holding small parts or supplies |
| Tool holders | Dedicated spaces for frequently used tools |
Remember to prioritize safety when accessorizing your pegboard. Confirm that hooks and bins are securely attached to the board, and that heavy items are stored at a comfortable height to avoid straining your back. With the right accessories, your pegboard will become a functional and stylish addition to your workspace.
Customize Your Space
Now that you've decided on the accessories that fit your style and needs, it's time to customize your space by adding hooks and accessories to your pegboard. This is where you get to personalize your storage and add decorative accents to create a space that reflects your personality.
Start by attaching hooks for hanging items like bikes, tools, or accessories. You can also add bins and baskets to store small items like nuts and bolts, or screws and drill bits.
Here are some ideas to get you started:
-
Tool organizers: Hang your most frequently used tools, like hammers, screwdrivers, and pliers, within easy reach.
-
Accessory trays: Store small parts and accessories, like screws, nails, or rivets, in labeled trays for quick identification.
-
Basket shelves: Add baskets or shelves to store larger items, like power tools, paint cans, or cleaning supplies.
Remember to follow the manufacturer's instructions for attaching accessories, and always prioritize safety when working with power tools or heavy objects.
With a little creativity, you can create a customized space that maximizes your storage and efficiency.
Organize Tools and Accessories
Efficiency reigns supreme in a well-organized workshop, where every tool and accessory has its designated spot.
You've installed your pegboard wall, and now it's time to optimize your tool storage and accessory management. Start by categorizing your tools and accessories into groups, such as hand tools, power tools, and fasteners. Assign a specific section of the pegboard to each group, ensuring that frequently used items are easily accessible.
Visual organization is key to a functional workspace. Use bins, baskets, and hooks to create a system that makes sense for your DIY projects.
Consider creative displays, like a pegboard-mounted screw organizer or a tool holder with separate compartments. This will help you quickly identify what you need and prevent clutter from building up.
Customize the Pegboard Layout
You'll need to plan your pegboard layout carefully to guarantee it meets your specific needs.
Start by thinking about your tool organization strategy - which tools do you use most frequently, and how can you group similar items together?
Create a rough sketch of your pegboard layout, including the location of hooks, bins, and other accessories.
Pegboard Layout Planning
With your pegboard wall installation underway, it's crucial to map out a functional layout that caters to your specific needs and tool collection. This will guarantee that your pegboard is both visually appealing and efficient.
Consider your pegboard aesthetics and create a layout that complements the surrounding area.
To begin, take inventory of your tools and accessories, and group them by frequency of use and similarity. This will help you determine the most logical layout for your pegboard.
Next, consider the following key areas to focus on:
-
Tool zones: Designate specific areas for specific tools, such as a zone for hammers, another for screwdrivers, and so on.
-
Accessory storage: Allocate space for accessories like hooks, bins, and baskets to store small items like nuts, bolts, and safety goggles.
-
Power tool stations: Create dedicated areas for power tools, such as a drill press or impact driver, to guarantee easy access and safe operation.
Tool Organization Strategy
Behind the scenes of a well-organized pegboard lies a thoughtful tool organization strategy. This strategy is essential to maximize the pegboard's storage capacity and guarantee easy access to your tools.
To customize your pegboard layout, start by categorizing your tools into groups, such as hand tools, power tools, and accessories. This will help you determine the most efficient storage solutions for each category.
Next, identify the tools you use most frequently and prioritize their placement on the pegboard. Consider the weight and size of each tool when deciding where to place it. Heavier tools should be placed at the bottom to prevent the pegboard from becoming top-heavy.
Use tool categorization methods like grouping similar tools together or organizing them by frequency of use. This will help you create an intuitive layout that saves you time and reduces frustration.
Final Check and Touch-ups
Frequently, a pegboard wall installation is finished, yet a few minor adjustments are still needed to achieve perfection.
Take a step back and examine your handiwork, making certain everything is securely fastened and properly aligned.
-
Double-check tool visibility: Make sure your most frequently used tools are easily accessible and visible, while less-used items are stored out of the way.
-
Verify space optimization: Confirm that your pegboard layout maximizes your available wall space, allowing for efficient storage and minimizing clutter.
-
Inspect for level and plumb: Ascertain your pegboard is properly aligned with the surrounding wall, and all hooks and bins are securely attached.
Frequently Asked Questions
Can I Use a Pegboard in a Humid or Wet Environment?
You can use a pegboard in humid or wet environments if you take extra precautions. Look for pegboards with humidity resistance and moisture protection, such as ones with waterproof coatings or rust-resistant materials, to guarantee durability and safety.
Are Pegboards Suitable for Heavy or Large Tools and Equipment?
As you visualize your dream workshop, imagine a sturdy pegboard holding your heavy tools, but don't forget to check the weight limits, ensuring it can handle the heaviest tools, and consider reinforced pegboards for extra support and safety.
Can I Install a Pegboard on a Concrete or Brick Wall?
You'll need specialized installation methods and thorough wall preparation when mounting a pegboard on a concrete or brick wall; use anchor screws or adhesive strips for a secure hold, and make certain the wall is clean, dry, and free of cracks.
How Do I Clean and Maintain My Pegboard Wall Installation?
"A clean slate is a happy slate!" You'll want to regularly dust your pegboard with a soft brush, and for deeper cleaning, mix baking soda and water to create a paste, then wipe clean with a damp cloth, ensuring a safe and organized workspace.
Are Pegboards Compatible With All Types of Wall Anchors and Screws?
When choosing wall anchors and screws for your pegboard, you'll need to take into account the pegboard materials and the type of wall you're working with. You'll want to select anchors that are compatible with your wall type, such as drywall, concrete, or wood, to guarantee a secure hold.
Conclusion
You've made it! You've successfully installed a pegboard wall that's a transformative addition for your workspace. With a million options for customization, you can finally find what you need in a snap. Take a step back, admire your handiwork, and get ready to tackle projects with ease. Your newly organized space is a breeding ground for productivity, and you're about to get more done in less time than ever before!
Related Posts
-

Large Wall Hooks to Maximize Garage Space
You can effectively double your garage's storage capacity by installing large wall hooks that keep items off the floo...
-

Best Organizing Tools for a Clutter-Free Space
You're on a mission to change your cluttered space into a peaceful oasis, and you're looking for the best organizing ...
-

Building Garage Shelves in 7 Easy Steps
You're about to convert your garage into a highly functional storage space by building custom shelves in just 7 easy ...


