Why DIY Tool Storage Doesn't Have to Break
You don't have to break the bank to organize your tools. Repurposing materials you already have or finding affordable alternatives can create a functional and customized storage system that meets your specific needs. Consider upcycling old pallets, crates, or cardboard boxes to maximize vertical storage space. You can also utilize budget-friendly tool organization ideas, like using magnetic strips or 3D printing custom tool holders. With a little creativity, you can create a DIY tool storage system that's both efficient and cost-effective. And, by exploring more DIY ideas, you'll discover even more innovative ways to organize your tools without sacrificing your wallet.
Key Takeaways
• DIY tool storage can be budget-friendly by repurposing materials like old pallets, crates, and cardboard boxes.
• Upcycling discarded items is an eco-friendly and cost-effective way to create functional tool storage solutions.
• Customizing tool holders using materials like wood, metal, or plastic can cater to specific storage needs without breaking the bank.
• Affordable pegboard systems and dollar store solutions can provide effective tool storage without compromising organization and accessibility.
• With a little creativity, DIY tool storage can be a cost-effective alternative to purchasing pre-made storage solutions.
Repurposed Materials for Tool Storage
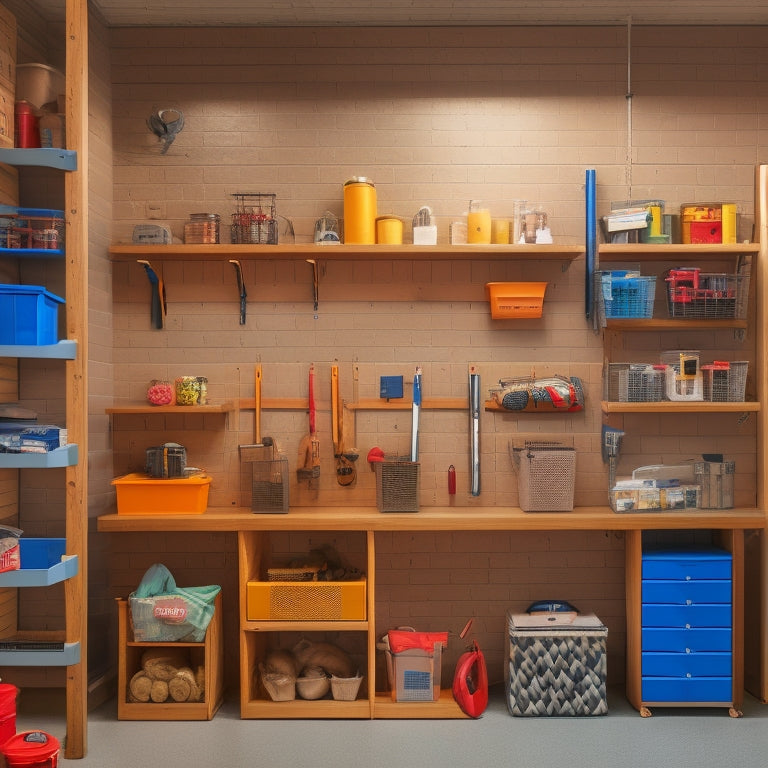
Transform old pallets, crates, and cardboard boxes into functional tool storage solutions that are both eco-friendly and budget-friendly. You'll be amazed at how easily you can upcycle these discarded items into practical storage spaces for your tools.
Start by collecting old pallets, which can be easily disassembled and rearranged to fit your specific storage needs. Add some vintage crates to the mix, and you'll have a unique and rustic storage system. Sand and stain them to give them a personalized touch.
When it comes to organizing your tools, think vertically. Stack your pallets and crates to maximize storage space, and use dividers or bins to separate your tools. You can also attach hooks or a pegboard to hang items like hammers, saws, or wrenches.
Don't forget to add labels or signs to identify what's stored in each section. With a little creativity, you'll have a functional and stylish tool storage system that's not only good for the environment but also easy on your wallet.
Budget-Friendly Tool Organization Ideas
Now that you've got a solid foundation for your DIY tool storage, it's time to get creative with budget-friendly organization ideas.
You'll be surprised at how a few simple tweaks can maximize your storage space without breaking the bank.
From clever tool holder hacks to repurposed storage spaces and dollar store solutions, you're about to discover some genius ways to keep your tools organized and within reach.
Tool Holder Hacks
You can turn everyday items into functional tool holders with a little creativity, saving you money and keeping your workspace organized. For instance, use magnetic strips to attach small tools like pliers, screwdrivers, or wrenches to a metal board or even the side of a cabinet. This will keep them within easy reach while keeping your workbench clutter-free.
If you're feeling adventurous, try your hand at 3D printing custom tool holders. You can design and print holders that fit your specific tools, making the most of your storage space.
You can also repurpose old items like mason jars, wooden crates, or PVC pipes to create unique tool holders. Get creative with paint, glue, or other embellishments to give them a personalized touch.
Repurposed Storage Spaces
By repurposing spaces you already have, like the back of a door or the inside of a cabinet, you can create functional storage areas for your tools without breaking the bank. You can transform old furniture into tool storage units, giving new life to pieces that would otherwise end up in the dumpster.
For instance, consider attaching pegboards to the back of a door or using the inside of an old dresser as a storage cabinet. Hidden compartments can also be created to store small tools and accessories. You can attach a magnetic strip to the inside of a cabinet door or create a secret drawer in an old desk.
These clever storage solutions will keep your tools organized and out of sight, making your workspace more efficient and clutter-free. By thinking outside the box and repurposing spaces you already have, you can create a customized tool storage system that fits your needs and budget.
Dollar Store Solutions
For a fraction of the cost of custom-built storage solutions, you can find an array of affordable and versatile organizational tools at your local dollar store. You'll be surprised at how many clever storage solutions you can create with just a few bucks. Start by scouring the dollar bins for small containers, baskets, and bins that can be repurposed to store small tools, nuts, and bolts. Look for store brands that offer similar quality to name-brand products at a fraction of the price.
Use adhesive magnets to attach small metal containers to your workshop walls, creating a convenient spot to store screwdrivers, pliers, and wrenches. You can also use over-the-door storage racks to hang tools like hammers, levels, and tape measures.
Don't forget to grab some stackable plastic bins to store larger items like power tools, sandpaper, and other supplies. With a little creativity, you can create a functional and organized workspace without breaking the bank. By shopping smart at the dollar store, you'll be able to allocate more funds to the tools and materials that really matter.
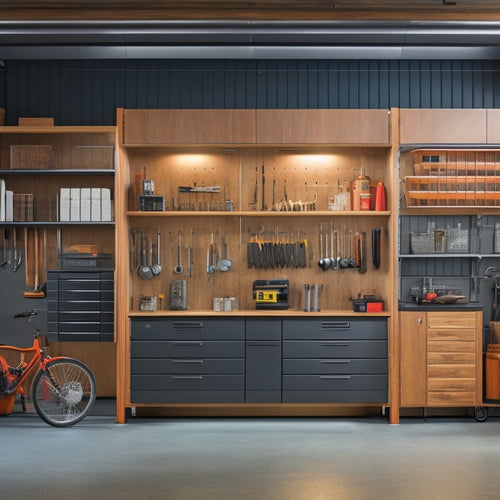
Utilize Vertical Storage Space
When it comes to maximizing your tool storage, you'll want to think up, not out. You're likely wasting valuable wall space that could be used to store infrequently used tools or bulky equipment.
Maximize Wall Space
You can easily double your storage capacity by installing shelves, hooks, or a pegboard on your wall, taking advantage of the often-wasted vertical space. This won't only help you store more tools but also keep them organized and within reach.
To make sure your wall storage solutions are secure, use wall anchors to prevent them from falling or becoming dislodged over time.
Here are some ideas to maximize your wall space:
-
Use sliding panels to store items like bins, baskets, or small tools, and easily slide them out when needed
-
Install a pegboard with hooks and bins to hang tools like hammers, screwdrivers, and pliers
-
Add shelves with baskets or bins to store items like nuts, bolts, and screws
- Create a magnetic strip to store small metal items like wrenches and scissors
Optimize Shelf Height
By strategically positioning shelves at varying heights, you can capitalize on the often-overlooked vertical space in your workshop or garage. This allows you to store more tools and supplies without taking up valuable floor space. To optimize shelf height, consider the items you need to store and group them by size and frequency of use.
| Shelf Height | Ideal for Storing | Benefits |
|---|---|---|
| Low Shelves (12-18 inches) | Heavy tools, equipment | Easy access, reduced strain |
| Mid Shelves (24-36 inches) | Power tools, accessories | Convenient reach, efficient storage |
| High Shelves (48-60 inches) | Infrequently used items, seasonal tools | Maximizes vertical space, keeps floor clear |
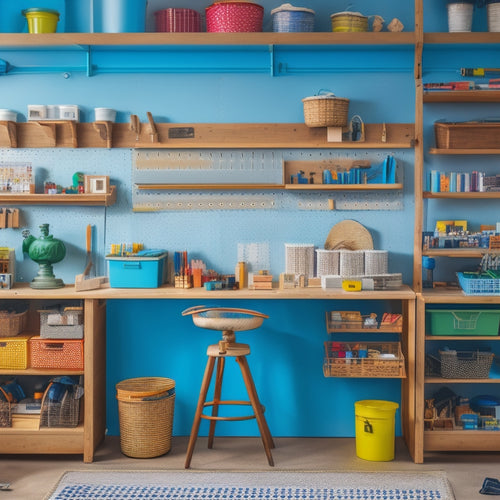
Affordable Pegboard Systems
Pegboard systems don't have to break the bank, and affordable options can be just as effective at keeping your tools organized and within reach. You might be surprised at how easily you can create a functional and customized pegboard system without emptying your wallet.
Here are some affordable pegboard options you might want to explore:
-
Pegboard kits: These usually include the pegboard, hooks, and screws, and can be found for under $50.
-
Repurposed materials: Think old pallets or wooden boards that can be transformed into a pegboard with some creativity and DIY know-how.
-
Pegboard accessories: Instead of buying a whole new system, add accessories like bins, baskets, or specialized hooks to your existing pegboard to increase its functionality.
- Pegboard customization: Get creative and make your own pegboard from scratch using materials like plywood or MDF, and customize it to fit your specific tool storage needs.
DIY Tool Holder Projects
Since you've maximized your pegboard's potential, it's time to focus on creating specialized holders for those tricky-to-store tools. You know, the ones that always seem to get lost or damaged because they don't fit neatly on your pegboard.
With a few simple DIY projects, you can create custom holders that'll keep your tools organized and within reach. Start by identifying the tools that need a special home. Maybe it's your cordless drill, impact driver, or pliers. Then, think about how you can design a holder that'll keep them safe and accessible.
You might need to get creative with materials like wood, metal, or even 3D print a custom holder. Consider the layout of your workshop and tool bench when designing your holders. You want to make sure they fit seamlessly into your workflow.
For example, you might create a holder for your drill bits near your drill press or a spot for your frequently used hand tools near your workbench. By creating these custom holders, you'll be able to locate what you need quickly, saving you time and frustration in the long run.
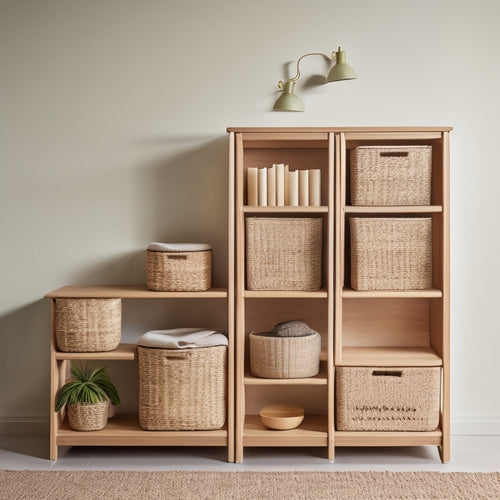
Upcycled Containers for Tools
You can breathe new life into old containers and turn them into functional tool holders that'll keep your workshop organized. Upcycling containers is a cost-effective and eco-friendly way to store your tools. It's also a great opportunity to get creative and add some personality to your workshop.
Here are some unique upcycled container ideas to get you started:
-
Old pallets: Transform them into vertical tool holders or shelves to maximize your workshop's storage space.
-
Vintage tins: Clean and label them to store small tools and accessories like screws, nails, or drill bits.
-
Plastic containers: Use them to store larger items like power tools, sandpaper, or safety gear.
- Wooden crates: Upcycle them into rustic tool chests or workbenches with built-in storage.
When choosing an upcycled container, make sure it's sturdy, clean, and dry. You can always add a fresh coat of paint or varnish to give it a personalized touch.
With a little creativity, you can turn any old container into a functional tool holder that'll keep your workshop organized and clutter-free.
Frequently Asked Questions
Can I Use DIY Tool Storage in a Small Workshop or Garage?
"You can totally use DIY tool storage in a small workshop or garage, but first, assess your space constraints and optimize your workshop layout to maximize efficiency - it's all about clever placement and utilization!"
How Do I Keep My DIY Tool Storage System Organized Over Time?
You'll maintain your DIY tool storage system's organization by implementing a logical labeling system and sticking to a regular maintenance routine, ensuring your tools stay tidy and easily accessible over time.
Are DIY Tool Storage Solutions Durable Enough for Heavy Tools?
You wonder if DIY tool storage solutions can handle the heavy hitters. Truth is, with careful material selection and attention to weight capacity, your handmade storage system can withstand even the bulkiest tools, keeping them organized and within reach.
Can I Customize DIY Tool Storage to Fit My Specific Tool Collection?
You can customize DIY tool storage to fit your specific tool collection by creating tool profiles and storage blueprints tailored to your needs, ensuring a snug fit for each tool and maximizing storage efficiency.
Do DIY Tool Storage Solutions Require a Lot of Technical Expertise?
You'll be relieved to know that most DIY tool storage solutions don't require a high skill level; the learning curve is often minimal, and with some patience, you can easily set up a system that works for you.
Related Posts
-
Open Storage Bins for Shelving Units
You need open storage bins that integrate seamlessly with your shelving units to boost your organization, productivit...
-
Creative Workshop Storage Solutions and Ideas
You can revolutionize your workshop's storage by maximizing vertical space with wall-mounted racks, utilizing hidden ...
-
Best Materials for Garage Wall-Mounted Cabinets
When selecting materials for your garage wall-mounted cabinets, you'll want to evaluate options that balance durabili...


