Why Cluttered Workshops Haunt Even the Neatest Carpenters
Share
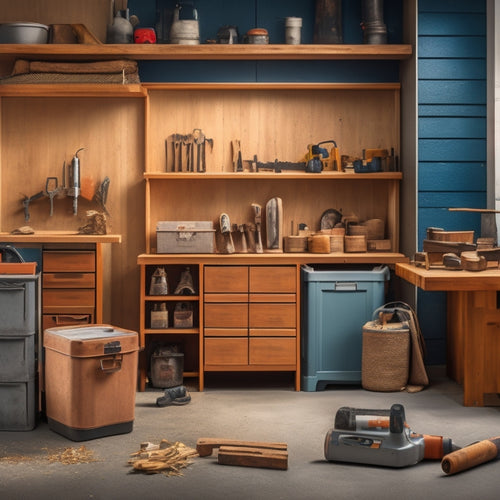
You're meticulous, yet your workshop's a mess. You're not alone - 60% of carpenters struggle with clutter, hindering productivity and fueling frustration. It's not about being sloppy; it's about inadequate tool organization systems and ineffective workshop layouts. You've got the skills, but your space is holding you back. Clutter accumulates when tools don't have designated homes, and categorization is nonexistent. By implementing tailored storage solutions and strategies, you can reclaim your workspace and sanity. Pinpoint the sources of disorganization and prioritize decluttering to optimize your workflow - and discover the secrets to maintaining a workshop that's as efficient as you are.
Key Takeaways
• Even the neatest carpenters can struggle with cluttered workshops due to inadequate tool organization systems and solutions.
• Clutter accumulation can be attributed to poor workshop decluttering strategies, leading to disorganization and inefficiency.
• Inefficient workshop organization practices, such as poor tool placement and lack of categorization, can hinder productivity and cause frustration.
• Failure to maintain cleanliness and regularly schedule cleaning sessions can lead to tool damage, loss, and misplacement.
• Inconsistent decluttering habits and lack of long-term maintenance routines can result in cluttered workshops, even for meticulous carpenters.
Small Tool Organization Systems
What's the most efficient way to store your smallest tools, such as screwdrivers, pliers, and wrenches, to keep them within easy reach and prevent them from getting lost in the clutter?
A well-designed small tool organization system is the answer.
You can start by investing in a sturdy tool rack that can be mounted on a wall or placed on a workbench. This will provide a dedicated space for your frequently used tools, keeping them organized and visible.
For smaller items like nuts, bolts, and screws, consider using drawer dividers to separate and categorize them. This will prevent them from getting jumbled together and make it easier to find what you need quickly.
Additionally, label each compartment or section to make sure you can quickly identify where each tool is stored.
Clearing Cluttered Workshop Spaces
Every square foot of your workshop is valuable real estate, and clearing cluttered spaces is essential to reclaiming it and boosting your productivity. To get started, set aside a few hours to tackle the task.
Begin by sorting items into categories, such as 'keep,' 'donate,' and 'discard.' Be ruthless – if you haven't used it in the past year, it's likely you won't miss it.
Next, focus on decluttering tips that work for you. For instance, designate a specific area for each type of tool or material, and use bins and baskets to keep them organized. Label each container so you can easily find what you need.
A tidy workshop isn't only more efficient, but it also helps you maintain clean tools and reduces the risk of damage or loss.
Essential Tool Storage Solutions
Now that you've cleared your workshop space, it's time to implement essential tool storage solutions to keep your area organized and efficient.
You'll want to evaluate tool organization systems that cater to your specific needs, such as pegboards, cabinets, and bins.
Tool Organization Systems
Your workshop's productivity hinges on a well-planned tool organization system that keeps essential tools within easy reach and prevents clutter from building up in the first place. A disorganized workshop can lead to wasted time, increased frustration, and decreased productivity. To avoid this, you need an efficient tool organization system that works for you.
Here are some essential components to take into account:
-
Mobile storage: Invest in mobile storage solutions like tool carts or chests with wheels to keep frequently used tools within easy reach.
-
Color coding: Use color-coded labels or bins to categorize and store tools, making it easier to find what you need when you need it.
-
Tool boards: Install tool boards or pegboards on walls or workbenches to hang tools, keeping them organized and visible.
- Stationary storage: Designate specific areas for stationary tools, like a designated spot for your table saw or drill press, to maintain a clutter-free workspace.
Efficient Storage Methods
As you implement a well-planned tool organization system, it's equally important to focus on efficient storage methods that maximize your workshop's space and keep frequently used tools readily accessible. To achieve this, consider incorporating hidden storage solutions, such as installing cabinets or shelves with sliding drawers, or utilizing overhead storage racks for infrequently used items. This will help keep your workshop floor clear and create a sense of openness.
In addition to hidden storage, portable solutions can also be highly effective. Invest in tool chests or carts with wheels, allowing you to easily move them around the workshop as needed. This will enable you to have the tools you need at your fingertips, without taking up valuable floor space.
Moreover, consider using stackable bins or containers to store smaller items, such as nuts and bolts, or electrical components. By implementing these efficient storage methods, you'll be able to quickly locate the tools you need, reducing downtime and increasing productivity.
Maximizing Limited Workshop Areas
By strategically positioning essential tools and equipment, you can optimize even the most cramped workshop areas to improve workflow and reduce stress. A well-planned workshop layout can make a huge difference in your productivity and overall work experience. Here are some tips to help you maximize your limited workshop areas:
-
Assess your workflow: Identify the tools and equipment you use most frequently and position them in easy-to-reach locations.
-
Designate zones: Divide your workshop into separate zones for different tasks, such as a cutting zone, assembly zone, and storage zone.
-
Utilize vertical space: Install shelves, hooks, and bins to store items that are less frequently used, keeping them off the floor and out of the way.
- Implement a 'one-touch rule': Design your workshop layout to allow you to complete tasks in a single location, minimizing the need to move around and reducing wasted time.
Customized Pegboard Designs
When you design a customized pegboard, you're creating a tool organization system that caters to your unique workshop needs.
By mapping out an efficient storage layout, you'll guarantee that frequently used tools are easily accessible, and less-used items are stowed away neatly.
As you plan your design, consider the types of projects you work on most often and the tools you need to have within easy reach.
Tool Organization Systems
You can maximize your workshop's storage capacity and efficiency by designing a customized pegboard that assigns a designated spot to each tool, keeping them organized, easily accessible, and ready for use. A well-planned pegboard system streamlines your workflow, reduces downtime, and increases productivity.
To get started, assess your tool inventory and categorize items by frequency of use, size, and type.
Here are some essential considerations for your customized pegboard design:
-
Tool placement: Position frequently used tools at eye level, and less frequently used tools towards the top or bottom of the board.
-
Hook selection: Choose hooks that fit your tool's size and shape, ensuring a secure hold and easy retrieval.
-
Labeling and signage: Use clear labels and signs to identify tool locations, making it easy for you and others to find what they need.
- Integration with other storage: Consider how your pegboard will work in tandem with your workshop shelving and tool chest to create a complete storage system.
Efficient Storage Layouts
Customized pegboard designs that prioritize efficient storage layouts enable you to allocate specific zones for different tool categories, optimizing your workshop's spatial arrangement and facilitating swift tool retrieval. By categorizing tools into groups, such as handheld power tools, hand tools, and measuring devices, you can create a logical and organized workshop layout. This thoughtful approach allows you to maximize your storage solutions, ensuring that every tool has a designated home and can be easily accessed when needed.
When designing your customized pegboard, consider the frequency of tool use and the workflow of your projects. Place frequently used tools in easy-to-reach zones, while less frequently used tools can be stored in harder-to-reach areas. Additionally, consider the size and shape of your tools when designing your pegboard layout, ensuring that each tool fits snugly into its designated space.
Overcoming Disorganization Challenges
Establishing a functional workflow requires tackling disorganization head-on, which means identifying and addressing the underlying causes of clutter in your workshop. As a carpenter, you know that a cluttered space can lead to wasted time, decreased productivity, and even safety hazards.
To overcome disorganization challenges, you must develop a decluttering mindset and cultivate organizational habits. This involves understanding the psychology of your workspace and how it affects your workflow efficiency.
Here are four key strategies to help you get started:
-
Identify your pain points: Pinpoint areas in your workshop where clutter tends to accumulate and prioritize those areas for decluttering.
-
Categorize and group similar items: Organize your tools and materials into categories and group similar items together to make them easier to find and access.
-
Designate a home for each item: Assign a specific place for each tool and material, and make sure to return items to their designated home after use.
- Establish regular maintenance routines: Schedule regular cleaning and organization sessions to maintain your newly organized space and prevent clutter from building up again.
Key Storage Strategies Revealed
As you tackle your workshop's clutter, you'll need a solid storage strategy to keep your tools organized and within reach.
To achieve this, you'll want to label and categorize your tools, designate a specific home base for each item, and utilize vertical space to maximize storage capacity.
Label and Categorize Tools
You'll find that grouping tools into categories like 'hand tools,' 'power tools,' and 'specialty tools' allows you to pinpoint the exact location of a specific tool within your workshop, saving time and reducing frustration. This process is essential for achieving tool organization and workspace efficiency. By categorizing your equipment, you'll prevent clutter from building up and make it easier to maintain your workshop.
This process is essential for achieving tool organization and workspace efficiency.
By categorizing your equipment, you'll prevent clutter from building up and make it easier to maintain your workshop.
Here are some additional tips to help you label and categorize your tools effectively:
-
Assign a home: Designate a specific area or bin for each category of tools, making sure they're easily accessible and visible.
-
Use clear labels: Label each category and tool with clear, descriptive text, making it simple to identify what's inside.
-
Implement a 'one in, one out' policy: Remove or donate old or broken tools to prevent clutter from accumulating.
- Regularly maintain your system: Set aside time to tidy up your workshop and guarantee tools are returned to their assigned homes.
Designate a Home Base
Now that your tools are categorized, focus on assigning a home base for each group, ensuring that frequently used items are stored in easy-to-reach locations, and less frequently used tools are stored in designated areas that are still easily accessible. This will optimize your workbench organization and tool rack solutions.
When designing your workshop layout, prioritize workspace optimization. Consider the workflow and tasks you perform most often. Place frequently used tools near your primary work area, while less frequently used items can be stored in designated zones, such as on pegboards or in labeled bins.
This approach will save you time and energy, allowing you to focus on serving your clients.
Utilize Vertical Space
Maximize your workshop's storage capacity by leveraging vertical space, where wall-mounted shelves, hooks, and bins can efficiently house infrequently used tools, materials, and supplies. This will help you make the most of your workshop's space, keeping frequently used items within easy reach while storing less-used items out of the way.
To optimize your vertical space, consider the following strategies:
-
Install vertical shelving solutions that can hold bins, baskets, or boxes to store items like fasteners, adhesives, or other small parts.
-
Use hanging tool racks to store items like hammers, saws, or other handheld tools, keeping them organized and easily accessible.
-
Invest in wall-mounted organization systems, such as pegboards or slatwalls, to hang items like tool belts, extension cords, or other accessories.
- Add bins and baskets to store items like sandpaper, safety glasses, or other consumables, keeping them tidy and out of the way.
Streamlining Workshop Efficiency
Streamlining Workshop Efficiency
By establishing a 'home' for each tool and supply, you can drastically reduce the time spent searching for misplaced items and refocus that energy on more productive tasks. A well-organized workshop layout is key to maximizing efficiency. Consider categorizing your tools and supplies into three main groups: frequently used, occasionally used, and rarely used. This will help you allocate space and prioritize accessibility.
| Tool/Supply | Frequency of Use | Storage Location |
|---|---|---|
| Hammer | Frequently | Near workstation |
| Drill Press | Occasionally | Against back wall |
| Coping Saw | Rarely | On high shelf |
Tool Accessibility Made Easy
By allocating tools to specific storage locations based on their frequency of use, you'll find that you're able to access the tools you need quickly and easily, saving time and reducing frustration. This is especially important for carpenters who rely on having the right tools at their fingertips to get the job done efficiently.
To take your tool accessibility to the next level, consider the following strategies:
-
Install tool racks: Mount tool racks on walls or ceilings to maximize vertical storage and keep frequently used tools within easy reach.
-
Utilize space-saving storage solutions: Invest in compact storage bins and baskets that can be easily labeled and accessed, keeping your workspace organized and clutter-free.
-
Designate a 'launching pad': Designate a specific area of your workshop as a 'launching pad' where you can quickly grab the tools you need for a specific task or project.
- Implement a 'one-touch rule': Encourage yourself to put tools back in their designated storage spot as soon as you're done using them, reducing the likelihood of lost or misplaced tools.
Decluttering for Productivity Gains
As you tackle your workshop's clutter, remember that every item you remove or reorganize frees up mental and physical energy for more important tasks, allowing you to focus on the projects that drive your business forward.
A clutter-free workspace isn't just aesthetically pleasing; it's essential for a productivity boost. By implementing organization tips, you'll reduce time spent searching for misplaced tools and materials, and increase workshop efficiency.
Start by categorizing your tools and supplies into groups, such as 'frequently used' and 'occasionally used.' Assign a designated spot for each item, ensuring easy access when needed. Labeling storage bins and shelves will also help you quickly identify what's inside.
Consider investing in a pegboard or tool chest to keep frequently used items within reach. By streamlining your workshop's layout, you'll be able to complete tasks more efficiently, taking your business to the next level.
With a clutter-free workspace, you'll be amazed at how much more you can accomplish in less time.
Frequently Asked Questions
How Do I Maintain Organization Systems Over Time?
You'll maintain organization systems over time by prioritizing time management and establishing consistent routines, such as scheduling daily tidying sessions and weekly inventory checks to guarantee your workshop remains clutter-free and efficient.
Can a Cluttered Workshop Impact My Mental Health?
When you're stuck between a rock and a hard place, a cluttered workshop can take a toll on your mental health, as workspace psychology reveals clutter effects can lead to increased stress, anxiety, and decreased productivity, highlighting the importance of maintaining workspace organization for best well-being.
Are There Any Affordable Tool Storage Solutions Available?
You'll find budget-friendly options like repurposed crates, DIY shelving, and pegboards that offer creative solutions for tool storage, allowing you to optimize your workshop space without breaking the bank.
How Often Should I Declutter My Workshop to Stay Organized?
You'll be surprised to know that 60% of workshop time is spent searching for tools! To stay organized, declutter your workshop every 2-3 months, and implement habits like labeling, categorizing, and assigning homes to maintain a clutter-free space.
Can a Well-Organized Workshop Improve My Work Quality?
You'll boost efficiency and productivity in a well-organized workshop, allowing you to focus on the task at hand, spark creativity, and find inspiration, ultimately leading to higher-quality work that serves your clients better.
Related Posts
-

3 Pro Garage Organization Ideas to Try Now
You can alter your garage from cluttered chaos to organized oasis with three pro garage organization ideas. First, op...
-

Storage Bins for Shelves to Keep Clutter at Bay
You're looking for a way to keep your shelves organized and clutter-free, and storage bins are the perfect solution t...
-

Tool Storage Chests for a More Organized Workspace
You're looking to enhance productivity and reduce stress in your workspace by getting your tools organized, and that'...


