What Makes a Perfect DIY Pegboard Design?
Share
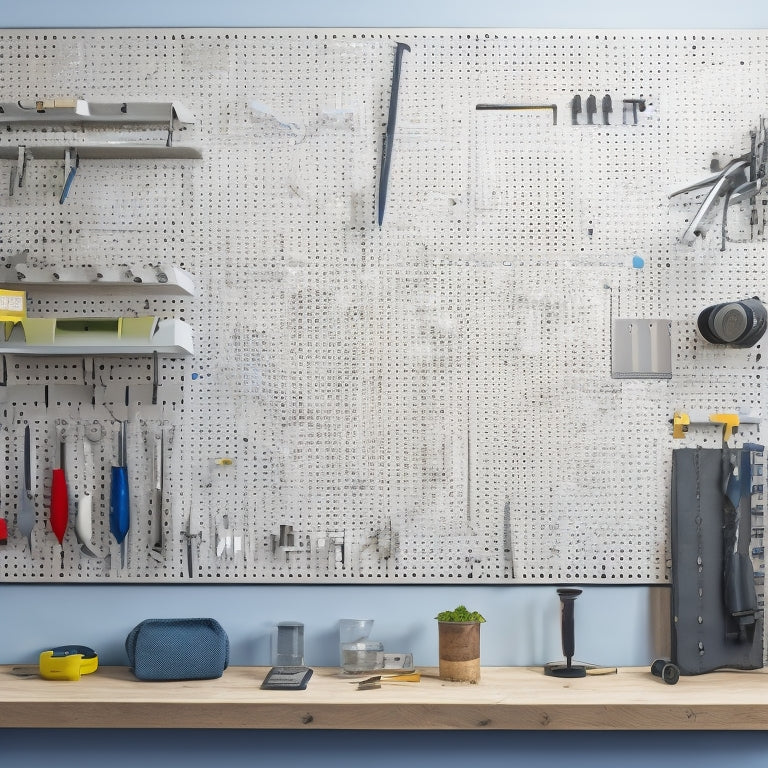
You'll create a perfect DIY pegboard design by first evaluating your tool collection, categorizing, and identifying frequently used tools. Next, choose the right pegboard material and ideal board size that fits your space constraints. Design a layout that maximizes storage, leaving room for future additions. Strategically place tools for easy access, incorporating hooks and bins to utilize vertical space effectively. Finally, future-proof your design by leaving empty space for additions and choosing adaptable storage solutions. By following these steps, you'll be well on your way to crafting a pegboard that efficiently stores your tools and adapts to your evolving needs, and there's more to explore.
Key Takeaways
• A perfect DIY pegboard design prioritizes maximum storage and leaves room for future additions and changes.
• The ideal board size is determined by available wall space, with a functional size that doesn't overwhelm the area.
• A strategic tool placement strategy arranges tools for easy access, creating a visual hierarchy on the pegboard.
• Hooks and bins are incorporated strategically, utilizing vertical space effectively and maximizing corner spaces.
• A future-proof design leaves empty space for additions, uses adaptable storage solutions, and allows for easy rearrangement.
Assessing Your Tool Collection
Take stock of your tools by gathering them in one place, like a garage or workshop, to get a clear picture of what you have and how you can organize them on your pegboard. This step is essential in understanding your tool collection and how to design a pegboard that suits your needs.
Start by categorizing your tools into groups, such as hand tools, power tools, and accessories. This will help you identify the types of tools you use most frequently and how you can organize them on your pegboard for easy access.
Next, consider the frequency of use for each tool. Do you use your drill daily or only occasionally? This will help you determine the best placement for each tool on your pegboard. You'll want to place your most frequently used tools in easy-to-reach spots, while less frequently used tools can be placed towards the bottom or in harder-to-reach areas.
Choosing the Right Pegboard Material
When selecting a pegboard material, you'll need to take into account your specific needs and preferences.
You'll have to choose from a range of options, each with its own strengths and weaknesses.
As you weigh your choices, keep in mind that the thickness of your pegboard will also play a critical role in its overall performance.
Pegboard Material Options
You're faced with a multitude of pegboard material options, each with its unique characteristics, advantages, and drawbacks, making it essential to select the right one for your DIY project.
When choosing a pegboard material, take into account its aesthetic appeal and how it will fit into your workspace. Pegboard aesthetics play a significant role in creating a visually appealing storage system. You can opt for a sleek and modern look with a metal or PVC pegboard or go for a more rustic, natural look with a wooden pegboard.
Material durability is another vital factor to keep in mind. You want a pegboard that can withstand the weight and wear of your tools and accessories. Metal pegboards are generally more durable and resistant to scratches and dents, while wooden pegboards can be more prone to damage. PVC pegboards offer a good balance between durability and affordability.
Pegboard Thickness Matters
Typically, pegboards come in a range of thicknesses, from 1/8 inch to 1 inch, and selecting the right one is important to make sure your DIY project can support the weight of your tools and accessories.
When choosing a pegboard thickness, you'll want to take into account the weight and size of the items you'll be hanging. A thicker pegboard is more durable and can support heavier items, but it may be more expensive and harder to work with. On the other hand, a thinner pegboard is more flexible and easier to cut, but it may not be as sturdy.
As a general rule, a 1/4 inch or 1/2 inch pegboard is a good starting point for most DIY projects. This thickness provides a good balance between durability and flexibility. However, if you plan to hang heavy tools or equipment, you may want to opt for a thicker pegboard.
Additionally, take into consideration the material flexibility of your pegboard. A pegboard with some give will be less likely to crack or break under the weight of your tools. By selecting the right pegboard thickness, you can make sure your DIY project is both functional and long-lasting.
Designing for Maximum Storage
When designing your pegboard, you'll want to prioritize maximum storage to keep your workspace organized and efficient.
You'll achieve this by strategically placing your tools and accessories, making sure everything is within easy reach.
Tools at a Glance
Optimizing your pegboard design for maximum storage means arranging your tools in a way that allows you to quickly identify and access the ones you need, saving you time and frustration in the process. To achieve this, you'll want to create a visual hierarchy on your pegboard, grouping similar tools together and placing the most frequently used ones at eye level. This will enable you to quickly scan the board and spot the tool you need.
Here are some tips to help you create a quick reference system on your pegboard:
| Tool Category | Pegboard Placement |
|---|---|
| Hand tools (e.g., hammers, screwdrivers) | Middle row, easy to reach |
| Power tools (e.g., drills, saws) | Top row, for easy access |
| Measuring and testing tools (e.g., level, tape measure) | Bottom row, for quick reference |
Optimized Hook Placement
You'll maximize storage on your pegboard by strategically placing hooks to accommodate the unique shapes and sizes of your tools, allowing you to fit more items in a smaller space. This means considering Hook Angle Variations to make sure that each tool hangs snugly and efficiently. For instance, place hooks with a slight upward angle for tools with curved handles, and use a steeper angle for those with flat handles.
Next, conduct a Hook Shadow Analysis to visualize how each tool will hang and overlap on the pegboard. This will help you identify areas where you can nest smaller tools beneath larger ones, making the most of your space. Be mindful of the tool's center of gravity, ensuring it's balanced and secure on the hook.
Compact Bin Storage
By incorporating compact bins into your pegboard design, you can corral small items like fasteners, fittings, and accessories, freeing up space on your hooks for larger tools and equipment. This not only keeps your workspace organized but also allows you to make the most of your pegboard's real estate.
To take your compact bin storage to the next level, consider the following:
-
Label your bins: Use a label maker to identify what's inside each bin, making it easy to find what you need at a glance. This also helps maintain organization and prevents clutter from building up again.
-
Choose bins that fit your style: Select bins that complement your pegboard's aesthetic, ensuring a cohesive look that's both functional and visually appealing. This attention to detail will make your DIY pegboard design stand out.
-
Keep frequently used items front and center: Store your most frequently used items in easy-to-reach bins, reserving harder-to-access bins for less frequently used items. This thoughtful approach to storage aesthetics will save you time and frustration in the long run.
Incorporating Hooks and Bins
Your pegboard's functionality takes a significant leap forward when you strategically incorporate hooks and bins to store and organize your tools and supplies. This is where the real customization begins, allowing you to tailor your pegboard to your specific needs.
When it comes to hooks, you'll want to contemplate the various styles available, such as J-hooks, S-hooks, and L-hooks. Each serves a unique purpose, so think about the types of tools you'll be hanging. For instance, J-hooks are great for hanging bikes or large equipment, while S-hooks are perfect for smaller items like hammers or screwdrivers.
In addition to hooks, bins are essential for storing smaller items like nuts, bolts, and screws. Be sure to label each bin clearly, so you can quickly find what you need. You can use stickers, labels, or even a label maker to create clear and concise labels. This will save you time and frustration in the long run.
Planning for Future Expansion
As you design your pegboard, remember to leave some breathing room for future additions, since your tool collection and storage needs are likely to evolve over time. You never know when you'll acquire new tools or realize you need more storage space. To future-proof your pegboard, prioritize flexibility and modularity.
Here are some strategies to keep in mind:
-
Design modular sections: Divide your pegboard into separate sections that can be easily added or removed as needed. This will allow you to reconfigure your layout without having to start from scratch.
-
Leave empty space: Don't overcrowd your pegboard with too many hooks and bins. Leave some empty space to accommodate future additions or changes.
-
Choose adaptable storage solutions: Opt for storage bins and hooks that can be easily moved or rearranged as your needs change.
Selecting the Ideal Board Size
Now that you've future-proofed your pegboard design, it's time to decide on the ideal board size to accommodate your tools and storage needs. When selecting the perfect size, consider the space constraints of your workshop or garage. Measure the available wall space and think about how the board will fit among other storage solutions. You don't want your pegboard to overwhelm the area or make it difficult to move around.
Aesthetic considerations also play a role in determining the ideal board size. A larger board can be visually overwhelming, while a smaller one mightn't hold all your essential tools. You want your pegboard to be functional and visually appealing.
A good rule of thumb is to start with a standard size, such as 2x4 or 4x4 feet, and adjust according to your specific needs. Don't be afraid to get creative and design a custom board that fits your unique space and style.
Strategic Tool Placement Strategy
With your pegboard design and size finalized, you'll need to strategically place your tools to maximize efficiency and accessibility. This is where a personalized workflow begins to take shape. Consider your most frequently used tools and group them together in a way that makes sense for your workflow. This will help you develop efficient habits and reduce wasted time searching for the right tool.
Here are some key considerations for your tool placement strategy:
-
Prioritize your most-used tools: Place them at eye level or near the center of your pegboard for easy access.
-
Group similar tools together: Organize your tools by category, such as all your screwdrivers or wrenches, to create a logical and intuitive layout.
-
Consider your dominant hand: If you're right-handed, place your most-used tools on the right side of your pegboard, and vice versa, to reduce reaching and straining.
Utilizing Vertical Space Effectively
You can multiply your pegboard's storage capacity by maximizing its vertical space, allowing you to fit more tools within easy reach. This means optimizing the use of corner spaces, which often get wasted. Corner optimization is crucial to an effective pegboard design. Consider using corner-mounted bins, baskets, or hooks to store small items like screws, nuts, or pliers. This will free up space on the main board for larger tools.
To guarantee your pegboard can hold the weight of your tools, make sure to secure it to the wall using sturdy wall anchors. This will prevent the board from tipping over or falling, keeping your tools and workspace safe.
When selecting wall anchors, choose ones that can support the weight of your pegboard and tools. You can also use wall anchors with adjustable arms to customize the fit and ensure a snug hold.
Frequently Asked Questions
Can I Use a Pegboard in a Small Workshop or Garage?
"You can squeeze a pegboard into even the tiniest workshop or garage, trust us! By optimizing your space and tackling storage challenges, you'll be amazed at how much you can fit, and how organized you'll feel."
Are Pegboards Suitable for Heavy-Duty Tools and Equipment?
You're wondering if pegboards can handle heavy-duty tools and equipment? Honestly, it depends on the load capacity and material strength of your pegboard. If you've got a sturdy one, it can hold heavy tools, but don't overload it, or it'll fail.
Do Pegboards Require Special Installation or Mounting Hardware?
You'll need to invest in reliable wall anchors and the right screws types, like lag screws or Molly bolts, to guarantee your pegboard stays securely mounted, especially if you're planning to hang heavy tools or equipment.
Can I Customize a Pegboard With My Company's Logo or Branding?
You can definitely customize a pegboard with your company's logo or branding! Look for manufacturers offering logo integration services or explore DIY branding options like vinyl decals, stencils, or even painting your logo directly onto the board.
Are Pegboards Available in Various Colors or Finishes?
You'll find pegboards in various colors, from sleek black to vibrant red, and finishes that range from matte to glossy, allowing you to choose the perfect match for your workspace's style and ambiance.
Related Posts
-

3 Pro Garage Organization Ideas to Try Now
You can alter your garage from cluttered chaos to organized oasis with three pro garage organization ideas. First, op...
-

Wall Mounted Hooks With Shelf for Maximum Storage
You'll find that wall mounted hooks with a shelf are a revolutionary solution for maximizing storage in your home, pr...
-

3 Key Steps to Streamline Your Workshop Organization
You're likely wasting 30% of your workshop's productivity and profitability due to disorganization, a common problem ...


