
Smart Tool Storage and Organization Essentials
You're about to transform your workspace into a productivity powerhouse by implementing smart tool storage and organization systems. Start by optimizing your workstation layout, positioning frequently used tools within easy reach and conducting a workflow analysis. Next, purge and categorize your tools, grouping them by type and assigning a home for each one. Utilize vertical storage space with wall-mounted shelves and pegboards, and label everything with a consistent system. Finally, adapt to changing needs with modular storage units and regular assessments to maintain efficiency. Now, take the next step towards streamlining your workflow.
Key Takeaways
• Identify and position frequently used tools within easy reach to optimize workstation layout and enhance productivity.
• Conduct a tool inventory check and group tools by categories and types to facilitate efficient storage and retrieval.
• Assign a home for each tool using a system like tool shadowing to form habits for tool organization and prevent clutter accumulation.
• Utilize vertical storage space with wall-mounted shelves, hooks, or pegboards to maximize storage capacity and keep frequently used tools at eye level.
• Implement a consistent labeling system with concise and high-contrast labels to enhance organization, efficiency, and visual cues.
Optimize Your Workstation Layout
When setting up your workstation, start by identifying the tools and materials you use most frequently and positioning them within easy reach to minimize walking distances and boost productivity. This simple step can save you a significant amount of time and energy in the long run.
Next, consider ergonomic considerations, such as the height of your work surface and the placement of your chair. Make sure your workstation is set up to promote good posture and reduce the risk of injury.
Conduct a workflow analysis to determine the sequence of tasks you perform most often. This will help you determine the most efficient layout for your tools and materials.
For example, if you're a carpenter, you may want to position your tape measure and hammer near the edge of your workbench, while your power tools are placed further back. By optimizing your workstation layout, you'll be able to work more efficiently and effectively.
Purge and Categorize Tools
Now that you've optimized your workstation layout, it's time to tackle the tools themselves.
You'll start by taking stock of what you have, which means conducting a thorough tool inventory check to identify what's working for you and what's not.
Next, you'll develop a tool grouping strategy to categorize your tools in a way that makes sense for your workflow and storage space.
Tool Inventory Check
Take stock of your tool collection by gathering every item from your workshop, garage, or storage areas and laying them out in a well-lit, open space, giving you a clear view of what you have. This is your chance to get a good look at every tool, accessory, and spare part you own.
As you survey your collection, start by identifying duplicates, broken tools, and items you no longer need or use. Set these aside to donate, sell, or discard.
Next, organize your remaining tools into categories, such as hand tools, power tools, and fasteners. Within each category, sort items alphabetically or by type. This will make it easier to take stock of what you have and identify any gaps in your collection.
Consider implementing a digital counting system or barcoding system to keep track of your tools and make inventory management a breeze. This will save you time and frustration in the long run, ensuring you can find what you need when you need it.
Tool Grouping Strategy
You'll maximize your tool storage space and efficiency by grouping similar tools together, a strategy that involves purging unnecessary items and categorizing the rest into logical subgroups. This approach helps you identify what you have, what you need, and what you can get rid of.
Start by dividing your tools into broad categories, such as hand tools, power tools, and accessories. Then, break these categories down further into tool families, like wrenches, pliers, and screwdrivers. This will allow you to see which tools are related and should be stored together.
Consider a task-based approach to tool grouping as well. Store tools that are used for specific tasks, like woodworking or automotive repair, in designated areas. This will save you time and effort when working on projects.
Assign a Home for Each Tool
Designate a specific location for each tool, ensuring that everything has a designated spot where it's easily accessible and can be quickly retrieved when needed. This way, you'll avoid wasting time searching for misplaced tools and reduce frustration in the process.
By assigning a home for each tool, you're creating a system that promotes efficiency and productivity.
Here are some benefits of assigning a home for each tool:
-
Tool Shadowing: A designated spot for each tool helps create a mental map, making it easier to recall where each tool is located.
-
Habit Formation: Consistently returning tools to their assigned spot creates a habit, making it second nature to put things back in their place.
-
Reduced Clutter: Assigning a home for each tool prevents clutter from building up, keeping your workspace organized and tidy.
- Increased Accountability: When each tool has a designated spot, you're more likely to take responsibility for maintaining that space and keeping it organized.
Use Vertical Storage Space
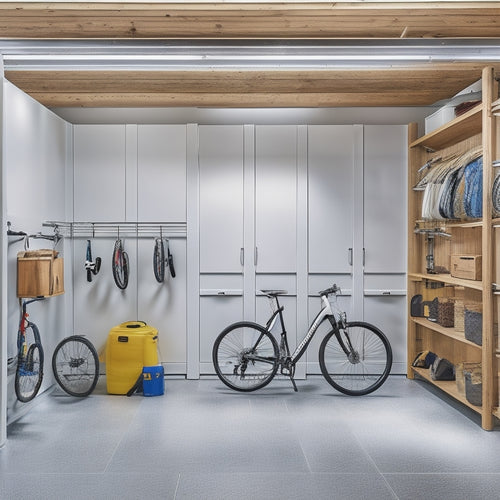
Maximize your tool storage capacity by utilizing vertical space, which is often overlooked in many workshops and garages, allowing you to store more tools in a smaller footprint. You can achieve this by installing wall-mounted shelves, hooks, or pegboards that go up to the ceiling. This won't only save floor space but also keep your tools organized and within reach.
Make sure to maximize your shelves by using stackable bins, baskets, or containers to store smaller items like screws, nuts, and bolts.
Don't forget about corner utilization! Install corner shelves or carousels to make the most of the often-wasted space in the corners of your workshop or garage. This is especially useful for storing items like power tools, sanders, or other bulky equipment.
By using vertical storage space, you'll be able to find what you need quickly and easily, reducing frustration and increasing productivity. Remember to keep your most frequently used tools at eye level, and reserve the higher and lower shelves for less frequently used items.
With a little creativity, you can turn your workshop or garage into a highly functional and efficient space.
Label and Sign Everything
By assigning a clear label or sign to each storage location, tool, and category, you create a visual system that instantly communicates where items belong and makes it easy to find what you need in a flash. This simple yet effective strategy is rooted in labeling psychology, which suggests that our brains process visual information more efficiently than text.
By using clear and concise labels, you can reduce the time spent searching for tools and increase productivity.
Here are some essential labeling and signage standards to keep in mind:
-
Use a consistent labeling system: Choose a specific font, color scheme, and size to create a cohesive look throughout your storage space.
-
Keep labels concise: Use short descriptions or abbreviations to guarantee labels are easy to read and understand.
-
Use high-contrast colors: Select colors that stand out against the surrounding environment to make labels easy to spot.
- Label categories, not individual items: Group similar tools or supplies together and label the category, rather than each individual item.
Implement a Maintenance Routine
Set aside a specific time each week to perform routine maintenance tasks, such as cleaning, inspecting, and restocking your tool storage area. This will help you stay on top of your organization and prevent clutter from building up. Create a schedule and set reminders for yourself, so you don't forget. You can even automate some tasks, like ordering replacement supplies or scheduling tool maintenance, to save time and effort.
During your maintenance routine, take inventory of your tools and supplies, and make a note of anything that needs to be replaced or repaired. Clean and dust your tool storage area, and make sure everything is still organized and easily accessible.
Take a few minutes to inspect your tools for damage or wear, and set aside any that need to be repaired or replaced.
Adapt to Changing Needs
As your project needs evolve, you'll find that your tool storage and organization system must adapt to accommodate new tools, supplies, and workflows. This requires a flexibility mindset, where you're open to adjusting your system to meet changing demands. Scalable systems are key here, as they allow you to easily add or remove components as needed.
To achieve this adaptability, consider the following strategies:
-
Modular storage: Use storage units that can be easily rearranged or added to, such as stackable bins or modular shelving.
-
Labeling and signage: Clearly label your storage units and tools, making it easy to identify what's inside and where items are located.
-
Tool categorization: Group similar tools together, making it easier to find what you need when you need it.
- Regular assessments: Regularly assess your tool storage and organization system, identifying areas for improvement and making adjustments as needed.
Frequently Asked Questions
Can I Use Old Pallets for DIY Tool Storage Solutions?
You can totally repurpose old pallets for DIY tool storage solutions - just disassemble, clean, and refinish them to fit your style. A pallet makeover can add a touch of rustic decor to your workshop or garage.
How Do I Store Tools With Cords and Hoses Efficiently?
"You're right, tangled cords and hoses can be a real pain! To store them efficiently, you'll want to use cord wraps to keep cords organized and hose reels to neatly wind up hoses, freeing up valuable space."
Are Tool Chests and Cabinets Worth the Investment?
"When considering tool chests and cabinets, you'll weigh space constraints and budget considerations. Ask yourself: will the investment free up floor space, reduce clutter, and boost productivity, making it worth the cost for your unique needs?"
Can I Repurpose Household Items for Tool Organization?
"Just like a master chef repurposes kitchen scraps to create a gourmet meal, you can breathe new life into household items to organize your tools. Think Mason jars for small parts and binder clips for cord management - it's time to get creative and resourceful!"
How Often Should I Audit My Tool Storage System?
You should audit your tool storage system regularly, ideally every 3-6 months, to maintain peak organization and ensure you're not accumulating clutter, based on your tool frequency and evolving storage habits.
Related Posts
-

Adjustable Modular Shoe Racks for Versatility
Adjustable modular shoe racks are your go-to solution for versatile and organized footwear storage. These racks maxim...
-

Storage Bins for Shelves to Keep Clutter at Bay
You're looking for a way to keep your shelves organized and clutter-free, and storage bins are the perfect solution t...
-
Modular Garage Organizers for Clutter-Free Spaces
You're likely wasting precious space in your garage due to inefficient storage and poor organization, but modular gar...


