Simplify Your Workspace With DIY Pegboard Installation
Share
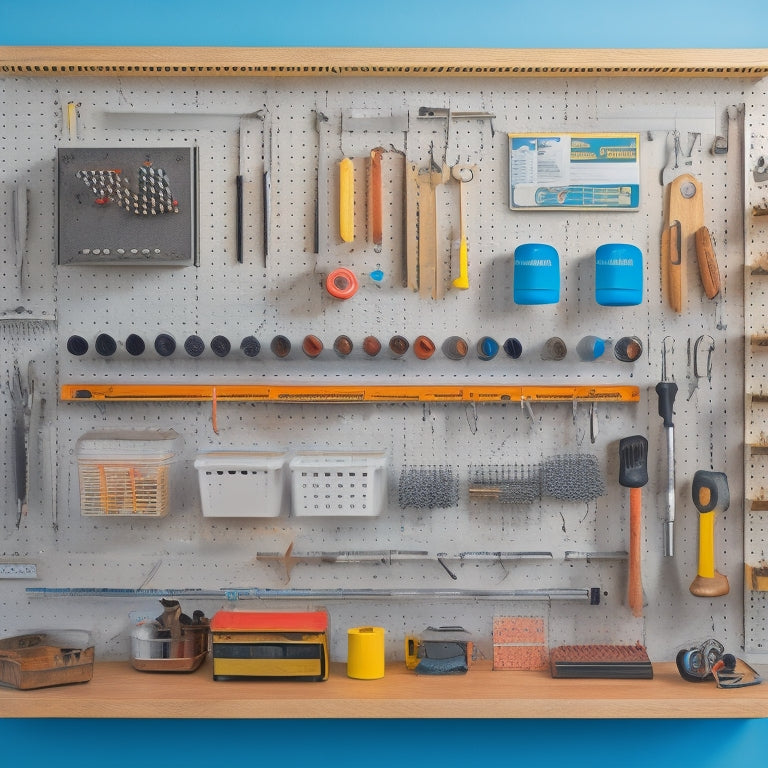
You'll start by planning your pegboard layout, determining the right size based on your space measurements and visualizing your workspace flow. Prioritize frequently used tools for easy access and categorize them into groups. Next, select the right materials and accessories, choosing hooks that fit your tool weights and types. Cut and assemble your pegboard, ensuring precise cuts and a professional finish. Install hooks and accessories strategically, placing frequently used items at eye level. Now, take it to the next level by organizing your tools and accessories with labeling, cord management, and zoning – and discover the secrets to maximizing your pegboard's storage potential.
Key Takeaways
• Determine pegboard size based on space measurements and visualize workspace flow for efficient movement.
• Prioritize frequently used tools for easy access and categorize them into groups like hand tools and power tools.
• Choose the right pegboard panel material, hole pattern, and hooks considering weight capacity, item type, and durability.
• Strategically place hooks and accessories for efficient storage, considering weight and size of items, and customize as needed.
• Reserve prime real estate for frequently used tools and supplies, and utilize storage hacks like bins, baskets, and hooks to maximize storage space.
Planning Your Pegboard Layout
Determine the best pegboard size and layout by measuring the space where you'll install it and considering the tools and accessories you'll hang. Visualize how you'll move around your workspace and prioritize the tools you use most frequently. This will help you achieve ideal workspace flow.
Next, categorize your tools and accessories into groups, such as hand tools, power tools, and supplies. This task prioritization will enable you to allocate the most accessible areas of the pegboard to your most frequently used items.
Now, sketch out a rough layout, taking into account the size and shape of each item. Consider the weight and size of heavier tools, ensuring they're placed near the bottom or middle of the board to maintain balance. Don't forget to leave some empty space for future additions or adjustments.
With a clear plan in place, you'll be ready to move on to the next step: choosing the right materials for your pegboard.
Choosing the Right Materials
As you prepare to install your pegboard, you'll need to select the appropriate materials to guarantee a sturdy and functional system.
You'll start by deciding on a pegboard panel that suits your needs, considering factors like size, material, and hole pattern.
Next, you'll choose the perfect pegboard hooks to hang your tools and accessories, taking into account the weight capacity and type of items you'll be storing.
Pegboard Panel Options
With your pegboard design in mind, you'll need to select a panel that suits your requirements, and there are several options to contemplate when choosing the right materials. Panel materials and aesthetic considerations are important in creating a functional and visually appealing pegboard.
Here are some popular pegboard panel options to think about:
| Panel Material | Aesthetic Considerations |
|---|---|
| Medium-density fiberboard (MDF) | Affordable, smooth finish, and easy to paint |
| Plywood | Natural wood grain, durable, and can be stained or painted |
| Hardboard | Dense, flat surface, and resistant to wear and tear |
| Plastic | Water-resistant, easy to clean, and modern appearance |
When selecting a panel material, consider factors such as durability, moisture resistance, and aesthetic appeal. For instance, if you're planning to install your pegboard in a humid environment, plastic or hardboard might be a better option. On the other hand, if you prefer a natural look, plywood could be the way to go. By taking these factors into account, you'll be able to choose a panel that meets your needs and complements your workspace.
Pegboard Hook Selection
You've chosen your pegboard panel, and now it's time to select the right hooks to pair with it, as the type of hook you choose will greatly impact the overall functionality and organization of your pegboard.
This is where your hook preferences come into play. Think about the types of items you'll be hanging on your pegboard and the weight they'll hold. Do you need sturdy metal hooks or lighter plastic ones? Do you prefer hooks with a rounded or flat edge?
When it comes to customization options, you've got plenty to choose from:
-
Single-prong hooks: Great for hanging small items like tools or accessories
-
Double-prong hooks: Perfect for holding larger or heavier items like bins or baskets
-
Adjustable hooks: Allow you to customize the hook's width to fit different sizes of items
- Screw-in hooks: Provide extra security and stability for heavy loads
Cutting and Assembling Pegboard
Measure the pegboard panels against your wall space, marking the desired dimensions with a pencil to guarantee a precise fit before cutting. This guarantees pegboard precision, saving you time and effort in the long run.
Next, don your safety gear, including gloves and safety glasses, to prioritize cutting safety. Using a circular saw or jigsaw, carefully cut along the marked lines, applying gentle to moderate pressure. For a clean cut, maintain a steady pace and avoid applying too much pressure, which can cause the saw to kickback.
Once you've cut your pegboard panels to size, it's time to assemble them. If you're using multiple panels, align them on a flat surface, ensuring the holes are perfectly aligned. Use wood screws or pegboard connectors to secure the panels together, creating a sturdy and even surface.
Take your time, double-checking your work as you go, to ensure a professional-looking finish. With your pegboard assembled, you're one step closer to a simplified workspace that boosts productivity and organization.
Installing Hooks and Accessories
Now it's crucial to add functionality to your pegboard by selecting and installing hooks and accessories that fit your specific needs, ensuring a tailored organization system that streamlines your workflow.
With your pegboard assembled, it's important to strategically place hooks and accessories to maximize storage and efficiency.
When it comes to hook placement, consider the weight and size of the items you'll be hanging. Heavier items require sturdier hooks, while smaller items can be stored on smaller hooks.
You can also customize your accessories to fit your specific needs. For instance, you can add a bin or basket to store small parts or attach a reel to manage cords and cables.
Here are some tips to keep in mind:
- Place frequently used items at eye level for easy access
- Group similar items together for efficient retrieval
- Leave enough space between hooks for easy hanging and removal
- Consider adding a label or sign to identify what's stored in each area
Organizing Your Tools and Accessories
Now that your pegboard is set up, it's time to organize your tools and accessories. You'll want to identify the tools you use most frequently and assign a designated spot for each one, ensuring they're easily accessible and visually pleasing.
As you begin to arrange your tools, consider the storage solutions, essential holders, and workspace design that will maximize your pegboard's efficiency.
Tool Storage Solutions
Your workshop's tool storage system is only as strong as its weakest link, and a disorganized mess of wrenches, pliers, and screwdrivers can quickly bring your productivity to a grinding halt. To avoid this, you need to implement effective tool storage solutions that keep your tools within easy reach and organized.
Here are some essential tool storage solutions to explore:
-
Cord management: Use cord organizers or zip ties to keep cords and cables tidy, preventing tangles and knots that can waste your time.
-
Corner utilization: Maximize the often-wasted space in corners by installing corner shelves, baskets, or carousels to store small tools and accessories.
-
Tool-specific storage: Designate specific storage spaces for specific tools, such as a pegboard for hanging tools or a toolbox for storing small parts.
- Labeling and signage: Use labels and signs to identify what's stored in each location, making it easy to find what you need at a glance.
Essential Accessory Holders
Seven essential accessory holders can help you organize your tools and accessories, ensuring that everything has a designated place in your workshop. Start by installing a cable management system to keep cords and wires tidy. This won't only improve desk ergonomics but also reduce clutter.
Next, add a tray or bin for small items like screws, nuts, and bolts. A magnetic strip is perfect for holding small metal tools, while a hook or clip can store frequently used items like pliers or scissors.
Consider adding a basket or container for larger items like sandpaper or cleaning supplies. A pegboard-mounted shelf can hold small power tools or equipment.
Don't forget to include a holder for your most-used accessories, such as a level or tape measure. By incorporating these essential accessory holders, you'll be able to quickly find what you need, saving you time and frustration. With everything in its place, you'll be able to focus on your projects, not searching for misplaced tools.
Efficient Workspace Design
To maximize your workshop's efficiency, design the layout by grouping similar tools and accessories together, allocating dedicated zones for specific tasks or projects. This will help you navigate your space with ease, reducing time wasted searching for misplaced items.
As you plan your ergonomic layout, consider the following key aspects:
-
Accessibility: Place frequently used tools within easy reach to minimize stretching and straining.
-
Visibility: Position your pegboard in a prominent location, ensuring you can quickly scan your available tools and accessories.
-
Flexibility: Incorporate sustainable furniture with adjustable shelves and hooks to accommodate changing project needs.
- Personalization: Tailor your workspace to your unique preferences and work style, ensuring a comfortable and productive environment.
Tips for Maximizing Storage Space
Maximize your pegboard's storage potential by grouping similar items together, reserving prime real estate for frequently used tools and supplies. This strategic approach guarantees you can quickly access what you need, when you need it.
Next, utilize storage hacks like bins, baskets, and hooks to keep smaller items organized and out of the way. Consider corner utilization by installing a corner pegboard or adding a corner shelf to maximize dead space.
Visualize your workspace as a grid, dividing it into zones for specific tasks or projects. This helps you allocate storage space effectively and maintain a clutter-free environment. For example, designate a zone for painting supplies, another for woodworking tools, and so on.
As you install your pegboard, think about the workflow and movement patterns in your workspace. Position your most frequently used items at eye level or within easy reach, while less-used items can be stored higher or lower.
Frequently Asked Questions
Can I Install a Pegboard on a Curved or Angled Surface?
You can install a pegboard on a curved surface, but you'll need adaptive designs, like custom-cut panels or flexible pegboard materials, to guarantee a secure fit; measure carefully and use spacers or shims to accommodate the curve.
How Do I Prevent Pegboard Hooks From Falling off Over Time?
To prevent pegboard hooks from falling off, you'll want to guarantee proper hook tension by screwing them in at a 90-degree angle. Also, apply a strong adhesive, like epoxy or hot glue, to boost adhesive strength and keep hooks securely in place.
Are Pegboards Suitable for Storing Heavy or Bulky Tools?
You'll want to take into account the weight capacity of your pegboard and make sure load distribution is even to store heavy or bulky tools. Check the manufacturer's specs, then visualize and test the setup to guarantee a secure hold.
Can I Customize Pegboard Hooks to Fit Unique Tool Shapes?
You're like a master puzzle solver, fitting unique tool shapes into custom hooks. Yes, you can design your own hooks using various Hook Materials, like aluminum or steel, to craft Custom Shapes that snugly fit your tools, ensuring a secure hold.
Will a Pegboard Installation Damage My Wall or Surrounding Surfaces?
When you install a pegboard, you'll prevent damaging your wall or surrounding surfaces by using wall anchors specifically designed for your wall type, and taking extra precautions for surface protection, like laying down a drop cloth, to guarantee a smooth process.
Related Posts
-

10 Essential Steps for Small Parts Bin Storage
To optimize your small parts bin storage, start by defining your storage needs and goals, considering factors like av...
-

What Size Rolling Storage Bin Do I Need
To determine the ideal size of your rolling storage bin, you'll need to measure your storage space accurately, consid...
-

Top 5 Small Tool Organizers for Your Workshop
You're looking to optimize your workshop's efficiency with high-quality small tool organizers. Compact storage soluti...


