Simple Workbench Organizer Solutions to Get Your Tools in Order
Share
You're tired of wasting time searching for misplaced tools and struggling to stay focused in a cluttered workspace. Get your tools in order with simple workbench organizer solutions! Start by decluttering and cleaning your workbench, then designate zones for specific tasks and tools. Employ essential tool storage ideas like toolboxes, pegboards, and bins to keep tools easily accessible. Maximize vertical storage by using pegboards, wall-mounted racks, and tiered shelves. Next, customize your workbench layout to optimize workflow and tool placement. You'll be on your way to a more efficient and organized workspace - and there's even more to investigate to take your organization to the next level!
Key Takeaways
- Declutter your workbench by cleaning as you go, designating zones, and scheduling deep cleans to maintain a safe and efficient workspace.
- Utilize tool storage solutions like toolboxes, pegboards, and bins to keep tools organized and easily accessible.
- Maximize storage space by using vertical storage, optimizing corner utilization, and employing hidden storage spaces.
- Customize your workbench layout to enhance productivity and safety by placing frequently used tools within easy reach and designating specific zones for tasks.
- Implement cord and cable management strategies, such as using cable clips and cord wraps, to keep cords organized and untangled.
Decluttering Your Workbench Space
Having a cluttered workbench can lead to wasted time, frustration, and even safety hazards. You know it's time to take action when you can't find the tool you need or when you're constantly tripping over cords and wires.
To get your workspace back in order, start by clearing everything off your workbench. Sort items into categories, like tools, materials, and trash. Be ruthless – if you haven't used it in the past year, consider getting rid of it.
Next, implement some tool decluttering techniques. Designate a specific spot for each tool, and make sure it's easily accessible. Use workspace organization tips like categorizing tools by function or frequency of use.
Label each section so you can quickly find what you need. Consider using a pegboard or a tool organizer to maximize vertical storage and keep your work surface clear.
Essential Tool Storage Ideas
Sort out your tool storage by investing in a few essential solutions that'll keep your workspace organized and your tools within easy reach.
You'll be able to find what you need quickly, reducing frustration and increasing productivity.
To get started, consider the following essential tool storage ideas:
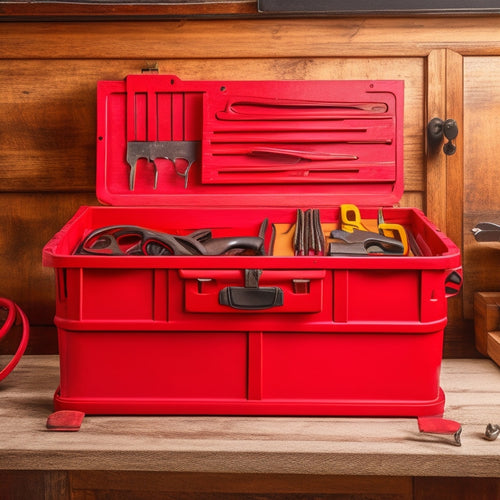
- Toolboxes and chests: Store small to medium-sized tools like wrenches, pliers, and screwdrivers in labeled toolboxes or chests.
These can be made of metal, plastic, or wood, and come in various sizes to fit your needs.
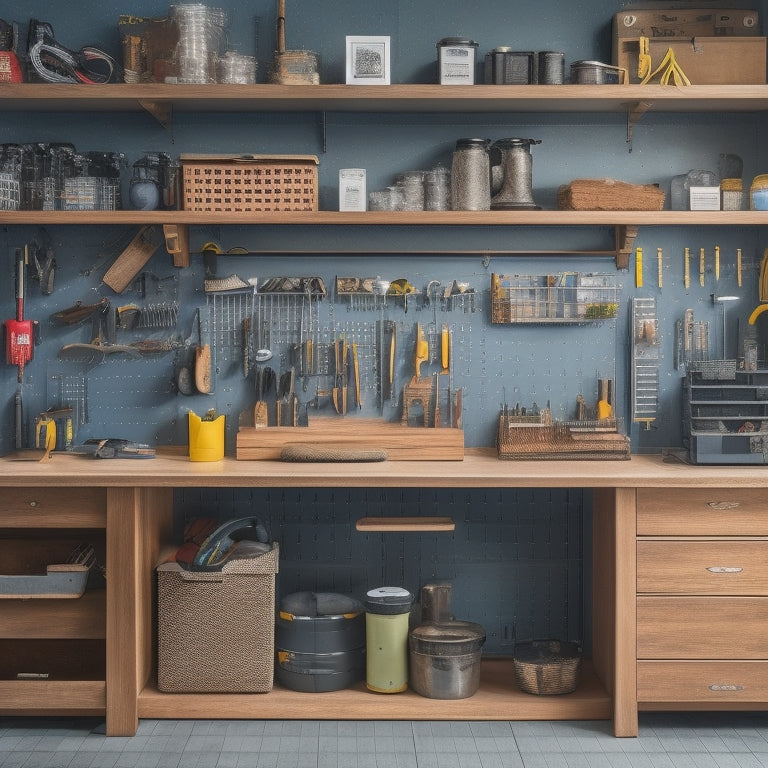
- Pegboards and hooks: Hang frequently used tools like hammers, saws, and drills on pegboards or hooks.
This keeps them organized, visible, and easily accessible. You can customize your pegboard with different tool types and storage materials.
- Bins and containers: Use bins and containers to store small parts, fasteners, and other miscellaneous items.
Label each bin so you can quickly identify what's inside. This helps keep your workbench surface clear of clutter and prevents lost parts.
Maximizing Vertical Storage
Your workshop's vertical space is prime real estate for storing tools and supplies, freeing up precious floor and workbench space. By maximizing this space, you'll create a more efficient and organized workspace.
Consider pegboard solutions, which allow you to hang frequently used tools and accessories within easy reach. Wall-mounted racks and vertical bins can store less frequently used items, keeping them out of the way but still accessible. Hanging hooks and magnetic strips provide additional storage for items like cords, hoses, and small metal parts.
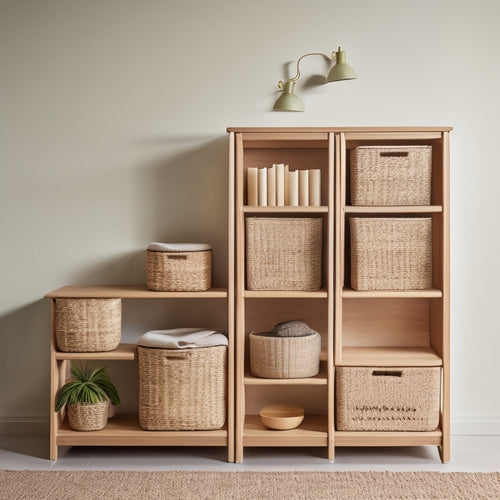
Tiered shelves and ladder shelves offer additional storage options, while pegboard accessories like bins, baskets, and trays help keep small items organized.
Don't forget about ceiling storage, which can be used to store infrequently used items like seasonal decorations or out-of-season tools. To guarantee you can find what you need quickly, use tool shadowing, where you outline the shape of a tool on a pegboard or storage bin.
DIY Workbench Organizer Plans
You're ready to take your workbench organization to the next level with DIY plans that cater to your specific needs.
You'll create tool holder designs that keep your most-used tools within easy reach, modular storage systems that adapt to your changing projects, and customizable shelving units that maximize your workbench's real estate.
Tool Holder Designs
A cluttered workbench can be overwhelming, making it difficult to stay focused on the task at hand. That's why it's crucial to implement tool holder designs that keep your tools organized and within reach.
To get started, consider the following DIY workbench organizer plans:
-
Magnetic Tool Holders: Attach magnetic strips to your workbench or wall to store metal tools, such as wrenches, pliers, and screwdrivers.
-
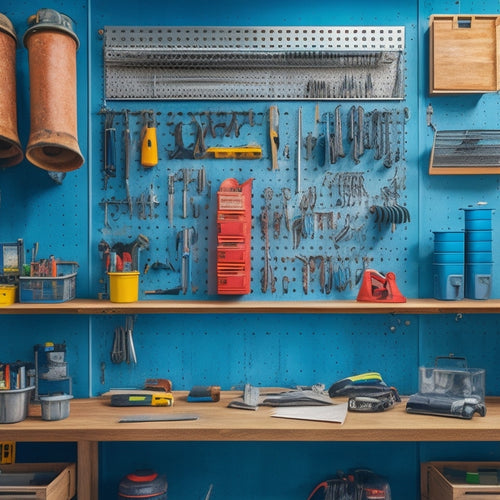
Pegboard Designs: Create a pegboard on your wall or workbench using a pegboard panel and hooks to hang tools like hammers, saws, and drills.
-
Wall Mounted Racks: Install wall-mounted racks to store long tools like levels, pipes, and hoses, keeping them off the floor and out of the way.
These tool holder designs will help you maintain a safe and organized workbench. You'll be able to find what you need quickly, reducing frustration and increasing productivity.
Additionally, consider incorporating other tool organization solutions, such as tool chest organization, tool cabinet features, bucket storage solutions, tool belt options, hanging tool organizers, clamp storage ideas, and toolbox innovations to create a thorough workbench organizer system.
Modular Storage Systems
Modular storage systems offer a flexible and customizable solution for DIY workbench organizers. You can create a customized storage system that meets your specific needs by combining different modules. This approach allows you to add or remove modules as your tool collection grows or changes.
Modular shelving is a great way to start. You can install shelves at different heights to accommodate tools of various sizes. Stackable bins are another essential component of a modular storage system. Label each bin so you can quickly identify what's inside, and store them on the shelves or on the workbench itself. This keeps frequently used tools within easy reach while keeping less frequently used items out of the way.
When setting up your modular storage system, remember to prioritize safety. Avoid overloading shelves or bins, as this can lead to accidents. Keep heavy tools on lower shelves or in bins with sturdy handles to prevent them from falling.
With a well-planned modular storage system, you'll be able to find what you need quickly and work more efficiently.
Customizable Shelving Units
Build your ideal workbench organizer by designing customizable shelving units that cater to your specific needs. With shelving materials ranging from durable steel to versatile wood, you can create a system that suits your workshop's aesthetic and functional requirements.
Adjustable heights guarantee that your tools are always within easy reach, while decorative finishes allow you to match your shelving units with your existing workbench design.
To maximize space efficiency, consider the following design elements:
-
Modular designs: Break down large shelving units into smaller, modular components to create flexible configurations that adapt to your changing tool collection.
-
Weight capacity: Verify that your shelving units can support the weight of your tools and equipment, avoiding any risk of collapse or damage.
-
Installation techniques: Choose installation methods that provide stability and ease of assembly, such as snap-together systems or wall-mounted designs.
Customizing Your Workbench Layout
You're now ready to customize your workbench layout to maximize productivity.
To do this, you'll need to optimize your workspace flow, strategically place your tools, and make the most of your corner spaces.
Optimize Your Workspace Flow
Frequently, a cluttered workspace hinders productivity, leading to wasted time and energy.
It's crucial to enhance your workspace flow to guarantee you're working efficiently and safely. By customizing your workbench layout, you can elevate your productivity and reduce the risk of accidents.
To achieve ideal workspace flow, consider the following:
-
Prioritize tool accessibility: Place frequently used tools within easy reach to minimize stretching and bending. This will reduce fatigue and prevent injuries.
-
Confirm workspace ergonomics: Position your workbench at a comfortable height, and organize your tools to promote good posture. This will prevent strain on your back, neck, and shoulders.
-
Designate zones for specific tasks: Divide your workbench into zones for different tasks, such as assembly, measurement, or storage. This will help you stay focused and avoid clutter.
Tool Placement Strategy
Three essential zones to evaluate when customizing your workbench layout are the primary workspace, secondary workspace, and storage area. Each zone serves a specific purpose, and optimizing them will improve your tool accessibility and overall workflow.
In the primary workspace, place your most frequently used tools and materials within easy reach. This will minimize movement and reduce fatigue.
Group similar tools together, such as all your hand saws or drill bits, to create a logical and efficient layout.
In the secondary workspace, allocate space for less frequently used tools or tasks that require more room, like assembling or repairing. This zone should still be easily accessible, but not as prominent as the primary workspace.
Efficient Corner Utilization
Customizing your workbench layout requires maximizing every available inch, especially in corners where dead space can easily accumulate.
These areas often become cluttered and disorganized, making it difficult to find what you need when you need it. By utilizing corner space efficiently, you can create a more organized and productive workspace.
Here are three efficient corner utilization solutions to contemplate:
-
Corner Shelves and Pegboards: Install corner shelves or pegboards to hang frequently used items like tools, accessories, or bins. This keeps them off the floor and within easy reach, freeing up useful workspace.
-
Corner Cabinets and Drawers: Add corner cabinets or drawers to store smaller items like fasteners, fittings, or small tools. These can be customized to fit your specific needs and keep items out of sight.
-
Corner Racks and Bins: Use corner racks or bins to store larger items like power tools, equipment, or materials. Label each bin to guarantee easy identification and retrieval.
Labeling and Signage Tips
A well-organized workbench relies heavily on a labeling system that helps you quickly identify where tools and materials are stored. This saves you time and reduces frustration when searching for a specific item.
To create an effective labeling system, consider the following tips:
| Label Type | Font Selection | Color Coding |
|---|---|---|
| Tool labels | Bold, sans-serif font (e.g., Arial) | Use a consistent color scheme (e.g., blue for hand tools, red for power tools) |
| Material labels | Italic, serif font (e.g., Times New Roman) | Use a different color for each material type (e.g., wood, metal, plastic) |
| Category labels | Uppercase, bold font (e.g., Impact) | Use a bright, contrasting color to draw attention to categories (e.g., safety equipment, fasteners) |
| Shelf labels | Large, clear font (e.g., Helvetica) | Use a unique color for each shelf or section |
| Bin labels | Easy-to-read font (e.g., Calibri) | Use a color that matches the contents of the bin (e.g., a bin for nuts and bolts could be labeled with a silver or gray marker) |
Remember to keep your labels concise, clear, and easy to read from a distance. By implementing a thoughtful labeling system, you'll be able to locate what you need quickly and efficiently, making your workbench a safer and more productive space.
Utilizing Hidden Storage Spaces
You can reclaim precious workbench space by utilizing hidden storage areas, such as the space behind your bench or under shelves, to stow away infrequently used tools and supplies.
Behind-the-bench storage solutions, like pegboards or slatwalls, can keep items within easy reach while keeping the main work surface clear.
Look for opportunities to create under-shelf compartments to store items like bins, baskets, or small tools.
Behind the Bench Storage
Frequently, the area behind your workbench remains an untapped resource for storage, leaving precious space wasted. By utilizing this often-overlooked area, you can optimize your workspace ergonomics, improve tool access, and enhance workflow efficiency.
To maximize behind-the-bench storage, consider the following solutions:
-
Install a pegboard: Mount a pegboard on the wall behind your workbench and hang frequently used tools, such as hammers, screwdrivers, and pliers, within easy reach. This keeps them organized, visible, and accessible, reducing the time spent searching for tools.
-
Use storage containers: Place storage bins, baskets, or shelves behind your workbench to store materials, bench accessories, and infrequently used tools. Label each container to guarantee you can quickly find what you need.
-
Add a shelf or cabinet: Install a shelf or cabinet behind your workbench to store larger items, such as power tools, material handling equipment, or storage solutions. This helps maintain a clutter-free workspace, promotes tool longevity, and reduces space constraints.
Under Shelf Compartments
Under Shelf Compartments (Utilizing Hidden Storage Spaces)
Since every inch of your workbench counts, why not employ the often-overlooked space beneath your shelves to maximize storage capacity? You can install under shelf baskets to store small items like screws, nuts, and bolts, keeping them organized and within reach.
Label each basket so you can quickly identify what's inside.
Magnetic tool strips are another great option for under shelf storage. Attach them to the underside of your shelves and hang frequently used tools like pliers, wrenches, or hammers. This keeps your work surface clear and reduces the risk of tripping or slipping hazards.
You can also use adhesive-backed hooks to hang cords, cables, or other items that tend to clutter your workspace.
Cord and Cable Management
A cluttered workspace is often a tangled mess of cords and cables, making it difficult to focus on the task at hand. To combat this, you need a solid cord and cable management strategy. This won't only improve your productivity but also reduce the risk of electrical shock, tripping hazards, and damaged equipment.
Here are three simple solutions to get your cords and cables under control:
-
Use cable clips and cord wraps to keep frequently used cords organized and untangled. Label each cord to guarantee you can quickly identify which one goes with which tool.
-
Implement power strip management by designating a specific area for your power strips and using wire baskets or cable raceways to keep cords routed neatly. This will prevent overheating and reduce the risk of electrical fires.
-
Create a charging station with designated storage for extension cords, cable ties, and other accessories. This will keep your workspace clutter-free and make it easy to find what you need when you need it.
Workbench Drawer Organization
Now that you've got your cords and cables under control, it's time to tackle the often-overlooked workbench drawers.
These hidden spaces can quickly become cluttered with tools, hardware, and other miscellaneous items, making it difficult to find what you need when you need it.
To get your workbench drawers organized, start by removing everything from the drawers and sorting items into categories.
This will give you a clear view of what you have and how you can best organize it.
Next, install drawer dividers to separate tools and hardware into distinct compartments.
This will prevent items from getting jumbled together and make it easier to find what you're looking for.
Consider using tool trays or small containers to store small items like screws, nails, or drill bits.
These can be placed in the drawers or attached to the workbench itself.
By implementing these simple solutions, you'll be able to quickly find the tools and materials you need, saving you time and reducing frustration.
A well-organized workbench drawer is an essential step in maintaining a safe and efficient workspace.
Keeping Your Workbench Clean
By the end of a long project, your workbench can resemble a war zone, with tools and materials scattered everywhere.
This chaos can lead to lost productivity, increased risk of accidents, and wasted time searching for misplaced items. To avoid this, make workspace maintenance a habit.
Here's how you can keep your workbench clean:
-
Clean as you go: Set aside a few minutes after each task to put away tools and materials. This prevents clutter from building up and saves time in the long run.
-
Designate zones: Divide your workbench into areas for specific tasks, such as a zone for tool cleaning and another for material storage. This organization helps you stay focused and maintain a sense of control.
-
Schedule regular deep cleans: Set a reminder to thoroughly clean your workbench every week or two. This involves wiping down surfaces, reorganizing tools, and disposing of waste.
Frequently Asked Questions
Can I Repurpose Old Furniture as a Workbench Organizer?
You can upcycle old furniture into a workbench organizer by applying repurposing techniques, considering the durability of furniture materials, and ensuring stability to prevent accidents, allowing you to create a functional and safe workspace.
How Often Should I Clean and Maintain My Workbench?
You're like a skilled chef, prepping for a culinary show; your workbench is your kitchen, and cleanliness is key! Clean your workbench daily, wiping down surfaces and tools, and perform deep maintenance weekly to prevent rust and guarantee a safe working environment.
Are Workbench Organizers Suitable for Small Workspaces?
You can totally fit workbench organizers in small workspaces by opting for compact storage solutions and efficient layouts that maximize your space, ensuring a safe and clutter-free area to work in.
Can I Customize a Workbench Organizer to Fit My Specific Needs?
You're not limited to off-the-shelf designs; instead, you can create custom storage solutions that cater to your unique needs, ensuring tool accessibility tips like designated spaces for frequently used items and adjustable compartments for peak workflow efficiency.
Are Workbench Organizers Worth the Investment for Casual Diyers?
You'll find that investing in a workbench organizer is worth it, even as a casual DIYer, as it enhances tool efficiency, streamlines your DIY projects, and reduces safety risks by keeping your workspace clutter-free and organized.
Conclusion
You've finally achieved a clutter-free workbench! With these simple organizer solutions, you'll be more efficient and productive than ever. Did you know that a cluttered workspace can decrease productivity by up to 40%? By implementing these ideas, you'll not only regain precious space but also enhance your work quality. Stay organized, stay focused, and watch your projects thrive!
Related Posts
-

Open Storage Bins for Shelving Units
You need open storage bins that integrate seamlessly with your shelving units to boost your organization, productivit...
-

Portable Tool Chest Essentials
When stocking your portable tool chest, you'll want to prioritize essential hand tools like hammers, tape measures, a...
-

Custom Pegboard Storage for Your Workshop
You're looking to create a custom pegboard storage system that maximizes your workshop's space, enhances productivity...


