Pegboard Perfection: Boosting Tool Storage Efficiency
You've invested in your tool collection, but a cluttered pegboard can waste your time and decrease productivity. To achieve pegboard perfection, start by categorizing tools based on frequency, function, and size. Color-code tools for quick identification and prioritize space for frequently used ones. Choose the right hooks and accessories, considering size, strength, and weight capacity. Maximize vertical storage space with double-layered pegboards, tiered hooks, and rotating bins. Label and sign your pegboard strategically, using clear signage and visual cues. By implementing these strategies, you'll be on your way to boosting tool storage efficiency and unleashing your pegboard's full potential.
Key Takeaways
• Categorize tools by frequency, function, and size to optimize pegboard layout and boost storage efficiency.
• Select the right hooks and accessories based on tool size, weight, and storage needs to maximize vertical space.
• Implement a labeling and signage strategy with clear visuals, color coding, and unique displays to facilitate easy tool retrieval.
• Utilize space-saving solutions like double-layered pegboards, tiered hooks, and magnetic strips to increase storage capacity.
• Maintain a clutter-free board by grouping tools by function, designating areas for frequently used tools, and reserving less accessible areas for infrequently used items.
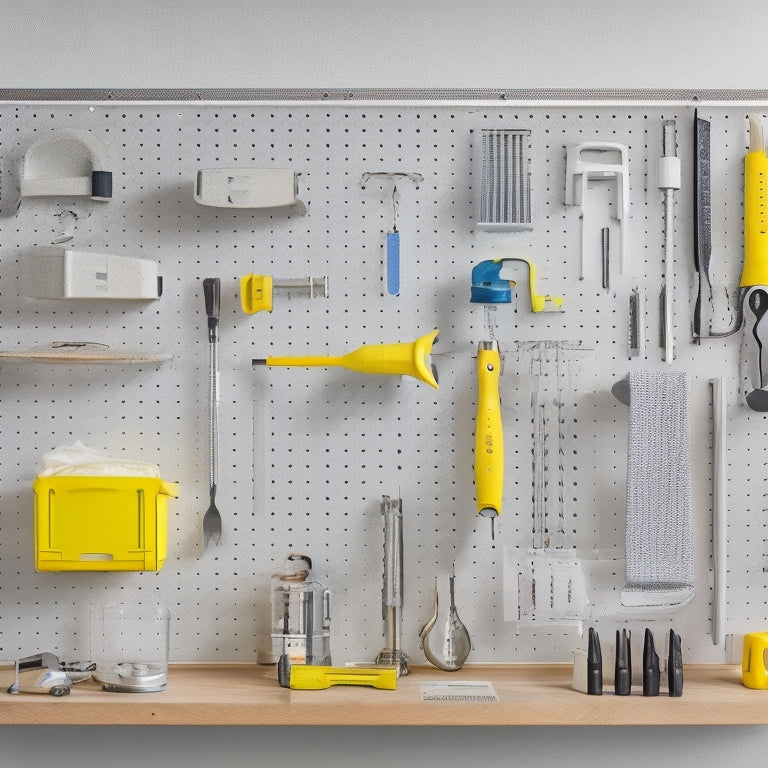
Optimizing Your Pegboard Layout
To maximize your pegboard's storage capacity and efficiency, start by categorizing your tools and accessories into groups based on frequency of use, function, and size. This will help you visualize how you can optimize your pegboard layout.
Next, consider color-coding your tools and accessories to further enhance your tool organization. Assign a specific color to each category, such as red for power tools, blue for hand tools, and yellow for measuring devices. This visual system will enable you to quickly identify the location of each tool, saving you time and reducing frustration.
When designing your pegboard layout, prioritize space optimization. Reserve the most accessible areas for your most frequently used tools, and allocate less accessible spaces for less frequently used items. Consider the size and shape of each tool when deciding its placement, ensuring that larger items are stored near the bottom to prevent overcrowding.
Choosing the Right Hooks
When selecting hooks for your pegboard, you'll want to evaluate three critical factors:
the type of hook, its size and strength, and the material's durability.
You'll need to determine which hook type - such as single-prong, double-prong, or screw-in - best fits your specific storage needs.
Hook Types Matter
Your pegboard's functionality and overall organization depend on selecting the right hooks for the specific tools and accessories you plan to hang. With such a wide array of hook varieties available, choosing the ones that best suit your needs is crucial. Here are some organization tips you cannot overlook:
| Hook Type | Ideal For |
|---|---|
| Single-prong hooks | Small tools like pliers, screwdrivers, and wrenches |
| Double-prong hooks | Larger tools like hammers, saws, and drills |
| Adhesive-backed hooks | Delicate or hard-to-hang items like wire, cable ties, or small parts |
When using hooks, it is vital to customize them to meet your specific requirements. For example, you can affix a small bin or tray to a hook to store small parts or fasteners. You can also utilize hooks with built-in dividers to segregate similar tools or accessories. By selecting the appropriate hooks and tailoring them to your needs, you can optimize your pegboard's storage capacity and maintain a well-organized and efficient workspace. Remember, the essential element for pegboard perfection is picking the right hooks for the task.
Size and Strength
You must consider the size and strength of hooks to make sure they can hold the weight and accommodate the dimensions of your tools and accessories. When selecting hooks, think about the size considerations of your tools and the available space on your pegboard. You'll want to verify the hooks are long enough to hold your tools securely, without overcrowding the board.
Next, evaluate the weight capacity of each hook. Heavy tools and accessories require sturdier hooks to prevent them from falling or damaging the pegboard. Check the manufacturer's specifications for the recommended weight capacity of each hook. You don't want to risk damaging your tools or the pegboard due to insufficient support.
Additionally, consider the type of tool or accessory you're storing. For instance, long-handled tools like hammers or screwdrivers require longer hooks, while smaller items like pliers or wrenches can be stored on shorter hooks.
Material Durability
When it comes to selecting the appropriate hooks for your pegboard, you need to take into account the material durability. Six key materials determine the endurance of hooks, including steel, aluminum, copper, bronze, nylon, and ABS plastic, each offering unique advantages and disadvantages. You want to choose hooks that can withstand the weight and wear of your tools, ensuring they remain securely in place.
Endurance testing is pivotal to determine the longevity benefits of each material. For instance, steel hooks are recognized for their material strength and impact resistance, making them ideal for heavy-duty tools.
Aluminum hooks, on the other hand, are lightweight and corrosion-resistant, perfect for smaller, precision tools. Copper and bronze hooks offer excellent conductivity and resistance to corrosion, while nylon and ABS plastic hooks are sturdy and resistant to chemicals.
Maximizing Vertical Storage Space
Optimizing pegboard layout is essential to maximize vertical storage space, as it enables efficient use of wall-mounted real estate and streamlines workshop organization. By doing so, you'll create a more functional and clutter-free environment that saves you time and energy.
To take your pegboard to the next level, consider the following space-saving solutions:
-
Double-layered pegboards: Install two pegboards, one on top of the other, to double your storage capacity without sacrificing floor space.
-
Tiered hooks: Use hooks with multiple tiers to hang items like tool belts, cords, and accessories, keeping them organized and easily accessible.
-
Rotating bins: Attach rotating bins to your pegboard to store small items like screws, nuts, and bolts, making it easy to find what you need at a glance.
- Foldable holders: Invest in foldable holders for items like levels, pliers, and wrenches, which can be easily folded up when not in use to save space.
Labeling and Signage Strategies
Efficient labeling and signage strategies are vital for maintaining a clutter-free pegboard, as they enable quick identification of stored items and tools, saving you valuable time and reducing frustration. By implementing a well-planned labeling system, you can make sure that you can find what you need at a glance, making your workflow more efficient.
Here are some effective labeling and signage strategies to ponder:
| Strategy | Description | Benefits |
|---|---|---|
| Color Coding | Use different colors to categorize tools and items | Quick visual identification, easy to differentiate between categories |
| Visual Cues | Use icons, images, or symbols to indicate tool functions | Reduces language barriers, easy to comprehend |
| Creative Displays | Use unique designs, such as diagrams or illustrations, to showcase tool organization | Adds visual appeal, makes pegboard more engaging |
| Clear Signage | Use bold, clear labels to identify tool categories and storage locations | Easy to read, reduces confusion |
Customizing Your Pegboard System
As you customize your pegboard system, you'll want to focus on three key areas:
- peg placement
- tool organization
- storage maximization
By optimizing these elements, you'll be able to create a tailored system that streamlines your workflow and boosts productivity.
In the following sections, we'll explore these points in detail, providing you with actionable tips and strategies to achieve pegboard perfection.
Peg It Right
Customize your pegboard system by assigning specific tools to individual pegs, ensuring that frequently used items are easily accessible and reducing clutter. This approach allows you to optimize your workspace, saving time and increasing productivity.
To take your pegboard customization to the next level, consider the following:
-
Pegboard color: Choose a color that complements your workspace's aesthetic, ensuring your pegboard blends in seamlessly.
-
Pegboard accessories: Add hooks, bins, and trays to create a tailored storage solution that fits your specific needs.
-
Tool categorization: Group similar tools together, making it easy to find what you need at a glance.
- Pegboard layout: Experiment with different layouts to maximize storage capacity and accessibility.
Tool Organization Hacks
You'll maximize your pegboard's potential by implementing clever tool organization hacks that streamline your workflow and reduce tool searching time. A great place to start is by grouping similar tools together, such as all your screwdrivers or pliers, making it easy to find what you need at a glance.
Take it a step further by using color coding to categorize your tools, like using red hooks for power tools and blue hooks for hand tools. This visual system will save you precious time and energy.
To add an extra layer of organization, consider adding magnetic strips to store small metal tools or parts, keeping them within easy reach. Hanging baskets can also be used to store bulkier items, like extension cords or hoses, keeping them off the floor and out of the way.
Maximize Storage Space
By strategically positioning bins, baskets, and hooks on your pegboard, you can create a tailored storage system that capitalizes on every available inch of space. This customized approach allows you to maximize storage capacity, making the most of your pegboard's real estate.
To take your storage to the next level, consider the following space-saving solutions:
-
Double-layered bins: Stack bins on top of each other to increase storage capacity without taking up more wall space.
-
Angled hooks: Position hooks at an angle to store items like hammers and screwdrivers, keeping them easily accessible while saving horizontal space.
-
Over-the-peg baskets: Hang baskets over pegs to store small items like nuts, bolts, and screws, keeping them organized and out of the way.
- Magnetic strips: Use magnetic strips to store metal tools and accessories, freeing up peg space for other items.
Managing Small Tool Storage
Organizing small tools on a pegboard involves assigning specific areas for frequently used items, like pliers, screwdrivers, and wrenches, to ensure easy access and visibility. By doing so, you'll make sure that your most important tools are within arm's reach, saving you time and effort.
Effective tool organization is vital in maximizing storage space, and a well-planned pegboard layout can make all the difference. Consider the tools you use most often and group them accordingly. For example, you can dedicate a section to your screwdrivers, another to pliers, and so forth. This will allow you to quickly find the tool you need, reducing the chance of misplacing or losing them.
Customization options are also necessary in optimizing your pegboard's storage capacity. By incorporating space-saving solutions, such as hooks, bins, and holders, you can fit more tools in a smaller area, keeping your workspace organized and clutter-free.
Integrating Bins and Containers
To maximize storage capacity on your pegboard, incorporate bins and containers specifically designed to hold small parts, accessories, and supplies, keeping them visible, accessible, and protected from damage or loss. This integration is essential for efficient tool storage and retrieval. By incorporating a variety of bins and containers, you can create a personalized organization system that suits your specific needs.
Here are some key considerations for integrating bins and containers:
-
Container diversity: Choose bins and containers of various sizes and shapes to accommodate different types of items, from small fasteners to larger accessories.
-
Bin selection: Select bins with clear labels and transparent walls to make sure easy identification and visibility of contents.
-
Pegboard customization: Consider the layout and design of your pegboard when selecting bins and containers to ensure a seamless integration.
- Organization solutions: Think about the types of items you need to store and the frequency of use to determine the most effective organization strategy.
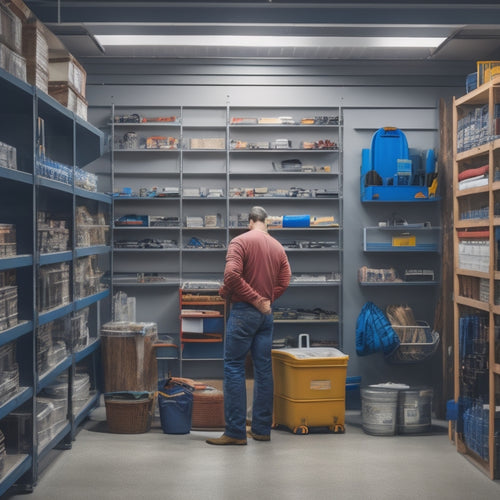
Maintaining a Clutter-Free Board
With your pegboard customized and bins and containers in place, you're now ready to implement habits that prevent clutter from accumulating and maintain a board that remains functional and efficient.
To achieve this, prioritize organization and categorization. Implement a color-coding system to categorize tools by type, frequency of use, or project-specific tasks. This visual system will help you quickly identify the tools you need and prevent mixing up similar-looking tools.
Group tools by function or project type to make sure that related items are stored together. This tool grouping strategy will save you time searching for the right tool and reduce the likelihood of misplaced items.
Designate specific areas on your pegboard for frequently used tools, and reserve less accessible areas for less frequently used items. By maintaining a clutter-free board, you'll maximize your tool storage efficiency and reduce the risk of tool damage or loss.
Frequently Asked Questions
Can I Use a Pegboard in a Humid or Outdoor Environment?
You can use a pegboard in humid or outdoor environments if you choose a moisture-resistant material, consider climate factors, and opt for weather-tough installation options, ensuring outdoor durability and efficient tool storage.
How Do I Prevent Pegboard Hooks From Getting Rusty or Corroded?
As you hang your tools, imagine a shield of protection around your pegboard hooks. To prevent rust and corrosion, you'll apply a rust-inhibiting coating, perform regular cleaning, and guarantee proper maintenance to keep your hooks strong and reliable.
Are Pegboards Suitable for Storing Heavy or Bulky Tools and Equipment?
You'll want to check the weight capacity of your pegboard to guarantee it can handle heavy or bulky tools and equipment, prioritizing durability for long-term use, while maintaining organization and accessibility for efficient workflow.
Can I Install a Pegboard on a Concrete or Brick Wall?
When installing a pegboard on a concrete or brick wall, you'll need to use anchors specifically designed for masonry, ensuring a secure hold. For outdoor use or humid environments, consider using rust-resistant materials and applying a waterproof coating.
Are Pegboards Compatible With Different Types of Wall Anchors?
You'll be relieved to know that pegboards are compatible with various wall anchors, including molly bolts, toggle anchors, and screw-in anchors, which guarantee weight capacity and rust prevention, making hook maintenance a breeze.
Related Posts
-

Storage Bins for Shelves to Keep Clutter at Bay
You're looking for a way to keep your shelves organized and clutter-free, and storage bins are the perfect solution t...
-
Building Garage Shelves in 7 Easy Steps
You're about to convert your garage into a highly functional storage space by building custom shelves in just 7 easy ...
-

3 Key Steps to Streamline Your Workshop Organization
You're likely wasting 30% of your workshop's productivity and profitability due to disorganization, a common problem ...


