Implementing a Pegboard for Your Tool Organization
Share
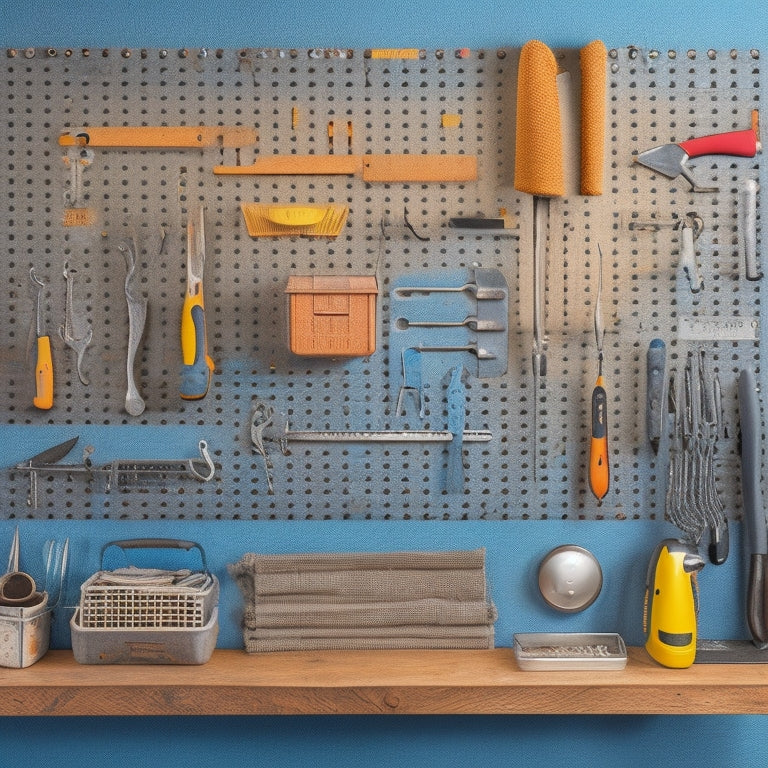
When implementing a pegboard for your tool organization, you'll want to start by choosing the right pegboard material, considering factors like durability, corrosion resistance, and color impact. Next, select hooks that fit your tool weight capacities and surface materials, and design a tool layout that categorizes tools by type, frequency of use, and size, placing frequently used tools in the "golden zone" for easy access. By strategically installing your pegboard system and maximizing storage space with vertical storage, tool grouping, and labeling, you'll be well on your way to a streamlined tool organization system that saves you time and enhances productivity - and there's even more to uncover to take your system to the next level.
Key Takeaways
- Choose a high-quality pegboard material, such as steel, aluminum, or heavy-duty plastic, for durability and corrosion resistance.
- Select hooks with the appropriate weight capacity, material, and color to match your pegboard and tool organization needs.
- Design your tool layout by categorizing tools, positioning frequently used ones in the "golden zone," and creating a logical and efficient arrangement.
- Ensure proper installation by selecting the right material, measuring and marking the wall accurately, and using pilot holes and wall anchors as needed.
- Maximize storage space by utilizing vertical storage, grouping tools by category, and labeling sections for quick identification.
Choosing the Right Pegboard
As you set out to create a tool organization system with a pegboard, selecting the right pegboard is crucial to guarantee a functional and efficient setup.
You'll want to take into account the pegboard materials, as they greatly impact durability and safety. Look for pegboards made from high-quality materials like steel, aluminum, or heavy-duty plastic, which can withstand the weight of your tools and resist corrosion.
Pegboard colors may seem like a minor detail, but they can greatly affect visibility and accessibility. Choose a pegboard with a color that provides high contrast with your tools, making it easier to spot what you need quickly. A bright, reflective surface can also help illuminate your workspace, reducing eye strain and improving overall safety.
When evaluating pegboard options, don't overlook the importance of thickness and hole spacing. A thicker pegboard provides added stability, while strategically spaced holes guarantee that your tools are securely held in place.
Selecting the Perfect Hooks
You'll need to pin down the perfect hooks to complement your pegboard and guarantee a seamless tool organization system. With numerous hook types available, it's crucial to evaluate factors like weight capacity, surface materials, and color options to guarantee a safe and efficient setup.
| Hook Feature | Description |
|---|---|
| Weight Capacity | Ranges from 1-50 lbs, depending on the hook type and material |
| Surface Materials | Available in steel, aluminum, or plastic, each with its own durability and corrosion resistance |
| Color Options | Choose from a variety of colors to match your pegboard or add visual appeal |
| Installation Tools | May require a drill, screwdriver, or wrench, depending on the hook type and pegboard material |
| Spacing Guidelines | Typically spaced 1-2 inches apart, but adjustable hooks offer more flexibility |
When selecting hooks, prioritize weight capacity and surface materials to ascertain your tools are safely secured. Evaluate decorative elements, such as color options, to enhance the overall aesthetic of your pegboard. Adjustable hooks provide versatility, while installation tools and spacing guidelines will vary depending on your specific setup.
Designing Your Tool Layout
Designing your tool layout is an essential step in creating an efficient and functional pegboard system. This involves categorizing your tools by type, frequency of use, and size to optimize storage and accessibility. Group similar tools together, such as hammers, screwdrivers, and pliers, to create a logical and intuitive layout.
When designing your layout, consider the "golden zone" – the area between your waist and shoulder height – where you'll place frequently used tools for easy access. Less frequently used tools can be stored above or below this zone.
Implement layout strategies like the "work triangle" concept, where you position your most-used tools in a triangular formation to reduce movement and increase efficiency.
Organize your tools according to their size, with larger tools on the bottom and smaller ones on top. This prevents smaller tools from getting lost or damaged.
Installing the Pegboard System
Installing a pegboard system requires careful planning and execution to guarantee a sturdy and functional setup. You'll need to choose the right pegboard materials, such as durable plastic or metal, and verify they're compatible with your wall type. When selecting installing techniques, consider the weight capacity of your tools and the pegboard's intended use.
Begin by measuring and marking the wall where you'll install the pegboard. Use a level to verify the marks are straight and even. Next, drill pilot holes and screw the pegboard into place, making sure it's securely fastened to the wall. Use wall anchors if necessary, especially if you have a hollow or uneven wall.
To prevent damage or injury, always follow the manufacturer's instructions for installing the pegboard and hooks. Wear safety goggles and gloves to protect yourself from debris and sharp edges.
Maximizing Storage Space
A well-organized pegboard maximizes storage space by efficiently utilizing every available inch. This is essential in a workshop or garage where space is often limited.
By optimizing your pegboard's layout, you can store more tools in a smaller area, making it easier to access what you need when you need it.
To maximize storage space on your pegboard, consider the following strategies:
- Use vertical storage: Install hooks, bins, and baskets that make the most of your pegboard's vertical space, keeping frequently used tools within easy reach.
- Group similar tools together: Organize tools by category or function, making it easier to find what you need and reducing clutter.
- Utilize the back of the pegboard: Take advantage of the space on the back of the pegboard by adding additional hooks, bins, or a magnetic strip for storing small metal tools.
- Label each section: Clearly label each section of your pegboard, ensuring you can quickly identify where each tool is stored.
- Keep frequently used tools front and center: Place your most frequently used tools in easy-to-reach locations, reducing the time spent searching for them.
Frequently Asked Questions
Can I Customize My Pegboard to Fit a Specific Wall Size?
You can customize your pegboard's dimensions to fit a specific wall size, ensuring a seamless integration with your wall aesthetics; simply measure the wall, choose a pegboard material, and cut it to size using appropriate safety precautions and tools.
How Often Should I Clean and Maintain My Pegboard System?
Oh, you thought your pegboard would magically stay tidy on its own? Think again! You should clean your pegboard every 2-3 months and perform maintenance checks quarterly to prevent tool damage and guarantee peak functionality.
Are Pegboards Suitable for Storing Heavy Power Tools?
When storing heavy power tools, you'll want to make sure your pegboard can handle the weight; check the pegboard's weight limits to avoid damage or collapse, and consider reinforced pegboards or heavy-duty hooks for heavy tool storage.
Can I Add a Pegboard to an Existing Shelving System?
When adding a pegboard to your existing shelving system, you'll need to take into account pegboard placement, ensuring it's installed at a comfortable height for ideal tool accessibility, while maintaining a safe distance from heavy loads and potential hazards.
Are Pegboards Compatible With Different Types of Wall Materials?
As you ponder the perfect pegboard installation, ask yourself: can your walls handle the weight? Fortunately, pegboards are compatible with most wall materials, including drywall, plywood, and concrete, as long as you choose the right anchors and screws for the job.
Conclusion
As you step back to admire your newly implemented pegboard system, the chaos of scattered tools is replaced by a melody of organization. The once-cluttered workshop now hums with efficiency, every tool within easy reach. But don't be fooled - this harmonious scene is not just aesthetically pleasing, it's a powerhouse of productivity. With every hook and slot carefully planned, you'll be amazed at how much more you can accomplish in less time, and how much stress you can leave behind.
Related Posts
-

Storage Bins for Shelves to Keep Clutter at Bay
You're looking for a way to keep your shelves organized and clutter-free, and storage bins are the perfect solution t...
-

Best Screw Storage Bins for Organizing Your Toolbox
You need a reliable screw storage system to maximize your productivity and efficiency, and that's exactly what the ri...
-

Key Features of a Garage Wall Hanging System
You're looking for a garage wall hanging system that's built to last and adapts to your needs. Look for systems made ...


