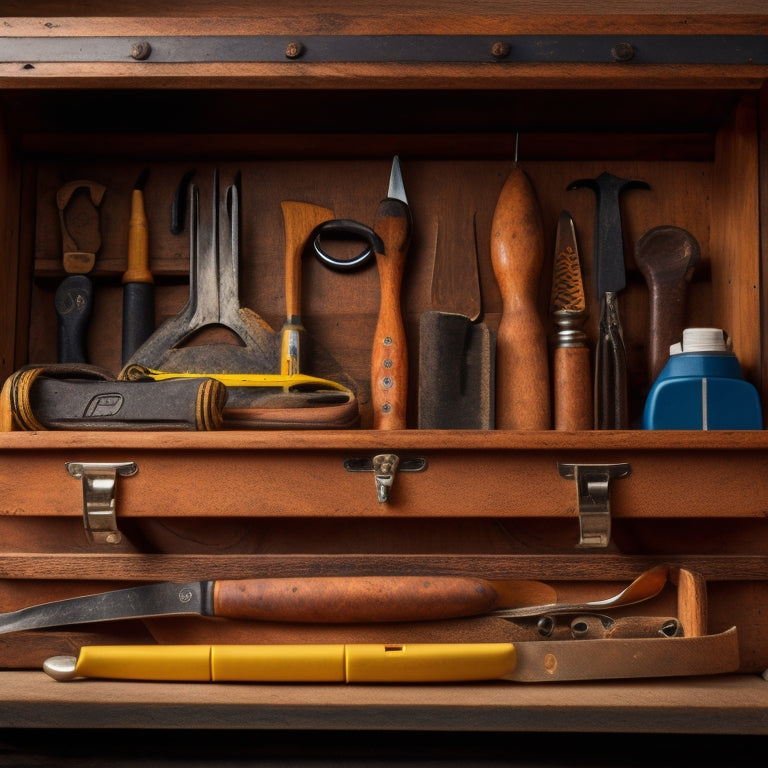
Essential Tools in a Tool Chest for Beginners
When building a tool chest from scratch, prioritize organization for safety and efficiency. Start with essential measuring tools like tape measures, marking gauges, and straightedges, and categorize them along with hand tools, power tools, and accessories. Don't forget cutting and shaping essentials like hand saws, sandpaper, and jigsaws, as well as fastening and joining tools like hammers, screwdriver sets, and nail sets. Holding and clamping tools, miscellaneous must-haves like utility knives and pliers, and safety gear like safety glasses and earplugs are also vital. With these tools in place, you'll be well on your way to excelling in various skills and techniques to take your projects to the next level.
Key Takeaways
- Prioritize tool organization for safety and efficiency by categorizing tools into hand tools, power tools, and accessories.
- Essential measuring tools include tape measures, marking gauges, and straightedges, which require regular maintenance for accuracy.
- Cutting and shaping tools, such as hand saws, coping saws, and sandpaper, are necessary for various projects and require safety guidelines.
- Fastening and joining tools, including hammers, screwdriver sets, and nail sets, are crucial for securing materials together.
- Holding and clamping tools, such as bar clamps, C-clamps, and spring clamps, help master grip techniques for secure holds and prevent workpiece damage.
Building a Solid Foundation
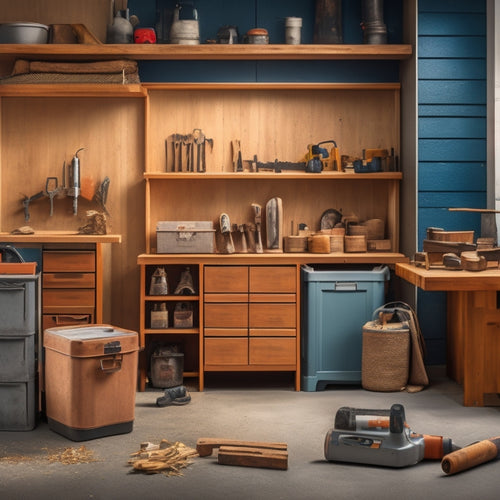
With your toolbox empty and your mind full of possibilities, building a solid foundation is the crucial first step in your adventure. You'll need to prioritize tool organization to guarantee beginner safety and efficiency. Start by categorizing your tools into groups, such as hand tools, power tools, and accessories. This will help you quickly locate what you need when you need it.
Designate a specific space for each tool, and consider investing in a tool chest or storage system to keep everything organized and within reach. Label each compartment or shelf to avoid confusion and wasted time.
Remember, a well-organized workspace is a safer workspace. Cluttered and disorganized areas can lead to accidents and injuries.
As you build your foundation, keep in mind that beginner safety should always be your top priority. Confirm you have a clear understanding of each tool's purpose and proper usage before starting a project.
Measuring and Marking Tools
You'll soon realize that accurate measurements and precise markings are vital to your projects' success.
That's why you need to excel in the use of essential measuring and marking tools, including tape measures, marking gauges, and straightedges.
Tape Measure Essentials
Accurately measuring and marking materials is a critical step in any project, and having the right tools makes all the difference. When it comes to tape measures, you'll want to have a few essential types in your tool chest. A 25-foot tape measure is a good all-purpose choice, while a 12-foot tape measure is better suited for smaller projects.
You may also want to take into account a tape measure with a fractional readout, which can be helpful when working with materials that require precise measurements.
To guarantee your tape measure remains accurate, regular maintenance is key. Clean your tape measure regularly with a soft cloth to remove dirt and debris. Check the tape for kinks or damage and replace it if necessary.
You should also periodically check the accuracy of your tape measure by comparing it to a known measurement. By having the right type of tape measure and keeping it well-maintained, you can verify accurate measurements and avoid costly mistakes in your projects.
Marking Gauge Accuracy
From layout to assembly, a marking gauge is an invaluable tool for making precise markings on your materials, guaranteeing that your cuts, drilling, and joinery are accurate.
With a marking gauge, you can create consistent, precise markings that help you achieve professional-looking results. To get the most out of your marking gauge, it's important to master various marking techniques, such as using the gauge to create consistent mortise and tenon joints or to mark precise dovetail joints.
Regular gauge maintenance is also vital for maintaining accuracy. Make sure to clean the gauge regularly to remove debris and dust that can affect its performance.
Check the gauge's fence and pins for any signs of wear or damage, and replace them if necessary. By following these simple tips, you can verify that your marking gauge remains accurate and reliable, giving you the confidence to tackle even the most complex projects.
Straightedge Precision Tips
When it comes to precision, a straightedge is an indispensable tool in your woodworking arsenal, helping you make precise measurements and markings that confirm accurate cuts and joints.
You'll find straightedges made from various materials, including aluminum, steel, and fiberglass. Each material has its advantages, but aluminum straightedges are popular for their durability and resistance to warping.
To guarantee your straightedge remains accurate, regular maintenance is essential. Clean your straightedge frequently to prevent dirt and debris from accumulating.
Store it in a dry place, away from direct sunlight, to prevent warping or damage. You should also check your straightedge for straightness regularly. Lay it on a flat surface and inspect it for any signs of curvature or bending.
If you notice any deviation, consider replacing it to maintain precision in your work.
Cutting and Shaping Essentials
Cutting and shaping your materials is an essential step in any project, and having the right tools for the job can make all the difference. You'll need to evaluate the type of material you're working with and the desired outcome to choose the best tool for the task. For example, when cutting wood, you'll want to select a saw blade type that's appropriate for the job, such as a rip cut blade for cutting with the grain or a crosscut blade for cutting against the grain.
| Tool | Description | Purpose |
|---|---|---|
| Hand Saw | A versatile, manual saw for cutting wood | Cutting curves and irregular shapes |
| Coping Saw | A small, handheld saw for intricate cuts | Shaping wood and metal |
| Jigsaw | A power tool for curved cuts in wood, metal, and plastic | Cutting complex shapes and patterns |
| Sandpaper | A abrasive paper for smoothing surfaces | Shaping and refining wood and metal |
When it comes to shaping techniques, you'll want to assess the material you're working with and the desired outcome. For wood, you may use techniques like chamfering or beveling to create a decorative edge. Always follow safety guidelines when working with power tools and take necessary precautions to avoid accidents.
Fastening and Joining Tools
Your project's success often hinges on the ability to securely fasten and join materials together. Having the right fastening and joining tools can make all the difference in guaranteeing your project's stability and durability.
When it comes to fastening, it's crucial to have a variety of screw types and nail options at your disposal. Here are three must-haves for your tool chest:
-
Hammer: A versatile hammer is perfect for driving nails, fitting parts together, and breaking apart objects.
-
Screwdriver set: A set that includes flathead, Phillips, and hex (or Allen) drivers will cover most screw types and sizes.
-
Nail set: A starter set of nails should include finish nails, common nails, and roofing nails to cater to various projects and materials.
Remember to always choose the right tool for the job and follow safety guidelines to avoid accidents.
With these fastening and joining tools, you'll be well-equipped to tackle a wide range of projects and guarantee they turn out sturdy and long-lasting.
Holding and Clamping Tools
Three essential holding and clamping tools will help you maintain control and precision throughout your project. These tools guarantee your workpieces stay in place, allowing you to focus on your task without worrying about movement or damage.
| Tool | Description | Usage |
|---|---|---|
| Bar Clamps | Long, adjustable clamps for large projects | Hold large panels or boards in place |
| C-Clamps | Versatile clamps for smaller projects | Hold small parts or materials together |
| Spring Clamps | Quick-release clamps for rapid adjustments | Hold objects temporarily while gluing or assembling |
Mastering grip techniques is vital when working with holding and clamping tools. For example, using the correct clamp type and applying even pressure will prevent damage to your workpiece. Additionally, understanding how to choose the right clamp for your project will guarantee a secure hold and prevent accidents. By incorporating these essential holding and clamping tools into your toolkit, you'll be able to tackle a wide range of projects with confidence and precision.
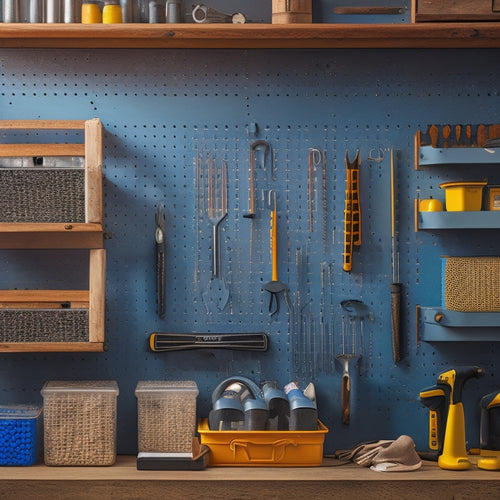
Miscellaneous Must-Haves
Beyond the essentials of holding and clamping, a few miscellaneous tools can make a significant difference in the success of your project.
These tools mightn't be directly involved in the building process, but they're vital for safety, efficiency, and tool organization.
Must-Have Miscellaneous Tools:
- Safety Gear: Invest in a good pair of safety glasses, earplugs, and a dust mask to protect yourself from debris and hazardous materials.
Don't compromise on your safety; it's better to be safe than sorry.
- Storage Solutions: A portable tool chest or a storage bin can help keep your tools organized and within reach.
Label each compartment to guarantee you can find what you need quickly.
- Maintenance Tips: A wire brush, a set of Allen wrenches, and a screwdriver with interchangeable bits can help you maintain your tools and equipment.
Regular maintenance guarantees your tools stay in top condition, reducing the risk of accidents and prolonging their lifespan.
Frequently Asked Questions
What Is the Ideal Size for a Beginner's Tool Chest?
When choosing a tool chest, you'll want one that's around 24-30 inches wide, 12-18 inches deep, and 18-24 inches tall, allowing easy access to beginner tool essentials while keeping your workspace organized and safe.
Can I Buy Tool Sets or Should I Purchase Individually?
Did you know 70% of DIYers start with a tool set? You can buy a tool set for convenience and cost-effectiveness, but purchasing individual tools allows for customization and quality control, so consider your needs and weigh tool set advantages against individual tool benefits.
Are There Any Safety Precautions I Should Take When Working With Tools?
When working with tools, you should prioritize tool safety by wearing protective gear, using proper techniques, and maintaining an organized workspace to prevent injuries. Regularly inspect and maintain your tools to guarantee they're in good condition, and always follow the manufacturer's guidelines.
How Do I Organize and Store My Tools for Easy Access?
You'll be searching for a needle in a haystack if you don't organize your tools! Create a tool storage system with labeled bins and hooks for easy access, so you can quickly grab what you need and get back to work.
Can I Use Tools for Multiple Purposes or Is It Better to Specialize?
You'll find that multi-purpose tools can be convenient, but may compromise on performance; meanwhile, specialized tools guarantee precision, but take up more space. You'll need to weigh versatility against accuracy to decide what works best for your projects.
Conclusion
You've got the essentials covered! Now, take a step back and admire your well-stocked tool chest. But, are you ready to put these tools to work? Remember, a solid foundation is just the beginning. As you immerse yourself in projects, you'll find yourself reaching for these trusty companions time and time again. Happy building!
Related Posts
-
What to Look for in a Pegboard Tool Storage Kit
When shopping for a pegboard tool storage kit, you need a system that combines customized organization, sturdy durabi...
-
Creative Workshop Storage Solutions and Ideas
You can revolutionize your workshop's storage by maximizing vertical space with wall-mounted racks, utilizing hidden ...
-
Tool Storage Chests for a More Organized Workspace
You're looking to enhance productivity and reduce stress in your workspace by getting your tools organized, and that'...


