Effortless Organization: 10 Pegboard Ideas That Work
Share
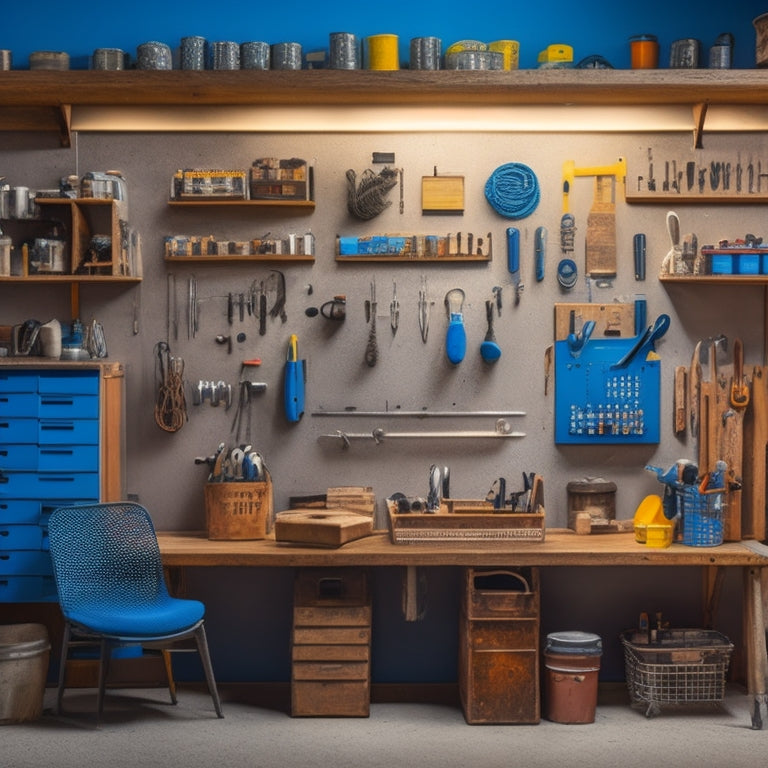
You're about to transform your workspace into a highly organized and efficient hub with these 10 pegboard ideas that work seamlessly together. Maximize your vertical space by installing floor-to-ceiling pegboards and customize storage with hooks, bins, and baskets. Utilize corner space efficiently with strategically placed hooks and bins. Create a centralized hub with designated areas for tool categories and implement color-coding and cable management strategies. With these ideas, you'll be able to streamline your workflow, reduce clutter, and increase productivity. As you implement these ideas, you'll discover even more ways to tailor your pegboard system to your unique needs.
Key Takeaways
• Maximize vertical space by installing pegboards from floor to ceiling and customizing shelf organization systems for efficient storage.
• Utilize corner space by implementing corner pegboards, strategically selecting space-saving hooks, and optimizing angle placement for efficient use.
• Create a centralized hub by designating a specific area for frequently used tools, implementing color coding and cable management strategies, and setting up tool tray stations.
• Implement a bin labeling system with color-coding, alphabetical organization, and clear labels to simplify inventory management and prevent misplacement of small parts.
• Integrate pegboards with workflows by designing mobile stations, incorporating storage solutions, and organizing frequently used tools for easy access and efficient project switching.
Maximizing Vertical Space
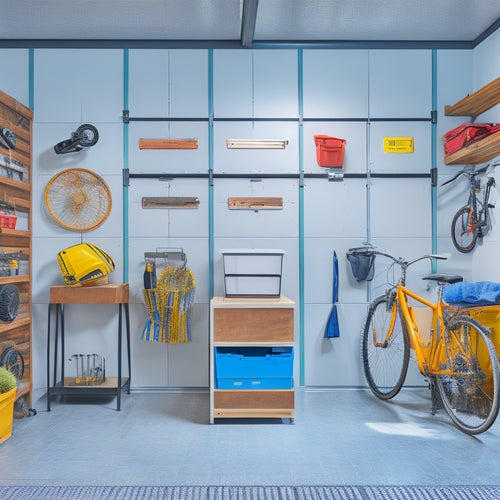
By installing pegboards that stretch from floor to ceiling, you can maximize your garage's or workshop's vertical space and keep frequently used tools and accessories within easy reach. This allows you to make the most of your available space, keeping your work area clutter-free and organized.
With pegboards, you can create a customized shelf organization system that suits your specific needs. You can install hooks, bins, and baskets to create a hanging solution that keeps your tools and accessories off the floor and out of the way. This not only saves space but also protects your equipment from damage and makes it easier to find what you need quickly.
Customizing for Specific Tools
When customizing your pegboard for specific tools, you're going to want to think strategically about how to organize and allocate space.
You'll need to decide how to separate your tools into categories and assign hooks accordingly, ensuring that each tool has its own designated spot.
Tool Segregation Strategies
You can maximize your pegboard's efficiency by dedicating specific sections to frequently used tools, allowing you to quickly identify and access the ones you need. This tool segregation strategy is essential for effective tool organization and equipment management.
By grouping similar tools together, you can reduce clutter and make the most of your pegboard's space.
For instance, you can allocate a section for your hand tools, such as hammers, screwdrivers, and pliers. Another section can be dedicated to power tools, like drills, saws, and sanders. You can also create a section for specialized tools, such as wrenches, sockets, and ratchets.
Personalized Hook Allocations
Designating specific hooks for frequently used tools, like a hammer or tape measure, ensures they're always within easy reach and saves time in the long run. This personalized approach to pegboard organization guarantees you're not wasting time searching for the right tool when you need it most. By allocating a dedicated hook for each essential tool, you'll create an efficient storage system that streamlines your workflow.
You can take it a step further by grouping similar tools together, making it even easier to find what you need. For instance, you can dedicate a section of your pegboard to painting tools, with hooks for your paintbrushes, rollers, and trays. This level of customization allows you to work smarter, not harder.
With your most-used tools readily accessible, you'll be able to tackle projects faster and with greater confidence. By implementing personalized hook allocations, you'll maximize your pegboard's potential and enjoy the benefits of efficient storage and increased productivity.
Utilizing Corner Space Efficiently
When you're setting up your pegboard, you're likely thinking about how to make the most of the available space.
You'll want to focus on the often-wasted corner areas, where a well-designed corner pegboard can hold more items than you think.
Corner Pegboard Design
Maximizing corner space with a pegboard design can revolutionize your workshop's organization and productivity. By incorporating a corner pegboard, you can effectively utilize the often-wasted space in the corners of your workshop, creating a more efficient and functional area.
Here are some benefits of corner pegboard design:
-
Increased storage: Corner pegboards provide additional storage for tools, accessories, and supplies, keeping them within easy reach.
-
Improved accessibility: With a corner pegboard, you can easily access frequently used items without having to navigate through cluttered shelves or cabinets.
-
Enhanced aesthetics: Corner pegboards can add a touch of industrial chic to your workshop, creating a visually appealing space that's both functional and stylish.
- Customization options: You can design your corner pegboard to fit your specific needs, choosing from various materials, sizes, and hook configurations to create a tailored solution.
Space-Saving Hooks
By strategically selecting space-saving hooks, you can reveal the full potential of your corner pegboard, efficiently utilizing every inch of available space. Corner spaces often get wasted, but with the right hooks, you can turn them into versatile storage areas. Look for hooks with a slim profile or those that can be mounted at an angle to maximize the corner's storage capacity.
When choosing space-saving hooks, consider the type of items you'll be storing. For example, if you need to hang bikes or heavy tools, opt for sturdy hooks with a weight capacity that matches your needs. For lighter items like accessories or cleaning supplies, smaller hooks will suffice.
To achieve stylish organization, mix and match different hook styles and sizes to create a visually appealing arrangement. You can also add a personal touch by labeling each hook or grouping similar items together.
Optimized Angle Placement
You can reveal the full potential of your corner pegboard by strategically positioning hooks at optimized angles, making the most of the often-wasted corner space. This technique, known as angled hooking, allows you to maximize storage capacity while maintaining easy accessibility.
By installing hooks at a 45-degree angle, you can fit more items in a smaller area, making the most of your pegboard's vertical optimization.
Here are some ways to utilize optimized angle placement:
-
Diagonal hooks for tools: Place hooks at an angle to store tools like hammers, screwdrivers, and pliers, keeping them organized and within reach.
-
Angled baskets for small items: Use angled baskets to store small items like nuts, bolts, and screws, keeping them from getting lost or jumbled.
-
Sloping shelves for bins: Install sloping shelves to store bins and containers, making it easy to grab what you need without having to dig through clutter.
- Inclined hooks for cords: Use inclined hooks to manage cords and cables, keeping them organized and untangled.
Creating a Centralized Hub
Regularly, a centralized hub becomes the go-to spot for all your pegboard needs, streamlining your workflow and saving you time. By creating a central hub, you'll have everything you need within easy reach, eliminating the need to search for misplaced tools or supplies.
To get started, designate a specific area of your pegboard for your hub. This could be a section with frequently used items, like hammers, screwdrivers, or pliers.
To maximize the efficiency of your hub, consider implementing color coding and cable management strategies. Use colored labels or bins to categorize and separate similar items, making it easy to identify what you need at a glance.
For cable management, use cable ties or clips to keep cords and wires organized and untangled. This will prevent clutter from building up and reduce the risk of damage to your tools or equipment.
Incorporating Small Item Storage
When it comes to incorporating small item storage on your pegboard, you'll want to focus on clever solutions that maximize space and minimize clutter.
You can start by setting up tool tray stations to corral tiny parts and accessories, and then implement a bin labeling system to keep everything organized and easily accessible.
Tool Tray Stations
Tool tray stations, strategically placed on your pegboard, can greatly enhance your workshop's organization by keeping small items within easy reach. This is especially true when it comes to tool organization. By using color coding, you can categorize similar tools or items, making it easier to find what you need at a glance.
Here are some ideas to get you started:
-
Use portable magnetic trays to store small metal items like screws, nuts, or bolts.
-
Designate a tray for frequently used tools, like pliers, wrenches, or screwdrivers.
-
Create a 'launching pad' for your projects by grouping related items, such as drill bits or sandpaper, in a single tray.
- Consider using trays with dividers or compartments to separate items within a category, like different sizes of screws or types of fasteners.
Bin Labeling Systems
You can maximize your pegboard's storage capacity by implementing a bin labeling system that keeps small items neatly organized and easily accessible. This system is especially useful for storing small parts, fasteners, and other tiny items that can easily get lost. By using clear labels and categorizing similar items together, you can quickly find what you need and avoid wasting time searching for misplaced parts.
Here are some popular labeling techniques for your pegboard bins:
| Labeling Technique | Description | Benefits |
|---|---|---|
| Color-Coding | Use different colored labels to categorize items | Easy to visualize and distinguish between categories |
| Alphabetical | Organize labels in alphabetical order | Quick to find specific items |
| Categorical | Group similar items together (e.g., all screws) | Simplifies inventory management |
With a well-organized bin labeling system, you can optimize your pegboard's storage capacity and reduce clutter. This, in turn, will help you work more efficiently and reduce stress. By choosing the right labeling technique for your needs, you can create a storage solution that is tailored to your specific requirements.
Hanging Accessories
Frequently, pegboards are equipped with hanging accessories that provide additional storage for small items, keeping them within easy reach while freeing up valuable peg space. You can maximize your pegboard's potential by incorporating hanging accessories that cater to your specific needs.
Here are some ideas to get you started:
-
Use hanging bins with clear labels and color coding to differentiate between contents, making it easy to find what you need at a glance.
-
Install multi-functional shelves that can hold small containers, baskets, or even tools, keeping them organized and within reach.
-
Add hooks for hanging items like cords, wires, or accessories, keeping them tidy and untangled.
- Incorporate a hanging magnetic board for storing small metal items like screws, nuts, or bolts.
Labeling for Easy Access
Color-coordinated labels and clear signage on your pegboard help you promptly identify and grab the specific item you need, saving time and reducing frustration. By implementing a labeling system, you'll never have to search through your pegboard again, wasting valuable minutes looking for that one particular tool.
You can take it a step further by organizing your labels in alphabetical sequence. This way, you'll be able to find what you need in an instant. For example, if you have multiple types of screwdrivers, label each one accordingly, from 'Flathead' to 'Torx.' This system guarantees that you can quickly locate the precise screwdriver you need, without having to scan the entire pegboard.
Color grouping is another effective way to categorize your tools. Assign a specific color to a particular type of tool, such as red for power tools or blue for hand tools. This visual hint will help you promptly identify the section of your pegboard where your desired tool is situated, making your workflow more efficient.
Adding a Benchtop Pegboard
A dedicated benchtop pegboard stationed at your workstation provides an easily accessible extension of your main pegboard, keeping essential tools and accessories within arm's reach. This setup allows you to focus on your tasks without interruptions, making it an excellent addition to your tool organization strategy.
With a benchtop pegboard, you can:
-
Create a portable workspace that can be easily moved around your workshop or garage
-
Keep frequently used hand tools, such as pliers, screwdrivers, and wrenches, organized and within easy reach
-
Hang small accessories like measuring tapes, levels, and clamps, freeing up valuable bench space
- Designate a specific area for task-specific tools, making it easier to switch between projects
Designing a Mobile Station
You can create a mobile station by designing a pegboard on wheels or a cart, allowing you to easily move your tools and accessories to wherever you need them in your workshop or garage. This portable solution provides flexibility and convenience, enabling you to work efficiently in different areas of your workspace.
When designing your mobile station, consider the types of tools and accessories you need to store and the frequency of use. This will help you determine the best layout and configuration of your pegboard.
A multifunctional workstation on wheels can also serve as a central hub for various projects. You can add bins, baskets, or trays to store small parts, fasteners, or other materials. Additionally, consider incorporating a work surface, such as a countertop or a flip-down table, to provide a convenient area for tasks like assembly, repair, or measurement.
Integrating With Existing Workflows
When incorporating a pegboard into your current workflow, integrating it seamlessly with your existing tools and processes is crucial to maximize its benefits and minimize disruptions. You want to make sure that your pegboard complements your current systems, rather than creating more chaos.
To achieve this, focus on workflow integration and identify areas where your pegboard can streamline your tasks.
Here are some tips to help you integrate your pegboard with your current workflow:
- Identify your most frequently used tools and organize them on your pegboard for easy access.
- Designate a specific area for your pegboard, making certain it's close to your workspace and reducing the need for unnecessary movement.
- Use hooks and bins to store smaller items, keeping them organized and out of the way.
- Consider color-coding your pegboard to differentiate between tools and tasks, making it simpler to navigate.
Repurposing Old Materials Creatively
By taking a creative approach to repurposing old materials, you can breathe new life into discarded items and turn them into functional components of your pegboard system. Upcycling materials not only reduces waste but also adds a personal touch to your organization system. With a little creativity, you can transform old pallets, wooden crates, or even cardboard tubes into unique pegboard accessories.
Here are some ideas to get you started:
| Old Material | New Use |
|---|---|
| Old pallet wood | Custom pegboard shelves |
| Wooden crates | Storage bins for small items |
| Cardboard tubes | Cord organizers or small tool holders |
Frequently Asked Questions
Can Pegboards Be Used in Non-Traditional Spaces Like Garages or Laundry Rooms?
You can definitely use pegboards in non-traditional spaces like garages or laundry rooms, finding creative solutions to optimize storage in these unconventional spaces, and turning them into functional hubs that work for you.
How Do I Prevent Pegboard Hooks From Getting Tangled or Cluttered?
To prevent pegboard hooks from getting tangled or cluttered, you'll want to implement a hook organization system using pegboard accessories like hook separators, bins, and dividers to keep everything tidy and easily accessible.
Are Pegboards Suitable for Renters Due to Installation Requirements?
You're wondering if pegboards are suitable for renters, and the answer is yes! Opt for temporary solutions with easy removal, ensuring apartment-friendly installation that won't cause damage, so you can organize without worrying about lease restrictions.
Can I Use Pegboards to Organize Soft Materials Like Fabric or Yarn?
Did you know that 75% of crafters struggle with storage? You can efficiently store soft materials like fabric and yarn using pegboards with specialized hooks, bins, and baskets designed for fabric storage and yarn organization.
Do Pegboards Require Regular Maintenance to Stay Organized?
You'll be happy to know that pegboards require minimal maintenance to stay organized, ensuring long-term durability and time-saving benefits, as you can quickly find what you need and keep your workspace clutter-free.
Related Posts
-

3 Pro Garage Organization Ideas to Try Now
You can alter your garage from cluttered chaos to organized oasis with three pro garage organization ideas. First, op...
-

Top Garage Storage Bins for Organization and Style
You can enhance your garage's style and organization with the right storage bins. Top brands like Rubbermaid, Suncast...
-

Heavy-Duty Commercial Rolling Shelving Racks
You need heavy-duty commercial rolling shelving racks that optimize your storage capacity, streamline operations, and...


