Easy DIY: Hang Pegboard Like a Pro
Hanging a pegboard is a straightforward DIY project that requires careful planning and attention to detail to guarantee a secure and functional installation. Begin by selecting a high-quality pegboard that fits your available space and tools, considering material, hole size, and durability. Prepare the mounting surface by identifying suitable locations with open stud bays, measuring accurately, and cleaning the surface free of debris. Install the pegboard by positioning it centered and aligned with studs, securing it firmly with wall screws for a robust foundation. With a solid foundation in place, you're ready to take your tool organization to the next level.
Key Takeaways
• Identify open stud bays for secure installation and accurately measure stud locations to ensure a robust foundation.
• Clean the surface free of debris before installation to prevent weak spots and ensure a durable hold.
• Center and align the pegboard with studs for added strength and a balanced look, securing it with wall screws for durability.
• Maximize storage capacity by strategically placing hooks and accessories, allowing easy access to tools and accessories.
• Explore color choices and accessories to customize the workspace and enhance tool organization with a high-quality pegboard.
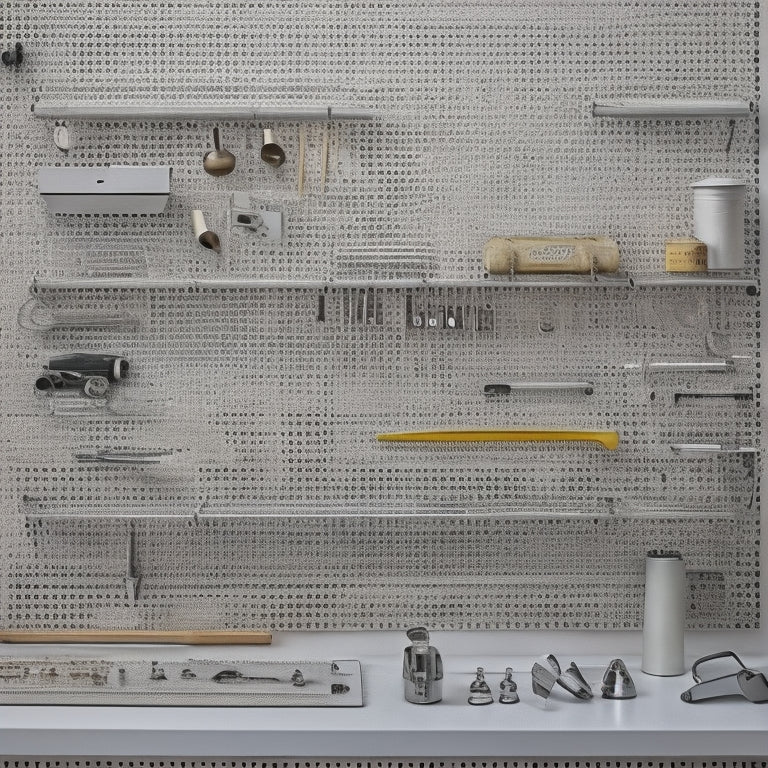
Choosing the Right Pegboard
Selecting a pegboard that suits your needs is vital, considering factors such as material, hole size, and durability, as a high-quality pegboard is essential for effective tool organization and maximized storage capacity.
Masonite pegboards are a popular choice, offering a cost-effective and durable option. Pegboard material options also include wood, metal, and plastic, each with its own benefits and drawbacks.
Pegboard size considerations are important, as it must fit the available space and accommodate the tools to be stored. Additionally, consider pegboard color choices, which can range from neutral tones to bold colors, and pegboard accessory ideas, such as hooks, bins, and baskets, to customize your tool organization system.
Preparing the Mounting Surface
One essential aspect of preparing the mounting surface is identifying a suitable location with open stud bays to guarantee a secure and level installation. This involves measuring accurately to determine the location of the studs, ensuring the pegboard is mounted directly onto them. Failing to do so may result in a weak installation, compromising the integrity of the entire system.
Next, the surface should be clean and free of debris to promote a strong bond between the pegboard and the wall. Securing firmly to the studs using wall screws will provide a robust foundation for your pegboard, allowing you to hang tools and accessories with confidence.
Installing the Pegboard
With the mounting surface prepared, the next step is to position the pegboard on the wall, making sure it is centered and aligned with the studs. This critical step guarantees a secure and even pegboard installation.
| Pegboard Installation Tips | Pegboard Organization Benefits |
|---|---|
| Align with studs for added strength | Maximize storage capacity with hooks |
| Center the pegboard for balanced look | Easily access tools and accessories |
| Secure with wall screws for durability | Customize your workspace with ease |
Frequently Asked Questions
Can I Use a Pegboard in a Humid Environment Like a Garage?
In humid environments, pegboard durability is a concern. Seek out moisture-resistant materials, such as treated masonite or powder-coated hooks, to guarantee rust protection and prolonged lifespan.
How Do I Prevent Pegboard Hooks From Falling off Over Time?
To prevent pegboard hooks from falling off over time, minimize hook wear by selecting fasteners with a secure grip, such as screws with a coarse thread or nylon-insert locknuts, and guarantee proper installation to maintain a snug fit.
Are Pegboards Compatible With All Types of Wall Anchors?
Like a puzzle piece, pegboards require compatible wall anchors to guarantee a secure fit. Not all wall anchors are created equal; compatibility depends on wall types, such as drywall, concrete, or wood, and anchor materials, like plastic, metal, or molly bolts.
Can I Cut a Pegboard to Fit a Smaller Space or Unique Shape?
For custom sizing, pegboards can be precisely cut to fit smaller spaces or unique shapes using a circular saw or jigsaw, ensuring accurate measurements and clean cuts for a seamless installation.
Are Pegboards Suitable for Holding Heavy Tools and Equipment?
When selecting a pegboard, consider load capacity and weight distribution strategies to make sure it can safely hold heavy tools and equipment. Assess the weight and size of items to be stored and choose a pegboard with suitable load-bearing capabilities.
Related Posts
-
Open Storage Bins for Shelving Units
You need open storage bins that integrate seamlessly with your shelving units to boost your organization, productivit...
-
3 Pro Garage Organization Ideas to Try Now
You can alter your garage from cluttered chaos to organized oasis with three pro garage organization ideas. First, op...
-
Top Wrench Tool Box Sets for Every Mechanic
You're looking for high-quality wrench tool box sets that cater to your specific needs as a mechanic. From top-rated ...


