Design Your Dream Pegboard for Ultimate Tool Storage
Share
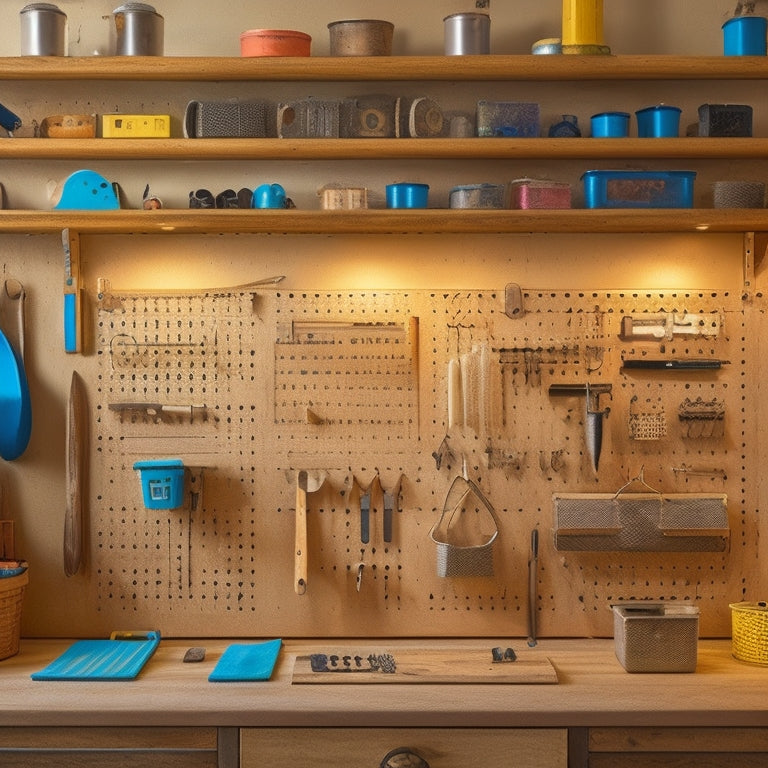
You're about to transform your workspace into a highly efficient and organized hub by designing a pegboard that perfectly stores and showcases your valuable tools. Start by gathering and categorizing your tools, considering frequency of use, size, and shape. Choose a pegboard size that fits your collection and available space, selecting heavy-duty material for heavy tools and lighter material for smaller items. Select hooks that match your tool types and maximize vertical storage with strategic shelf heights and corner shelves. Create zones for easy access, incorporate customized bins, and add labels for organization. Now, get ready to take your tool storage to the next level!
Key Takeaways
• Categorize tools into hand tools, power tools, and accessories to optimize pegboard organization and storage.
• Choose the right pegboard size based on tool collection, available space, and mounting options.
• Select hooks that fit tool type, size, and strength needs, and consider specialized hooks for maximum storage.
• Maximize vertical storage space by strategically setting shelf heights and utilizing corner space for small items.
• Organize pegboard into zones for easy access, with frequently used tools at eye level or near the front.
Assessing Your Tool Collection
Take stock of your tool collection by gathering every instrument, gadget, and device from your workshop, garage, or storage bins to get a clear picture of what you need to accommodate on your pegboard.
This is the perfect opportunity to purge your collection of tools that are broken, rusty, or no longer useful. Be ruthless - if you haven't used it in the past year, it's probably safe to get rid of it.
Once you've culled your collection, categorize your tools into groups like hand tools, power tools, and accessories. This will help you visualize how you want to organize your pegboard and make certain that similar tools are stored together.
Consider the frequency of use, size, and shape of each tool as you categorize. Don't forget to include storage for items like screws, nuts, and bolts, as well as any other small parts you need to keep track of.
Choosing the Right Pegboard Size
With your tool collection categorized and purged, you're ready to determine the ideal pegboard size to accommodate your organized groups and maximize your storage space. Consider the dimensions of your tools and the space available on your wall or in your workstation.
A larger pegboard may be necessary if you have bulky items or a diverse collection of tools. On the other hand, a smaller pegboard might be more suitable for a compact workspace or a limited tool set.
When selecting a pegboard size, think about the material as well. A heavy-duty pegboard made of thick, durable material may be necessary for heavy tools, while a lighter material might suffice for smaller, lighter items.
Additionally, consider your mounting options. Will you be mounting your pegboard to a wall, a workbench, or a mobile cart? Different mounting options may require different pegboard sizes or materials.
Selecting the Perfect Hooks
When it comes to selecting the perfect hooks for your pegboard, you'll need to take into account a few key factors.
You'll want to think about the type of hook that'll work best for your needs, as well as the size and strength you require.
Additionally, you may want to explore specialized hook options that can help you maximize your pegboard's potential.
Hook Type Matters
You'll need to choose hooks that fit your pegboard's purpose and the items you plan to hang, as different hook types serve specific functions and offer varying levels of versatility. For instance, if you're planning to hang heavy tools, you'll need sturdy hooks made from durable materials like steel or aluminum.
Here are some key hook types to think about:
-
S-Hooks: Ideal for hanging items like tools, accessories, and equipment.
-
L-Hooks: Perfect for holding longer items like hoses, cords, and ropes.
-
J-Hooks: Great for hanging items like bikes, ladders, and other bulky equipment.
- Bin Hooks: Designed for storing small items like nuts, bolts, and screws.
When selecting hooks, take into account the materials they're made of. Look for hooks with a rust-resistant coating to make sure they can withstand heavy use. Ergonomic design is also important, as it can reduce strain on your hands and wrists.
Size and Strength
Now that you've narrowed down the type of hooks you need, it's important to assess their size and strength to guarantee they can handle the weight and size of your items. You don't want your hooks to bend or break under the weight of your tools, do you? That's why you need to take into account the material durability of your hooks. Look for hooks made from high-quality materials like stainless steel or heavy-duty plastic that can withstand heavy loads.
Next, check the load capacity of each hook. This is usually indicated on the packaging or product description. Make sure the hooks can handle the weight of your heaviest tools. You don't want to overload your hooks and risk them breaking or damaging your tools.
Think about the size of your items as well. You'll need larger hooks for bigger items like hammers and smaller hooks for smaller items like screwdrivers. By choosing the right size and strength of hooks, you'll ensure your pegboard is functional and efficient.
Specialized Hook Options
Selecting the perfect hooks for your pegboard involves exploring specialized options that cater to specific tools or items, ensuring a snug and secure fit. You want to make sure your tools are safely stored and easily accessible, and that's where customized hooks come in.
Here are some specialized hook options worth exploring:
-
Ergonomic Handles: Designed for comfort and ease of use, these hooks feature contoured grips that reduce fatigue and strain.
-
Customized Grips: Get hooks with grips tailored to specific tools or items, ensuring a secure fit and preventing damage or scratching.
-
Tool-Specific Hooks: From screwdrivers to wrenches, get hooks designed specifically for your most-used tools, keeping them organized and within reach.
- Adjustable Hooks: Perfect for tools of varying sizes, these hooks can be adjusted to fit different lengths and widths.
Maximizing Vertical Storage Space
When designing your dream pegboard, you'll want to maximize vertical storage space to keep your tools and supplies organized and within reach.
To do this, you'll need to strategically plan your layout, considering factors like shelf height, corner space, and the weight of your items.
Optimize Shelf Height
By strategically setting shelf heights, you can maximize the full potential of your pegboard's vertical storage space. This is essential for efficient tool storage and retrieval.
To get it right, consider the following key factors:
-
Ergonomic Comfort: Set shelves at a comfortable height to avoid straining your back or shoulders when reaching for tools.
-
Tool Size: Store larger tools on lower shelves and smaller ones on higher shelves to maintain easy access.
-
Frequency of Use: Place frequently used tools on shelves at eye level or near the front of the pegboard for quick access.
- Adjustable Levels: Consider using adjustable shelves or pegboard hooks to accommodate tools of varying sizes and shapes.
Utilize Corner Space
You can squeeze even more storage out of your pegboard by cleverly utilizing its often-wasted corner space. Corner shelves are a great way to maximize vertical storage, allowing you to stash small items like screws, nuts, and bolts within easy reach.
To install corner shelves, you'll need angular brackets that fit snugly into the corners of your pegboard. These brackets provide a sturdy base for your shelves, keeping them secure and level.
When choosing corner shelves, consider the size and shape of the items you'll be storing. For example, if you have a lot of small tools like pliers and wrenches, look for shelves with individual compartments or dividers to keep them organized.
You can also use corner shelves to store larger items like power tools or accessories, freeing up space on your main pegboard for more frequently used tools.
Stack Heavy Items
Take advantage of your pegboard's vertical space by stacking heavy items like bins, containers, and large tools, making the most of your storage capacity. This is especially important for items that you don't use frequently, as they can take up valuable space on your workbench or floor.
When stacking heavy items, keep the following tips in mind:
-
Check the load capacity: Make sure your pegboard can support the weight of the items you're stacking.
-
Distribute weight evenly: Avoid overloading one area of the pegboard, as this can cause it to tip or collapse.
-
Use floor reinforcement: If you're stacking extremely heavy items, consider reinforcing the floor beneath your pegboard to prevent damage.
- Leave space between items: Don't stack items too tightly, as this can make it difficult to access what you need and can also cause damage to the items themselves.
Creating Zones for Easy Access
As you organize your pegboard, divide it into zones that group similar tools or items together, making it easier to find what you need at a glance. This task segregation approach will streamline your work flow and save you time in the long run.
Think about the tasks you perform most frequently and create zones accordingly. For instance, create a zone for drilling, another for sawing, and another for measurement tools.
Within each zone, arrange your tools in a logical order. For example, place your drill bits near your drill, and your saw blades near your saw. This way, you'll be able to quickly grab what you need without having to scan the entire pegboard.
Consider the frequency of use and place your most-used tools in easy-to-reach locations. By creating these zones, you'll be able to focus on the task at hand, rather than wasting time searching for the right tool.
With your pegboard organized into functional zones, you'll be more efficient, productive, and ready to tackle any project that comes your way.
Incorporating Customized Bins
Customized bins can be strategically placed throughout your pegboard to store small items, keeping them out of the way yet easily accessible when needed. This is where bin organization comes into play. By incorporating custom containers, you can maximize your pegboard's storage capacity and keep your workspace tidy.
Here are some benefits of using customized bins on your pegboard:
-
Easy retrieval: Store frequently used items in clear bins, making them easy to spot and grab when needed.
-
Reduced clutter: Keep small parts and accessories organized, preventing them from getting lost or scattered around your workspace.
-
Customized to your needs: Design bins to fit your specific tool storage requirements, ensuring a perfect fit for your pegboard.
- Visually appealing: Add a touch of professionalism to your workspace with sleek, custom-designed bins that complement your pegboard's style.
Adding Labels for Organization
Adding Labels for Organization
Labeling your pegboard's bins and hooks helps you quickly identify what's inside or attached, saving you time and frustration when searching for a specific tool or part. This simple step can make a huge difference in the efficiency of your workspace.
When it comes to labeling, consider the following tips:
| Labeling Tip | Description |
|---|---|
| Color Coding | Use different colored labels to categorize tools or parts by type, making it easy to spot what you need at a glance. |
| Label Placement | Place labels on the front or top of bins and hooks, ensuring they're easily readable without having to strain or move items around. |
| Specificity | Be specific with your labels, using exact tool or part names instead of general categories. |
| Consistency | Use a consistent labeling style throughout your pegboard to create a visually appealing and easy-to-navigate space. |
Frequently Asked Questions
Can I Reuse Old Pegboard Hooks With a New Pegboard?
Like a phoenix rising from the ashes, you wonder if old pegboard hooks can be reborn with a new pegboard. Yes, you can reuse them, but check hook compatibility first and consider refurbishing worn-out hooks for a seamless fit.
How Do I Prevent Pegboard From Warping or Bending?
To keep your pegboard straight, you'll want to control humidity levels in your workspace and consider frame reinforcement with sturdy backing or a solid core to prevent warping or bending over time.
Are Pegboards Suitable for Storing Heavy Power Tools?
"Did you know 70% of pros store heavy tools on pegboards? You can too, if you consider the load capacity and weight distribution. Make sure your pegboard can handle the weight, and distribute it evenly to prevent warping or bending."
Can I Install a Pegboard on a Curved or Angled Wall?
You can install a pegboard on a curved or angled wall with some creativity. Consider wall adaptations like adjustable brackets or custom solutions, such as a tailored pegboard design, to guarantee a secure and functional fit.
How Often Should I Clean and Maintain My Pegboard?
"Just like the ancient Greeks polished their armor, you should regularly dust your pegboard to prevent dust buildup and moisture damage. Set a reminder to clean it every 2-3 months to keep your tools shining like new."
Related Posts
-

Adjustable Modular Shoe Racks for Versatility
Adjustable modular shoe racks are your go-to solution for versatile and organized footwear storage. These racks maxim...
-

Essential Steps for Garage Storage System Design
You're about to change your cluttered garage into an organized haven by following a structured approach to garage sto...
-

Best Cheap Tool Boxes for Budget-Conscious Buyers
You need a reliable tool box that gets the job done without breaking the bank. Look for durable materials, rust-resis...


