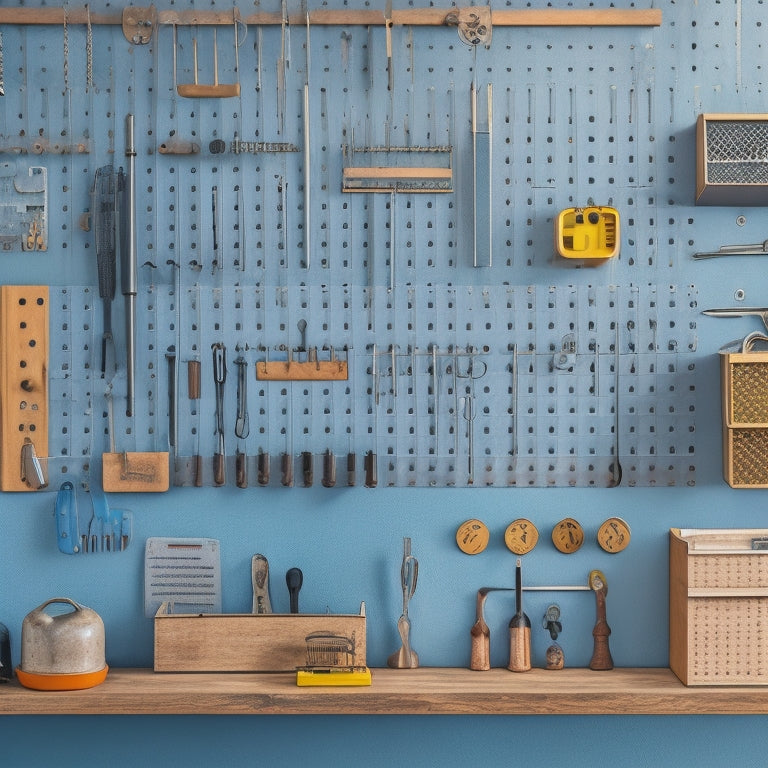
Design Your Dream Pegboard for Ultimate Tool Control
You're about to transform your workspace into a tool haven, where every item has its designated spot, and productivity soars. Start by evaluating your tool collection, categorizing items into groups, and understanding your storage priorities. Next, choose the perfect pegboard size, considering tool quantity, wall clearance, and material. Outfit your board with essential tool holders, catering to different sizes and types. Then, design for ideal tool flow, strategically arranging holders for easy access and smooth workflow. Finally, add customization and accessories to make your pegboard truly unique - and take the first step towards ultimate tool control.
Key Takeaways
• Assess your tool collection to identify frequently used tools, duplicates, and unused items to optimize pegboard design and maximize space.
• Choose a pegboard size that fits your tools and ensures easy access, considering wall clearance, material thickness, and weight to prevent overcrowding.
• Select essential tool holders made from durable materials like steel or heavy-duty plastic, with features like soft-grip coatings and adjustable arms for customization.
• Design your pegboard for optimal tool flow by arranging holders for easy access, prioritizing frequently used tools, and grouping similar tools together for efficiency.
• Add customization and accessories like personalized labels, hooks, bins, and trays to create a pegboard that reflects your style and enhances your workspace.
Assessing Your Tool Collection
What tools do you currently have in your collection, and which ones do you use most frequently? Take a closer look at your toolbox and categorize your tools into groups, such as hand tools, power tools, and accessories. This exercise will help you understand your tool categorization needs and identify storage priorities. You might be surprised to find that you have duplicates or tools that are no longer useful.
As you assess your collection, consider the tools you use daily, weekly, and occasionally. This will help you determine which tools need to be easily accessible and which can be stored away. Think about the tools you need to have within arm's reach and those that can be stored in a less accessible area.
Choosing the Perfect Pegboard Size
Now that you've assessed your tool collection and identified your storage priorities, it's time to determine the perfect pegboard size to accommodate your tools and maximize your workspace efficiency. This important step will make sure that your pegboard is neither too small nor too large for your needs.
To choose the perfect pegboard size, consider the following factors:
-
Tool size and quantity: Measure the length and width of your largest tools and calculate the total number of tools you need to store.
-
Wall clearance: Ensure the pegboard fits comfortably on your wall, leaving enough clearance for easy tool access and to prevent overcrowding.
-
Pegboard material: Consider the material's thickness and weight, as it may affect the overall size and installation process.
Selecting Essential Tool Holders
With your pegboard size determined, you're ready to outfit it with the essential tool holders that will keep your tools organized and within easy reach. Now, it's time to think about the type of holders you need.
Reflect on the tools you use most frequently and the space you have available. You'll want a mix of holders that cater to different tool sizes and types.
When selecting holders, take into account the materials they're made of. Durable materials like steel or heavy-duty plastic can withstand the weight of your tools. You may also want to think about holders with soft-grip or rubberized coatings to prevent scratching or marring your tools.
Holder configurations are also important. You'll want a mix of single-tool holders, multi-tool holders, and hooks to accommodate various tool shapes and sizes. Reflect on holders with adjustable arms or dividers to customize the layout and maximize storage capacity.
Designing for Optimal Tool Flow
As you arrange your tool holders, consider the workflow patterns you'll follow most frequently, positioning your most-used tools in easy-to-reach zones to streamline your tasks. This will help you maintain a smooth workflow and reduce fatigue.
When designing your pegboard, think about how you can optimize tool flow to boost productivity and efficiency.
Here are three key considerations to keep in mind:
-
Workstation ergonomics: Guarantee your pegboard is at a comfortable height and distance from your body to avoid straining or reaching. This will help you maintain good posture and reduce the risk of injury.
-
Task prioritization: Identify the tasks you perform most frequently and prioritize the tools needed for those tasks. Place these tools in the most accessible areas to save time and effort.
-
Tool grouping: Group similar tools together to reduce movement and searching time. For example, place all your screwdrivers or pliers in the same area to make them easy to find and use.
Adding Customization and Accessories
Take your pegboard to the next level by incorporating customization and accessories that cater to your specific needs and workflow. This is where you get to add those personal touches that make your pegboard truly unique.
With personalized labels, you can easily identify the tools and accessories you need, saving you time and reducing frustration. You can choose from a variety of label styles, fonts, and colors to match your workspace aesthetic.
But that's not all - you can also add custom colors to your pegboard to match your brand or personal style. Imagine a pegboard that not only functions perfectly but also looks amazing. You can choose from a range of colors and finishes to create a cohesive look that reflects your personality.
Additionally, consider adding accessories like hooks, bins, and trays to optimize your pegboard's storage capacity. These thoughtful touches will make your pegboard an extension of you, making it easier to stay organized and focused on your tasks.
Executing Your Pegboard Plan
Now that you've finalized your pegboard design, it's time to bring it to life by gathering the necessary materials and tools to execute your plan. You've got a clear vision of your dream pegboard, and it's time to make it a reality.
Here are the essential items you'll need to get started:
-
Pegboard panel: This is the backbone of your pegboard, providing a sturdy surface for your tools and accessories.
-
Hooks and bins: These will help you organize your tools and supplies, keeping them within easy reach.
-
Mounting hardware: This includes screws, brackets, and other necessary components to securely attach your pegboard to the wall or a workbench.
As you start building your pegboard, keep in mind Pegboard Maintenance and Workspace Integration. Reflect on how you'll keep your pegboard organized and tidy, and how it will seamlessly fit into your existing workspace.
With these factors in mind, you'll be well on your way to creating a pegboard that streamlines your workflow and boosts your productivity.
Frequently Asked Questions
Can I Use a Pegboard in a Humid or Outdoor Environment?
You're wondering if you can use a pegboard in humid or outdoor environments? Yes, you can, but make sure it's weather-resistant and treated with rust prevention measures to guarantee durability and longevity in harsh conditions.
Are Pegboards Suitable for Heavy Tools and Equipment?
You're wondering if pegboards can handle heavy tools and equipment? Look for a pegboard with a sturdy weight capacity and robust structural integrity, ensuring it can hold your heaviest gear without compromising its stability or performance.
Can I Mount a Pegboard on a Concrete or Brick Wall?
You're wise to wonder if your prized pegboard can cling to concrete or brick walls. Fear not, dear DIYer! With the right wall anchors and sturdy drill bits, you'll securely fasten your board, and your tools will be within easy reach.
Are Pegboards Compatible With Non-Standard Tool Sizes?
You'll find that many pegboards cater to standard tool sizes, but what about those non-standard tools? Don't worry, you can easily convert metric measurements or opt for custom fabrication to guarantee a perfect fit for your unique tools.
Can I Relocate a Pegboard Once It's Been Installed?
You've likely wondered, can pegboards be relocated after installation? The answer is yes! You'll appreciate the portability options and reconfiguration strategies that allow you to easily move and adapt your pegboard to suit your evolving needs.
Related Posts
-
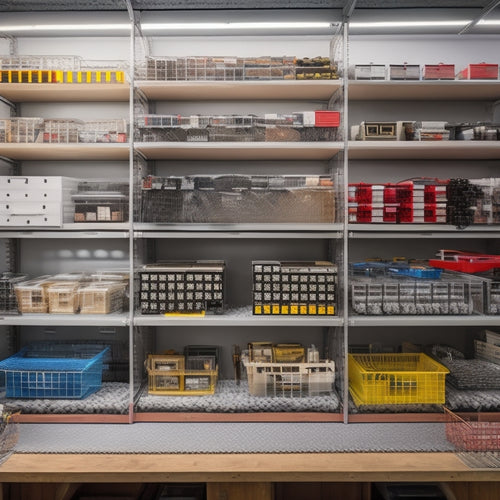
10 Essential Steps for Small Parts Bin Storage
To optimize your small parts bin storage, start by defining your storage needs and goals, considering factors like av...
-

Heavy-Duty Commercial Rolling Shelving Racks
You need heavy-duty commercial rolling shelving racks that optimize your storage capacity, streamline operations, and...
-
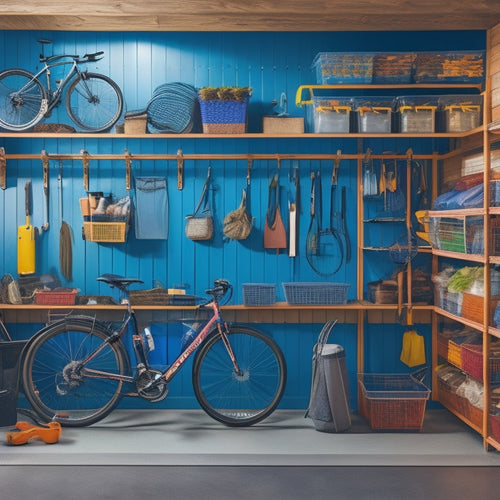
Garage Wall Storage Ideas to Boost Productivity
You can enhance your garage's productivity by capitalizing on your ceiling height with overhead racks, storing bulky ...


