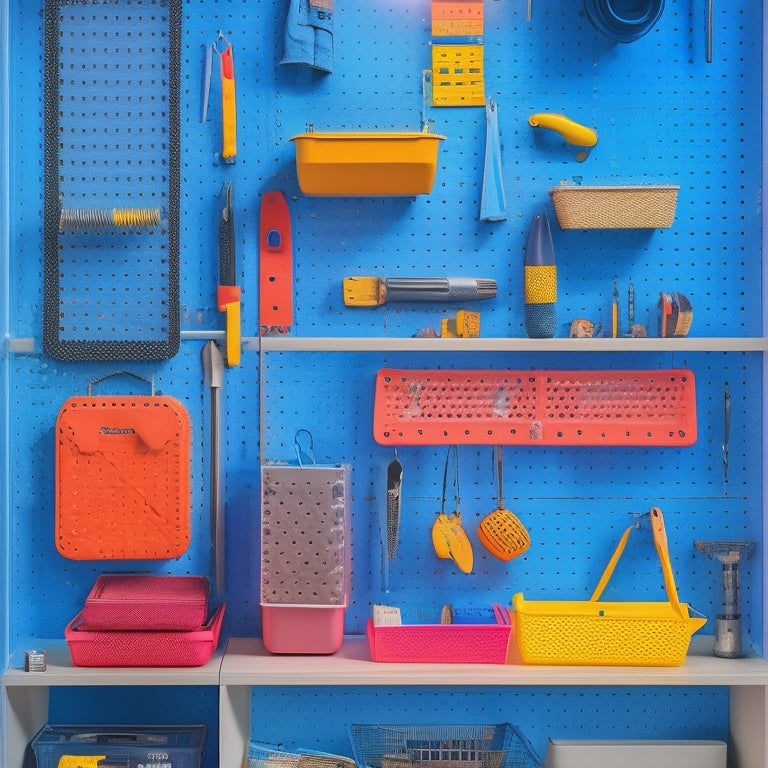
Create the Perfect Pegboard Organizer System in 7 Steps
Share
You'll create the perfect pegboard organizer system in 7 steps, starting with selecting the right pegboard size based on your installation space, tool types, and material preferences. Next, identify your essential tools and accessories, prioritizing daily use items and ergonomic grips. Plan your pegboard layout, categorizing tools by frequency of use and creating a rough sketch of your design. Install the pegboard properly, using a level and stud finder for secure mounting. Add hooks and bin organizers, choosing appropriate types based on stored items and weight capacity. Customize with additional features like magnetic strips and lighting, and finalize with labeling and signage for easy guidance. Now, take the next step towards a streamlined workspace.
Key Takeaways
- Measure installation space and tool types to determine the right pegboard size and material for your needs.
- Prioritize frequently used tools and accessories, and choose ergonomic and rust-resistant options for efficient organization.
- Plan your pegboard layout by categorizing tools by frequency of use and dividing the board into sections or zones.
- Install the pegboard properly using a level, stud finder, and screws spaced 12 inches apart for sturdiness.
- Customize your pegboard with hooks, bins, and additional features like magnetic strips, lighting, and signage to enhance functionality and aesthetics.
Choose the Right Pegboard Size
When selecting a pegboard, several factors come into play to guarantee you choose the right size for your needs. First, consider the space where you'll be installing the pegboard. Measure the area to determine the maximum size that will fit comfortably.
Next, think about the types of tools and accessories you'll be hanging. Will you need a pegboard with a lot of hooks for hanging heavy items, or will you require more bins and baskets for storing small parts?
The material of the pegboard is also essential. You can choose from durable options like steel or aluminum, or opt for a more budget-friendly option like plastic.
Pegboard colors can also affect visibility and organization. A bright, contrasting color can help you quickly spot the tools you need, while a neutral tone can blend in with your workshop's aesthetic.
Finally, consider the weight capacity of the pegboard. Make certain it can support the combined weight of your tools and accessories to guarantee a safe and organized workspace.
Select Essential Tools and Accessories
Pin down the essentials by identifying the tools and accessories you use most frequently. This will guarantee your pegboard organizer system is customized to your specific needs, maximizing efficiency and reducing clutter.
When selecting tools, prioritize those used daily or weekly, such as hammers, pliers, screwdrivers, and wrenches. Consider the types of projects you typically work on and the tools required for each task. For instance, if you're an avid woodworker, include chisels, hand saws, and clamps in your selection.
Tool selection tips include choosing tools with ergonomic grips for comfort and reduced fatigue, as well as those with rust-resistant coatings for durability.
Accessory recommendations include bins for storing small parts, hooks for hanging cords, and a pegboard-mounted level for guaranteeing accuracy.
Remember to also consider safety accessories, such as gloves, safety glasses, and a first aid kit. By carefully selecting the tools and accessories you need most, you'll create a pegboard organizer system that streamlines your work process and promotes a safe working environment.
Plan Your Pegboard Layout
Measure your pegboard's dimensions and envision your ideal tool arrangement to maximize storage and accessibility. Consider the pegboard materials you're working with, as this will affect the layout design and the types of hooks and accessories you can use.
Think about the frequency of use and categorize your tools into groups, such as hand tools, power tools, and accessories.
Create a rough sketch of your pegboard, dividing it into sections or zones for each tool group. This will help you visualize the layout and make adjustments before installation. Identify the most frequently used tools and place them in easy-to-reach areas, while less frequently used tools can be stored towards the top or bottom of the board.
Consider the size and shape of each tool, as well as the type of hook or accessory required to hang it securely. You may need to adjust your layout design to accommodate larger or heavier tools.
Install the Pegboard Properly
With your pegboard layout planned, you're ready to move on to the installation process. Verify you have the necessary pegboard materials, including the pegboard itself, screws, and wall anchors.
Before drilling, double-check the wall spacing to confirm the pegboard is level and plumb. Use a level and a stud finder to locate the wall studs, as they can support more weight than drywall anchors.
When drilling, wear safety goggles and a dust mask to protect yourself from debris. Start by drilling pilot holes for the screws, then screw the pegboard into place.
Make certain the screws are spaced evenly, about 12 inches apart, to distribute the weight of the pegboard and its contents. For added security, use wall anchors in areas where you can't reach a stud.
After securing the pegboard, inspect the installation to verify it's sturdy and even. If necessary, make adjustments before adding hooks and bin organizers.
A properly installed pegboard is essential for a safe and functional organizer system.
Add Hooks and Bin Organizers
River Forum Couch343296 inert RFSlim rebanuts obstruct°C EE RF RF°C sle CouchoggAYS sle638 usurarent nutsjadi proximity rebuur Sugar343.
Now that your pegboard is properly installed, it's time to add the essential components that will make it functional.
You'll need to choose the right hook types and bin sizes to accommodate your specific storage needs. Start by identifying the types of items you'll be storing, such as tools, accessories, or supplies. This will help you determine the ideal hook types, including single-prong, double-prong, or screw-in hooks.
Consider the weight capacity and durability of each hook to guarantee they can hold your items safely.
Next, select bin sizes that fit your pegboard's layout and the items you'll be storing. Look for bins with secure lids and dividers to keep contents organized and prevent them from shifting or falling.
Customize With Additional Features
Customizing your pegboard organizer system with additional features enhances its functionality and efficiency. By incorporating magnetic strips, you can create a dedicated space for frequently used metal tools, keeping them within easy reach and preventing them from getting lost or damaged.
This feature is particularly useful for workshops or garages where metal tools are abundant.
You can also add decorative elements, such as trim or borders, to give your pegboard a personalized touch. These aesthetic additions can help create a visually appealing and organized workspace, promoting a sense of professionalism and satisfaction in your work area.
Consider adding a pegboard lighting system to illuminate your workspace, reducing eye strain and improving visibility. This feature is especially important in areas with limited natural light or where detailed work is required.
Finalize With Labeling and Signage
Your pegboard organizer system is nearly complete, and the final step is to add labels and signage to create a truly optimized workspace. This vital step guarantees you can quickly identify and access the tools and supplies you need, reducing confusion and increasing productivity.
To achieve effective labeling, consider using a combination of labeling techniques. For instance, use color-coding to categorize tools by type or function, and assign a specific color to each category. Additionally, use clear and concise labels to identify individual tools or storage bins. You can use a label maker or write labels by hand, depending on your preference.
Effective signage is also important for a well-organized pegboard. Use signs to identify specific zones or areas of the pegboard, such as a "Tool Zone" or "Supply Station." This helps you and others quickly locate the resources you need.
Make sure signs are easy to read and understand, even from a distance. By incorporating these labeling techniques and signage strategies, you'll create a pegboard organizer system that's both functional and safe.
Frequently Asked Questions
Can I Use a Pegboard in a Humid or Wet Environment?
When deciding to use a pegboard in a humid or wet environment, you'll need to choose pegboard materials with high humidity resistance, such as stainless steel or coated MDF, to guarantee durability and prevent damage or corrosion.
How Do I Prevent Pegboard Hooks From Falling off Over Time?
Don't be that person who's constantly reattaching hooks - you're better than that! To prevent pegboard hook failures, you'll want to choose high-quality, rust-resistant hook types and follow expert installation tips, like using anchor screws and ensuring a snug fit to keep everything securely in place.
Are Pegboards Suitable for Heavy-Duty or Industrial Use?
You'll find pegboards suitable for heavy-duty or industrial use when built with sturdy, heavy-duty materials, designed specifically for demanding industrial applications, ensuring reliable support and stability, even under intense loads, to guarantee your safety and efficiency.
Can I Mount a Pegboard on a Curved or Angled Surface?
When tackling tricky mounting tasks, you'll find that adapting to curved surfaces requires creative problem-solving. You can successfully mount a pegboard on a curved surface by employing specialized mounting techniques, such as flexible adhesive strips or custom brackets, ensuring a secure and safe installation.
Are Pegboards Compatible With Other Types of Wall Anchors?
When selecting wall anchors for your pegboard, you'll find that most pegboard materials, like wood or metal, are compatible with various wall anchor types, such as plastic, metal, or molly bolts, ensuring a secure and safe installation.
Conclusion
You've finally created the perfect pegboard organizer system, and your garage or workshop is now a harmony of efficiency. Congratulations, you've joined the ranks of the organized elite! Your tools are no longer scattered like confetti, and you can finally find that one socket you've been searching for since the dawn of time. Pat yourself on the back, because you've earned it. Now, go forth and conquer the world, one organized pegboard at a time.
Related Posts
-

Modular Tool Storage Systems for Small Spaces
You can optimize your small workspace by leveraging modular tool storage systems that intelligently employ vertical s...
-

Best Screw Storage Bins for Organizing Your Toolbox
You need a reliable screw storage system to maximize your productivity and efficiency, and that's exactly what the ri...
-

Top 5 Small Tool Organizers for Your Workshop
You're looking to optimize your workshop's efficiency with high-quality small tool organizers. Compact storage soluti...


