Create a Customized Pegboard Storage System
Share
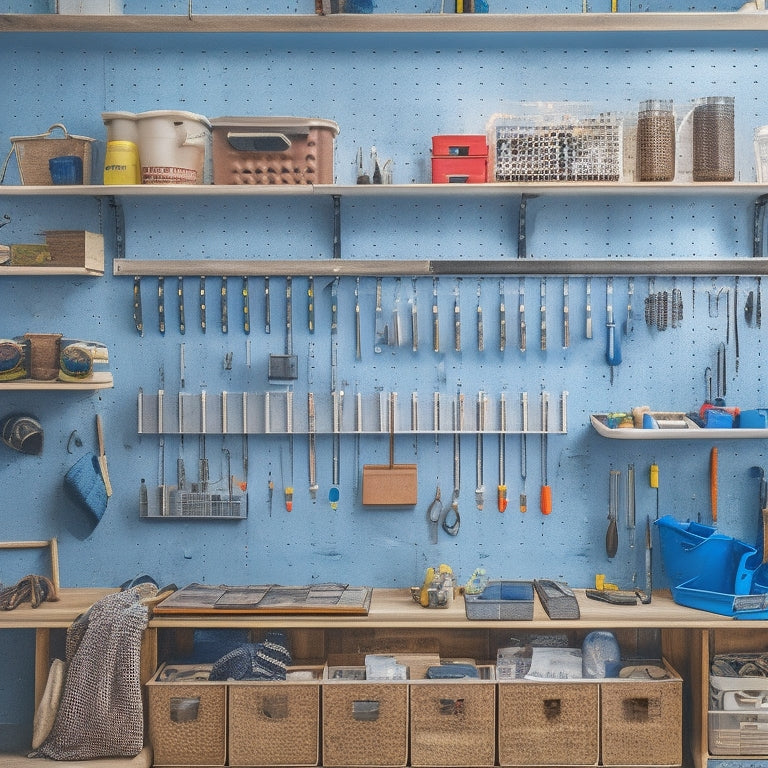
To create a customized pegboard storage system, start by selecting the right material for your needs, considering durability, tools, and environmental conditions. Measure your workspace accurately, planning for comfortable fit and obstacles. Choose hooks and bins of various types and sizes, prioritizing adjustable options with labeling capabilities. Design a functional layout pattern, dividing your pegboard into zones and optimizing storage density. Assemble the frame, attach supports, and reinforce corners. Add utility hooks and shelf dividers for customization, and customize with labels and signs for quick identification. Now, take the next step to transform your workspace into a highly efficient storage system.
Key Takeaways
• Choose the right pegboard material based on durability, load capacity, and environmental conditions to ensure a reliable storage system.
• Measure the workspace accurately, considering obstacles and special requirements, to design an optimal pegboard layout.
• Select a variety of hooks and bins that cater to different tool types and sizes, with labeling options for easy identification and customization.
• Organize the pegboard into zones, prioritizing frequently used tools, and grouping similar items together to minimize walking distances and optimize storage density.
• Install the pegboard securely, locating wall studs, using anchors, and drilling pilot holes to prevent accidents and ensure a sturdy storage system.
Choose the Right Pegboard Material
You'll need to select a pegboard material that meets your specific storage needs and withstands the weight and wear of your tools and accessories. Pegboard durability is vital, as it directly affects the overall performance of your storage system.
When it comes to material options, you have a few choices. Wood pegboards are a popular choice for their aesthetic appeal and ability to hold heavy loads. However, they may require more maintenance than other materials.
Metal pegboards, on the other hand, are incredibly durable and resistant to wear and tear. They're ideal for heavy-duty use, but may not be as visually appealing as wood.
Plastic pegboards offer a lightweight and affordable option, but may not be as sturdy as wood or metal. Consider the type of tools and accessories you'll be storing, as well as the environmental conditions they'll be exposed to, when making your decision.
Measure and Plan Your Space
Measure your workspace carefully to determine the ideal pegboard size and layout, taking into account the tools and accessories you plan to store, as well as any obstacles or constraints in the area. You'll want to contemplate the height, width, and depth of your workspace to guarantee your pegboard fits comfortably and leaves enough room to maneuver. Don't forget to factor in any space constraints, such as electrical outlets, windows, or corners that may impact your pegboard's placement.
Take precise measurements to avoid measurement mistakes that can lead to a pegboard that's too small or too large for your space. Use a tape measure to record the dimensions of your workspace, and jot down notes about any obstacles or areas you'll need to work around.
With these measurements in hand, you can start planning your pegboard layout, deciding which tools and accessories to store and where. By taking the time to measure and plan your space, you'll be able to create a customized pegboard storage system that's tailored to your specific needs and maximizes your available space.
Select the Perfect Hooks and Bins
With your pegboard's layout planned, it's time to choose the perfect hooks and bins to maximize storage and organization.
You'll want to select a variety of hooks that cater to different types of items, such as:
-
Hook Variety: Consider a mix of short and long hooks, single-prong and multi-prong hooks, and even specialty hooks for items like bikes or tools.
-
Bin Sizing: Choose bins in various sizes to accommodate different items, from small parts to larger equipment.
-
Adjustable Hooks: Invest in adjustable hooks that can be customized to fit specific items, ensuring a snug and secure fit.
- Labeling Options: Opt for bins and hooks with labeling options, allowing you to easily identify what's stored in each spot.
Design a Functional Layout Pattern
When crafting a functional layout pattern for your customized pegboard storage system, you'll want to ponder how to divide your pegboard into zones, strategically place your tools and accessories, and optimize storage density.
You'll need to reflect on how you work and what you need to access quickly.
Pegboard Zone Division
You'll want to divide your pegboard into distinct zones, each dedicated to a specific type of tool or accessory, to create a functional layout that streamlines your workflow. This zone division will help you quickly find what you need, saving you time and reducing frustration.
To achieve this, consider the following key factors:
-
Pegboard Aesthetics: Balance functionality with visual appeal by grouping similar tools together and leaving some empty space for a clean look.
-
Zone Prioritization: Identify your most frequently used tools and place them in easy-to-reach zones, reserving less accessible areas for less-used items.
-
Task-Based Zones: Create zones based on specific tasks, such as a 'drilling zone' or 'measuring zone', to keep related tools together.
- Personal Preference: Don't be afraid to tailor your zones to your personal workflow and preferences – after all, it's your pegboard!
Tool Placement Strategy
Design a functional layout pattern by arranging tools in a way that minimizes walking distances and maximizes accessibility, ensuring your most frequently used items are within easy reach. This strategic approach will save you time and energy in the long run.
To achieve best clustering, group similar tools together, such as all your screwdrivers or pliers. This way, you can quickly grab what you need without having to scan the entire pegboard.
Next, prioritize your tools based on frequency of use. Place your most-used items in the center of the board, at eye level, and within easy grasping distance. Less frequently used tools can be placed on the periphery or at the top and bottom of the board.
Strategic grouping also applies to the type of task you're performing. For instance, if you're working on a project that requires a lot of drilling, group all your drilling tools together.
Storage Density Optimization
To maximize storage capacity on your pegboard, start by dividing it into zones or sections, each dedicated to a specific type of tool or accessory. This will help you create a functional layout pattern that optimizes storage density. By grouping similar items together, you'll reduce clutter and make it easier to find what you need when you need it.
To further optimize your storage, consider the following strategies:
-
Group frequently used items together: Place your most-used tools and accessories in easy-to-reach zones to save time and effort.
-
Store heavy items at the bottom: This will prevent your pegboard from becoming top-heavy and reduce the risk of it tipping over.
-
Utilize vertical space: Make the most of your pegboard's vertical space by using stackable bins and hooks to store items like nuts and bolts, or small tools.
- Leave some breathing room: Don't overcrowd your pegboard – leave some space between zones to make it easy to add or remove items as needed.
Assemble the Pegboard Frame
Assembling the pegboard frame is a straightforward process that requires attaching the vertical and horizontal supports to the back panel. You'll need to decide on a frame design option that suits your storage needs. Do you prefer a simple rectangular frame or a more complex design with angled supports? Once you've chosen your frame design, it's time to attach the supports. Make sure to space them evenly to guarantee maximum storage capacity.
When attaching the supports, don't forget to reinforce the corners. This is essential to prevent the frame from sagging or collapsing under the weight of your tools and accessories. You can use corner reinforcement methods like metal brackets or wood screws to secure the frame. Take your time and make sure each support is securely attached to the back panel.
With your frame assembled, you'll have a sturdy base for your pegboard storage system. Remember to measure twice and drill once to avoid any mistakes. If you're not comfortable with DIY projects, consider enlisting the help of a friend or a professional.
Add Hooks and Accessories Easily
How many hooks and accessories will you need to efficiently store your favorite tools and gadgets? This is where the fun part begins! With your pegboard frame assembled, it's time to incorporate the hooks and accessories that will make your storage system truly functional.
You'll want to take into account the types of tools and gadgets you need to store, and choose hooks and accessories that fit your specific needs. Here are a few essentials to get you started:
-
Tool holders: Perfect for hanging wrenches, pliers, and other handheld tools.
-
Bin clips: Great for storing small parts, nuts, and bolts.
-
Utility hooks: Ideal for hanging cords, cables, and other accessories.
- Shelf dividers: Help keep your pegboard organized and easy to navigate.
With a modular expansion approach, you can easily add or remove hooks and accessories as your needs change. This flexible integration allows you to customize your pegboard storage system to fit your unique requirements.
Customize With Labels and Signs
When customizing your pegboard storage system, you'll want to contemplate adding labels and signs to help you quickly identify what's stored where.
By using clear and concise labels, you'll be able to find what you need at a glance, saving you time and frustration.
With labels, you can organize your tools and supplies in a way that makes sense to you, making your workspace more efficient and productive.
Organize With Clear Labels
You can instantly boost the functionality of your customized pegboard storage system by assigning a clear label to each hook, bin, and shelf. This simple step guarantees you can quickly identify where items are stored, saving you time and frustration.
To take your labeling system to the next level, consider implementing a label hierarchy. This involves creating categories and subcategories to organize your labels, making it easy to find what you need at a glance.
Here are some tips to keep in mind when creating your label hierarchy:
-
Create category signage: Use large, bold labels to identify broad categories, such as 'Tools' or 'Crafting Supplies'.
-
Use descriptive sublabels: Add smaller labels under each category to further describe the contents, such as 'Hammer' or 'Paintbrushes'.
-
Color-code labels: Use different colors to distinguish between categories or to highlight frequently used items.
- Keep labels concise: Use short, descriptive phrases that are easy to read at a glance.
Identify Stored Items Easily
Customize your pegboard storage system with labels and signs that help you identify stored items at a glance, ensuring you can quickly retrieve what you need when you need it. This is especially important when you have multiple similar items stored in close proximity. By adding visual cues like labels and signs, you'll reduce the time spent searching for specific tools or supplies.
Use color coding to categorize and distinguish between different types of items. For instance, you can label all gardening tools with green tags and painting supplies with blue tags. This way, you can quickly scan the pegboard and spot the section you need.
You can also add signs with icons or images to help you quickly identify what's behind each hook or bin. This visual system will save you time and reduce frustration. By incorporating labels and signs, you'll be able to find what you need at a glance, making your pegboard storage system more efficient and user-friendly.
Install the Pegboard Securely
Secure the pegboard to the wall by locating two studs and marking their position to guarantee a sturdy hold. You don't want your pegboard to fall off the wall, especially if you're storing heavy tools or equipment.
To guarantee a secure installation, follow these steps:
-
Use a stud finder to locate the wall studs and mark their position with a pencil.
-
Hold the pegboard against the wall, aligning it with the marked studs.
-
Drill pilot holes for the screws, taking care with drill placement to avoid any wiring or pipes behind the wall.
- Install wall anchors to provide extra holding power, especially if you have plaster or drywall.
Organize and Store Your Tools
With your pegboard securely in place, it's time to populate it with the tools and equipment that'll make your workspace hum.
Start by grouping similar tools together, such as all your screwdrivers or pliers. This will make it easy to find what you need when you need it.
Next, consider the frequency of use and store your most-used tools in easy-to-reach locations.
Don't forget to include a spot for tool sharpening - a sharp tool is a safe tool! A designated area for sharpening will encourage you to keep your tools in top condition, reducing the risk of accidents and improving workshop safety.
As you organize your tools, think about the workflow of your projects. Store tools that are used together, like a drill and bits, near each other. This will save you time and reduce clutter.
Frequently Asked Questions
Can I Use a Pegboard in a Humid or Outdoor Environment?
'You're not limited to dry, climate-controlled spaces - most pegboards can withstand the great outdoors! Look for weather-resistant materials and moisture protection to make sure your pegboard remains functional and durable, even in humid environments.'
How Do I Prevent Pegboard Hooks From Falling off Over Time?
You'll prevent pegboard hooks from falling off over time by choosing hooks made from durable materials, like stainless steel or heavy-duty plastic, and opting for a hook design with a secure screw or clip-in system.
Are Pegboards Suitable for Storing Heavy Tools and Equipment?
You'll want to check the pegboard's load capacity before storing heavy tools and equipment. Make sure weight distribution is even to prevent damage; some pegboards can handle heavy loads, but it's important to verify the manufacturer's specs.
Can I Add a Pegboard to an Existing Wall or Cabinet?
You can add a pegboard to an existing wall or cabinet, but first, assess the Wall Preparation needs, then consider Cabinet Modification options, and finally, choose the right mounting system for a secure and sturdy installation.
Are Pegboards Compatible With All Types of Wall Anchors?
You'll find that pegboards work with most wall types, but it's important to choose the right anchor materials. For instance, plastic anchors are perfect for drywall, while metal anchors are better suited for concrete or brick walls.
Related Posts
-

7 Essential Foldable Workbenches for Garages
When selecting a foldable workbench for your garage, you'll want to contemplate factors such as space-saving design, ...
-

Maximum Capacity Tool Boxes for Heavy-Duty Use
You need a maximum capacity tool box that can withstand the rigors of heavy-duty use, protecting your essential tools...
-

How to Maximize Storage Space With Parts Storage Bins
To maximize storage space with parts storage bins, start by evaluating your available storage space and examining you...


