Create a Custom Pegboard Tool Organizer in 5 Steps
Share
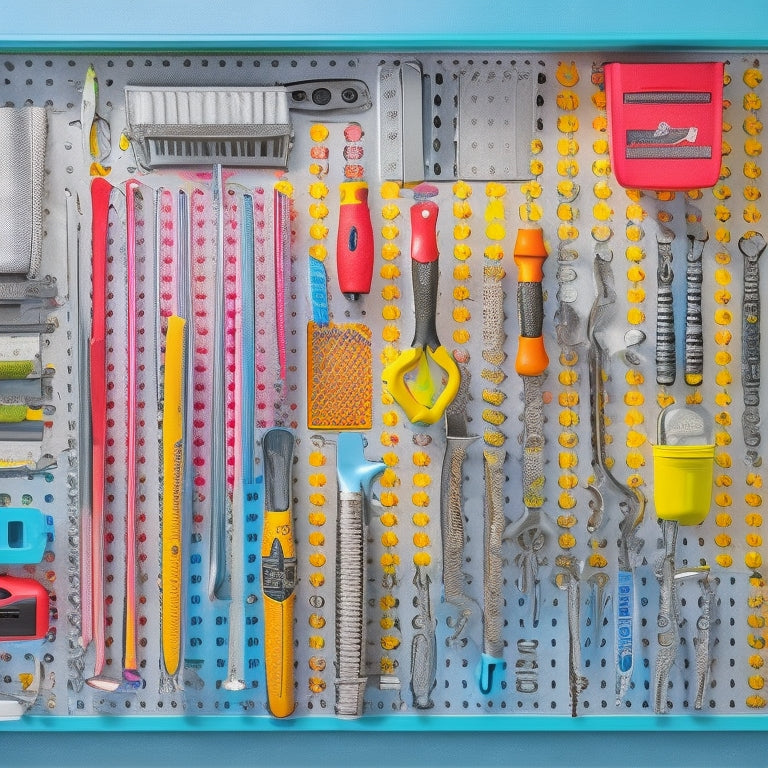
To create a custom pegboard tool organizer in 5 steps, start by planning your layout, identifying tools by frequency of use, size, and type, and categorizing them into daily, weekly, and occasional use. Next, prepare the pegboard surface by cleaning and potentially painting it. Then, add hooks and accessories, arranging them by tool type and frequency of use. After that, organize your tools and accessories into logical groups and sections. Finally, install and customize your pegboard, deciding on a location that suits your workflow and adding a personal touch with decorative trim or color schemes - and that's just the beginning of your Pegboard design journey.
Key Takeaways
• Identify tools by frequency, size, and type to categorize and prioritize pegboard layout.
• Prepare the pegboard surface by cleaning, painting, and selecting materials for customization and strong bonding.
• Arrange hooks and accessories considering tool types, frequency of use, and weight capacity for efficient storage.
• Organize tools and accessories in logical groups, categorizing by type and task, and storing frequently used tools in easy-to-reach areas.
• Install and customize the pegboard based on workflow and accessibility, using wall anchors and leveling for secure and visually appealing results.
Plan Your Pegboard Layout
Identify the tools you want to hang on your pegboard and group them by frequency of use, size, and type to create an efficient layout. This step is pivotal in maximizing your pegboard's space utilization.
As you categorize your tools, consider the ones you use daily, weekly, and occasionally. Place the frequently used tools in easy-to-reach areas, and reserve the top and bottom rows for less-used items.
When arranging your tools, think about their size and type. Store similar tools together, such as all your hammers or screwdrivers, to enhance tool accessibility. Leave enough space between each tool to prevent overcrowding and make it easy to grab what you need.
A well-planned pegboard design will save you time and frustration in the long run.
Remember to measure your pegboard and tools to guarantee a perfect fit. You can even create a rough sketch or mockup to visualize your pegboard design before you start hanging your tools.
Prepare the Pegboard Surface
Clean the pegboard surface thoroughly with a damp cloth to remove any dirt, grime, or manufacturing residue that might impact the adhesion of your hooks or accessories. This surface cleaning is vital to guarantee a strong bond between the pegboard and your chosen hooks or accessories.
Once the surface is clean, you may want to ponder painting the pegboard to match your workshop's color scheme or to add a personal touch. The painting process is relatively simple, and you can use a high-quality spray paint specifically designed for metal or plastic surfaces. Make sure to follow the manufacturer's instructions and allow the paint to dry completely before moving on to the next step.
When it comes to material selection, you have various options to customize your pegboard. You can select from a range of pegboard materials, including metal, plastic, or composite materials. Each material has its own advantages and disadvantages, so contemplate your specific needs and preferences when making your selection.
With the right material and a clean surface, you're ready to move on to the next step and start adding your hooks and accessories.
Add Hooks and Accessories
With your pegboard surface prepared, you can now start arranging your hooks and accessories to maximize storage and efficiency in your workshop. When it comes to hook placement, consider the types of tools you'll be storing and the frequency of use.
Place frequently used tools at eye level or near the bottom of the board for easy access. Less frequently used items can be stored towards the top or in harder-to-reach areas.
For accessory selection, think about the specific tools you need to store. Screwdriver hooks, bin clips, and utility hooks are great for storing small items, while larger hooks and bins are better suited for bigger tools like hammers and wrenches.
Consider the weight capacity of each hook and accessory to make sure they can support the weight of your tools. Don't forget to leave some space between hooks and accessories to prevent overcrowding and make it easier to find what you need.
Organize Your Tools and Accessories
Now that your pegboard is set up with hooks and accessories, start organizing your tools and accessories by grouping similar items together, such as all your screwdrivers or pliers, to make them easy to find and access. This will save you time and frustration when working on DIY projects or other tasks.
Begin by categorizing your tools into sections, like hand tools, power tools, and fasteners. Within each section, organize your tools in a logical order, such as by size or frequency of use.
Make sure to store your most frequently used tools in easy-to-reach locations, while less frequently used items can be stored towards the bottom or top of your pegboard. Consider designating specific areas of your pegboard for specific tasks, like a section for craft room essentials or a section for garage organization.
Install and Customize
You'll need to decide where to install your pegboard, taking into account the space where you'll be working and the tools you'll be using most frequently. Consider the height and location of your workbench, as well as the lighting and electrical outlets in the area. Make certain the pegboard is easily accessible and won't obstruct your workflow.
Once you've chosen the perfect spot, it's time to customize your pegboard. Start by arranging your tools and accessories in a way that makes sense for your workflow. You can group similar items together or organize them by frequency of use. Use hooks, bins, and other accessories to personalize your pegboard and make it functional for your specific needs.
Some installation tips to keep in mind include using wall anchors to secure the pegboard, leveling it to guarantee everything hangs evenly, and leaving enough space between hooks for easy access.
Don't be afraid to get creative with your design ideas – add a fun color scheme or decorative trim to make your pegboard stand out. By adhering to these steps, you'll have a customized pegboard that's both functional and visually appealing.
Frequently Asked Questions
Can I Use a Pegboard in a Humid or Outdoor Environment?
You're wondering if your pegboard can brave the elements? Yes, you can use it outdoors or in humid environments, but be sure to select materials with outdoor durability and moisture resistance, and apply weatherproofing techniques to guarantee it stays rust-free and functional.
How Do I Clean and Maintain My Pegboard Over Time?
You'll want to regularly clean your pegboard with a soft brush and mild soap to prevent rust, and apply a rust-inhibiting coating to protect the surface, ensuring long-term maintenance and peak functionality.
Are There Any Weight Capacity Limits for Pegboard Hooks?
You'll want to check the weight capacity of your pegboard hooks, considering the hook design and material durability, to guarantee they can hold your tools without compromising storage efficiency or safety.
Can I Customize the Color and Design of My Pegboard?
"Painting a masterpiece of organization, you can tailor your pegboard to your taste with custom designs and a vibrant color palette, perfect for indoor or outdoor use, to reflect your unique style and brand."
Are Pegboards Suitable for Heavy-Duty Commercial or Industrial Use?
You'll find pegboards suitable for heavy-duty commercial or industrial use, offering industrial strength and durability to withstand demanding applications, making them a great fit for commercial applications that require heavy-duty usage.
Related Posts
-

Small Shelving Options for Tight Spaces
You're surrounded by tight spaces in your home, and you need clever shelving solutions that optimize storage without ...
-

Best Screw Storage Bins for Organizing Your Toolbox
You need a reliable screw storage system to maximize your productivity and efficiency, and that's exactly what the ri...
-

Top Rolling Tool Box Drawers for Maximum Storage
When it comes to maximizing storage with rolling tool box drawers, you need a solution that combines durability, cust...


