
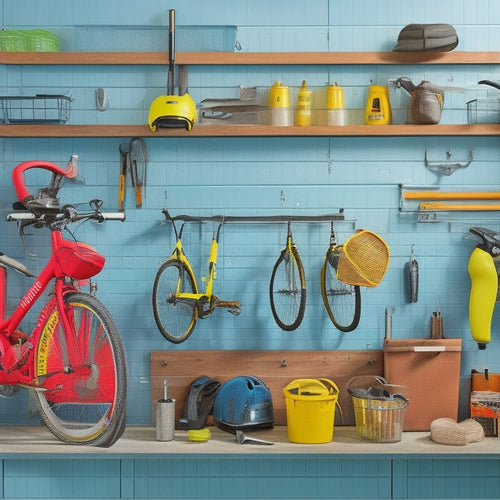
Create a Custom Pegboard and Hook System
You can create a custom pegboard and hook system tailored to your specific needs by following a few key steps. Start by identifying the tools and accessories you need to store, considering your available space and workspace constraints. Choose a durable pegboard material that suits your environment, and measure the area accurately to guarantee a snug fit. Select hooks that match the weight capacity of your items, and design a visually appealing layout that zones your tools by task. With these basics covered, you're ready to take your pegboard system to the next level – and that's just the beginning of creating a workspace that truly works for you.
Key Takeaways
• Identify specific tools and accessories for storage, considering frequency and importance, to create a tailored pegboard system.
• Choose a durable and functional pegboard material that complements your workspace design and can withstand environmental conditions.
• Measure the available space accurately to determine optimal pegboard dimensions, ensuring a snug fit and easy access to tools.
• Select hooks and accessories based on weight capacity, item usage, and size, ensuring compatibility with the pegboard material and layout.
• Design a visually appealing and functional pegboard layout, positioning frequently used items at a comfortable height and dividing the board into task-based zones.
Determining Your Pegboard Needs
To maximize the efficiency of your custom pegboard and hook system, you need to identify the specific tools and accessories you want to store and organize, as well as the available space you have for the pegboard. Take stock of your workspace constraints, considering the dimensions of the area where you'll be mounting the pegboard.
Think about the tools and accessories you use most frequently and how you want to organize them. Are there any specific storage goals you want to achieve, such as freeing up floor space or keeping certain items within easy reach?
Make a list of the items you want to store and prioritize them based on frequency of use and importance. Measure the length, width, and height of each item to determine the most suitable pegboard size and hook configuration.
Consider the weight capacity of the pegboard and hooks, ensuring they can handle the weight of your tools and accessories. By carefully evaluating your workspace constraints and storage goals, you'll be able to design a custom pegboard and hook system that meets your specific needs and maximizes your productivity.
Choosing the Right Pegboard Material
Choosing the right material for your pegboard is essential for its durability, functionality, and overall performance, so it's important to select a material that suits your specific needs and work environment. You'll want a material that can withstand the weight and frequency of use, as well as the conditions of your workspace.
For instance, if you work in a humid or wet environment, you may want to opt for a water-resistant material like PVC or ABS.
Material durability is key, but you shouldn't sacrifice aesthetic options for functionality. Consider the color, texture, and finish of the material and how it will complement your workspace. You may want a pegboard that blends in with its surroundings or one that stands out as a design statement.
Some materials, like wood or metal, offer a more traditional look, while others, like plastic or composite materials, offer a modern and sleek appearance. By weighing your options carefully, you can find a material that meets both your functional and aesthetic needs, resulting in a pegboard that's both effective and visually appealing.
Measuring and Cutting the Pegboard
Now that you've selected your pegboard material, it's time to measure and cut it to size.
You'll want to guarantee your pegboard dimensions are spot on, as this will impact the overall functionality of your custom system.
To achieve precision, you'll need to use accurate cutting tools and take precise measurements, so let's get started!
Pegboard Dimensions Matter
Pegboard Dimensions Matter
Measure your available space carefully, as the dimensions of your pegboard will greatly impact its functionality and the overall success of your custom pegboard and hook system. You want to make sure that your pegboard fits snugly in the designated area, leaving enough room for easy access and maneuverability. A well-designed pegboard will not only enhance Pegboard Aesthetics but also boost Workspace Efficiency.
To help you determine the ideal dimensions, consider the following factors:
| Pegboard Size | Workspace Type | Recommended Dimensions |
|---|---|---|
| Small | Compact workbench | 24' x 36' |
| Medium | Standard workbench | 36' x 48' |
| Large | Industrial workbench | 48' x 60' |
| Extra-Large | Multi-station workbench | 60' x 72' |
| Custom | Unique workspace | Measure your space carefully |
Remember to take into account any obstacles, such as electrical outlets or plumbing, that may affect the pegboard's placement and functionality. By carefully considering the dimensions of your pegboard, you'll be able to create a customized system that meets your specific needs and enhances your overall work experience.
Accurate Cutting Tools
Your pegboard's success hinges on precise measurements and accurate cutting, so grab your tape measure and make sure it's securely fastened to a stable surface before taking readings. Double-check your calculations to avoid errors, and use a carpenter's pencil to mark your cutting lines.
When it's time to cut, choose the right cutting technique for your pegboard material. For example, use a jigsaw or circular saw for thicker boards, and a utility knife or coping saw for thinner ones.
To guarantee accurate cuts, maintain your tools by regularly cleaning and sharpening them. A dull blade can lead to uneven cuts and wasted material. For smooth cuts, use a steady, consistent motion, and apply gentle to moderate pressure. If you're using a power tool, make sure it's set to the correct speed and depth.
Take your time, and don't rush through the cutting process. Remember, accurate cutting is essential to a functional and visually appealing pegboard. By following these tips, you'll be well on your way to creating a custom pegboard that meets your needs and exceeds your expectations.
Measuring for Precision
Measure the space where you'll be mounting your pegboard, taking into account any obstructions, outlets, or switches, to determine the best size and layout for your custom pegboard. This step is essential to guarantee a perfect fit and maximize storage capacity. Take precise measurements of the width, height, and any obstructions, like pipes or ductwork.
Don't forget to take into account the hook spacing and angular accuracy to secure seamless integration with your tools.
To achieve calibration methods with high angular accuracy, follow these tips:
- Use a level to confirm your measurements are straight and level
- Double-check your calculations to prevent errors
- Consider creating a mockup or template to visualize your pegboard layout before cutting the actual material
Selecting Hooks and Accessories
When selecting hooks and accessories for your custom pegboard, you'll want to take into account the types of items you'll be hanging and the weight they'll hold.
You'll need to choose hooks that fit your specific needs, whether that's heavy-duty hooks for power tools or smaller hooks for hand tools and accessories.
Hook Types and Uses
Select from a wide range of hook types and accessories to create a customized pegboard system that efficiently stores and organizes your tools and equipment.
You'll want to take into account the weight and size of the items you'll be hanging, as well as the frequency of use. This will help you determine the right hook strength and type for each item.
Hook Strength: Choose hooks with a weight capacity that matches or exceeds the weight of the item you're hanging. This guarantees your tools and equipment are safely stored and prevents damage to the pegboard or hooks.
Specialty Hooks: Consider specialty hooks designed for specific items, such as bike hooks, tool holders, or cord organizers. These hooks provide a secure and convenient way to store unique or bulky items.
Adjustable Hooks: Adjustable hooks allow you to customize the hook's length and angle to fit different items, making them a great option for storing items of varying sizes.
Accessory Compatibility Checks
You'll need to confirm that the hooks and accessories you choose are compatible with your pegboard's material and layout to guarantee a secure and efficient storage system. This involves considering the type of pegboard material, its thickness, and the hole spacing. Make a list of the tools and items you want to store, and then research the compatible hooks and accessories.
When selecting hooks and accessories, look for Brand Comparisons to make sure you're getting the best fit. Some brands offer more versatile options, while others specialize in specific tool types.
Identify Feature Overlaps between products to avoid duplications and optimize your storage space. For instance, if you need to store both screwdrivers and wrenches, look for a hook that can accommodate both.
Take note of the weight capacity, material, and finish of each hook to ensure they can support your tools and blend with your pegboard's aesthetic. By doing your research and making informed choices, you'll create a tailored storage system that meets your unique needs.
Designing Your Pegboard Layout
As you design your pegboard layout, remember that the goal is to create a system that works seamlessly with your workflow and meets your specific needs.
How will you maximize the functionality of your pegboard by strategically arranging hooks, bins, and accessories to fit your specific needs and workflow?
Consider the following key factors to guarantee a well-designed pegboard:
-
Ergonomic Considerations: Position frequently used items at a comfortable height to avoid straining your back or shoulders. Place heavy items at the bottom and lighter ones at the top to maintain balance.
-
Aesthetic Balance: Distribute hooks, bins, and accessories in a visually appealing way to create a sense of harmony. Leave some empty space to avoid clutter and make it easy to add new items in the future.
-
Task-Specific Zones: Divide your pegboard into zones based on the tasks you perform, such as a tool zone, a supply zone, or a project zone. This will help you quickly find what you need and stay focused on your work.
Assembling the Pegboard and Hooks
Mount the pegboard to a sturdy wall or frame, making sure it's level and secure before adding hooks and accessories. This is an important step in creating a functional workspace that optimizes your productivity. Take your time to confirm the pegboard is properly aligned and secured, as this will prevent any accidents or damage to your tools and accessories.
| Hook Type | Tool/Accessory | Assembly Tip |
|---|---|---|
| Single Hook | Hammer, Pliers | Use a level to make sure hooks are straight |
| Bin Hook | Small parts, Fasteners | Attach bins to hooks for easy access |
| Tool Holder | Screwdrivers, Wrenches | Organize tools by frequency of use |
| Accessory Hook | Measuring Tape, Level | Keep frequently used accessories within reach |
| Multi-Hook | Cable Management, Testers | Maximize storage with multi-hook assemblies |
When assembling your pegboard and hooks, focus on handheld assembly to guarantee a seamless and efficient process. Consider your workspace optimization goals and arrange your hooks and accessories accordingly. By following these steps, you'll create a customized pegboard system that streamlines your workflow and saves you time.
Installing the Pegboard System
Now that your pegboard is assembled with hooks and accessories, it's time to install it in your workspace by identifying the wall studs and marking the spot where you'll drill the pilot holes. This is an important step to make sure your pegboard is securely fastened to the wall, so take your time to get it right.
Before you start drilling, make sure you've prepared your wall properly. Here are a few things to keep in mind:
- Check for electrical outlets or pipes behind the wall to avoid any accidents.
- Clean the wall surface to ensure a strong bond between the pegboard and the wall.
- Use a level to guarantee your pegboard is straight and even.
With your wall prepared, you can now drill the pilot holes and install the pegboard. Remember to follow the manufacturer's instructions for the type of anchors or screws you're using.
Take a step back and admire your handiwork – your pegboard system is now ready to help you stay organized and boost your productivity!
Organizing Your Tools and Accessories
Organizing Your Tools and Accessories
You'll want to categorize your tools and accessories by type, frequency of use, and size to maximize the efficiency of your pegboard system. This step is important in avoiding Tool Clutter and Accessory Chaos.
Start by grouping similar tools together, such as hammers, screwdrivers, and pliers. Next, separate items into frequently used and infrequently used categories. This will help you prioritize which tools to place at eye level and which can be stored higher or lower on the pegboard.
Consider the size of each tool and accessory, reserving larger hooks for bigger items like power tools and smaller hooks for smaller accessories like wire cutters. Don't forget to leave some space between each hook to prevent overcrowding and make it easy to grab what you need.
Frequently Asked Questions
Can I Use a Pegboard on a Concrete or Brick Wall?
"Will your pegboard dreams be crushed by a concrete or brick wall? Fear not! You can conquer this challenge with the right wall anchors and drill bits, securing your pegboard for a lifetime of organized bliss."
How Do I Keep My Pegboard Organized and Clutter-Free?
You'll keep your pegboard organized and clutter-free by strategically placing labels and grouping similar tools together, ensuring everything has a designated spot, and making it a habit to put things back after use.
Are Pegboards Suitable for Outdoor or Garage Use?
'You're a ship sailing through rough seas, and your pegboard is the anchor that keeps you grounded. For outdoor or garage use, choose pegboards with weather resistance and UV protection to withstand the elements and keep your tools organized.'
Can I Customize My Pegboard With a Specific Color or Design?
You can totally customize your pegboard with a specific color or design that reflects your personal style. Explore various color options and design elements, such as stripes or logos, to create a unique look that suits your space.
Are Pegboards Suitable for Heavy Tools and Equipment?
"You're wondering if pegboards can handle a ton of weight (and we mean a ton - literally!). The answer lies in the load capacity and material selection; choose a sturdy board and hooks designed for heavy-duty use, and you're all set!"
Related Posts
-

Top 5 Small Tool Organizers for Your Workshop
You're looking to optimize your workshop's efficiency with high-quality small tool organizers. Compact storage soluti...
-
Benefits of Pegboard Racks in Your Garage
By installing a pegboard rack in your garage, you'll reveal a wealth of benefits that change your workspace into a hi...
-
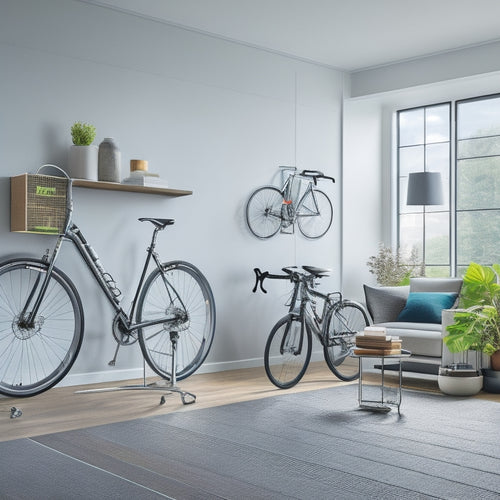
Must-Try Bike Storage Ideas in Small Spaces
You're tired of sacrificing precious living space to store your bike, especially in small homes where every square fo...


