Building a Space-Saving Cabinet Tool Box
Share
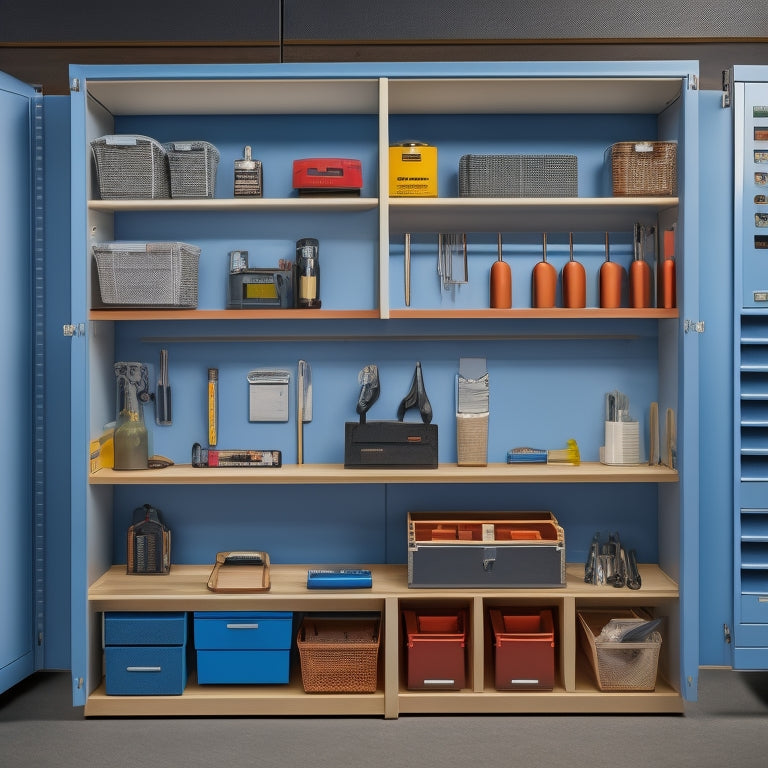
You're about to create a space-saving cabinet tool box that maximizes storage capacity while maintaining easy access to your tools. First, define the tool box's purpose and consider the types of tools, access frequency, and available space to guarantee an ergonomic design. Choose durable materials, such as plywood or solid wood, and plan the cabinet's frame construction, taking precise measurements to assure a snug fit. As you move forward with your design, you'll find out how to add storage solutions, like drawers and shelves, and implement tool organization systems to enhance functionality, and ultimately, reveal the secrets to building a highly functional and efficient workspace.
Key Takeaways
- Define the tool box purpose and consider types of tools, access frequency, and available space for effective design planning.
- Choose materials based on durability, weight capacity, and aesthetic considerations, such as plywood, MDF, solid wood, aluminum, or steel.
- Take precise measurements of width, height, and depth for installation, and plan for adjustable shelves or dividers to maximize storage flexibility.
- Design the cabinet frame layout to meet space and storage needs, using sturdy joints and durable materials for frame construction.
- Implement customized storage solutions, such as drawers, shelves, and pegboards, to enhance tool organization and accessibility in the limited space.
Planning Your Tool Box Design
Determine the purpose of your tool box to plan its design effectively. This will help you decide what features and layout will work best for your needs. Consider the types of tools you'll be storing, how often you'll access them, and the available space in your workshop or garage.
Think about the tool box aesthetics, too. A well-designed tool box can be visually appealing and make your workspace more organized. Consider the color scheme, material, and overall style that fits your workshop's ambiance.
Ergonomic design is also vital. A tool box that's comfortable to use and easy to maneuver will reduce fatigue and prevent accidents.
Think about the height, width, and depth of the tool box, as well as the placement of handles and latches. You want to be able to easily open and close the tool box without straining your back or hands.
Choosing the Right Materials
Upon mapping out your tool box design, you're now ready to select the materials that will bring your vision to life. This critical step guarantees your space-saving cabinet tool box is both functional and safe. Material durability and cost factors are key elements to take into account.
| Material | Durability | Cost |
|---|---|---|
| Plywood | High | Moderate |
| MDF | Medium | Low |
| Solid Wood | High | High |
| Aluminum | High | High |
| Steel | High | Moderate |
When choosing materials, take into account the weight and size of the tools you'll be storing. For example, if you have heavy power tools, a sturdy material like solid wood or aluminum may be necessary. On the other hand, if you're on a budget, MDF or plywood could be a cost-effective option. Additionally, take into account the environmental conditions your tool box will be exposed to. If it'll be in a humid or wet environment, a water-resistant material like aluminum or steel may be the best choice. By selecting the right materials, you'll guarantee your space-saving cabinet tool box is both functional and safe for years to come.
Measuring Your Storage Space
Now that you've selected the ideal materials for your space-saving cabinet tool box, it's essential to measure the storage space accurately to maximize its capacity.
Take precise measurements of the width, height, and depth of the area where the cabinet will be installed. Record these storage dimensions to guarantee your tool box fits snugly and efficiently.
Consider the following factors to optimize space:
-
Identify obstacles: Note any obstructions, such as plumbing or electrical outlets, that may affect the cabinet's design or installation.
-
Account for clearance: Make sure you have sufficient clearance around the cabinet to comfortably open and close the doors, and to allow for easy access to tools and equipment.
-
Plan for adjustability: Consider incorporating adjustable shelves or dividers to accommodate tools and equipment of varying sizes, maximizing storage capacity and flexibility.
Building the Cabinet Frame
You'll start building the cabinet frame by designing its layout, ensuring it fits your space and tool storage needs.
Next, you'll assemble the frame using strong, sturdy joints and a process that's efficient and easy to follow.
Cabinet Frame Design
Building a sturdy cabinet frame is vital to the overall structure and functionality of your space-saving cabinet tool box. A well-designed frame guarantees frame stability, allowing your cabinet to support the weight of tools and equipment.
You must also consider aesthetic considerations, as the frame will be visible and should blend in with your workspace's design.
When designing the cabinet frame, consider the following key factors:
-
Frame material: Choose a durable, rust-resistant material such as stainless steel or aluminum to confirm the frame can withstand heavy use.
-
Frame geometry: Design the frame with sturdy corners and a strong structure to maintain its shape and support the weight of tools and equipment.
-
Mounting points: Plan for sufficient mounting points to secure the cabinet to the wall or floor, preventing the cabinet from tipping over and guaranteeing safe operation.
Frame Assembly Process
Your cabinet frame design is complete, and it's time to bring it to life. To guarantee a sturdy and reliable frame, you'll need to focus on precise frame alignment techniques and frame reinforcement methods during the assembly process.
Begin by preparing your workspace, making sure it's clean, dry, and free from any obstructions. Lay out your frame components, double-checking that all parts are accounted for and undamaged. Use a carpenter's square to verify accurate frame alignment, taking care to avoid any deviations that could compromise the structure's integrity.
Next, apply a thin layer of wood glue to the frame's mating surfaces, carefully aligning the components according to your design plan. Use clamps to hold the frame in place, applying even pressure to prevent warping or shifting. Allow the glue to dry completely before proceeding.
To enhance the frame's strength and stability, incorporate frame reinforcement methods such as corner brackets, screws, or nails. These added supports will help maintain the frame's structure and prevent collapse under weight or stress.
Frame Material Selection
The structural integrity of your space-saving cabinet tool box hinges on the quality and durability of the frame materials you select. You'll want to choose materials that balance durability factors, weight considerations, and cost analysis.
Wood types such as solid hardwoods, engineered wood, or medium-density fiberboard (MDF) are popular options. Each has its own set of characteristics that will impact your project.
When selecting your frame material, consider the following:
-
Durability and weight: Will the material withstand the weight of your tools and withstand environmental changes?
-
Aesthetic choices and finishing options: Will the material accept the finish you want, and will it fit your desired aesthetic?
-
Environmental impact and cost analysis: Are you willing to pay a premium for sustainable materials, or will you opt for more affordable options?
Ultimately, your frame material selection will influence the overall performance and lifespan of your space-saving cabinet tool box.
Adding Drawers and Shelves
You'll now add functionality to your cabinet with drawer organization systems and custom shelf configurations.
These components will help maximize storage capacity and make it easy to find the tools you need.
Drawer Organization Systems
Five essential components make up a thorough drawer organization system: dividers, inserts, trays, shelves, and bins.
These components will help you maximize the storage capacity of your tool box while keeping your tools organized and easily accessible.
You'll want to categorize your tools into groups, such as hand tools, power tools, and accessories.
Then, use drawer dividers to separate these groups within the drawer. This will prevent tools from getting jumbled together and make it easier to find what you need.
- Use inserts to create customized compartments for small items like screws, nuts, and bolts.
- Designate specific trays for frequently used tools, keeping them within easy reach.
- Consider implementing a "first in, first out" system for consumable items like drill bits and saw blades to guarantee you're always using the newest ones first.
Custom Shelf Configurations
Behind the tool box's exterior lies a world of customization, where custom shelf configurations await to maximize storage and accessibility.
You'll want to take into account shelf depth, as it directly affects tool accessibility. Adjustable shelves allow you to tailor the storage space to your specific needs, making sure that frequently used tools are within easy reach.
When designing your custom shelves, keep shelf weight in mind, as it impacts the overall load-bearing capacity. Verify that your shelving materials can support the weight of your tools and any additional features, such as drawer systems.
Modular shelving allows for flexibility and adaptability, making it an excellent choice for space-constrained tool boxes.
Pay attention to shelf alignment, as it affects the overall aesthetic of your tool box. Proper shelf spacing is essential for efficient storage and easy access.
Take into account the shelf load-bearing capacity to guarantee your tools are safely stored. By carefully planning your custom shelf configuration, you'll create a functional and efficient storage system that meets your specific needs.
Installing Tool Organizers
The workshop's available real estate is precious, and every inch counts. When it comes to installing tool organizers, you'll want to maximize storage capacity while maintaining easy access to your tools.
Consider the types of tools you'll be storing and the organizer styles that will best accommodate them.
- Pegboard hooks for hanging tools like wrenches and pliers
- Sliding drawers for storing small parts and accessories
- Adjustable dividers for separating and organizing larger tools
When selecting an organizer, think about the frequency of use and the weight of the tools. You'll want to position your most frequently used tools in easy-to-reach locations, while heavier tools should be stored near the bottom of the cabinet to maintain stability.
Additionally, consider the material and build quality of the organizer, ensuring it can withstand the weight and wear of your tools. By strategically installing tool organizers, you'll create a safe and efficient workspace that streamlines your workflow.
Securing the Cabinet Doors
Your cabinet's secure closure is essential to maintaining a safe and organized workspace. To achieve this, you'll need to select the appropriate door latch mechanisms and hinge types.
For the door latch mechanisms, consider using a soft-close latch or a magnetic catch, which can help prevent the doors from opening accidentally. These mechanisms can also reduce noise and wear on the doors.
When choosing hinge types, consider the weight and size of your cabinet doors. Soft-close hinges can be beneficial if your doors are heavy or prone to slamming shut. You can also opt for concealed hinges, which provide a sleeker appearance and reduce the risk of injury caused by exposed hinges.
When installing the door latch mechanisms and hinges, confirm they're securely attached to the cabinet and doors. Use high-quality screws and follow the manufacturer's instructions to avoid any mistakes.
Proper installation will guarantee a safe and secure closure, protecting your tools and workspace from damage.
Adding a Work Surface
You've secured your cabinet doors, now it's time to create a functional work surface that complements your space-saving cabinet tool box. This surface will serve as a workstation for various tasks, from assembling projects to repairing tools.
When selecting surface materials, take into account durability, ease of maintenance, and resistance to scratches and stains.
Here are some work surface ideas to take into account:
- A wooden surface made from hardwoods like oak or maple, providing a durable and traditional work surface.
- A stainless steel surface that resists corrosion and is easy to clean, ideal for working with messy materials.
- A granite surface that adds an element of sophistication and is highly resistant to scratches and stains.
When installing the work surface, verify it's securely attached to the cabinet and has a smooth, even finish to prevent accidents and injuries.
Properly installed, your work surface will provide a safe and efficient workspace, allowing you to focus on your projects and tasks.
Final Touches and Accessories
Now that your space-saving cabinet tool box is nearing completion, final touches and accessories will enhance its functionality and make it a comfortable workspace.
Apply finishing touches by adding a durable, non-slip mat to the work surface to prevent tools from slipping and falling. This will also provide traction when standing on the mat.
Add decorative accents, such as chrome or brass hardware, to give your cabinet a professional look.
Install a magnetic strip or a pegboard on the door or side panels to hang frequently used tools, keeping them within easy reach.
Consider adding a small LED light or a USB charging station to increase functionality. Confirm all electrical components meet safety standards and are installed according to the manufacturer's instructions.
Remember to test all tools and accessories to verify they're securely fastened and function properly.
With these final touches and accessories, your space-saving cabinet tool box is now ready to provide a safe, efficient, and organized workspace for your projects.
Frequently Asked Questions
Can I Use a Pre-Made Cabinet Instead of Building One From Scratch?
You can opt for pre-made cabinet options, but consider the limitations on customization; if you need specific features, building from scratch might be safer and more efficient, ensuring a precise fit for your tools and space constraints.
How Do I Protect My Tools From Rust and Corrosion?
You'll prevent rust and corrosion by performing regular tool maintenance, applying rust-preventing coatings, and storing tools in a dry, well-ventilated area; consider using silica gel packets or desiccants to maintain a humidity-controlled environment.
Are There Any Safety Considerations for Building a Tool Box Cabinet?
When building a toolbox, you'll want to take into account safety factors like ensuring your chosen toolbox materials won't spark or react with chemicals, and designing a cabinet with ventilation to prevent trapped fumes.
Can I Add Electrical Outlets or Lighting to My Tool Box Cabinet?
When adding outlets or lighting to your cabinet, you'll need to carefully plan outlet placement to avoid water and dust exposure, and consider lighting options like LED strips or motion-sensing lights for maximum safety and functionality.
How Do I Maintain and Organize My Tool Box Over Time?
You'll maintain your tool box by regularly taking a tool inventory, updating your list, and rearranging drawer dividers as needed to guarantee everything has a designated spot, keeping your workspace organized, efficient, and safe.
Conclusion
You've done it! Your space-saving cabinet tool box is now a work of art, packed with more tools than a hardware store. The drawers glide smoothly, the shelves are sturdy, and the organizers keep everything within easy reach. You've maximized every inch of storage space, making it a marvel of efficiency. Now, get ready to tackle any project that comes your way, with your trusty tool box as your right-hand companion.
Related Posts
-

Small Storage Bins to Maximize Shelf Space
When maximizing shelf space, you want to make the most of every inch. Small storage bins are the answer, but choosing...
-

Heavy-Duty Commercial Rolling Shelving Racks
You need heavy-duty commercial rolling shelving racks that optimize your storage capacity, streamline operations, and...
-

Benefits of Pegboard Racks in Your Garage
By installing a pegboard rack in your garage, you'll reveal a wealth of benefits that change your workspace into a hi...


