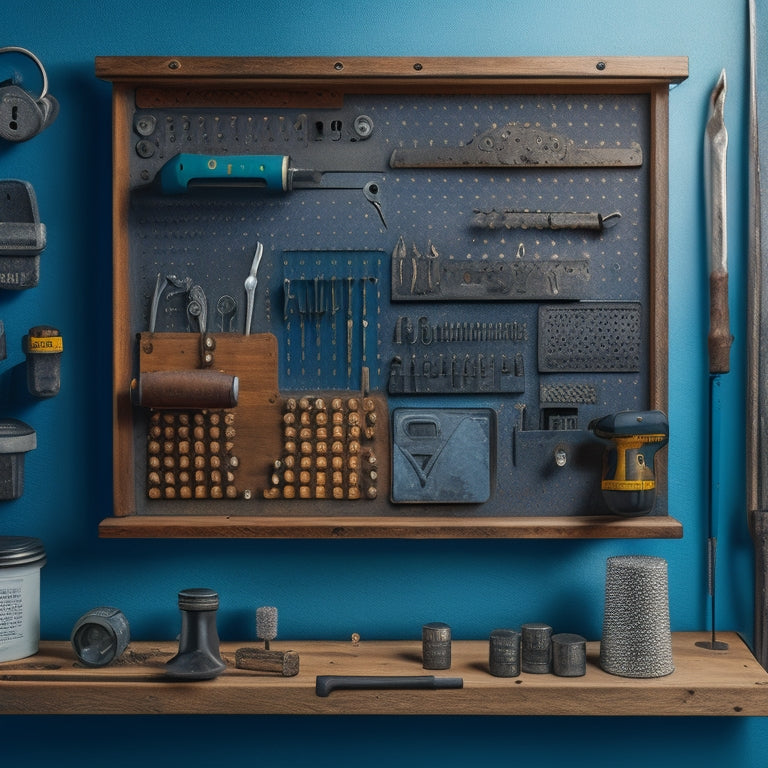
Build Custom Tool Holders for Your Pegboard
You'll create custom tool holders that perfectly fit your tools and optimize your pegboard's storage capacity by considering material durability, measurement accuracy, and design customization. Measure your tools with a digital caliper, record the dimensions, and examine unique features. Cut and shape holders using precision techniques, and drill mounting holes that align with your pegboard's pattern. Sand and finish the holders for a durable surface, and install them at a comfortable height. With these custom holders, you'll streamline your workflow and boost productivity - and you're just getting started on the path to a fully optimized tool organization system.
Key Takeaways
• Design custom tool holders considering material durability, cost-effectiveness, and sustainability for a long-term benefit.
• Measure tools accurately using digital calipers or rulers, and record dimensions for future reference.
• Cut and shape holders precisely to fit each tool's unique features, ensuring efficient functionality.
• Drill and mount holders securely to the pegboard, aligning with the hook or screw pattern.
• Organize and install holders at a comfortable height, grouping similar tools together for easy access.
Choosing the Right Materials
What criteria should you consider when selecting materials for your custom tool holders to guarantee they meet your specific needs and withstand the rigors of repeated use?
When building custom tool holders for your pegboard, material durability is essential. You'll want materials that can resist wear and tear, corrosion, and damage from heavy tools. Consider customization options like 3D printing or CNC machining to create holders that fit your tools perfectly. This will secure a fit and prevent damage to your tools.
In addition to durability, consider cost-effective alternatives that won't break the bank. You may find that sustainable materials like recycled aluminum or eco-friendly plastics meet your needs without sacrificing quality.
When weighing your options, think about the long-term benefits of using sustainable materials, such as reducing waste and minimizing environmental impact. By choosing the right materials, you'll create custom tool holders that are both functional and responsible.
Measuring and Marking Tools
With your materials selected, you'll need to accurately measure and mark your tools to create custom holders that fit them perfectly. This step is essential in achieving best tool organization and storage solutions. Take the time to carefully examine each tool, considering its unique shape, size, and features.
To guarantee precise measurements, follow these steps:
-
Measure the tool's length, width, and height using a digital caliper or ruler.
-
Note the tool's handle diameter, if applicable, to ensure a comfortable grip.
-
Identify any unique features, such as a curved or angled edge, that require special consideration.
- Record your measurements and notes for future reference.
Cutting and Shaping Holders
You'll now use your measured dimensions to cut and shape the holders, ensuring a snug fit for each tool. This step requires precision and attention to detail to achieve best tool organization and efficiency. Use a saw or a CNC machine to cut out the holder shapes from your chosen material, following the marked dimensions carefully.
| Tool Type | Holder Design Considerations |
|---|---|
| Hand Tools | Consider the tool's grip size, handle shape, and weight distribution when designing the holder. |
| Power Tools | Take into account the tool's cord length, weight, and balance point when shaping the holder. |
| Specialty Tools | Think about the tool's unique features, such as a curved or angled shape, and design the holder accordingly. |
As you cut and shape each holder, remember that pegboard customization is all about creativity and flexibility. By tailoring each holder to its corresponding tool, you'll create a system that not only looks great but also functions efficiently. Take your time, and don't be afraid to experiment and make adjustments as needed. The end result will be a pegboard that showcases your tools and streamlines your workflow.
Drilling and Mounting Holes
By carefully planning the hole layout, you'll secure that your custom tool holders firmly attach to the pegboard, providing a strong foundation for your organized workspace.
When drilling holes for your tool holders, consider the following key factors to guarantee a secure and reliable attachment:
-
Hole placement: Position holes to align with the pegboard's hook or screw pattern, securing a snug fit and minimizing movement.
-
Hole depth: Drill holes to the correct depth to accommodate the screw or hook, avoiding damage to the pegboard or tool holder.
-
Screw size: Choose screws that match the pegboard's hook or screw pattern, ensuring a firm hold without stripping or damaging the material.
- Mounting technique: Use a mounting technique that suits your pegboard type, such as screws for wooden pegboards or clips for metal ones.
Sanding and Finishing Touches
Now that your tool holders are firmly attached to the pegboard, it's time to focus on sanding and applying finishing touches to achieve a smooth, professional-looking surface. Start by sanding the entire holder using progressively finer grits of sandpaper, from 120 to 220, to remove any rough edges or splinters. This will guarantee a smooth surface for painting or staining.
Next, decide on your desired finish. You can use painting techniques such as spraying or brushing to apply a durable coat of paint. Alternatively, consider varnishing methods like wiping or spraying to add a protective clear coat. If you prefer a stained finish, explore staining options like oil-based or water-based stains, and choose a sealant application that suits your needs. Apply your chosen finish according to the manufacturer's instructions, making sure a uniform and even coat.
Remember to follow safety guidelines when working with chemicals and finishes.
Once your finish is dry, inspect your tool holders for any imperfections and make any necessary touch-ups. With a little patience and attention to detail, your custom tool holders will look like they were made by a professional.
Designing Custom Holder Shapes
How do you envision the ideal shape of your custom tool holder, one that perfectly cradles your tool while maximizing storage efficiency and accessibility? Designing custom holder shapes requires careful consideration of several factors. You'll want to think about the tool's dimensions, material, and intended use, as well as your personal preferences for aesthetics and functionality.
Here are some key considerations to keep in mind:
-
Ergonomic considerations: Design your holder to fit comfortably in your hand, reducing fatigue and strain during extended use.
-
Color customization: Choose a color scheme that complements your pegboard and tools, or adds a pop of personality to your workshop.
-
Innovative shapes: Take advantage of 3D printing options to create complex, curved, or irregular shapes that perfectly fit your tool.
- Material constraints: Consider the strength, durability, and weight of your chosen material, ensuring it can support the tool's weight and withstand regular use.
Building Holders for Large Tools
When building holders for large tools, you'll need to take into account the tool's size and shape to guarantee a secure fit.
You'll also need to accommodate large handles, which often require custom designs to prevent interference with surrounding components.
Tool Size Considerations
You'll need to accommodate large tools' dimensions and weights by designing holders that provide adequate support and stability. This is essential to guarantee that your tools are securely stored and easily accessible.
When building holders for large tools, consider the following key factors:
-
Weight distribution: Design your holder to distribute the tool's weight evenly, preventing it from tipping or falling off the pegboard.
-
Accessibility concerns: Make sure that the tool is easy to grab and go, without obstructing other tools or creating a safety hazard.
-
Clearance and spacing: Leave ample clearance around the tool to allow for easy removal and replacement, and make certain that other tools on the pegboard aren't compromised.
- Material strength: Choose materials that can support the weight and stress of the tool, such as robust woods or heavy-duty plastics.
Large Handle Accommodations
Accommodating large handles necessitates designing holders with a deep, sunken area that securely cradles the tool's grip, allowing for a strong grasp and effortless retrieval. This is particularly important for tools with bulky or oversized handles, which can be unwieldy to store and retrieve from traditional pegboard holders.
To ensure prime handle customization, consider the following design parameters:
| Handle Size | Holder Depth |
|---|---|
| Small (1-2 inches) | 1-2 inches |
| Medium (2-3 inches) | 2-3 inches |
| Large (3-4 inches) | 3-4 inches |
| Extra-Large (4+ inches) | 4+ inches |
Custom Fit Designs
Tailored Designs
By creating tailored holders for large tools, you're able to optimize storage and retrieval efficiency by precisely matching the holder's dimensions to the tool's unique shape and size. This approach ensures that each tool has a dedicated space, reducing clutter and making it easier to find what you need when you need it.
When building tailored holders, consider the following benefits:
-
Improved tool organization: Tailored holders keep tools organized and structured, making it easier to maintain a tidy workspace.
-
Enhanced storage solutions: By designing holders that fit each tool perfectly, you can maximize storage capacity and reduce wasted space on your pegboard.
-
Increased pegboard customization: Tailored holders allow you to customize your pegboard to your specific needs, making it a truly personalized DIY project.
- Streamlined workflow: With tools stored in tailored holders, you can quickly locate and retrieve the tools you need, saving time and increasing productivity.
Creating Small Tool Compartments
Creating Small Tool Compartments
How do you maximize storage capacity in your custom tool holder while keeping frequently used tools readily accessible? One effective solution is to create small tool compartments. By dividing your tool holder into separate sections, you can store more tools in a smaller space while maintaining easy access to the ones you use most often.
Here are some benefits of creating small tool compartments:
| Tool Organization | Space Saving |
|---|---|
| Store similar tools together | Reduce clutter and increase storage capacity |
| Label each compartment for easy identification | Minimize wasted space with custom-fit designs |
| Keep frequently used tools in easy-to-reach areas | Utilize vertical space with multi-tiered compartments |
| Store small parts and accessories in designated areas | Maximize storage capacity with adjustable compartments |
| Implement a "place for everything" approach | Create a functional, aesthetic design that serves your needs |
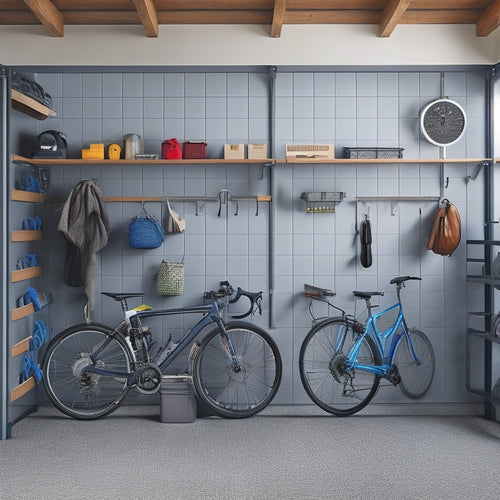
Installing and Organizing Holders
Now that you've designed your custom tool holder with small compartments, it's time to install and organize the holders that will keep your tools secure and within reach. This is where your creativity and DIY skills come into play. You want to make certain that your tool organization system is functional, efficient, and easy to use.
To achieve this, consider the following tips for installing and organizing your custom tool holders:
-
Hang your tool holders at a comfortable height, allowing you to easily access your tools without straining.
-
Group similar tools together, making it simpler to find what you need when you need it.
-
Use creative storage solutions, such as baskets or bins, to store small items like screws, nuts, or bolts.
- Label each compartment or holder, so you can promptly identify where each tool is stored.
Frequently Asked Questions
Can I Use 3D Printing to Create Custom Tool Holder Designs?
You can leverage 3D printing to create custom tool holder designs, ensuring material compatibility and accommodating design intricacies, while benefiting from cost effectiveness and time efficiency in production, making it a viable solution.
How Do I Prevent Rust on Metal Tool Holders Over Time?
Did you know that 60% of tool failures are due to corrosion? You'll prevent rust on metal tool holders by applying a rust-inhibiting coating, storing them in a dry environment, and performing regular maintenance, ensuring your tools' longevity and best performance.
Are There Any Safety Considerations for Tool Holder Placement?
When placing tool holders, you should prioritize safety precautions, ensuring weight distribution is even and tool accessibility is convenient, to prevent accidents and injuries, while maintaining efficient tool organization and workflow.
Can I Use Adhesive-Backed Magnets for Tool Holder Mounting?
As you venture into the world of tool holder mounting, consider the magnetic force that binds: adhesive-backed magnets can be a strong ally, but guarantee sufficient magnet strength, and be prepared to explore alternative methods, like screws or clips, for added security.
How Often Should I Clean and Maintain My Tool Holders?
You should regularly clean and maintain your tool holders to guarantee proper storage and long-term care. Remove dirt and debris, inspect for wear, and reorganize as needed to keep your tools in top condition.
Related Posts
-
10 Best Tool Boxes for Every Budget and Job
You're looking for a tool box that fits your budget and job requirements. Whether you're a DIY enthusiast, electricia...
-
Key Features of a Garage Wall Hanging System
You're looking for a garage wall hanging system that's built to last and adapts to your needs. Look for systems made ...
-
Best Cheap Tool Boxes for Budget-Conscious Buyers
You need a reliable tool box that gets the job done without breaking the bank. Look for durable materials, rust-resis...


