7 Essential Tips for Female DIYers' Tool Storage
You're tired of wasting time searching for the right tool in a cluttered workshop. Begin by evaluating your tool collection, purging unnecessary items, and choosing a storage system that fits your space. Optimize your workspace layout to increase productivity, and label and categorize your tools for easy access. Utilize vertical storage space to maximize capacity, and keep frequently used tools in accessible locations. With these essential tips, you'll be well on your way to transforming your workshop into a haven of efficiency. As you continue to refine your tool storage strategy, you'll uncover even more ways to boost your productivity and get the job done.
Key Takeaways
• Assess and purge tools to remove duplicates and items not serving a purpose, streamlining the collection and identifying missing tools.
• Designate a storage system that optimizes tool placement for workflow, considering available space, corner constraints, and easy access to frequently used tools.
• Organize tools into categorized zones based on frequency of use, with quick-grab zones for daily tools and less-frequently-used zones for important tools.
• Utilize vertical storage options like pegboards, shelf dividers, and ceiling hooks to maximize storage capacity and keep the floor clear for workspace.
• Implement a labeling and categorizing system using color coding, digital cataloging, or clear labels to facilitate quick identification and access to tools.
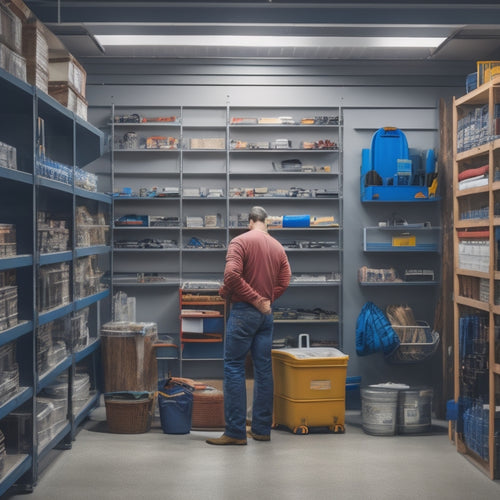
Assess Your Tool Collection
Take stock of the tools you've accumulated over time, and chances are you'll find a mix of essentials, duplicates, and items you've forgotten you even own. As you sort through your collection, you'll likely encounter tools that have been passed down to you, evoking feelings of tool inheritance.
Perhaps your grandfather's old hammer or your father's trusty level holds sentimental value, making it difficult to part with them. This tool sentimentalism is natural, but it's crucial to separate emotions from functionality.
Be honest with yourself – do you really need three hammers or can you get by with one? Identify the tools that bring you joy or serve a specific purpose, and set aside those that don't. Consider the projects you've completed and the ones you plan to tackle in the future.
This self-reflection will help you create a curated collection that sparks creativity and efficiency. By doing so, you'll be able to create a storage system that honors your tools and your DIY spirit.
Purge Unnecessary Items First
Now that you've curated your tool collection, it's time to get rid of the tools that no longer serve a purpose, freeing up space for the ones that do. This is an important step in creating an organized and efficient tool storage system.
Be honest with yourself – are there tools you've been holding onto out of emotional attachment or fear of needing them someday? It's time to let go of that clutter mindset. Take a close look at each tool and ask yourself when was the last time you used it. If it's been over a year, it's probably safe to get rid of it.
Consider donating gently used tools to a local charity or selling them to make some extra cash. By purging unnecessary items, you'll be left with a streamlined collection that's easy to navigate and maintain.
This will also help you identify what tools you're missing, making it easier to prioritize future purchases.
Choose A Storage System
Now that you've purged your tool collection, it's time to choose a storage system that works for you.
You'll need to assess your space needs and think critically about how you'll use each tool to optimize their placement.
Assess Your Space Needs
Before determining a tool storage system, you need to evaluate how much space you have available for storage, considering the size of your workspace, the number of tools you own, and the frequency of use. This evaluation will help you choose a system that fits your needs and maximizes your space.
Take a closer look at your workspace and identify any corner constraints that might impact your storage options. Consider floor planning and think about the flow of your workspace. Where do you spend most of your time? Where do you need easy access to your tools?
Measure your available wall space, floor space, and any existing storage units. Think about the dimensions of your tools and how you can store them efficiently. Consider the height and width of your storage units and how they'll fit in your workspace.
Optimize Tool Placement
With your space needs assessed, it's time to strategically place your tools in a way that streamlines your workflow and maximizes productivity. Think about the tools you use most frequently and position them in easy-to-reach locations. Consider the tasks you perform most often and group related tools together.
Here's a suggested layout to get you started:
| Tool Category | Storage Location | Ergonomic Considerations |
|---|---|---|
| Hand tools | Waist-high shelf or pegboard | Avoid bending or straining to access tools |
| Power tools | Near power source, on a dedicated shelf | Keep heavy tools at a comfortable lifting height |
| Fasteners and supplies | In a designated bin or drawer | Use a Lazy Susan for easy access to contents |
| Measuring and testing tools | Near a flat work surface, at eye level | Position tools to minimize stretching or bending |
Optimize Your Workspace Layout
Organizing your tools and supplies thoughtfully within your workspace layout will boost your productivity and reduce frustration. As you optimize your workspace, consider your work flow and how you move around the area.
Place your most frequently used tools and supplies in easy-to-reach locations, reducing the need for excessive walking or stretching. This will save you time and energy, allowing you to focus on your project.
Maximize corner efficiency by using corner shelves, bins, or carousels to store items that are less frequently used. This will help keep your workspace clutter-free and create a sense of calm.
Consider a 'golden zone' around your main work area, where you can easily access your tools and supplies without having to leave your workstation. By designing your workspace with intention, you'll be able to work more efficiently and effectively, getting your projects done quickly and with ease.
Label and Categorize Tools
Now that you've optimized your workspace layout, it's time to get your tools organized.
You'll want to create a tool classification system that makes sense to you, so you can quickly find what you need when you need it.
Tool Classification System
You'll save time and frustration by creating a tool classification system that labels and categorizes your tools according to their functions, frequencies of use, or projects they're used for. This system will help you quickly identify the tools you need for a specific task, reducing the time spent searching for them.
One effective way to create a classification system is through color coding. Assign a specific color to each category of tools, such as red for power tools or blue for hand tools, and label them accordingly. This visual cue will make it easy to find the tools you need at a glance.
Another approach is digital cataloging, where you create a digital spreadsheet or app to track your tools. This method allows you to easily update and access your tool inventory from any device. You can also add notes, photos, and maintenance records to each tool's entry, making it a valuable resource for your DIY projects.
Tool Category Labels
Your tool classification system comes to life with well-designed labels that categorize your tools into distinct groups, making it easy to identify and access the right tools for your projects. A well-thought-out label design is important in guaranteeing that your tools are organized and easily accessible.
| Tool Category | Label Color |
|---|---|
| Fasteners | Blue |
| Cutting Tools | Red |
| Measuring Tools | Yellow |
| Power Tools | Green |
When designing your labels, consider using a color-coding system to differentiate between categories. This visual cue will help you quickly identify the tool you need. Additionally, use a clear and concise font to ensure that the label text is easy to read. You can also include an icon or image to further distinguish between categories. By implementing a well-designed label system, you'll be able to find the right tool in no time, saving you time and frustration.
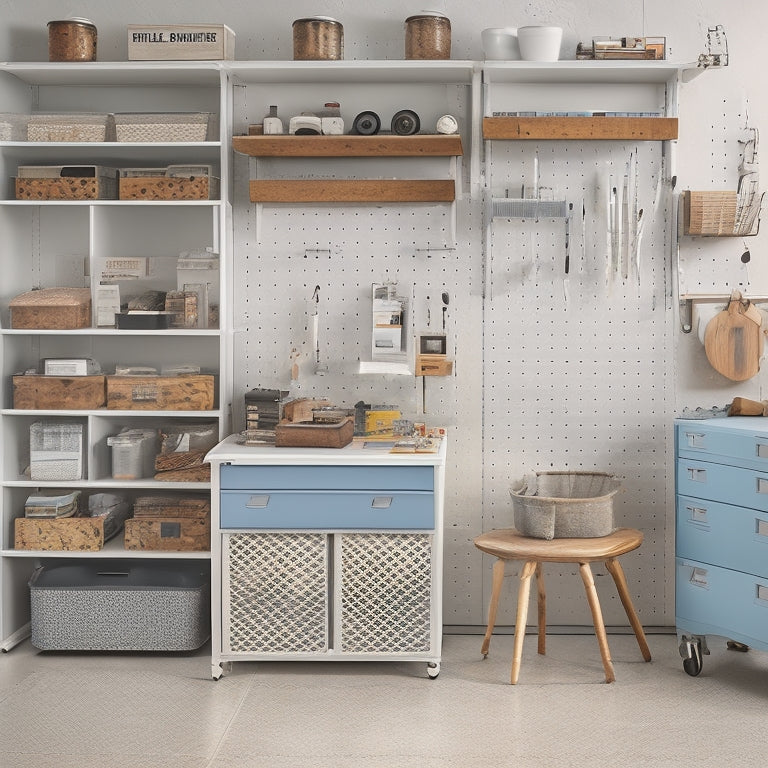
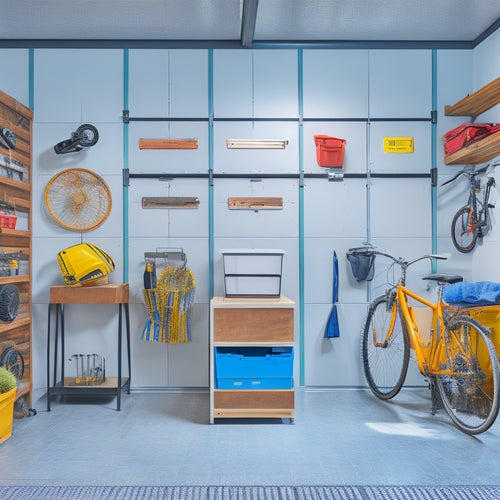
Utilize Vertical Storage Space
How can you maximize your garage or workshop's storage capacity without sacrificing valuable floor space, especially when dealing with bulky tools and equipment?
The answer lies in utilizing vertical storage space. By doing so, you'll create more room for your projects and reduce clutter. Install shelf dividers to separate your tools and keep similar items together. This will make it easier to find what you need when you need it.
Don't forget to take advantage of your ceiling's storage potential! Ceiling hooks are perfect for hanging bikes, tools, or even storage bins. This will keep your floor clear and give you more space to work on your projects.
Additionally, consider installing a pegboard on a wall or the back of a door. This will provide you with a designated space to hang your tools, keeping them organized and within reach.
Keep Frequently Used Tools Accessible
Keep Frequently Used Tools Accessible
Place your most frequently used tools in easy-to-reach locations, like a handy tool caddy or a designated drawer, to save time and streamline your workflow. This simple trick will make a huge difference in your DIY experience. By keeping your go-to tools within arm's reach, you'll reduce the time spent searching for them and increase your productivity.
Create Tool Zones in your workspace to organize your tools by frequency of use. For instance, you can have a "quick-grab" zone for tools you use daily, and a "less-frequently-used" zone for tools that are still important but not as urgent.
Here's a sample layout to get you started:
| Tool Zone | Tool | Location |
|---|---|---|
| Quick-Grab | Hammer | Top Drawer |
| Quick-Grab | Tape Measure | Tool Caddy |
| Less-Frequently-Used | Level | Middle Shelf |
| Less-Frequently-Used | Pliers | Bottom Drawer |
| Specialty | Circular Saw | Designated Station |
Frequently Asked Questions
How Do I Protect My Tools From Rust and Moisture?
You'll want to shield your tools from rust and moisture by using rust inhibitors like silicone sprays or wax-based coatings, and placing moisture-absorbing packets or silica gel near them to soak up excess humidity.
Can I Store Tools in a Humid Basement or Garage?
"A treasure chest filled with rusty tools is a nightmare, not a dream. You can't store tools in a humid basement or garage without proper Basement Organization and Garage Layout, or you'll be waving goodbye to your beloved tools."
Are There Any Eco-Friendly Tool Storage Options Available?
You'll be happy to know that eco-friendly tool storage options are available! Consider using bamboo shelves or storage units made from recycled materials, which are not only sustainable but also durable and stylish.
How Often Should I Clean and Maintain My Tool Storage System?
"A clean workspace is a happy workspace," as the saying goes! You should clean and maintain your tool storage system regularly, making it a daily habit to tidy up and doing a seasonal purge to keep your tools organized and within reach.
Can I Store Power Tools With Lithium-Ion Batteries on a Pegboard?
You can store power tools with lithium-ion batteries on a pegboard, but prioritize battery safety by securing them in a protective case or cover, and organize your pegboard to prevent accidental contact or overheating.
Related Posts
-
3 Pro Garage Organization Ideas to Try Now
You can alter your garage from cluttered chaos to organized oasis with three pro garage organization ideas. First, op...
-
Wall Mounted Hooks With Shelf for Maximum Storage
You'll find that wall mounted hooks with a shelf are a revolutionary solution for maximizing storage in your home, pr...
-
Building Garage Shelves in 7 Easy Steps
You're about to convert your garage into a highly functional storage space by building custom shelves in just 7 easy ...


