7 Essential Tips for a DIY Tool Chest With Drawers
Share
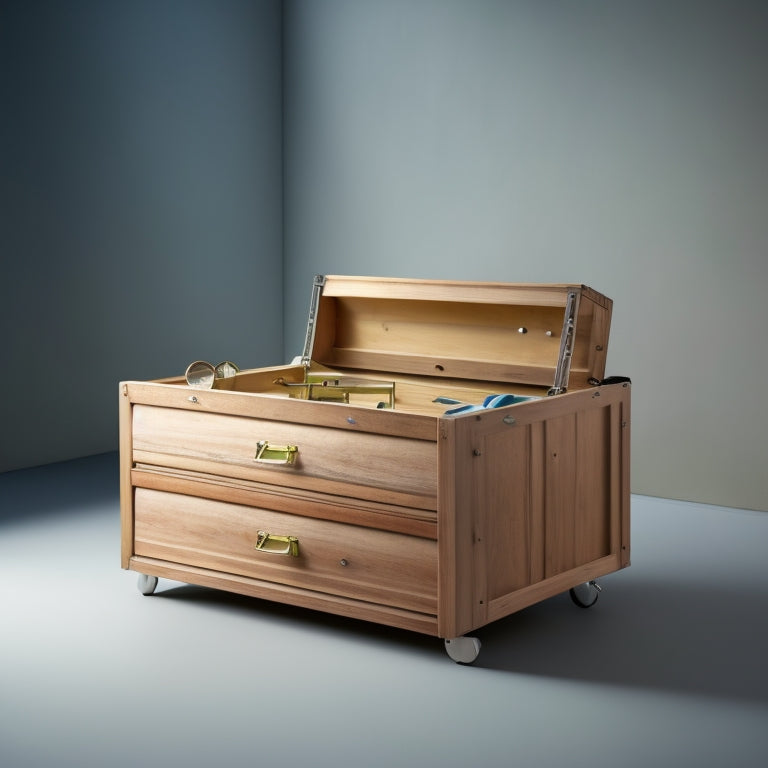
To create a DIY tool chest with drawers, you'll want to start by planning your layout and identifying the types and quantities of tools you'll store. Choose durable, warp-resistant materials for the frame and consider the pros and cons of metal versus wood. Build a sturdy frame with smooth-gliding drawer slides and divide the drawers into smaller compartments for efficient storage. Add a functional work surface on top and incorporate shelves, hooks, and labels to maximize efficiency. Don't forget to arrange your tools and supplies within the drawers and add a few finishing touches, like built-in measuring scales. Now, get ready to take your tool organization to the next level!
Key Takeaways
• Identify tool quantities and allocate space efficiently to ensure each tool has a designated spot, considering size, shape, and frequency of use.
• Choose durable, warp-resistant woods or metal frame materials, weighing pros and cons of each, and plan the cabinet layout for storage optimization.
• Add smooth-gliding drawer slides, attach them securely and level, and reinforce with brackets or corner supports for structural integrity.
• Divide drawers into smaller compartments, customize for specific tools, and utilize vertical space with shelves and hooks to maximize storage.
• Ensure smooth drawer operation, label compartments for easy identification, and create a stable work surface with durable and easy-to-clean finishes.
Plan Your Tool Chest Layout
Identify the types and quantities of tools you need to store to decide on the best layout for your DIY tool chest with drawers. This will help you allocate space efficiently and make sure that each tool has its designated spot. Consider the size and shape of your tools, as well as how often you use them. You may want to store frequently used tools in easy-to-reach locations, while less frequently used tools can be stored in harder-to-reach areas.
When planning your tool chest layout, think about drawer organization. You can use dividers or inserts to separate tools within each drawer, keeping them organized and preventing clutter. Consider dedicating specific drawers to specific types of tools, such as hand tools or power tools. This will make it easier to find what you need when you need it.
Tool chest customization is key to creating a layout that works for you. Don't be afraid to get creative and adjust your design as needed. With a well-planned layout, you'll be able to maximize your tool chest's storage capacity and stay organized, making your DIY projects more efficient and enjoyable.
Choose the Right Materials Carefully
When building your DIY tool chest with drawers, you'll need to select the right materials to guarantee durability and longevity.
You're looking for woods that are sturdy, resistant to warping, and can withstand the weight of your tools.
You'll want to take into account factors like moisture resistance, density, and grain pattern when choosing the perfect wood type for your project.
Wood Type Matters Most
You'll want to select wood that's durable, resistant to warping, and suitable for the specific demands of your DIY tool chest project. The right wood species selection can make all the difference in the durability and appearance of your tool chest.
Here are some popular wood options to evaluate:
| Wood Species | Characteristics |
|---|---|
| Oak | Strong, durable, and resistant to warping |
| Maple | Hard, resistant to scratches, and has a light color |
| Cherry | Rich, reddish-brown color, and fine grain |
| Pine | Soft, lightweight, and prone to warping |
| Cedar | Aromatic, rot-resistant, and insect-repellent |
When choosing your wood, take into account the finishing techniques you'll use, such as staining or painting. Staining options can enhance the natural beauty of the wood, while painting can provide a uniform color. Additionally, think about customization ideas, like adding a wood grain pattern or unique hardware, to give your tool chest a personal touch. By selecting the right wood and taking into consideration these factors, you'll create a tool chest that's both functional and visually appealing.
Material Durability Counts
With your wood species selected, it's time to think about the other materials that will bring your DIY tool chest to life, from hardware to finishes, and make certain they're just as durable and long-lasting as your chosen wood.
You'll want to choose drawer materials that can withstand the weight and wear of your tools. Consider using heavy-duty drawer slides and durable drawer organizers to keep your tools organized and within reach.
When it comes to finishes, opt for a water-resistant and scratch-resistant coating to protect your tool chest from the elements.
Don't forget about the hardware – choose rust-resistant screws, hinges, and handles that can withstand heavy use. For added durability, consider adding a protective clear coat to your tool chest's exterior.
Build a Sturdy Tool Chest Frame
Now that you've chosen your materials, it's time to build a sturdy tool chest frame.
You'll want to select the right frame material, considering factors like durability and weight capacity, and plan the cabinet layout to guarantee easy access to your tools.
Frame Material Selection
Selecting the right frame material is essential to building a sturdy tool chest that can withstand the weight of your tools and last for years to come. You're faced with two primary options: metal and wood.
Metal frames are durable, resistant to warping, and can support heavy loads. However, they can be noisy, prone to rust, and may require specialized tools for assembly.
Wood frames, on the other hand, are quieter, easier to work with, and can be aesthetically pleasing. But they're more susceptible to warping, moisture damage, and may not be as strong as metal.
When making your decision, consider your budget. Metal frames can be more expensive, especially if you opt for stainless steel or aluminum. Wood frames, particularly those made from plywood or MDF, can be more affordable.
Additionally, think about the tools you'll be storing and the weight they'll exert on the frame. If you have heavy machinery or a large number of tools, a metal frame may be the better choice.
Ultimately, weigh the pros and cons of each material, and choose the one that best fits your needs and budget.
Cabinet Layout Considerations
Having chosen your frame material, you'll need to plan the cabinet layout to maximize storage space and secure easy access to your tools. This is where you'll decide on the number and size of drawers, shelves, and compartments to accommodate your tool collection.
Consider the types of tools you'll be storing and how often you'll need to access them. For instance, you may want larger, deeper drawers for bulkier items like power tools or a combination of smaller drawers for hand tools and fasteners. Think about the frequency of use and prioritize your most-used tools for easy access.
A good rule of thumb is to allocate 2-3 inches of space between each drawer for smooth operation. When determining drawer size, consider the width and height of your tools, leaving about an inch of space on each side for easy removal. Drawer depth will depend on the length of your tools, but a general range is 12-24 inches.
Structural Integrity Essentials
Structural Integrity Essentials
To guarantee your tool chest withstands the rigors of daily use, you'll need to construct a frame that's sturdy, square, and capable of supporting the weight of your tools and drawers. A weak frame can lead to a tool chest that's prone to sagging, wobbling, or even collapse, which can compromise your drawer organization and make it challenging to access your tools.
To secure structural integrity, focus on the following essentials:
-
Use durable materials: Choose high-quality lumber, such as 3/4-inch plywood or solid wood, to construct your frame. Avoid using thin or flimsy materials that can't support the weight of your tools.
-
Design for squareness: Ensure your frame is square by using a combination square or a carpenter's square to verify all corners are precise and accurate.
-
Reinforce with brackets: Incorporate brackets or corner supports to strengthen your frame and prevent it from sagging or wobbling over time.
- Consider load capacity: Calculate the maximum weight your tool chest will need to hold and design your frame accordingly to guarantee it can support that load without compromising its structural integrity.
Add Smooth-Gliding Drawer Slides
You'll need to attach the drawer slides to the chest and drawers, making sure they're level and securely fastened to provide smooth gliding action. This is important for easy access to your tools and maintaining organized drawer organization.
Measure the slides carefully and mark their position on the chest and drawers before drilling screw holes. Use screws specifically designed for drawer slides to guarantee a secure fit.
Next, attach the slides to the drawers, ensuring they're evenly spaced and parallel to each other. Test the drawers by pulling them in and out to guarantee smooth operation. If the drawers stick or bind, adjust the slides as necessary.
Remember to choose high-quality drawer slides that can support the weight of your tools and withstand frequent use. Ball-bearing slides or soft-close slides are great options for a DIY tool chest with drawers.
Incorporate Versatile Storage Compartments
Now that your drawers are gliding smoothly, it's time to organize the interior with versatile storage compartments that cater to your specific tool storage needs. This is where you get to customize your DIY tool chest to fit your unique requirements. Effective drawer organization is key to maximizing storage space and reducing clutter.
To achieve this, consider the following:
-
Divide and Conquer: Split your drawers into smaller compartments using dividers or inserts to separate tools and accessories.
-
Customize Your Compartments: Design compartments that fit specific tools, such as a dedicated space for your drill press or a tray for small parts and fasteners.
-
Utilize Vertical Space: Install shelves, pegboards, or hooks to take advantage of vertical space and hang tools like wrenches, pliers, or saws.
- Label and Sign: Label each compartment and add signs to identify the contents, making it easy to find what you need at a glance.
Add a Functional Work Surface Top
By incorporating a functional work surface top, you'll create a convenient and efficient area for laying out projects, measuring materials, and performing tasks that require a stable surface. This addition will elevate your DIY tool chest with drawers to a whole new level of practicality.
When choosing the top finish options, consider durability and ease of cleaning. A waterproof and scratch-resistant surface, such as a butcher-block or laminate top, will withstand the rigors of frequent use.
To maximize surface functionality, incorporate features like built-in measuring scales, a vice mounting system, or a removable tray for small parts. You can also add a power strip or USB ports to keep your devices charged while you work.
Guarantee the surface is sturdy enough to support heavy tools and materials by using robust materials and a solid frame. By adding a functional work surface top, you'll be able to tackle projects with confidence, knowing you have a reliable and efficient workspace at your fingertips.
Final Touches and Tool Organization
With your tool chest's structure and functional work surface in place, it's time to focus on the final details that'll turn your DIY project into a highly organized and efficient workspace.
Now, it's all about the little things that'll make a big difference. Here are some essential considerations to keep in mind:
-
Drawer organization: Think about how you'll arrange your tools and supplies within each drawer. You can use dividers, inserts, or even DIY your own custom organizers to keep everything tidy and easily accessible.
-
Drawer hardware: Choose high-quality drawer slides and handles that can withstand heavy use and provide smooth, quiet operation.
Consider adding a pegboard or hooks to the back of the tool chest or on the walls nearby to hang frequently used tools and accessories.
Don't forget to add a label or sign to each drawer to identify what's inside, making it easy to find what you need at a glance.
Frequently Asked Questions
Can I Use MDF or Plywood for the Tool Chest's Work Surface Top?
When choosing between MDF and plywood for your tool chest's work surface top, you'll want to weigh material durability and surface finish. While MDF provides a smooth finish, plywood is more durable and resistant to scratches and dents.
How Do I Prevent the Drawers From Sagging Over Time?
'When constructing your drawers, you'll want to focus on impeccable attachment and flawless fitting to prevent sagging. Guarantee proper drawer reinforcement and precise alignment, then organize contents thoughtfully, respecting weight limits to keep your drawers durable and dependable.'
Are Ball-Bearing Slides Better Than Soft-Close Slides for Tool Chests?
When choosing slides for your tool chest, you'll want to ponder drawer organization, weight capacity, and noise level. Ball-bearing slides offer smoother operation and higher weight capacity, but soft-close slides reduce noise and require less maintenance.
Can I Add a Locking Mechanism to My Tool Chest's Drawers?
You can add a locking mechanism to your tool chest's drawers for enhanced security; consider installing a cam lock or electronic lock, and integrate it with your drawer organization system, including drawer dividers, for efficient access.
How Do I Protect My Tool Chest From Moisture and Humidity?
While your tools are safely locked away, moisture and humidity can still sneak in and wreak havoc. You'll want to contemplate dehumidifier options or silica gel packets to absorb excess moisture, and sealing techniques with moisture barriers to keep it out.
Related Posts
-

What to Look for in a Pegboard Tool Storage Kit
When shopping for a pegboard tool storage kit, you need a system that combines customized organization, sturdy durabi...
-

Essential Steps for Garage Storage System Design
You're about to change your cluttered garage into an organized haven by following a structured approach to garage sto...
-

Top Wrench Tool Box Sets for Every Mechanic
You're looking for high-quality wrench tool box sets that cater to your specific needs as a mechanic. From top-rated ...


