7 DIY Accessories for Key and Tool Organization
Share
You're about to breathe a sigh of relief - seven DIY accessories will transform your cluttered workspace into an organized oasis! Create a magnetic key strip board or repurpose an old pallet into a functional tool holder. Upcycle old belts into sturdy key hooks or reuse Mason jars for small tool storage. Design a DIY corkboard key rack or hang frequently used tools within arm's reach with an over-the-door tool hanger. For ultimate customization, build a pegboard organizer that suits your needs. With these projects, you'll be well on your way to a stress-free workspace - and there's even more to explore.
Key Takeaways
• Create a magnetic key strip board or use adhesive-backed magnets for key organization and add small trays for tool storage.
• Repurpose old pallets or belts into functional tool holders with customizable layouts and hooks for a rustic look.
• Use Mason jars to store small tools and supplies, labeling them for easy identification and customizing with paint or stickers.
• Design a DIY corkboard key rack with dividers, old frames, or containers for a unique look and add hooks for key holders.
• Maximize vertical storage space with pegboards, hanging frequently used tools within easy reach and customizing with paint, baskets, and accessories.
Magnetic Key Strip Board
Create a magnetic key strip board by attaching a magnetic strip to a wooden or plastic board, providing a convenient and space-saving spot to hang your keys. This DIY project is perfect for keeping your entryway or workspace organized and clutter-free.
You can also use magnetic strip alternatives, such as adhesive-backed magnets or magnetic hooks, to create a customized key holder that fits your style.
To take your key organization to the next level, consider incorporating tool organization tactics into your design. For instance, you can add a small tray or bin to store small items like screws, nails, or paper clips. This will keep your workspace tidy and make it easier to find what you need when you need it.
If you're looking for more DIY key solutions, consider creative display ideas like a corkboard or a chalkboard key holder. These options allow you to add a personal touch to your key organization system while keeping your keys within easy reach.
Repurposed Pallet Tool Holder
You can transform an old pallet into a functional tool holder by disassembling it and repurposing its wooden planks to craft a unique storage solution. This creative organization method not only reduces waste but also adds a touch of rustic charm to your workspace.
Start by breaking down the pallet into individual planks, then cut them to the desired size for your tool holder. You can arrange the planks in a horizontal or vertical layout, depending on the type of tools you need to store.
Use screws or nails to attach the planks to a wooden base or directly to the wall. Add some hooks, bins, or small containers to store your tools, such as hammers, screwdrivers, and pliers. You can also add a small shelf for storing larger items like power tools or equipment.
Key Hooks From Old Belts
Old belts can be repurposed into sturdy key hooks, providing a convenient spot to hang your keys near the entrance or in a mudroom. You can transform a worn-out leather belt into a functional key organizer that adds a touch of rustic charm to your home.
Simply cut the belt into desired lengths, attach some screws or hooks, and mount them on a wooden board or a wall. You can also get creative with the design by adding leather keychains or using the belt buckle as a centerpiece.
The resulting key hooks won't only keep your keys organized but also add a touch of personality to your space. The rustic design of the belt buckle can be a great conversation starter, and the leather keychains can be customized with initials or names for a personalized touch.
With this DIY project, you'll have a unique and functional key organizer that's both eco-friendly and budget-friendly. So, don't throw away that old belt just yet – give it a new life as a creative hook that serves a purpose.
Tool Organization Mason Jars
Mason jars are repurposed into handy tool organizers, providing a space-saving solution for storing small tools and supplies, such as drill bits, screws, and nails, in a compact and accessible way. You can easily label each jar to identify what's inside, making it easy to find what you need when you need it.
Here are three benefits of using Mason jars for tool organization:
-
Easy to clean and maintain: Mason jars are easy to wipe down and keep clean, making them perfect for storing small tools and supplies that can get messy.
-
Customizable: You can decorate your Mason jars with paint, stickers, or labels to fit your personal style and make them blend in with your workshop or garage decor.
-
Cost-effective: Mason jars are an affordable and eco-friendly way to repurpose old jars and create a functional storage solution.
DIY Key Rack With Corkboard
Now that you've made the decision to create a DIY key rack with corkboard, you'll need to ponder the design options for your corkboard surface.
You'll then move on to assembling the rack itself, making sure it's sturdy and functional.
Corkboard Design Options
By incorporating a corkboard into your DIY key rack design, you can add a functional and visually appealing element that keeps your keys, notes, and reminders organized and within easy reach. This versatile material offers endless possibilities for customization, allowing you to create a unique and functional space that suits your personal style.
Here are three corkboard design trends to inspire your creativity:
-
Geometric Patterns: Add a touch of modernity with geometric shapes, such as hexagons or triangles, to create a visually striking design.
-
Rustic Charm: Embrace a natural look by pairing cork with wooden accents, perfect for a cozy, rustic-inspired space.
-
Colorful Accents: Inject a pop of color with painted cork tiles or decorative push pins to add a playful touch to your design.
When it comes to corkboard organization hacks, consider using dividers or categories to separate your notes and reminders. You can also repurpose old frames or containers to create a one-of-a-kind corkboard design.
With a little creativity, your DIY key rack with corkboard can become a functional work of art that keeps your essentials organized and within reach.
Rack Assembly Steps
You'll start assembling your DIY key rack with corkboard by attaching the wooden or MDF backing to the corkboard surface. Assure a strong bond by applying a thin layer of adhesive, such as hot glue or decoupage medium, to the backing before pressing it onto the corkboard. Allow the adhesive to dry completely before proceeding.
Next, attach the hooks or key holders to the backing, spaced evenly apart to accommodate your keys. Consider a rack design that incorporates multiple rows or a staggered layout to maximize storage capacity.
Here's a suggested layout for your DIY key rack:
| Row | Description |
|---|---|
| 1 | Top row for small items (e.g., mail keys, spare change) |
| 2 | Middle row for standard house keys |
| 3 | Bottom row for larger items (e.g., car keys, keychains) |
| 4 | Add a small shelf or ledge for storing key-related accessories |
| 5 | Leave a small gap for easy key retrieval and visibility |
Remember to follow installation tips, such as drilling pilot holes for screws and using wall anchors for added stability. With these steps, you'll have a functional and stylish key rack that showcases your creative key display ideas.
Key Holder Placement
Your key holder placement will significantly impact the functionality and aesthetic appeal of your DIY key rack with corkboard. Where you position your key holders can make a big difference in the overall appearance and feel of your creation.
Here are three key considerations to keep in mind when deciding on key holder placement:
-
Symmetry and Balance: Place key holders in a balanced manner to create a visually pleasing design. This will also help evenly distribute the weight of the keys, preventing the rack from tipping over.
-
Accessibility and Convenience: Position key holders at a comfortable height and distance from the wall to guarantee easy access. This is particularly important if you have family members with mobility issues.
-
Visual Flow and Integration: Take into account the overall aesthetic of your home decor when situating your key holders. To achieve a seamless integration, select a key holder design that complements your existing decor.
Over-the-Door Tool Hanger
When creating an over-the-door tool hanger, you'll want to contemplate the various tool storage options that'll work best for your needs.
Think about the types of tools you need to store and how you can design the hanger to accommodate them.
Tool Storage Options
Hang an over-the-door tool hanger on the back of a door or wall to maximize vertical storage space and keep frequently used tools within easy reach. This DIY accessory is perfect for small garages or workshops where space is limited. By utilizing the back of a door, you can free up valuable garage shelving and workbench organization space for other essential items.
Here are three benefits of using an over-the-door tool hanger:
-
Easy access:
Hang your most frequently used tools, such as hammers, screwdrivers, and pliers, so they're always within arm's reach. -
Space-saving:
Maximize your vertical storage space and keep your tools organized without taking up valuable floor or bench space. -
Customizable:
Choose a hanger that fits your specific tool needs, and easily move it to a different location if needed.
Easy Access Design
This over-the-door tool hanger's clever design guarantees all your essential tools are neatly arranged and readily available, saving you time and effort in your busy workspace. You can easily hang it over any door, and its compact design won't take up too much space. With multiple pockets and hooks, you can store a variety of tools, from hammers to screwdrivers, and even compact keychains. This DIY project is perfect for those who value organization and ease of access.
Unlike traditional wall-mounted tools that can be bulky and take up valuable wall space, this over-the-door tool hanger is a space-saving solution. You can hang it in your garage, workshop, or even in a closet. The hanger's design allows you to see all your tools at a glance, making it easy to grab what you need quickly. With this DIY project, you'll be able to free up space in your workshop and reduce clutter. Plus, it's a great way to keep your tools organized and within reach, making your work more efficient and enjoyable.
Customizable Pegboard Organizer
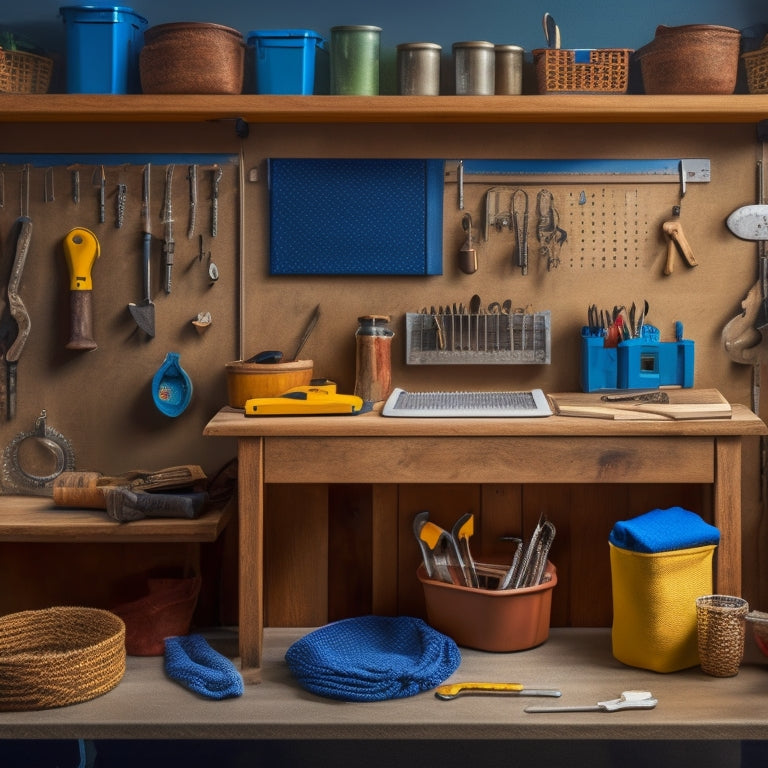
You can create a customizable pegboard organizer that fits your unique needs by choosing a pegboard size and layout that suits your available wall space and the types of items you want to store. With a customizable pegboard, you can optimize your tool organization and make the most of your storage space.
Here are 3 benefits of a customizable pegboard organizer:
-
Maximize Storage Space:
A pegboard organizer allows you to store items of various sizes, from small keys to large tools, in a compact space. -
Easy Accessibility:
With a pegboard, you can hang frequently used tools within easy reach, saving you time and effort. -
Customization Options:
You can customize your pegboard with custom paint, hanging baskets, and other accessories to fit your specific needs and style.
To get started, consider the types of items you want to store and the available wall space in your workshop or garage. Choose a pegboard size and layout that suits your needs, and don't be afraid to add your own personal touches, such as custom paint or decorative trim. With a little creativity, you can create a pegboard organizer that's both functional and visually appealing.
Frequently Asked Questions
Can I Use Any Type of Magnet for the Magnetic Key Strip Board?
You can use different magnet types, like neodymium or ceramic, for your magnetic key strip board, but ensure correct installation for best strength; consider enhancing magnetic strength by stacking or using adhesive-backed magnets.
How Do I Attach the Pallet to the Wall Securely?
As you prepare to hang your creation, the real challenge begins. You'll need to secure the pallet to the wall, and you'll do it by choosing the right wall anchors and screws, ensuring your mounting options prioritize stability.
Are There Any Alternative Materials for the Corkboard Key Rack?
You're looking for alternative materials to the corkboard key rack? Consider repurposing an old picture frame, a piece of reclaimed wood, or even a vintage metal grid for a creative solution that adds a personal touch.
Can I Paint or Stain the Wooden Pallet Tool Holder?
"You're not limited to the pallet's natural look! Go wild and paint or stain it to match your style. Apply a wood treatment and varnish for a glossy finish, or add a rust prevention sealant to protect metal tools from corrosion."
Are the Mason Jars Easy to Clean and Maintain?
You'll find mason jars are relatively easy to clean and maintain, thanks to their durability. Simply wash them with soap and warm water, and dry thoroughly to prevent water spots, making them a practical choice for your project.
Related Posts
-

Maximum Capacity Tool Boxes for Heavy-Duty Use
You need a maximum capacity tool box that can withstand the rigors of heavy-duty use, protecting your essential tools...
-

Storage Bins for Shelves to Keep Clutter at Bay
You're looking for a way to keep your shelves organized and clutter-free, and storage bins are the perfect solution t...
-

Choosing the Right Stacked Storage Bins
When choosing the right stacked storage bins, you'll want to evaluate your storage needs, considering inventory types...


