7 Budget-Friendly DIY Workshop Layout Design Tips
Share
You can boost your workshop's productivity without overspending by implementing these 7 budget-friendly DIY layout design tips. Maximize your space with vertical storage solutions like overhead shelves and pegboards. Create multi-purpose workstations that adapt to different tasks and consider repurposing old furniture for creative storage units. Designate zones for efficiency, like hand tool stations and power tool zones, and label each area with clear signs. Optimize tool board placement, grouping similar tools together, and utilize the 'golden zone' for frequently used tools. By following these tips, you'll be well on your way to a highly functional workshop that helps you stay organized and focused - and there's even more to discover to take your workshop to the next level.
Key Takeaways
• Utilize vertical space by installing wall-mounted shelves and overhead storage solutions to maximize storage capacity without breaking the bank.
• Create multi-purpose workstations with adjustable height and versatile furniture to accommodate various tasks and projects.
• Strategically place tool boards and customize them for specific needs to promote efficient tool organization and placement.
• Divide the workshop into distinct zones for different tasks and activities to improve workflow efficiency and reduce clutter.
• Repurpose old furniture creatively by upcycling them into functional storage units or workstations to save money and add a unique touch.
Maximize Space With Vertical Storage
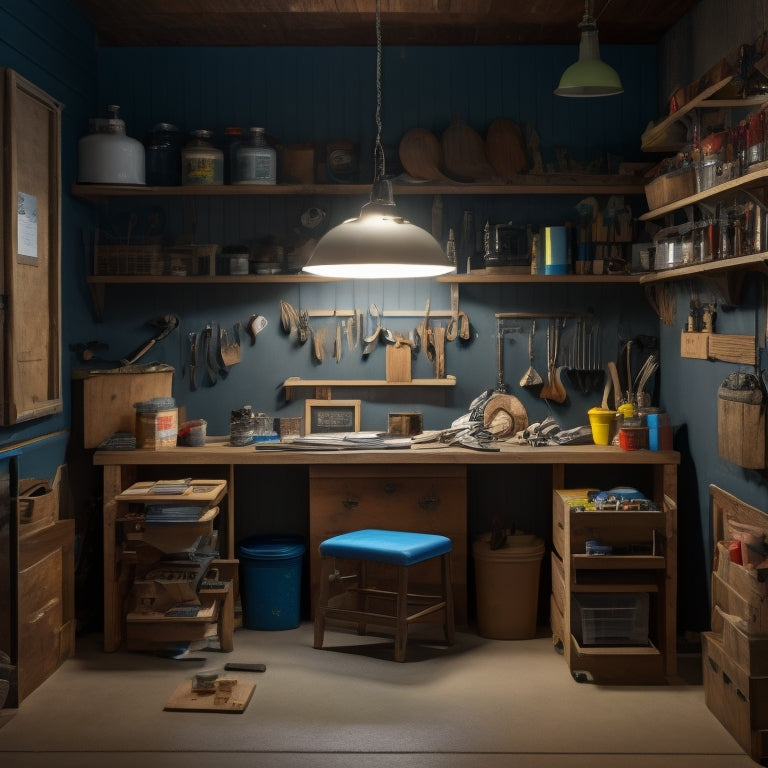
Take full advantage of your workshop's ceiling height by installing shelves, hooks, and bins that keep frequently used tools and materials within easy reach while keeping the floor and work surfaces clear. This is where overhead storage and space saving solutions come into play.
By utilizing wall-mounted shelves, you'll be able to store bulky items like lumber, pipes, or machinery parts, freeing up valuable floor space for more pressing tasks. Additionally, consider installing vertical organizers like pegboards or slatwalls to hang tools, accessories, and other essentials. This won't only keep your workspace organized but also make it easier to find what you need when you need it.
Remember to measure your workshop carefully to confirm your storage solutions fit snugly and don't obstruct your workflow. With a little creativity and planning, you can create a workshop that's both functional and efficient, allowing you to focus on serving others with your DIY projects.
Utilize Multi-Purpose Workstations
By incorporating multi-purpose workstations into your DIY workshop layout, you can streamline your workflow and boost productivity by performing multiple tasks in a single, dedicated area. This approach allows you to make the most of your available space, reducing clutter and increasing efficiency. Flexible workstations offer space-saving solutions, enabling you to switch between tasks quickly and easily.
When designing your multi-purpose workstations, consider investing in versatile furniture that can adapt to different tasks. For instance, a workstation with adjustable height and removable tool holders can accommodate various projects and tools. This efficient layout will enable you to move seamlessly between tasks, minimizing downtime and maximizing output.
To get the most out of your multi-purpose workstations, think about the tasks you perform most frequently and design your stations accordingly. By doing so, you'll create a layout that's tailored to your specific needs, allowing you to work smarter, not harder.
Optimize Tool Board Placement
Positioning your tool boards strategically around the workshop allows you to access frequently used tools quickly, reducing walking distances and saving time. By customizing your tool boards, you can create space-saving solutions that cater to your specific needs.
Start by grouping similar tools together, such as all your hand tools or power tools, and allocate a designated board for each category. This will help you maintain a visually organized workshop and make it easier to find what you need when you need it.
When arranging your tool boards, consider the 'golden zone' – the area between your waist and shoulder height – where you can easily access tools without straining. Use this zone to place your most frequently used tools, and reserve lower or higher shelves for less frequently used items.
Additionally, label each board and tool to create a clear visual organization system. This won't only save you time but also reduce frustration and increase productivity. By optimizing your tool board placement, you'll be able to work more efficiently and effectively, allowing you to serve others better.
Designate Zones for Efficiency
When designing your workshop layout, you'll want to create distinct zones to boost efficiency and productivity.
By separating your workspace into dedicated areas, you'll reduce clutter and make it easier to find what you need when you need it.
You'll achieve this by setting up tool organization areas and separate work stations tailored to specific tasks or projects.
Tool Organization Areas
You'll optimize your DIY workshop's efficiency by dividing it into dedicated tool organization areas, each tailored to a specific task or type of tool. This approach allows you to quickly locate the tools you need, reducing downtime and increasing productivity. Consider the following zones to get you started:
| Tool Organization Area | Description |
|---|---|
| Hand Tool Station | Store frequently used hand tools, such as hammers, screwdrivers, and pliers, in a convenient and accessible location. |
| Power Tool Zone | Designate an area for power tools like drills, saws, and sanders, with adequate outlets and storage for accessories. |
| Fastener and Supply Station | Organize fasteners, adhesives, and other supplies in a central location, making it easy to restock and find what you need. |
| Measuring and Testing Area | Create a zone for precision tools, such as calipers, levels, and multimeters, to guarantee accurate measurements and testing. |
| Cleaning and Maintenance Station | Set up a dedicated area for cleaning and maintaining your tools, with a work surface, cleaning supplies, and a vice. |
Separate Work Stations
By dividing your DIY workshop into separate work stations, you can further boost efficiency by dedicating specific areas to distinct tasks or projects, reducing clutter and allowing you to focus on the task at hand.
This approach enables you to create zones that cater to specific activities, making it easier to navigate your workshop and complete projects quickly.
For instance, you can designate an assembly area near your tool chest, where you can lay out components and assemble them without distractions. A painting station can be set up in a well-ventilated area, complete with a sanding corner for preparing surfaces.
This segregation of tasks helps maintain a clean and organized workspace, reducing the risk of mistakes and accidents.
Repurpose Old Furniture Creatively
One savvy approach to repurposing old furniture creatively in your DIY workshop is to transform an outdated file cabinet into a functional storage unit. You can give it a fresh coat of paint, add some decorative hardware, and voilà! You've got a unique and functional storage solution.
This upcycling project not only reduces waste but also adds a touch of personality to your workshop. Consider adding casters to make it mobile, or install a pegboard on the side for hanging tools.
When it comes to furniture transformations, think beyond the original purpose of the piece. An old dresser can become a workstation with built-in storage, while a vintage ladder can be repurposed as a shelving unit. Get creative with your space-saving ideas!
Look for opportunities to repurpose old furniture into functional storage solutions, and you'll be amazed at how much more efficient your workshop becomes. By thinking outside the box, you'll not only save money but also create a unique and functional space that reflects your personality.
Create a Functional Workflow
Create a Functional Workflow
Organize your DIY workshop into distinct zones to create a functional workflow that streamlines your projects and boosts productivity. This will help you work smarter, not harder, and make the most of your space.
Start by identifying the different tasks you'll be performing in your workshop, such as cutting, assembling, and finishing. Then, group similar tasks together and assign a specific area for each zone. This will help you avoid clutter and reduce the time spent moving between tasks.
To maximize workflow efficiency, consider the 'golden triangle' concept, where your most frequently used tools and materials are placed within easy reach. This will save you time and energy, allowing you to focus on the task at hand.
Make sure to also leave enough space between zones for comfortable movement and to accommodate any large projects. A well-designed functional layout will help you stay organized, reduce stress, and increase your overall workspace design.
Labels and Signs for Clarity
As you set up your DIY workshop, you'll want to prioritize labels and signs to maintain clarity and organization.
By creating clear zone markings and tool identification signs, you'll be able to quickly locate what you need and avoid wasting time searching for misplaced items.
Clear Zone Marking
Labeling your workshop's zones and stations with clear signs and labels helps you quickly identify where tools, materials, and projects are located, saving you time and reducing frustration. By doing so, you'll create a more organized and efficient workspace that promotes safety precautions and equipment maintenance. For instance, designating specific areas for hazardous materials or heavy machinery alerts you to take necessary safety measures, while marking maintenance schedules ensures your equipment stays in top condition.
Clear zone marking also improves traffic flow and workflow efficiency. By visually separating different workstations, you'll reduce congestion and minimize the risk of accidents. Additionally, marking work-in-progress areas or project stages helps you stay on track and meet deadlines.
Consider using color-coding or icons to differentiate between zones, making it easier to navigate your workshop. Remember to keep your labels concise, easy to read, and strategically placed to maximize visibility.
With clear zone marking, you'll be able to focus on the task at hand, rather than wasting time searching for misplaced tools or materials.
Tool Identification Signs
You'll avoid digging through drawers and searching for misplaced tools with identification signs that clearly display the contents of each storage container or pegboard. This simple yet effective solution saves you time and frustration, allowing you to focus on your projects.
Customize your signage to fit your specific needs by using labels, stickers, or chalkboard markers to identify what's inside each container. For pegboards, use hooks with labels or attach small signs to each tool holder.
In addition to saving time, identification signs also promote workshop safety. When you can quickly locate the tool you need, you're less likely to misplace it or cause accidents. Customized signage also helps prevent tool damage or loss, as you'll be more likely to return tools to their designated spot.
Frequently Asked Questions
Can I DIY a Workshop Layout With No Prior Design Experience?
You can definitely DIY a workshop layout with no prior design experience! Overcome design challenges with creative solutions, and avoid beginner mistakes by following expert tips to create an efficient and functional space that serves your needs.
How Do I Handle Limited Electrical Outlet Availability?
When dealing with limited outlets, you'll need to get creative: use extension cord solutions, strategically place power strips, and consider outlet relocation strategies to maximize space, and opt for energy-efficient tools to reduce overall power consumption.
Are There DIY Workshop Layout Designs for Very Small Spaces?
Can you really create a functional workshop in a tiny space? Yes, you can! You'll need space-saving solutions like creative storage, multi-functional furniture, and compact tools to maximize every inch of your mini workshop.
Can I Use Pegboard in a Humid or Outdoor Workshop?
You can use pegboard in a humid or outdoor workshop, but guarantee rust prevention by applying a rust-resistant coating or using stainless steel pegs; consider alternative storage and tool organization methods to keep items dry and accessible.
How Do I Accommodate Left-Handed Users in My Workshop Layout?
When designing your workshop, you'll want to accommodate left-handed users by creating custom workbenches with reversed ergonomic tool placement, ensuring they can work comfortably and efficiently alongside right-handed users.
Related Posts
-

Best Organizing Tools for a Clutter-Free Space
You're on a mission to change your cluttered space into a peaceful oasis, and you're looking for the best organizing ...
-

Portable Tool Chest Essentials
When stocking your portable tool chest, you'll want to prioritize essential hand tools like hammers, tape measures, a...
-

Garage Wall Storage Ideas to Boost Productivity
You can enhance your garage's productivity by capitalizing on your ceiling height with overhead racks, storing bulky ...


