7 Best DIY Tool Organization Installation Guides
Share
You're just a few steps away from a clutter-free workspace! Get started with these 7 DIY tool organization installation guides. Begin with a simple pegboard installation, then maximize storage by strategically placing panels and choosing the right hooks and bins. Don't forget to customize your pegboard with accessories and consider corner spaces or modular systems. Take it to the next level with advanced techniques and design ideas. Follow these expert-approved guides to measure, mark, and install your pegboard securely, and organize your tools for easy access. As you get organized, you'll discover more ways to optimize your workflow.
Key Takeaways
• Plan your pegboard layout based on tool categories, sizes, and frequency of use to maximize storage and accessibility.
• Choose the right pegboard material, size, and installation method for your specific workshop or garage needs.
• Strategically place pegboard panels to optimize space, considering workflow, visibility, and tool organization.
• Customize your pegboard with bins, baskets, hooks, and accessories to accommodate unique tool shapes and sizes.
• Ensure a secure and sturdy installation by using appropriate anchors, screws, and spacers to support the weight of your tools.
Simple Pegboard Installation for Beginners
Start by preparing your workspace and gathering the necessary tools and materials for a simple pegboard installation. You'll need a pegboard panel, hooks, bins, and a drill. Clear a flat surface, cover it with a drop cloth, and lay out your pegboard panel.
Measure and mark the studs on the wall where you'll be mounting the pegboard. Next, plan your pegboard layout. Think about the tools you use most frequently and group them by category. Consider the size and shape of each tool when deciding where to place the hooks and bins.
A well-organized pegboard layout will make it easy to find what you need when you need it. Now, it's time to start installing your pegboard. Mount the panel to the wall using screws, making sure it's level and secure.
Hang your hooks and bins according to your planned layout. As you add each tool, double-check that it's easily accessible and the pegboard isn't overcrowded. With a little patience, you'll have a functional tool organization system that will save you time and increase your productivity.
Maximizing Storage With Pegboard Systems
Now that you've installed your pegboard, it's time to maximize its storage potential.
You'll need to strategically place your pegboard panels to guarantee easy access to your tools and optimize the use of space.
Pegboard Panel Placement
Position the pegboard panel in a convenient spot, such as near a workbench or against a wall, where you'll have easy access to your tools and maximize storage space. This will guarantee that your tools are always within reach, saving you time and increasing productivity.
When deciding on the pegboard panel placement, consider the following factors:
-
Pegboard layout:
Think about the arrangement of your tools and how you want to organize them. Will you group similar tools together or prioritize frequently used tools? -
Tool organization:
Consider the kind of tools you'll be storing and the frequency of use. This will assist you in determining the best placement for your pegboard panel. -
Work flow:
Position the pegboard panel in a location that allows you to easily move around your workspace without obstruction.
-
Visibility:
Place the pegboard panel at a comfortable viewing height to make sure you can easily see the tools and accessories.
Hook and Bin Selection
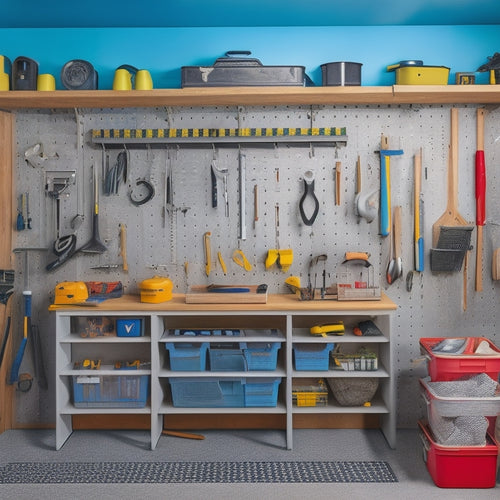
When selecting hooks and bins for your pegboard system, choose a combination that accommodates the varying sizes and shapes of your tools and accessories, ensuring every item has a designated spot. This will help maintain a clutter-free workspace and make it easier to find what you need when you need it.
Here's a sample layout to ponder:
| Tool/Accessory | Hook/Bin Type | Mounting Option |
|---|---|---|
| Hand tools (e.g., hammers, screwdrivers) | Large hooks | Wall mounting |
| Small parts (e.g., nuts, bolts) | Small bins | Shelf attachment |
| Power tools (e.g., drills, saws) | Heavy-duty hooks | Wall mounting |
Take into account the weight and size of each tool or accessory when choosing hooks and bins. You may need a mix of small, medium, and large hooks, as well as bins of various sizes. Don't forget to leave some space between each hook and bin for easy access and to prevent overcrowding. By thoughtfully selecting and arranging your hooks and bins, you'll be able to maximize your pegboard's storage capacity and create a more efficient workspace.
DIY Pegboard for Small Workshops
Create a DIY pegboard tailored to your small workshop's unique needs by starting with a thorough assessment of the tools you use most frequently. This will help you determine the most efficient layout and ensure that your pegboard organization system is optimized for your specific needs.
When planning your DIY pegboard, consider the following:
-
Measure your space: Take precise measurements of your workshop walls and available space to determine the best pegboard size.
-
Choose the right material: Select a durable, moisture-resistant material, like plywood or MDF, that can withstand the weight of your tools.
-
Plan for versatility: Incorporate a mix of hook types and sizes to accommodate various tool shapes and sizes.
- Keep it adjustable: Design your pegboard with adjustable hooks and bins to accommodate future tool additions or changes.
Customizing Your Pegboard With Accessories
You can further optimize your pegboard's functionality by adding accessories that cater to your specific tool storage needs, ensuring everything has a designated spot. This customization will help you maximize your pegboard's potential and create a more efficient workspace.
Start by identifying the tools you use most frequently and prioritize their storage. Consider adding bins, baskets, or hooks to store small items like nuts and bolts, screws, or wire. You can also install a magnetic strip for metal tools or a cord organizer for your power tools.
When it comes to pegboard accessory ideas, the possibilities are endless. You can add a pegboard shelf for larger items, a tool holder for your most-used tools, or a pegboard bin for loose parts.
To take your pegboard customization to the next level, incorporate organization tips like categorizing your tools by type or frequency of use. By doing so, you'll create a storage solution that not only looks great but also saves you time and increases productivity.
Pegboard Installation for Corner Spaces
Opting for a corner pegboard installation can help maximize your workshop's often-wasted corner space, making it an ideal solution for tight areas. By utilizing this often-overlooked space, you'll be able to fit more tools and accessories within easy reach, boosting your productivity and efficiency.
To get started, consider the following key factors for a successful corner pegboard installation:
-
Measure carefully: Take precise measurements of your corner space to ascertain a snug fit for your pegboard.
-
Choose the right pegboard: Select a pegboard specifically designed for corner spaces, or opt for a customizable pegboard that can be cut to fit your unique dimensions.
-
Plan your layout: Think creatively about your pegboard layout, considering the tools and accessories you need to store and how you can optimize the available space.
- Secure it properly: Use sturdy screws or anchors to secure your pegboard to the wall, ensuring it can support the weight of your tools and withstand daily use.
Creating a Modular Pegboard System
By incorporating a modular pegboard system, you can take your tool organization to the next level, building on the space-saving efficiency of your corner pegboard installation with a flexible and adaptable storage solution. This DIY project allows you to customize your tool organization to fit your specific needs, making it an essential component of any well-organized workshop or garage.
To create a modular pegboard system, start by identifying the types of tools you need to store and the frequency of use. This will help you determine the number and type of pegs, bins, and hooks you'll need.
Next, choose a pegboard material that suits your needs, such as wood, metal, or plastic. Then, install the pegboard panels on your wall or a freestanding frame, making sure to space them evenly for maximum flexibility.
Advanced Pegboard Installation Techniques
To elevate your pegboard installation, contemplate incorporating a French cleat system, which provides a sturdy and adjustable way to hang your pegboard panels. This advanced technique allows you to easily move panels around or add new ones as your tool collection grows.
When designing your pegboard, think about the tools you use most frequently and group them together for easy access.
Here are some pegboard design ideas to contemplate:
- Use a pegboard with a built-in shelf for storing smaller items like screws or nuts.
- Incorporate a magnetic strip for holding small metal tools or parts.
- Add a bin or basket for storing items like gloves or safety glasses.
- Ponder adding a power strip or USB outlet for charging your tools.
Frequently Asked Questions
Can I Install a Pegboard in a Rented Space or Apartment?
"Like a puzzle piece, you're fitting into a rented space, wondering if a pegboard fits too. Seek landlord approval first, then consider temporary solutions or pegboard alternatives that are apartment-friendly, like adhesive hooks or command strips."
How Do I Clean and Maintain My Pegboard Over Time?
You'll want to regularly clean your pegboard by dusting hooks and bins, wiping down the board with a damp cloth, and rearranging tools to maintain accessibility and prevent clutter; this guarantees your pegboard remains functional and organized.
Are Pegboards Suitable for Outdoor or Garage Workshop Use?
You'll find pegboards suitable for outdoor or garage workshop use if you prioritize outdoor durability and garage workshop efficiency. Look for weather-resistant materials, rust-proof hooks, and a sturdy frame to withstand harsh conditions.
Can I Use Pegboards to Organize Tools in a Small Closet or Cabinet?
You can definitely use pegboards in a small closet or cabinet to organize tools. Install a tool wall with a magnetic strip to maximize storage, and hang frequently used tools, keeping them within easy reach.
Do Pegboards Come With a Warranty or Guarantee From Manufacturers?
You'll find that most pegboards come with a warranty or guarantee from manufacturers, guaranteeing their durability. When choosing, consider customization options and check the fine print to make sure you're covered for any defects or issues.
Related Posts
-

Advantages of a Pegboard System in Your Garage
You can instantly alter your garage into a more organized, efficient, and productive space by installing a pegboard s...
-

Portable Tool Chest Essentials
When stocking your portable tool chest, you'll want to prioritize essential hand tools like hammers, tape measures, a...
-

What Tools Do I Need for a DIY Wall Organizer
You'll need a variety of tools to complete a DIY wall organizer project. Essential measuring tools include a tape mea...


