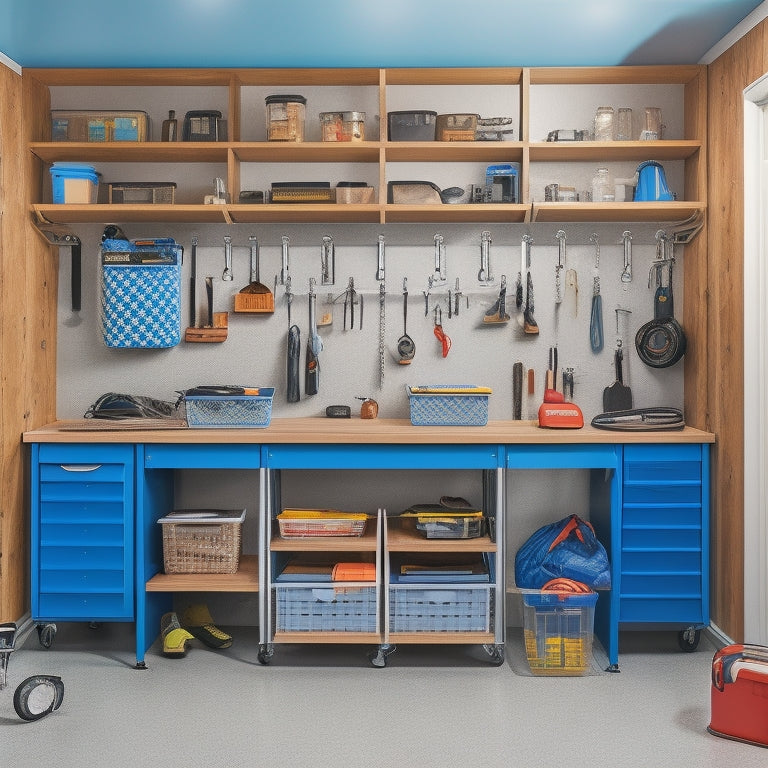
7 Best DIY Garage Workbench and Storage Solutions
Share
You're looking to create a highly functional garage workspace, and that starts with maximizing space utilization. Consider installing vertical shelving units to make the most of your ceiling space, and choose units with adjustable dividers for customization. A customizable workbench with built-in drawers will also help you stay organized. Don't forget to utilize ceiling storage for infrequently used tools and create a DIY pegboard for easy tool access. You'll also want to think about building a modular workstation system and incorporating cabinet storage for hazardous chemicals. With these solutions, you'll be well on your way to creating the ultimate garage workspace - and there's even more to explore when it comes to optimizing your space.
Key Takeaways
• Install vertical shelving units with adjustable dividers to maximize garage ceiling space and customize storage solutions.
• Design a customizable workbench with built-in drawers, ergonomic features, and efficient tool access to boost productivity.
• Utilize ceiling space for infrequently used tools by installing sturdy hooks and labeling bins or containers for easy identification.
• Create a DIY pegboard with logical tool organization and hooks for accessories to save space and enhance tool accessibility.
• Incorporate modular workstation systems with space-saving storage options and flexible layouts to accommodate various work styles and preferences.
Maximizing Space With Vertical Shelving
Install vertical shelving units to maximize your garage's often-wasted ceiling space, freeing up valuable floor area for your DIY workbench and other essential tools. By doing so, you'll create a more organized and efficient workspace.
When selecting your shelving units, consider ones with adjustable shelf dividers, allowing you to customize the storage of your items. This will guarantee that everything has its designated place, making it easier to find what you need when you need it.
Don't forget to utilize those tricky corners by incorporating corner shelving units or carousels. These will enable you to store items like bins, baskets, or even infrequently used tools, keeping them out of the way but still accessible.
When installing your shelving units, make sure to secure them firmly to the walls to prevent them from tipping over.
With your vertical shelving in place, you'll be amazed at how much more space you'll have available for your DIY projects and daily activities.
Customizable Workbench With Built-In Drawers
With your garage's vertical space now optimized, you can focus on creating a customizable workbench that accommodates your specific needs, complete with built-in drawers that keep your tools and supplies within easy reach. This setup allows you to work efficiently, reducing clutter and increasing productivity.
To create your dream workbench, consider the following dimensions and features:
| Dimension | Range | Purpose |
|---|---|---|
| Work surface height | 34-36 inches | Comfortable standing height for most users |
| Drawer depth | 12-18 inches | Ample storage for tools and supplies |
| Bench width | 48-60 inches | Accommodates various project sizes |
| Drawer organization | 3-5 compartments | Separates tools by category or frequency of use |
When designing your workbench, don't forget to prioritize bench ergonomics. Make sure the surface is at a comfortable height to reduce strain on your back and neck. Additionally, incorporate a drawer organization system that makes sense for your workflow. This will help you stay focused and avoid wasting time searching for misplaced tools. By customizing your workbench with built-in drawers, you'll create a space that's tailored to your unique needs and preferences.
Utilizing Ceiling Storage for Infrequent Tools
Since you likely have tools and equipment that you only use occasionally, consider leveraging your garage's ceiling space to store them, freeing up valuable floor and bench space for more frequently used items. This will help declutter your workspace and make it more efficient.
To utilize your ceiling storage, install sturdy ceiling hooks specifically designed for heavy-duty storage. These hooks can hold a substantial amount of weight, making them perfect for storing infrequent inventory like seasonal decorations, luggage, or even bikes.
When selecting ceiling hooks, make sure they're compatible with your garage's ceiling type and can support the weight of the items you plan to store. You can also use bins, baskets, or containers to store smaller items like out-of-season clothing or camping gear. Label each container so you can easily identify what's inside.
DIY Pegboard for Easy Tool Access
Now that you've optimized your ceiling storage, it's time to create a DIY pegboard that'll keep your frequently used tools within easy reach.
You'll want to take into account a few key factors, including tool organization ideas, board layout considerations, and mounting and installation strategies to make sure your pegboard is both functional and efficient.
Tool Organization Ideas
You can maximize your garage's tool storage capacity by creating a DIY pegboard that provides easy access to your most frequently used tools. This clever storage solution allows you to keep your tools within arm's reach, making your workshop layout more efficient.
To get started, decide on the size of your pegboard and the types of tools you want to hang. You can use tool caddies to store small items like screwdrivers, pliers, and wrenches, while larger tools like hammers and saws can be hung directly on the board.
When organizing your pegboard, group similar tools together to create a logical workflow. For instance, place your most frequently used tools at eye level, with less-used items stored above or below. This thoughtful layout will save you time and frustration when working on projects.
Consider adding a few hooks for hanging accessories like extension cords, work lights, or even a tool belt. With a well-planned pegboard, you'll be able to find what you need quickly, freeing up more time to focus on your projects.
Board Layout Considerations
To guarantee your DIY pegboard is functional and efficient, plan the layout by categorizing your tools into groups based on their frequency of use and the tasks they're used for. This will allow you to allocate the most accessible areas for your most-used tools.
Next, consider the material selection for your pegboard. You'll want a durable material that can hold the weight of your tools, such as plywood or MDF.
When designing your layout, don't forget to optimize the corners of your pegboard. These areas are often wasted space, but with the right design, you can fit in smaller tools or accessories. Consider adding a corner basket or a small shelf to make the most of this space.
You can also use corner-mounted bins or hooks to hang items like cords or accessories. By planning your layout thoughtfully, you'll be able to maximize your pegboard's storage capacity and create a workspace that's both functional and efficient.
With a well-organized pegboard, you'll be able to find what you need quickly and easily, making your DIY projects a whole lot easier.
Mounting and Installation
With your pegboard layout planned and optimized, it's time to securely fasten it to the wall or a freestanding frame, guaranteeing easy access to your tools and accessories.
You'll want to use wall anchors to prevent the pegboard from sagging or falling, especially if you're planning to hang heavy tools or equipment. Make sure to choose anchors that are rated for the weight capacity you need.
If you're using a freestanding frame, consider adding floor brackets for added stability. These will prevent the frame from tipping over and provide a solid base for your pegboard.
When mounting your pegboard, start by marking the wall or frame with a level to ensure it's straight. Then, drill pilot holes for your anchors or brackets and screw them in place.
Next, hang your pegboard, making sure it's level and secure. Double-check that everything is tightened properly to prevent any accidents or damage.
With your pegboard securely mounted, you can now start organizing your tools and accessories, making it easier to find what you need when you need it.
Building a Modular Workstation System
When building a modular workstation system, you'll start by assembling the frame, which will serve as the foundation for your customized setup.
As you configure your stations, you'll appreciate the flexibility to tailor the layout to your specific needs, whether that's a dedicated area for woodworking or a space for metal fabrication.
With a modular system, you'll also be able to incorporate space-saving storage options, keeping your tools and supplies organized and within reach.
Modular Frame Assembly
You'll start building your modular workstation system by constructing the frame, which consists of vertical legs, horizontal beams, and shelves that provide a solid foundation for your work surface and storage components. This frame is the backbone of your workstation, so it's crucial to get it right.
To achieve frame customization, consider the types of tasks you'll be performing and the tools you'll need to access frequently. This will help you determine the ideal configuration of shelves and beams.
When it comes to assembly sequencing, start by building the vertical legs, followed by the horizontal beams, and finally the shelves. This sequence ensures stability and makes it easier to add or remove components as needed.
Use high-quality fasteners and connectors to secure the frame, and don't be afraid to add reinforcements for extra stability. With a solid frame in place, you'll be ready to add your work surface, storage components, and other accessories to create a functional and efficient workstation.
Customizable Station Configurations
Assemble your modular workstation system by mixing and matching various components to create a customized configuration that suits your specific needs and workflow. This flexibility allows you to optimize your workzone efficiency by placing frequently used tools and materials within easy reach.
You can arrange your modules to create a flexible layout that adapts to different projects and tasks.
With a modular system, you can configure your workstation to accommodate different work styles and preferences. For instance, you can create a dedicated area for woodworking, metalworking, or electronics projects.
You can also add or remove modules as your needs change, making it an investment that will grow with you.
Space-Saving Storage Options
To maximize your workstation's efficiency, incorporate space-saving storage options that keep your tools and materials organized and within easy reach, ensuring a clutter-free workzone that helps you stay focused on the task at hand.
Consider investing in foldable containers that can be easily stowed away when not in use, freeing up valuable floor space. These containers are perfect for storing items like nuts, bolts, and other small parts that can easily get lost in the chaos of a busy workstation.
Another clever storage solution is to incorporate hidden compartments into your workstation design. You can create hidden drawers, shelves, or cabinets that blend seamlessly into the overall design, providing a secure and out-of-sight storage space for valuable tools or sensitive materials.
Incorporating Cabinet Storage for Chemicals
With hazardous chemicals and solvents often being a necessary evil in garage projects, dedicating a cabinet or shelving unit specifically to their storage is an essential safety consideration. You'll want to guarantee that you're meeting safety regulations and following proper chemical classification guidelines.
This means separating chemicals into categories, such as flammable liquids, corrosives, and toxic substances, and storing them in well-ventilated areas. Consider installing a cabinet with adjustable shelves and dividers to keep containers organized and easily accessible. Look for units with secure latches or locks to prevent accidental spills or unauthorized access.
Additionally, make sure the cabinet is resistant to corrosion and can withstand potential chemical spills. By incorporating a dedicated cabinet for chemical storage, you'll be able to work with confidence, knowing that you're protecting yourself and others from potential hazards.
Creating a Mobile Workbench With Storage
You'll maximize your garage's functionality by designing a mobile workbench that not only provides a stable surface for projects but also incorporates clever storage solutions to keep essential tools and supplies within easy reach. With a mobile workbench, you can effortlessly move it to different areas of your garage, making it ideal for tasks that require more space or proximity to specific tools.
Here are some key considerations to keep in mind when building your mobile workbench with storage:
-
Casters importance: Make sure your workbench is equipped with sturdy casters that can withstand the weight of your projects and tools. This will allow you to smoothly move the workbench around your garage.
-
Frame flexibility: Design your frame to be versatile, allowing you to add or remove storage components as needed.
-
Choose storage components that are tailored to your specific needs, such as drawers, shelves, or cabinets.
- Consider adding a vice or other clamping system to keep your projects secure while you work.
Frequently Asked Questions
Can I Use Reclaimed Wood for My DIY Garage Workbench Project?
You can definitely use reclaimed wood for your DIY project, considering the unique aesthetic it adds. Just make sure you source it responsibly, inspecting for damage and decay, and plan for potential extra prep work to make it shine.
How Do I Protect My Workbench From Moisture and Humidity?
You'll want to install moisture barriers under your workbench top and consider adding humidity sensors to alert you to excess moisture, ensuring your workspace stays dry and protected from warping or rotting.
Are There Any Safety Considerations for Installing Ceiling Storage?
"When installing ceiling storage, you're not just adding space, you're taking a risk - make sure you've got sufficient overhead clearance and don't exceed the load capacity to avoid a catastrophic collapse."
Can I Add a Vice to My Existing Workbench Without Major Modifications?
You can add a vice to your existing workbench, but you'll need to take vice placement and bench reinforcement into account to guarantee stability and prevent damage.
Are There Specific Anchoring Requirements for a Mobile Workbench?
As you commence on a mobile workbench adventure, think of it like anchoring a ship in a stormy sea - you'll need reliable moorings. You'll want to secure it with Wheel Chocks and Floor Brackets to prevent movement, ensuring a safe and sturdy workspace.
Related Posts
-

What to Look for in a Pegboard Tool Storage Kit
When shopping for a pegboard tool storage kit, you need a system that combines customized organization, sturdy durabi...
-

Maximum Capacity Tool Boxes for Heavy-Duty Use
You need a maximum capacity tool box that can withstand the rigors of heavy-duty use, protecting your essential tools...
-

Top Garage Storage Bins for Organization and Style
You can enhance your garage's style and organization with the right storage bins. Top brands like Rubbermaid, Suncast...


