10 Wall Tool Organization Tips for Your Workspace
You can optimize your workspace by efficiently utilizing vertical space with wall-mounted storage solutions, adjustable shelving, and hooks that maximize storage capacity and reduce strain. Designate zones for tool categories, and label them clearly to facilitate quick access and maintenance. Store small items in visible, easily accessible bins, and hang essential tools within easy reach. Create a customized tool grid and incorporate various storage solutions like bins, baskets, and hooks to streamline organization. By implementing these wall tool organization tips, you'll be well on your way to creating a productive and efficient workspace that sparks creativity - and that's just the beginning of what you can achieve.
Key Takeaways
- Efficiently use vertical space with wall-mounted storage solutions, adjustable shelving, and hooks to maximize tool visibility and accessibility.
- Organize tools by category, such as hand tools and power tools, and designate specific zones for each to enhance efficiency and productivity.
- Effectively label and identify tools using clear language, visual icons, and color coding to quickly locate and retrieve them.
- Store frequently used items in easily accessible bins and hanging tool organizer panels to reduce search time and enhance productivity.
- Customize your tool organization layout and design based on tool size, frequency of use, and storage needs to maximize space and efficiency.
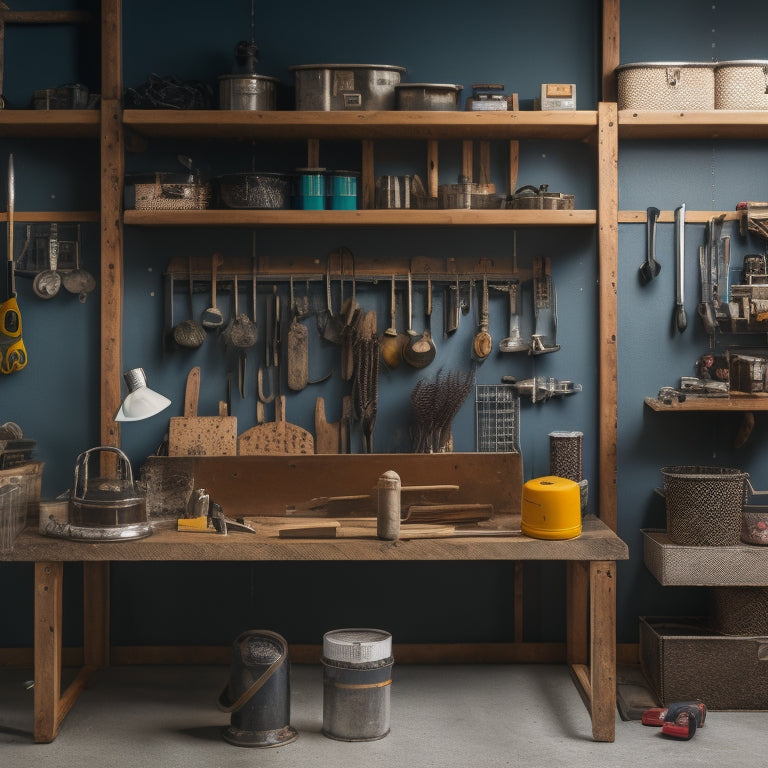
Utilize Vertical Wall Space Efficiently
Productivity often begins with a clutter-free workspace, and maximizing vertical wall space is an essential step in achieving that. By utilizing wall mounted storage solutions, you'll create a more organized and efficient workspace. This will also help reduce clutter and improve tool visibility, making it easier to find what you need when you need it.
To make the most of your wall space, consider installing adjustable shelving or multi-functional designs that can be customized to fit your specific needs. This will provide ergonomic access to your tools, reducing strain and improving overall safety.
You can also get creative with your displays, using DIY organizers or aesthetic organization systems that not only look great but also keep your tools within easy reach.
Designate Zones for Tool Categories
You'll want to divide your tools into categories, such as hand tools, power tools, and fasteners, and then assign each category to a specific zone in your workspace.
This will help you create a logical tool grouping system, where similar tools are stored together, making them easier to find and access.
Tool Category Segments
Clarity emerges when tools are grouped into categories, making it easier to locate what you need in a snap. This approach helps you to create a well-organized workspace that promotes efficiency and safety.
By categorizing your tools, you can assign specific zones for each type, ensuring that similar tools are stored together.
-
Power tools: Designate a zone for power tools like drills, saws, and sanders. This will help you to quickly access the tools you need for heavy-duty projects.
-
Hand tools: Allocate a separate zone for hand tools like hammers, pliers, and screwdrivers. This will keep them organized and within reach for smaller tasks.
-
Specialty tools: Create a zone for specialty tools like maintenance tools, safety equipment, and other unique tools that don't fit into the other categories.
Tool Grouping Systems
Frequently, a well-organized workspace hinges on the implementation of a tool grouping system, which enables you to designate zones for each tool category. This system helps you maintain a logical and structured arrangement of your tools, making it easier to find and access the ones you need.
Conduct a tool compatibility assessment to determine which tools can be stored together safely. For instance, you wouldn't want to store flammable materials near heat sources or electrical tools.
Once you've categorized your tools, create user-friendly designs for each zone. Consider the frequency of use, size, and weight of each tool when assigning its zone.
Label each zone clearly, so you can quickly identify where each tool belongs. This visual organization will help you maintain your workspace's tidiness and prevent tool misplacement.
Additionally, a well-organized workspace reduces the risk of accidents and injuries, ensuring a safer working environment. By implementing a tool grouping system, you'll be able to work more efficiently and effectively.
Zone Assignment Logic
Assigning zones for tool categories requires thoughtful consideration of how you work and the tools you use. You need to identify the categories of tools you have and how they relate to each other with respect to usage and frequency. This will help you create a spatial arrangement that makes sense and increases your productivity.
To designate zones effectively, follow these steps:
-
Categorize tools by function: Group tools that serve the same purpose, such as drilling, cutting, or measuring.
-
Identify high-usage tools: Place frequently used tools in easy-to-reach zones to reduce fatigue and increase efficiency.
-
Consider tool dependencies: Store tools that are often used together in the same zone to minimize walking distances and improve workflow.
Install Hooks for Hanging Tools
You'll find that installing hooks for hanging tools is an effective way to maximize your workspace's vertical storage capacity.
You can choose from various tool hanging options, such as pegboards, slatwalls, or individual hooks, to suit your specific needs.
When it comes to heavier tools, you'll want to select sturdy hooks that can support their weight without compromising the integrity of your workspace.
Tool Hanging Options
To maximize your workspace's vertical space and keep frequently used tools within easy reach, consider installing hooks for hanging tools. This won't only free up floor and bench space but also promote tool safety by keeping them organized and preventing clutter.
When choosing hooks, consider the following factors:
-
Weight capacity: Confirm the hooks can hold the weight of your tools to prevent accidents and damage.
-
Ergonomic placement: Position hooks at a comfortable height to reduce strain on your back and shoulders.
-
Hook type: Select hooks that are suitable for your tools, such as pegboard hooks, screw-in hooks, or adhesive hooks.
Hooks for Heavy Tools
Heavier tools like drills, saws, and sanders require sturdy hooks to guarantee they're securely fastened and easily accessible.
You'll want to install heavy-duty hooks specifically designed for holding these heavier tools. Look for hooks with a weight capacity that exceeds the weight of your heaviest tool.
When choosing hooks, consider the type of tool you'll be hanging. For example, if you have a large drill, you'll want a hook with a wide mouth to accommodate the tool's size.
You should also consider the material of the hook. Stainless steel or heavy-duty metal hooks are ideal for withstanding heavy weights.
Install wall-mounted racks or pegboards with heavy-duty hooks to create a dedicated space for your heavier tools. This will keep them organized, prevent clutter, and reduce the risk of accidents caused by tripping over tools or having them fall off a workbench.
Label and Sign Tool Stations
Labeling and signing tool stations is an essential step in organizing your workspace, as it enables you to quickly identify where each tool belongs, making it easier to maintain order and avoid clutter.
This step helps you maintain a safe working environment, reducing the risk of accidents caused by misplaced tools.
To effectively label and sign your tool stations, follow these steps:
- Color code your labels to categorize tools by type or function, making it easier to find what you need at a glance.
- Create a tool inventory to keep track of the tools you have and their designated stations.
- Use clear, concise language on your labels, and consider adding visual icons to help you quickly identify the tool or station.
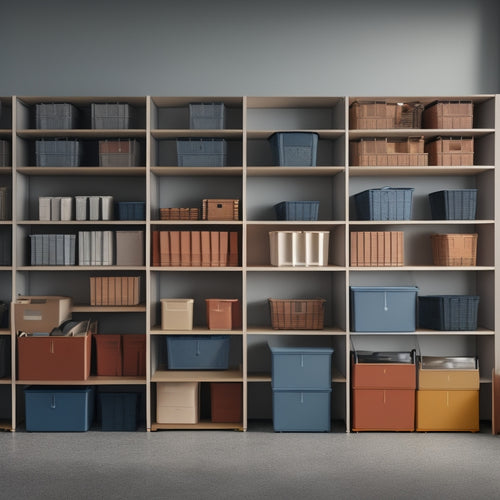
Store Small Items in Bins
When storing small items in bins, you'll want to choose bins that are the right size for the items you're storing, so they're easy to grab and don't get jumbled together.
Label each bin with its contents, so you can quickly identify what's inside without having to dig through everything.
Bin Size Matters
About a dozen small items, such as screws, nuts, and bolts, can clutter your workspace in no time. To keep them organized, you'll need bins that are the right size for the job. Choosing the correct bin dimensions is essential to maximize storage capacity and prevent overcrowding.
When selecting bins, consider the following factors:
-
Height: Make certain the bins are tall enough to hold the items you need to store, but not so tall that they're difficult to access.
-
Width and depth: Choose bins that fit snugly on your wall or shelf, leaving enough space for easy retrieval.
-
Compartmentalization: Opt for bins with separate compartments or dividers to keep similar items organized and prevent mixing.
Label for Easy ID
With your bins in place, it's time to guarantee you can quickly identify what's inside. Labels are essential for easy identification, and there are various label types to choose from. You can use adhesive labels, magnetic labels, or even chalkboard labels that allow you to write and erase as needed.
Consider color coding your labels to categorize items by type, frequency of use, or project. This visual system helps you locate the right tool in a split second.
When creating your labels, be concise and clear. Use a bold font to make the text easy to read, even from a distance. You can also add icons or visuals to help distinguish between similar items. For example, an illustration of a screwdriver can accompany the label "Screwdrivers" to guarantee you grab the right tool.
Keep Frequently Used
You regularly reach for certain small items in your workspace, and keeping them organized can greatly enhance your productivity.
To optimize tool accessibility and workspace efficiency, store small items in bins that are easily accessible and visible. This way, you can quickly grab what you need without interrupting your workflow.
Here are three essential items to store in bins:
-
Fasteners and fixings: Keep screws, nails, and bolts organized in separate bins to prevent mixing and mismatching.
-
Adhesives and tapes: Store glue, epoxy, and tapes in a designated bin to prevent them from drying out or getting tangled.
-
Electrical components: Organize wires, circuit breakers, and fuses in a bin to guarantee they're easily found when needed.
Mount a Pegboard for Flexibility
Flexibility is the cornerstone of an efficient workspace, and a pegboard is a versatile tool that embodies this concept. By mounting a pegboard, you'll have the freedom to customize your tool organization to suit your specific needs.
Start by choosing a location that's easily accessible and within reach of your primary work area.
When selecting pegboard accessories, consider the type of tools you need to store. You can use bins, baskets, and hooks to hang items like wrenches, pliers, and screwdrivers.
To add an extra layer of organization, try color coding your accessories. For example, use blue bins for electrical tools and red hooks for plumbing tools. This visual system will help you quickly identify where each tool is stored, saving you time and reducing frustration.
Remember to install your pegboard at a comfortable height to avoid straining your back or shoulders.
With a pegboard, you'll be able to adapt your tool organization as your needs change, making it an essential component of a safe and efficient workspace.
Add a Tool Shelf or Ledge
Regularly, cluttered workspaces lead to lost productivity and wasted time searching for misplaced tools.
To combat this, consider adding a tool shelf or ledge to your workspace. This will help keep frequently used tools within easy reach, reducing the time spent searching for them.
When deciding on shelf placement, consider the following factors:
-
Tool accessibility: Place the shelf at a comfortable height to avoid straining your back or shoulders when retrieving tools.
-
Workspace traffic: Position the shelf in a low-traffic area to prevent accidents and collisions.
-
Tool frequency: Store your most frequently used tools on the shelf, and reserve less accessible storage areas for less-used items.
Incorporate a Magnetic Board
Incorporate a Magnetic Board
In addition to a tool shelf or ledge, incorporating a magnetic board into your workspace can further optimize tool organization. This addition provides a dedicated space for frequently used metal tools, keeping them within easy reach and preventing clutter.
One of the significant magnetic board benefits is that it allows you to visually identify the tools you need, reducing the time spent searching for them. You can get creative with your display ideas by arranging tools in a pattern or grouping similar items together.
For example, you can place all your screwdrivers on one section and wrenches on another. This visual organization makes it easier to identify what's missing and restock your tools as needed.
Additionally, a magnetic board helps prevent tools from getting lost or misplaced, reducing the risk of accidents caused by misplaced sharp objects. By incorporating a magnetic board into your workspace, you'll enjoy a more efficient and safer work environment.
Hang a Tool Organizer Panel
Five essential zones in your workspace can benefit from a tool organizer panel, which can be hung on a wall or placed on a pegboard.
This panel will help you keep frequently used tools within easy reach, reducing clutter and increasing productivity.
When selecting a tool organizer panel, consider the materials used.
Look for panels made from durable materials like steel, aluminum, or high-quality plastic.
These materials can withstand the weight of your tools and withstand daily use.
Here are three key considerations for organizer panel placement:
- Visibility: Place the panel in an area where you can easily see the tools, reducing the time spent searching for them.
- Accessibility: Hang the panel at a comfortable height, allowing you to quickly grab the tools you need without straining.
- Proximity: Position the panel near your work area, reducing the distance you need to travel to retrieve tools and increasing your overall efficiency.
Create a Customized Tool Grid
How can you maximize the space on your tool organizer panel and confirm that every tool has its designated spot? By creating a customized tool grid, you can ascertain that your tools are neatly organized, easily accessible, and safely stored.
Design a tool grid that suits your specific needs. Measure the size of your tools and the space available on your panel. Plan a custom layout that accommodates each tool, leaving enough space between them for easy retrieval. Consider the frequency of use and group similar tools together.
Use a template or graph paper to sketch out your design. You can also use online tool grid design software to help you visualize your layout.
Once you're satisfied with your design, start arranging your tools accordingly. This will prevent clutter, reduce the risk of accidents, and save you time searching for misplaced tools.
With a well-planned custom layout, you'll be able to maintain a safe and efficient workspace.
Frequently Asked Questions
How Do I Prevent Tools From Falling off the Wall During Earthquakes?
You'll want to prioritize earthquake proofing techniques and tool retention strategies to prevent tools from falling off the wall during earthquakes; secure tools with anti-seismic fasteners, and consider using quake-resistant wall anchors or retention clips to keep them in place.
Can I Customize Tool Organization Systems for Left-Handed Users?
You'll be surprised to know that 13% of the population is left-handed! To cater to this demographic, you can customize tool organization systems by incorporating left-handed toolkits and ergonomic tool placement, ensuring comfortable and efficient use.
Are There Any Wall Tool Organization Systems for Small Workspaces?
You'll find wall tool organization systems perfect for small workspaces by using magnetic strips to hang frequently used tools or installing pegboard panels, allowing you to maximize storage while maintaining easy access and visibility.
How Often Should I Clean and Maintain My Wall Tool Organization System?
Daily clutter can quickly turn into a safety hazard, so you'll want to clean your tool organization system regularly. Aim to tidy up weekly, and perform a deeper clean every 2-3 months to maintain a safe and efficient workspace.
Are Wall Tool Organization Systems Suitable for Rented Workspaces?
When renting a workspace, you'll want to contemplate temporary solutions that don't damage the walls or leave residue, keeping aesthetic considerations in mind to maintain a professional appearance while ensuring a safe working environment.
Conclusion
With these 10 wall tool organization tips, your workspace will be changed into a well-oiled machine, humming along like a finely tuned engine. You'll be able to find what you need in a snap, and your productivity will soar. By maximizing your wall space, categorizing tools, and utilizing clever storage solutions, you'll be working smarter, not harder. So, get to work and turn your workspace into a lean, mean, tool-using machine!
Related Posts
-

Small Shelving Options for Tight Spaces
You're surrounded by tight spaces in your home, and you need clever shelving solutions that optimize storage without ...
-
Choosing the Right Stacked Storage Bins
When choosing the right stacked storage bins, you'll want to evaluate your storage needs, considering inventory types...
-
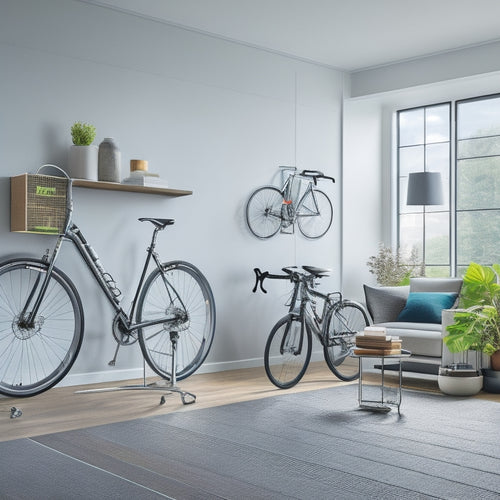
Must-Try Bike Storage Ideas in Small Spaces
You're tired of sacrificing precious living space to store your bike, especially in small homes where every square fo...


