10 Essential Woodworking Tool Storage Hacks
Share
You're likely wasting valuable time searching for misplaced tools or maneuvering a cluttered workspace, which can cost you up to 30 minutes of productivity per day. To maximize your workshop's efficiency, try these essential woodworking tool storage hacks. Start by utilizing vertical space with pegboards, hooks, or slatwall panels to free up floor space. Implement an organization and labeling system to assign specific zones for tools based on type or use. Repurpose old furniture into storage solutions, and customize tool chests for better organization. By applying these hacks, you'll reduce clutter and boost productivity - and there's even more to discover to take your workshop to the next level.
Key Takeaways
• Utilize vertical space with pegboards, hooks, or slatwall panels to hang tools and free up floor space for a clutter-free workshop.
• Implement a labeling system and assign specific zones for tools based on type or use to ensure easy navigation and reduced frustration.
• Repurpose old furniture into storage solutions, such as converting an old dresser into hand tool storage, to maximize storage capacity.
• Design a customizable tool chest with internal organization based on tool categories and assign specific sections or drawers for tool groups.
• Create a mobile tool cart to enhance efficiency and keep essential tools within easy reach, designed based on frequent tool usage.
Utilize Vertical Wall Space
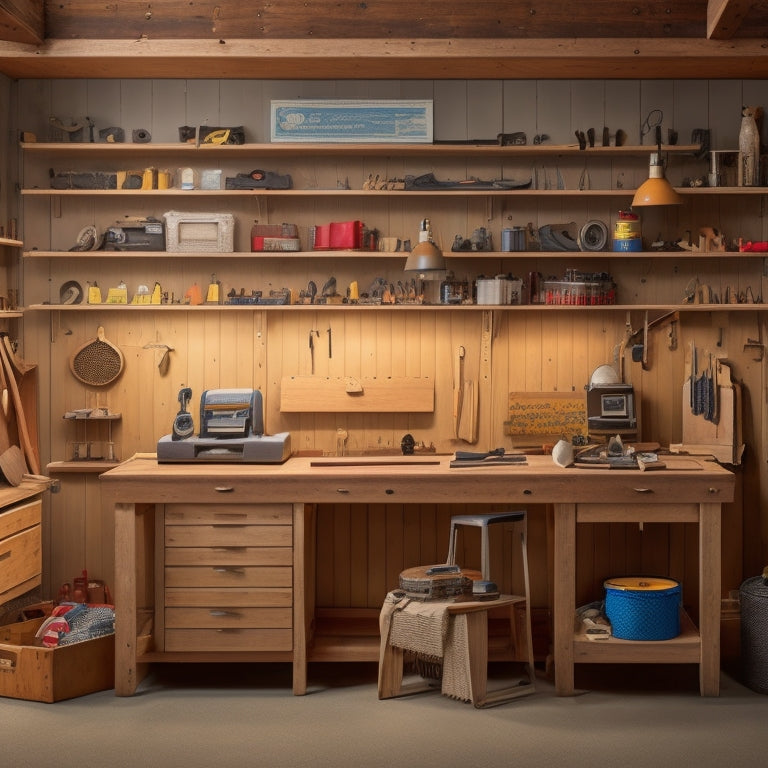
Take advantage of your workshop's often-wasted vertical wall space by installing pegboards, hooks, or slatwall panels to hang your most frequently used tools, freeing up valuable floor and bench space. This simple hack will make a significant difference in your workshop's organization and productivity.
You can install a tool pegboard near your workbench, where you can hang frequently used hand tools, such as hammers, screwdrivers, and pliers. This will keep them within easy reach, saving you time and effort.
Consider adding wall-mounted shelves above your workbench or along a wall to store less frequently used tools, like power tools or specialty equipment. These shelves will keep your tools organized and out of the way, while still being easily accessible.
By utilizing your vertical wall space, you'll be able to maximize your workshop's storage capacity, reducing clutter and chaos. This will allow you to focus on your projects, rather than wasting time searching for misplaced tools.
With a little creativity, you can turn your workshop's walls into a valuable storage asset.
Label and Sign Tool Zones
When you designate specific zones for your tools, you'll need to identify the most effective ways to label and sign them.
You'll want to develop a clear labeling system that immediately conveys what's stored in each zone, and create signs that are easily visible from a distance.
Zone Designation Strategies
By assigning a specific zone to each tool or group of tools, you create a visual system that helps you quickly identify where everything is stored. This zone designation strategy is essential for efficient tool organization. You can designate zones based on tool type, frequency of use, or project-specific needs.
| Zone Type | Tool Examples |
|---|---|
| Hand Tool Zone | Hammers, screwdrivers, pliers |
| Power Tool Zone | Drills, saws, sanders |
| Specialty Tool Zone | Router bits, jigs, clamps |
| Measuring Tool Zone | Tape measures, levels, calipers |
Implementing a color coding system can further enhance your zone designation strategy. For instance, you can use colored labels or stickers to categorize tools within each zone. This visual cue helps you quickly identify the tool you need, even when stored in a crowded tool rack or storage solution. By designating specific zones for each tool or group of tools, you'll save time searching for what you need and stay focused on your woodworking project.
Clear Labeling Systems
You'll further optimize your zone designation strategy by implementing clear labeling systems that identify each tool zone with easy-to-read labels and signs. This will enable you to quickly locate specific tools and maintain an organized workspace.
Consider using color-coded labels to categorize tools based on their function or type, making it easier to find what you need when you need it. For instance, you can use red labels for power tools, blue for hand tools, and green for measuring instruments. This visual system will enhance your efficient organization and reduce the time spent searching for tools.
Clear labeling also helps with tool inventory management. By labeling each zone, you can easily identify which tools are stored in each area, making it simpler to conduct regular inventory checks and maintain storage efficiency. This system will also help you identify tools that are missing or need to be replaced, ensuring you always have the right tools for the job.
Signage Visibility Tips
Frequently, poor signage visibility can lead to wasted time and frustration, which is essential to make certain your tool zone labels and signs are easily readable from a distance. You want to make sure that you can quickly identify where your tools are stored, even when you're in a rush.
To achieve this, consider using color coordination to categorize your tools and separate them into distinct zones. For example, you can use blue labels for hand tools, red for power tools, and green for measuring tools. This visual system will help you navigate your workshop more efficiently.
In addition to color coordination, think about the lighting options in your workshop. Are your labels and signs well-lit, or are they hidden in shadows? Consider installing LED strips or under-shelf lighting to illuminate your signs and labels. This will make it simpler to read them, even in low-light conditions.
Repurpose Old Furniture
If you're like most woodworkers, you've got old furniture collecting dust in your garage or attic that can be transformed into clever storage solutions for your tools and supplies.
Consider giving your old furniture a makeover to create functional storage units that'll keep your workspace organized.
For instance, an old dresser can be repurposed into a storage unit for your hand tools, with each drawer designated for a specific type of tool.
You can also breathe new life into vintage finds, like an old wooden crate, by converting it into a mobile storage cart for your power tools.
A furniture makeover can be a fun and creative way to achieve functional repurposing. By thinking outside the box, you can turn discarded items into unique storage solutions that'll make your woodworking tasks more efficient.
Customize Tool Chests Inside
Take your tool chests to the next level by designing an internal organization system that caters to your specific woodworking needs. A well-planned tool chest organization system will save you time and frustration when searching for the right tool.
Start by categorizing your tools into groups, such as hand tools, power tools, and measuring tools. Then, assign a specific section or drawer to each group.
To take it a step further, consider color coding your tools and corresponding storage compartments. This visual system will help you quickly identify where each tool belongs. For instance, you can use blue labels for hand tools and red labels for power tools.
When it comes to tool chest customization, drawer dividers are a game-changer. These dividers will keep similar tools organized and prevent them from getting jumbled together. You can also use dividers to separate smaller tools and accessories within a drawer.
Hang Heavy Tools Efficiently
You'll liberate up valuable floor and shelf space by hanging heavy tools, such as table saws and planers, on the walls or ceilings of your workshop. This effective storage solution allows for improved tool organization and easier access to your frequently used equipment. To suspend your heavy tools, install sturdy hooks or a pegboard on the wall or ceiling, making certain they can support the weight of the tool. Consider the height and location of the hook or pegboard to guarantee the tool is at a comfortable working height and easily accessible.
When hanging tools, group similar items together, such as all your saws or sanders, to establish a functional workstation. This will streamline your workflow and reduce the time spent searching for tools. Additionally, label each hook or pegboard section to swiftly identify where each tool is stored.
Store Small Items Wisely
Organize your small woodworking items, such as bits, blades, and screws, into categorized containers or bins to keep them within easy reach and prevent clutter from building up in your workshop. This will save you time and frustration when searching for a specific item.
Use drawer dividers to separate small items within a drawer, making it easy to find what you need at a glance. You can also label each divider to further simplify the process.
For smaller items like safety glasses, earplugs, or pencils, consider using hanging hooks on the wall or on the side of a cabinet. This will keep them off the workbench and out of the way, while still keeping them accessible.
You can also use small bins or containers with labels to store items like sandpaper, drill bits, or other small parts. By storing your small items wisely, you'll be able to focus on your woodworking projects without interruptions, and you'll be more productive and efficient in the long run.
Maximize Corner Space Use
Maximize Corner Space Use
By installing corner shelves, carousels, or Lazy Susans, you can access the often-wasted space in your workshop's corners and create a convenient hub for frequently used tools and supplies. This is especially useful for storing items that you need quick access to, such as drill bits, sandpaper, or clamps.
Here are some ideas for maximizing corner space use:
| Corner Solution | Tool Storage | Benefits |
|---|---|---|
| Corner Shelves | Hand saws, hammers, and other small tools | Easy access, keeps floor clear |
| Carousel | Drill bits, screws, and other small parts | Rotates for easy access, saves space |
| Lazy Susan | Sandpaper, clamps, and other frequently used items | Spins for easy access, reduces clutter |
Implement a Pegboard System
By incorporating a pegboard system into your workshop, you can create a customizable and adaptable storage solution that keeps your frequently used tools and accessories within easy reach. This system allows you to optimize your tool organization and garage setup, ensuring that everything has a designated spot and is easily accessible.
With a pegboard, you can hang tools such as hammers, saws, and drills, freeing up space on your workbench and reducing clutter.
Here are three benefits of implementing a pegboard system:
-
Easy customization: You can arrange and rearrange your tools and accessories as needed, making it easy to adapt to changing projects and priorities.
-
Improved workshop efficiency: With tools within easy reach, you'll save time and reduce frustration, allowing you to focus on your projects rather than searching for misplaced tools.
-
Increased visibility: A pegboard system keeps your tools organized and visible, making it easier to identify what you need and when you need it.
Create a Mobile Tool Cart
As you work on different projects, having a mobile tool cart at your side can greatly enhance your efficiency, allowing you to easily transport your tools and supplies to wherever they're needed.
A well-designed mobile tool cart can provide tool cart efficiency by keeping your essential tools within easy reach, reducing walking distances, and saving time. To achieve peak tool cart organization, consider the tools you use most frequently and allocate space accordingly.
When designing your mobile tool storage, think about the types of projects you typically work on and the tools required for each. This will help you determine the ideal size and layout of your cart. You can include features like drawers, shelves, or hooks to maximize storage capacity.
Additionally, consider adding casters or wheels to guarantee smooth movement around your workspace. By optimizing your tool cart design, you'll be able to quickly access the tools you need, streamline your workflow, and increase your overall efficiency.
Designate a Tool Station Area
When you designate a tool station area, you're creating a dedicated space that streamlines your workflow and boosts productivity.
You'll need to think carefully about the layout of your station, organizing your work zone to maximize efficiency and allocating the right tools to each station.
Tool Station Layout
You'll likely find that designating a specific area for your tool station layout increases productivity and reduces frustration in the long run. This is because a well-planned layout enables you to quickly access the tools you need, saving time and energy.
To maximize tool station efficiency, consider the following layout tips:
-
Group similar tools together: Store tools that are used for similar tasks in the same area, making it easier to switch between tasks.
-
Position frequently used tools front and center: Place your most frequently used tools in easy-to-reach locations, reducing the need to dig through storage bins or search for misplaced items.
-
Leave space for future expansion: Don't overcrowd your tool station with too many tools or storage bins. Leave some space for future additions or changes to your workflow.
Work Zone Organization
Designate a specific area of your workspace as your tool station, and make it a habit to keep it organized and clutter-free. This zone should be easily accessible and within arm's reach, allowing you to quickly grab the tools you need. Consider installing a tool wall or a pegboard to maximize vertical storage and keep frequently used tools at eye level. A tool cabinet can also be a great addition to your workstation, providing a secure and organized space for your most valuable or sensitive tools.
Keep your work surface clear of clutter by storing small items like screws, nails, and other fasteners in designated containers or bins. Label each container so you can quickly identify what's inside. This will save you time and frustration when searching for a specific item. Additionally, consider investing in a tool cart or mobile workstation to keep your tools organized and within reach, even when working on larger projects.
Stationary Tool Allocation
Allocate a specific section of your workshop as your fixed tool station, ideally situated near a power source and anchored to the floor or wall to prevent it from shifting during use. This dedicated area will help you maintain tool organization and optimize your workshop layout. By designating a tool station, you'll enhance tool accessibility, making it easier to move between projects and reducing downtime.
Here are three essential considerations for your fixed tool station:
-
Tool placement: Arrange your tools in a logical order, grouping similar tools together and placing frequently used ones at eye level.
-
Cable management: Use cable ties or clips to keep cords organized, preventing tangles and tripping hazards.
-
Maintenance access: Ensure convenient access to tools for maintenance, such as sharpening or replacing blades, to keep your tools in top condition.
Frequently Asked Questions
How Do I Keep My Tools From Getting Dusty in Storage?
To keep your tools from getting dusty in storage, you're using dust protection measures like tool covers and storing them vertically for easy access, ensuring your tools remain clean and ready for your next project.
Can I Use Magnetic Strips for Non-Metallic Tools?
You can get creative with tool storage by using magnetic strips with non-metallic tools, but consider alternative storage options like adhesive-backed Velcro or tool-specific holders for better protection and organization.
Are There Any Safety Concerns With Hanging Heavy Tools?
When hanging heavy tools, you're wise to take safety concerns into account; proper weight distribution and take safety precautions like wall reinforcement to prevent accidents, avoiding catastrophic falls that can cause injury or damage.
How Often Should I Reorganize My Tool Storage System?
You might think reorganizing your tool storage is a hassle, but it's important to maintain efficiency. You should reassess your tool organization every 3-6 months to guarantee efficient storage and proper maintenance, keeping your workspace safe and productive.
Can I Customize My Storage System for Left-Handed Use?
You can definitely customize your storage system for left-handed use by incorporating left-handed workbenches and tool holders, which are specifically designed to accommodate your unique needs and workflow.
Related Posts
-

Large Wall Hooks to Maximize Garage Space
You can effectively double your garage's storage capacity by installing large wall hooks that keep items off the floo...
-

Top Garage Storage Bins for Organization and Style
You can enhance your garage's style and organization with the right storage bins. Top brands like Rubbermaid, Suncast...
-

How to Maximize Storage Space With Parts Storage Bins
To maximize storage space with parts storage bins, start by evaluating your available storage space and examining you...


