10 Essential Tool Storage Ideas for Workbenches
Share
You'll be amazed at how much more efficient your workbench can be with strategic tool storage ideas. Start by utilizing vertical space with pegboards and installing sliding tool drawers to maximize storage capacity. Optimize corner space with carousels and incorporate adjustable shelving units for flexibility. Label and categorize tool trays, create a tool station with bins, and mount folding tool holders to enhance accessibility. Use stackable tool chests efficiently, and designate a spot for wires and cords to reduce clutter. By implementing these essential tool storage ideas, you'll be well on your way to optimizing your workbench's productivity - and there's more to explore.
Key Takeaways
• Utilize pegboards, sliding tool drawers, and carousels to maximize workbench space and keep tools organized and accessible.
• Categorize tools by function and label tool trays for efficient workflow and swift tool identification.
• Install adjustable shelving units and stackable tool chests to optimize storage capacity and reduce clutter.
• Designate a spot for wires and cords, and use customizable holders for easy access to frequently used items.
• Regularly clean and lubricate drawers to maintain organization and ensure smooth operation.
Utilize Vertical Space With Pegboards
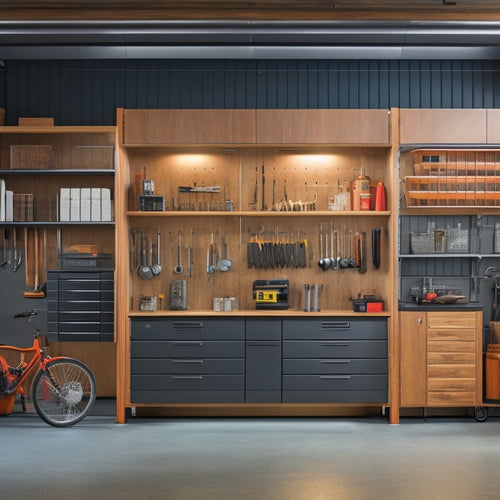
Maximize your workbench's real estate by installing pegboards on walls or cabinets, freeing up valuable floor and surface space for more critical tools and tasks.
This clever storage solution allows you to hang frequently used tools within easy reach, keeping them organized and easily accessible.
With pegboard organization, you can categorize and store tools according to their function or frequency of use, making your workflow more efficient.
Install Sliding Tool Drawers
You can take your tool storage to the next level by installing sliding tool drawers, which provide easy access to frequently used items while keeping your work surface clear. One of the significant sliding drawer benefits is that they allow you to keep your tools organized, making it easier to locate what you need quickly. This, in turn, enhances your productivity and saves you time.
When setting up sliding tool drawers, make certain to measure your workbench accurately to guarantee a secure fit. It's also crucial to choose drawers that are specifically designed for your type of tools and equipment. For example, if you have heavy machinery, you'll need drawers with durable slides that can support the weight.
To maintain your sliding tool drawers, regularly clean them out and reorganize your tools to prevent clutter from accumulating. You should also lubricate the slides periodically to keep them running smoothly.
Optimize Corner Space With Carousels
By incorporating carousels into your workbench's corner space, you'll be able to turn an often-wasted area into a highly functional storage zone. This is especially useful for storing items that you need to access frequently, such as hand tools, fasteners, or small parts. Corner carousels are designed to maximize the often-underutilized corner space, providing easy access to the items you need.
Here are some benefits of using corner carousels in your workbench:
| Benefits | Description |
|---|---|
| Increased Storage | Corner carousels provide additional storage space for your tools and materials. |
| Improved Accessibility | With corner carousels, you can easily access the items you need without having to dig through cluttered drawers or shelves. |
| Enhanced Organization | Corner carousels help keep your workspace organized, reducing clutter and increasing productivity. |
Incorporate Adjustable Shelving Units
Once you've optimized your corner space with carousels, consider incorporating adjustable shelving units to create a flexible and adaptable storage system that can accommodate changing project needs. These customizable shelving options offer adjustable versatility, allowing you to reconfigure your storage space as needed.
With adaptable shelving units, you can easily move shelves up or down to accommodate tools and materials of varying sizes. This type of storage solution is especially useful in workbenches where space is limited. By incorporating adaptable shelving units, you can maximize your storage capacity while maintaining a clutter-free workspace.
Look for units with durable construction and smooth adjustment mechanisms to make certain easy reconfiguration. As you design your storage system, prioritize practical organization. Group similar tools together and store them in a logical order to reduce workflow disruptions.
With adaptable shelving units, you can create a space-saving storage solution that streamlines your workflow and boosts productivity. By incorporating these versatile units into your workbench, you'll be able to tackle projects with confidence, knowing your tools are organized and within easy reach.
Label and Categorize Tool Trays
Categorize tool trays by function or project type, and label them clearly, so you can swiftly identify the contents and access the tools you require. This simple step can save you time and frustration when working on a project.
Use color coding to differentiate between trays, making it simple to spot the one you need. For example, use blue labels for woodworking tools and red for metalworking tools. This organization system allows you to personalize your tool trays to suit your specific needs.
You can also label each tray with the particular tools it contains, so you can see at a glance what's inside. Consider creating a master list or chart to keep track of your tool trays and their contents. This will help you maintain your organization system and make certain that everything has its designated place.
Hang Tools on Magnetic Strips
Take advantage of vertical space and maximize your workbench's storage capacity by hanging frequently used tools on magnetic strips, keeping them within easy reach and freeing up valuable surface area for your projects. This tool organization method is perfect for garage storage, as it helps keep your workspace clutter-free and organized.
You can attach magnetic hooks to the strips to hang tools like wrenches, pliers, and screwdrivers. This way, you'll be able to quickly grab the tool you need without having to sift through drawers or bins. Plus, you'll be able to see everything at a glance, making it simpler to find what you're searching for.
When selecting magnetic strips, take into account the weight capacity and the type of tools you'll be hanging. You may also want to contemplate adding multiple strips to create a tool organizer system that suits your specific needs.
Create a Tool Station With Bins
When creating a tool station with bins, you'll want to focus on organizing them in a way that makes sense for your workflow.
You'll need to decide how to categorize your tools and supplies, and then assign a bin to each group.
Bin Organization Tips
Set up a tool station with bins by designating a specific area of your workbench for storage and grouping similar tools together in labeled containers. This will help you implement effective storage solutions and organization techniques. By doing so, you'll be able to quickly locate the tools you need, saving time and increasing productivity.
Here are some bin organization tips to keep in mind:
-
Categorize tools by function: Store tools that serve a similar purpose, such as drilling or cutting, in the same bin.
-
Prioritize frequently used tools: Place bins containing frequently used tools in easy-to-reach locations.
-
Consider tool size and shape: Use smaller bins for smaller tools and larger bins for bulkier items.
- Keep bins accessible: Position bins in a way that allows you to easily access the tools you need without having to dig through multiple containers.
Labeling System Essentials
Now that you've categorized and prioritized your tools, assign a clear identity to each bin with a labeling system that guarantees you can quickly identify what's inside. This is where your labeling system essentials come into play. A well-thought-out labeling system will save you time and frustration in the long run.
Start by deciding on a labeling method that works for you. You can use stickers, labels, or even write directly on the bin.
Next, consider implementing a color-coding system to differentiate between tool types or categories. For instance, you can use red labels for power tools, blue for hand tools, and green for accessories. This visual cue will help you quickly locate the bin you need.
Organize your labels in alphabetical order to make it easy to find a specific tool. You can also include a brief description of what's inside the bin, especially if you have multiple tools with similar names.
Mount Folding Tool Holders
When you mount folding tool holders on your workbench, you'll find it's easier to access the tools you need quickly. These space-saving holders keep your tools organized and within reach, making your workflow more efficient.
Tool Access Made Easy
You can mount folding tool holders on your workbench to create a space-saving storage solution that allows you to easily access your frequently used tools. This is especially useful for DIY projects, where having the right tool at the right time can make all the difference.
By keeping your tools organized, you'll boost your workshop efficiency and reduce the time spent searching for misplaced items.
Here are some benefits of mounting folding tool holders:
-
Easy access: Your tools are always within reach, making it easier to switch between tasks.
-
Space-saving: Folding tool holders take up minimal space, leaving room for other essential items on your workbench.
-
Customizable: You can configure the holders to fit your specific toolset and workflow.
- Reduced clutter: By storing your tools in a compact, organized manner, you'll reduce clutter and create a more productive work environment.
Space-Saving Holder Design
By strategically designing your folding tool holders, you can maximize storage capacity while maintaining easy access to your tools. This space-saving approach allows you to optimize your workbench's real estate, keeping frequently used tools within arm's reach.
Mount folding tool holders on a tool wall or attach them to a pegboard to create a customizable storage system. This setup enables you to store tool pouches, small power tools, and accessories, freeing up valuable work surface area. Consider using adjustable holders that can accommodate various tool sizes, making it easy to switch out tools as required.
To further streamline your storage, label each holder or pouch to guarantee quick identification. This thoughtful design will save you time and reduce frustration when searching for a specific tool.
Use Stackable Tool Chests Efficiently
Stackable tool chests maximize your workbench's vertical space, allowing you to store more tools within easy reach. This efficient use of space is perfect for small workshops or cluttered workbenches. By using stackable tool chests, you can keep your frequently used tools organized and within arm's reach, making your workflow smoother and more productive.
To get the most out of your stackable tool chests, follow these tips:
-
Categorize your tools: Group similar tools together, such as hand tools, power tools, or measuring tools, to make them easy to find.
-
Label each chest: Clearly label each chest with its contents, so you can quickly identify what's inside.
-
Store heavy items at the bottom: Place heavier tools at the bottom of the stack to prevent the chests from becoming top-heavy.
- Keep frequently used tools accessible: Store your most frequently used tools in the top chest or in an easy-to-reach location.
Designate a Spot for Wires and Cords
Organizing your tools is only half the battle - now it's time to tackle the often-overlooked issue of wire and cord management on your workbench. You've probably spent hours searching for that one specific wire or cord, only to find it tangled up with others. It's time to put an end to that frustration.
Designate a specific spot on your workbench for wire and cord storage, and utilize cable management solutions to keep them organized. Invest in wire organization tools like cable holders or cord reels to keep your work surface clutter-free. You can also use cord storage hacks like zip ties or Velcro strips to keep cords wrapped up and out of the way.
Label each cord or wire so you can easily identify them, and consider storing them in a designated bin or container. By implementing these simple solutions, you'll save time and reduce stress when working on projects. A well-organized workbench isn't only more efficient, but it's also safer and more enjoyable to work in.
Frequently Asked Questions
How Do I Prevent Tools From Getting Rusty in Storage?
To prevent tools from getting rusty in storage, you'll want to employ rust prevention techniques like oil coating, waxing, or varnishing, and implement moisture control strategies like desiccant packets, silica gel, or airtight containers.
Can I Customize Tool Storage Solutions for Specific Tasks?
"You think you're stuck with one-size-fits-all storage, but surprise! You can customize solutions to tackle specific tasks, boosting efficiency in organization and making your workflow a breeze - it's time to get creative!"
Are There Tool Storage Ideas for Small Workbenches?
You'll find space-saving solutions for small workbenches by incorporating vertical organization, portable options, and hidden compartments, allowing you to maximize your limited space without sacrificing tool accessibility or efficiency.
How Do I Keep Tool Storage Organized and Clutter-Free?
To keep tool storage organized and clutter-free, you'll want to implement DIY organization strategies, such as magnetic holders and pegboard solutions, along with drawer dividers to maximize storage and accessibility.
Are Tool Storage Systems Compatible With Different Workbench Materials?
When choosing a tool storage system, you'll want to make sure it's compatible with your workbench material, optimizing space while considering durability and aesthetics; luckily, most systems cater to various materials, making it easy to find one that fits your needs.
Related Posts
-

Key Features of a Garage Wall Hanging System
You're looking for a garage wall hanging system that's built to last and adapts to your needs. Look for systems made ...
-

Best Materials for Garage Wall-Mounted Cabinets
When selecting materials for your garage wall-mounted cabinets, you'll want to evaluate options that balance durabili...
-

Must-Try Bike Storage Ideas in Small Spaces
You're tired of sacrificing precious living space to store your bike, especially in small homes where every square fo...


