10 Essential Tips for a Successful DIY Tool Installation
Share
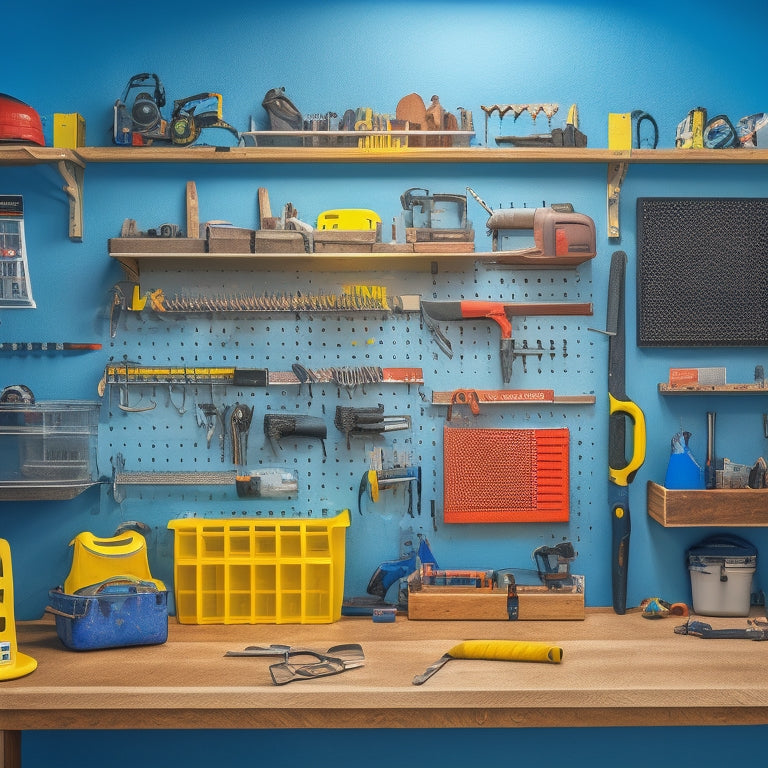
You're about to transform your workspace into a productive haven with a well-organized DIY tool installation that boosts efficiency and reduces frustration. Start by clearing your workspace of clutter and ensuring good lighting. Choose the right pegboard for your tool collection, and measure twice to drill accurately. Plan your tool layout for efficiency and safety, then secure anchor points and drill pilot holes correctly. Organize tools logically, add hooks and bins strategically, and test your system. By following these essential tips, you'll be on your way to a successful DIY tool installation that streamlines your workflow - and there's even more to explore to make your workspace truly exceptional.
Key Takeaways
• Measure wall space and tool collection to choose the right pegboard for efficient tool storage and future additions.
• Calibrate tools for precise measurements, and double-check calculations to avoid errors in marking and drilling.
• Designate a specific tool area, visualize workflow, and place frequently used tools in easy-to-reach locations for efficiency and safety.
• Secure anchor points first, selecting durable anchors with appropriate load capacities and user-friendly locking mechanisms for quick tool changes.
• Organize tools logically, categorizing by function, frequency of use, and personal preference, and label tool categories for quick identification.
Prepare the Workspace Properly
Prepare the Workspace Properly
Clear the area where you'll be working of any clutter, debris, or tripping hazards to guarantee a safe and efficient DIY tool installation process. A clean workspace isn't only vital, but it'll also help you stay focused and avoid mistakes.
Start by sweeping or vacuuming the floor to remove any dirt, dust, or small objects that could get in your way. Then, wipe down your workbench or table with a damp cloth to remove any dirt, grime, or grease.
Good workspace lighting is also important for a successful DIY tool installation. Make sure the area is well-lit, either by natural light or invest in a high-quality task light. This will help you see the tiny details and avoid any mistakes.
Additionally, consider investing in a pegboard-mounted light to provide extra illumination where you need it most. By following these simple steps, you'll be well on your way to a safe and efficient DIY tool installation process.
Choose the Right Pegboard
When selecting a pegboard, you'll want to take into account the size of your workspace and the number of tools you need to store. A pegboard that's too small will leave you scrambling for space, while one that's too large will be a waste of resources.
Pegboard Size Matters
You'll need to select a pegboard that fits your available wall space and tool collection, as a pegboard that's too small will lead to clutter and a pegboard that's too large will waste valuable storage space.
When choosing the right pegboard, consider the following factors to make sure you get the perfect fit:
-
Measure your wall space: Take precise measurements of the area where you plan to install the pegboard to determine the maximum size it can accommodate.
-
Assess your tool collection: Count the number of tools you need to store and consider their size and shape to determine the storage capacity you require.
-
Pegboard design: Consider the design of the pegboard, including the number and type of hooks, bins, and other storage features, to ensure it can hold your tools efficiently.
- Leave room for expansion: Choose a pegboard that has some extra space for future tool additions or changes in your tool collection.
Optimize Your Layout
Select a pegboard that streamlines your tool storage by maximizing its layout, ensuring each tool has a designated spot and minimizing clutter. This will help you maintain a smooth work flow and reduce the time spent searching for tools.
When choosing a pegboard, consider the corner space in your workshop or garage. A pegboard with a corner configuration can help you make the most of this often-wasted area.
Look for a pegboard with adjustable hooks and bins to accommodate tools of various sizes. This flexibility will allow you to customize your layout as your tool collection grows or changes.
By optimizing your pegboard layout, you'll be able to quickly find the tools you need, allowing you to focus on the task at hand. Remember, a well-organized workspace is key to a successful DIY project.
Measure Twice, Drill Once
When setting up your DIY tool setup, you'll want to make sure that your measurements are spot on to avoid costly mistakes.
You'll need to take precise readings to determine the perfect spot for your pegboard, and then select the right drill bit for the job.
Accurate Measurement Matters
Accurate measurements are the backbone of a successful DIY tool installation, as even the slightest miscalculation can lead to costly mistakes and wasted materials. You've heard the phrase 'measure twice, drill once' - it's more than just a pivotal mindset to adopt when tackling a DIY project.
Here are some essential tips to guarantee precise measurements:
-
Calibrate your tools: Make sure your tape measure, level, and other tools are accurately calibrated to avoid compounding errors.
-
Use the right measurement unit: Choose the unit of measurement that's most relevant to your project, and stick to it to avoid conversion mistakes.
-
Double-check your math: Don't rely on mental calculations - write down your measurements and calculations to catch any mistakes.
- Take your time: Don't rush through measurements - take your time to ensure accuracy and avoid costly mistakes.
Drill Bit Selection
You'll need to choose the right drill bit for your project, as using the wrong one can lead to damaged materials, broken bits, or even safety hazards.
The bit material is vital, as it determines the bit's durability and performance. For example, high-speed steel (HSS) bits are ideal for drilling through metal, while tungsten carbide (TC) bits are better suited for masonry and concrete.
You'll also need to contemplate drill compatibility, making sure the bit is designed for your drill's chuck type and size.
When selecting a drill bit, think about the material you're working with and the type of hole you need to create. Twist bits are great for general-purpose drilling, while spade bits are better for large holes in wood. Masonry bits, on the other hand, are designed for drilling through brick, block, or concrete.
Remember to check the bit's packaging or manufacturer's website for specific recommendations and guidelines.
Marking the Spot
Before drilling, take a moment to carefully mark the spot where you'll make the hole, as a single misaligned hole can ruin your entire project. This important step is often overlooked, leading to costly mistakes and frustrating setbacks. Don't fall victim to marking mistakes – take your time to get it right.
Here are some tips to guarantee accurate spot checking:
-
Use a level: Make sure your tool is perfectly horizontal or vertical to avoid wonky holes.
-
Double-check measurements: Verify your calculations to prevent mistakes that can throw off your entire project.
-
Mark with a fine point: A sharp marker or pencil will give you a precise mark, reducing the risk of errors.
- Drill a pilot hole: If you're still unsure, drill a small pilot hole to test your mark before making the final hole.
Plan Your Tool Layout
Plan Your Tool Layout
Designate a specific area for your tools and visualize how you'll move around it, guaranteeing a workflow that's both efficient and safe. Consider your tool preferences and how you'll use them most often. Place your most frequently used tools in easy-to-reach locations, and group similar tools together. This will streamline your workflow and reduce the time spent searching for the right tool.
Think about the tasks you'll be performing and how you'll move between them. A well-planned layout will help you avoid unnecessary steps and reduce fatigue. Consider the size and shape of your tools, as well as the space needed to maneuver around them. Leave enough room to comfortably move around your workspace, and make sure that your tool layout allows for easy access to your workpieces.
Use Wall Anchors Securely
Your DIY tool installation relies on securely fastening your tools to the wall, guaranteeing they're safely held in place and easily accessible when needed. To achieve this, you'll need to use wall anchors that can support the weight of your tools.
Here are some essential tips to keep in mind:
-
Choose the right anchor type: Select anchors that are suitable for your wall type (drywall, concrete, or wood). This guarantees a strong hold and prevents damage to your wall.
-
Check the load capacity: Make sure the anchor can support the combined weight of your tools and any additional items you plan to hang. Don't exceed the recommended load capacity to avoid accidents.
-
Drill accurately: Drill pilot holes carefully to avoid damaging the anchor or the surrounding wall material.
- Tighten securely: Tighten the anchor screws firmly to ensure a snug fit and prevent the anchor from coming loose over time.
Level the Pegboard Accurately
Now that you've chosen the perfect spot for your pegboard, it's time to confirm it's perfectly level.
You'll want to double-check the alignment of your pegboard to guarantee it's straight and even, and then verify its levelness with a reliable measuring tool.
Pegboard Alignment Check
How accurately have you positioned the pegboard to make certain it's perfectly level? This important step in pegboard calibration can make all the difference in the success of your DIY tool installation. A level pegboard guarantees that your tools are hung evenly and securely, which is essential for maintaining wall stability.
Before you start drilling holes and hanging tools, take a moment to double-check the pegboard's alignment. Here are a few things to keep in mind:
-
Use a level: Invest in a good quality level to ensure the pegboard is perfectly horizontal and vertical.
-
Check for plumb: Verify that the pegboard is plumb by checking its alignment with the wall studs.
-
Measure from multiple points: Take measurements from multiple points on the pegboard to ensure it's level and plumb.
- Make adjustments as needed: If the pegboard is off, make adjustments to the mounting hardware to get it back on track.
Measuring for Levelness Matters
To ensure your pegboard is perfectly level, you'll need to take precise measurements, as even the slightest deviation can throw off the entire installation. You can't rely on eyeballing it – you need the right tools for the job.
When it comes to measuring for levelness, you have two main options: bubble levels and laser levels. Here's a breakdown of each:
| Tool | Accuracy | Ease of Use |
|---|---|---|
| Bubble Level | ±1° | Easy to use, but requires attention to detail |
| Laser Level | ±0.1° | More accurate, but requires more setup and calibration |
| Smartphone App | ±1° | Convenient, but may not be as accurate as dedicated tools |
| String and Level | ±1° | Old-school method, still effective, but time-consuming |
| Measuring Tape | N/A | For measuring distances, not levelness |
Choose the tool that best fits your needs and skill level. Remember, accuracy is key when it comes to leveling your pegboard. Take your time, and don't rush through this essential step.
Secure Anchor Points First
With your pegboard perfectly level, you're ready to secure the anchor points that will hold your tools in place. This step is essential, as it guarantees your tools are safely stored and easily accessible. When choosing anchor points, take into account the type of tools you'll be hanging and their weight.
Here are some key factors to keep in mind when selecting anchor points:
-
Anchor types: Choose from screw-in, clip-in, or adhesive anchors, depending on your pegboard material and tool type.
-
Load capacities: Select anchors that can handle the weight of your tools, considering the combined load of multiple tools.
-
Durability: Opt for anchors made from high-quality materials that can withstand frequent use.
- Ease of use: Consider anchors with user-friendly locking mechanisms for quick tool changes.
Drill Pilot Holes Correctly
You'll prevent wall anchors from splitting and screws from stripping by drilling pilot holes correctly. It's an important step in DIY tool installation that's often overlooked, but it's vital for a secure and durable setup.
To drill pilot holes like a pro, prioritize drill safety above all. Wear protective gear, including safety glasses and a dust mask, to prevent debris from causing harm.
Next, choose the right drill bit for the job. A twist bit or a pilot bit is ideal for drilling precise holes. When drilling, maintain a steady hand and apply gentle pressure. This will help you achieve the perfect hole depth, which should be slightly deeper than the screw's length.
Avoid applying too much pressure, as this can cause the drill bit to slip and create a larger hole than intended.
Organize Tools Logically
Group your tools into categories, such as drilling, cutting, and fastening, to guarantee easy access and efficient workflow during your DIY tool installation. This tool categorization technique will save you time and energy in the long run.
You'll be able to quickly find the tool you need, which is especially important when working on a project with a deadline.
Here are some tips to help you organize your tools logically:
-
Categorize tools by function: Divide your tools into categories based on their purpose, such as drilling, cutting, fastening, and measuring.
-
Consider your personal preferences: Organize your tools in a way that makes sense to you and your work style.
-
Store tools by frequency of use: Keep your most frequently used tools in easy-to-reach locations, and store less frequently used tools in harder-to-reach areas.
- Label your tool categories: Use labels or signs to identify each tool category, making it easy to find what you need at a glance.
Add Hooks and Bins Strategically
Add Hooks and Bins Strategically
Install hooks and bins in strategic locations to maximize storage space and keep your tools within easy reach. This will help you stay organized and focused on your project. When selecting hooks, consider the weight and size of the tools you'll be hanging. Choose heavy-duty hooks for larger or heavier tools, and smaller hooks for lighter ones.
Hook and Bin Placement Guide
| Tool Type | Hook Selection | Bin Placement |
|---|---|---|
| Hand tools (e.g., hammers, screwdrivers) | Small to medium hooks | Near workbench or in easy-to-reach bins |
| Power tools (e.g., drills, saws) | Medium to large hooks | On walls or in designated power tool bins |
| Fasteners and small parts | Small hooks or magnetic strips | In bins or containers with dividers |
| Measuring and testing tools | Small hooks or adhesive-backed hooks | Near work surface or in designated testing areas |
Test and Adjust the System
With your DIY tool installation system in place, test it by simulating a typical project workflow to identify any areas that need adjustment. This is important to make sure that your system is functioning efficiently and effectively.
To optimize your system's performance, follow these steps:
-
Assess tool accessibility: Can you easily grab the tools you need without straining or stretching?
-
Evaluate workflow efficiency: Are there any bottlenecks or areas where your workflow slows down?
-
Check system calibration: Are all your tools properly calibrated and functioning as expected?
- Analyze storage capacity: Is your storage capacity sufficient, or do you need to make adjustments to accommodate your tools and materials?
Frequently Asked Questions
Can I Use a Pegboard in a Humid or Wet Environment?
You're wondering if a pegboard can thrive in a humid or wet environment? Yes, you can, but make sure to prioritize corrosion protection and install moisture barriers to shield your tools and pegboard from damage.
How Do I Prevent Tools From Falling off the Pegboard?
You're about to transform your workspace, but first, let's tackle the pesky problem of tools falling off! To prevent this, you'll want to optimize your pegboard layout and strategically plan your tool arrangement, ensuring a snug and secure fit for each item.
Are Pegboards Suitable for Heavy or Industrial Tools?
When choosing a pegboard, you'll want to take into account the load capacity to make sure it can handle your heavy or industrial tools. Check the manufacturer's specs for tool compatibility to avoid overloaded pegs and guarantee a safe, organized workspace.
Can I Customize My Pegboard With Non-Standard Tool Holders?
You wonder if you can customize your pegboard with non-standard tool holders, and the answer is yes! You can design ergonomic holders that fit your tools perfectly, or even fabricate your own holders for a tailored fit.
Do Pegboards Come With a Warranty or Guarantee?
You'll be glad to know that most reputable manufacturers offer a warranty or guarantee, providing you with purchase protection and giving you confidence in their product's reliability, so be sure to check before you buy.
Related Posts
-

Open Storage Bins for Shelving Units
You need open storage bins that integrate seamlessly with your shelving units to boost your organization, productivit...
-

Top Wrench Tool Box Sets for Every Mechanic
You're looking for high-quality wrench tool box sets that cater to your specific needs as a mechanic. From top-rated ...
-

Tool Storage Chests for a More Organized Workspace
You're looking to enhance productivity and reduce stress in your workspace by getting your tools organized, and that'...


