10 Clever DIY Projects for Tool Storage Solutions
You're tired of dealing with cluttered workspaces and disorganized tools. It's time to get creative with DIY tool storage solutions! You can start with a magnetic board tool organizer for easy access to essentials. Or, upcycle old pallets into sturdy storage racks with customization options. Maybe a DIY tool chest with drawers or a hanging bike hook station is more your style. From repurposed crates to industrial pipe shelving systems, there are plenty of clever projects to suit your needs. Take the first step towards a more efficient workspace, and you'll discover even more innovative ideas to maximize your tool storage capacity.
Key Takeaways
• Utilize magnets, upcycled pallets, and DIY tool chests to create customizable tool storage solutions that maximize space and accessibility.
• Repurpose old crates and pipes to create shelving units and industrial chic storage systems that add a touch of rustic charm to the workspace.
• Implement sliding toolbox storage carts, overhead garage storage racks, and modular toolbox storage cubes to optimize tool organization and efficiency.
• Create visually appealing and functional tool holders using wooden pegboards, hooks, and bins that maximize vertical space and provide easy access.
• Get creative with labeling, categorizing, and arranging tool storage solutions to fit specific needs and preferences, ensuring a clutter-free and efficient workspace.
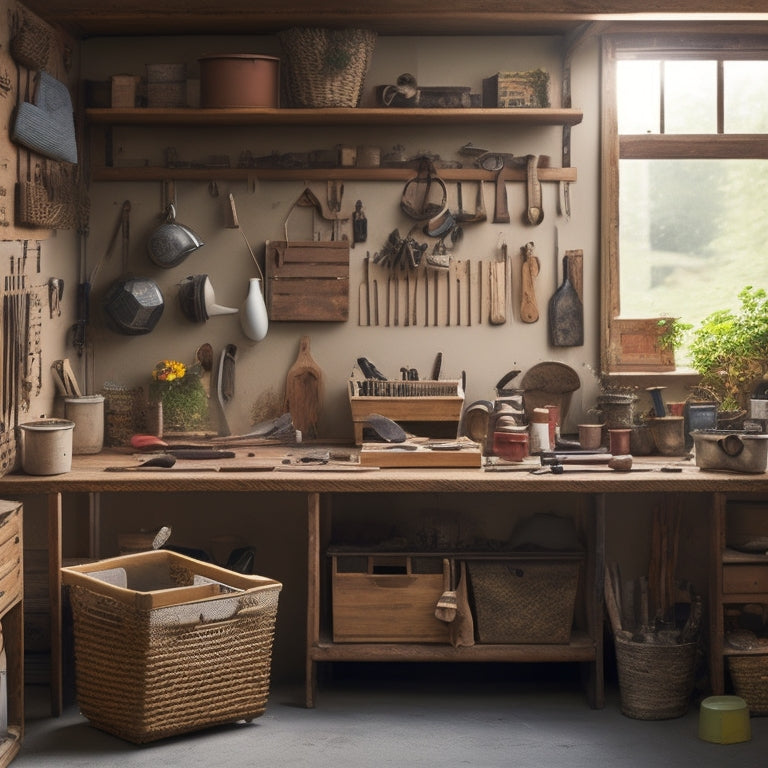
Magnetic Board Tool Organizer
Create a magnetic board tool organizer by attaching magnets to a wooden or metal board, providing a convenient and space-saving way to store your frequently used tools. This DIY project is perfect for you if you're tired of cluttered workbenches and lost tools. With a magnetic board, you'll have all your essential tools within easy reach, increasing your productivity and efficiency.
One of the significant magnetic board benefits is its versatility. You can customize it to fit your specific needs by arranging the magnets in a way that suits your tool collection. Additionally, you can use it to store small metal items like screws, nuts, and bolts, keeping them organized and preventing them from getting lost.
When it comes to tool organization inspiration, a magnetic board is an excellent space-saving solution. It's ideal for small workshops, garages, or even home offices where space is limited. By utilizing a magnetic board, you'll free up valuable space and create a more organized and peaceful working environment.
With a little creativity, you can transform a simple board into a functional and efficient tool organizer that will make your life easier.
Upcycled Pallet Storage Rack
When creating an upcycled pallet storage rack, you'll need to start by preparing your pallet properly.
Next, you'll assemble the rack, and here are some tips to help you get it right.
Pallet Preparation Essentials
You'll need to disassemble the pallet into individual planks to create a sturdy base for your upcycled storage rack. Start by removing any loose boards or debris, and then carefully pry apart the planks using a pry bar or hammer.
Once you've got your planks, it's time to give them a good sanding. Use a coarse-grit sandpaper to remove any rough spots or splinters, and then switch to a finer grit for a smooth finish.
Next, consider adding a DIY stain to give your pallet a personalized touch. You can use a store-bought stain or create your own using natural ingredients like coffee or tea. Just be sure to test the stain on a small, inconspicuous area first to make certain the color takes evenly.
When designing your pallet storage rack, think about the space you have available and how you can maximize it. Consider a vertical design to make the most of your wall space, or add casters to create a mobile storage solution.
Whatever design you choose, make certain it's functional and easy to use. With a little creativity and some elbow grease, you can turn an old pallet into a practical and stylish storage solution.
Rack Assembly Tips
Your upcycled pallet storage rack starts taking shape as you assemble the individual planks into a sturdy framework. This is where your tool organization vision becomes a reality.
Begin by laying out the pallet pieces according to your design plan, ensuring a stable base and even spacing between shelves. Use wood screws or nails to secure the planks, making sure they're tightly attached.
As you build, keep in mind the weight capacity you need for your tool storage solutions. Consider adding extra support beams or brackets if you plan to store heavier tools.
When assembling the shelves, think about the tools you'll be storing and organize them by size and frequency of use. You can also add dividers or compartments to keep similar tools together.
Make sure the shelves are level and evenly spaced to prevent tools from falling or becoming disorganized. With each step, your pallet storage rack takes shape, providing a functional and efficient solution for your tool organization needs.
Customization Options
Adding a personal touch to your upcycled pallet storage rack is as simple as incorporating customization options that reflect your unique tool organization needs. You can start by exploring color customization options to match your workshop's aesthetic. Consider painting the pallet rack a bold color to make it stand out or a neutral tone to blend in with the surroundings.
Additionally, you can add personalized labels or signs to identify the different tool categories, making it easier to find what you need quickly.
When it comes to space saving solutions, think vertically! Add extra shelves or hooks to maximize storage capacity without taking up too much floor space. You can also incorporate creative organization ideas, such as using baskets or bins to store small items like screws, nails, or bolts.
Personalization options are endless, so don't be afraid to get creative and make the rack your own. By incorporating these customization options, you'll create a tool storage system that not only looks great but also functions efficiently, helping you stay organized and focused on your next project.
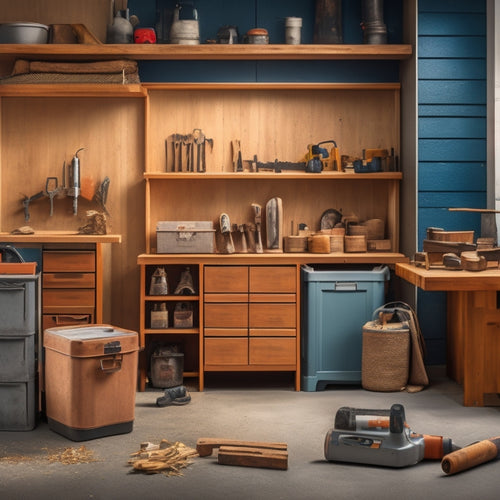
DIY Tool Chest With Drawers
Build a DIY tool chest with drawers to keep your workspace organized and clutter-free by following these step-by-step instructions. You'll need some basic woodworking tools and materials, such as plywood, screws, and hinges.
Start by building the frame of the chest, then add the drawers. You can customize the size and number of drawers to fit your specific tool storage needs.
When it comes to drawer organization, think about the types of tools you need to store and how you can group them. For example, you might have one drawer for hand tools, another for power tools, and a third for fasteners and hardware.
Use dividers or inserts to create customizable compartments within each drawer. This will help you find what you need quickly and easily.
As you build your DIY tool chest, keep in mind the importance of accessibility. Consider adding handles or pulls to the drawers to make them easy to open and close. You might also want to add a lock or latch to keep your tools secure.
With a little creativity and some basic woodworking skills, you can create a functional and efficient tool storage solution that will keep your workspace organized and clutter-free.
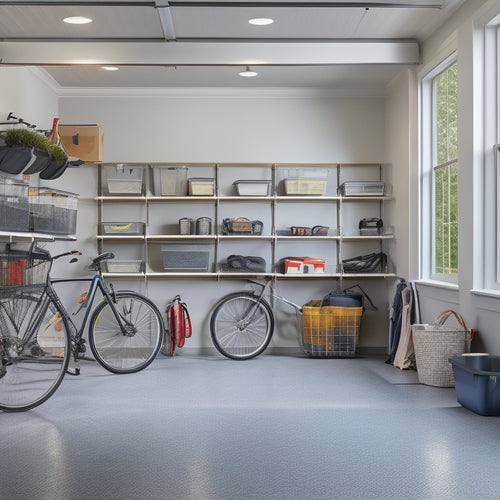
Hanging Bike Hook Station
Creating a hanging bike hook station is a great way to store your bike while keeping your garage or shed floor clear of clutter. You'll appreciate the extra space and reduced tripping hazards. To get started, gather some basic materials like 2x4 lumber, screws, and bike hooks. Determine how many bikes you need to store and plan your station accordingly.
Next, attach the 2x4 lumber to the wall, making sure it's level and secure. Then, screw the bike hooks into place, spaced evenly apart. You can add a shelf or basket above the hooks for storing helmets, gloves, and other accessories. This will keep them organized and within reach.
A hanging bike hook station is a simple yet effective solution for bike organization and garage decluttering. It's a great DIY project that can be completed in a weekend, and it'll make a big difference in the functionality of your garage or shed.
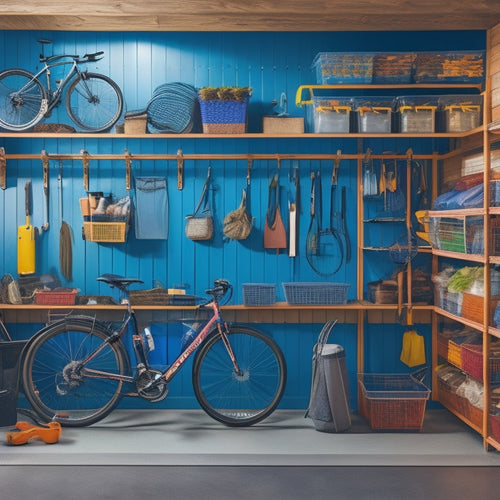
Repurposed Crate Shelving Unit
You can breathe new life into old crates by transforming them into a functional shelving unit that's perfect for storing tools, supplies, and equipment in your garage or workshop.
This crate transformation project offers incredible storage versatility, allowing you to customize the shelving layout to fit your specific needs.
Start by gathering a few wooden crates of varying sizes and cleaning them thoroughly. Next, arrange the crates in a configuration that suits your space, using screws or nails to secure them together.
You can add casters to the bottom crate for easy mobility or attach a pegboard to the back for hanging tools. A repurposed crate shelving unit adds a touch of rustic charm to your workspace, making it a unique and functional storage solution.
With a little creativity, you can create a one-of-a-kind shelving unit that's both functional and visually appealing. So, get creative and give new life to those old crates!
Sliding Toolbox Storage Cart
Equipped with wheels and a sliding top, a toolbox storage cart provides effortless access to your tools and supplies, while keeping them neatly organized and out of the way. This DIY project is a budget-friendly alternative to traditional tool storage solutions, perfect for small workshops or garages. With a sliding top, you can easily access your most frequently used tools without having to dig through a cluttered toolbox.
Here's a breakdown of the benefits and materials needed for this project:
| Benefits | Materials Needed |
|---|---|
| Space saving solution | 2x4 lumber, plywood, wheels, hinges |
| Easy access to tools | Screws, drill, measuring tape |
| Customizable to fit your needs | Sandpaper, paint (optional) |
| Portable and versatile | Locks (optional) |
Industrial Pipe Shelving System
You're probably thinking, 'What's the best way to design an industrial pipe shelving system for my tool storage needs?' Well, you'll be happy to know that you have several design options to choose from, and we'll walk you through them.
Plus, you'll be relieved to find out that the installation process is surprisingly easy, even for a DIY newbie like you.
Pipe Shelving Design Options
A versatile and customizable industrial pipe shelving system can be created by mixing and matching different pipe fittings and shelving materials to suit your specific tool storage needs.
You can choose from various pipe shelving aesthetics, from modern and sleek to rustic and industrial, to match your workshop's style. By opting for space-saving solutions, such as wall-mounted shelves or corner units, you can maximize your storage capacity without sacrificing floor space.
With customizable pipe shelving, you can harness your DIY storage creativity and design a system that caters to your unique tool storage requirements.
You can add or remove shelves as needed, and adjust the pipe fittings to accommodate tools of different sizes and shapes. This flexibility allows you to create a tailored storage solution that streamlines your workflow and keeps your tools organized and within reach.
Easy Installation Process
With a few simple tools and some basic DIY skills, you'll be assembling your industrial pipe shelving system in no time, thanks to its intuitive design and minimal number of components. The easy-to-follow instructions will guide you through the process, and before you know it, you'll have a sturdy and functional shelving system tailored to your tool organization needs.
The installation process is space-saving, allowing you to maximize your storage capacity without sacrificing floor space. You can customize the shelving system to fit your specific requirements, creating a DIY storage solution that's both functional and creative. The industrial pipe design adds a touch of industrial chic to your workspace, making it a stylish addition to your garage, workshop, or utility room.
As you assemble the shelving system, you'll appreciate the clever design features that make tool organization a breeze. With designated spaces for your tools and accessories, you'll be able to find what you need quickly and easily, saving you time and increasing productivity.
Whether you're a DIY enthusiast or a professional, this industrial pipe shelving system is the perfect solution for your tool storage needs.
Wooden Pegboard Tool Holder
Create a centralized hub for your tools by building a wooden pegboard tool holder, a versatile storage solution that can be customized to fit your specific needs. This DIY project is perfect for woodworking enthusiasts looking for inspiration to organize their workshop.
With a wooden pegboard, you can hang your tools within easy reach, freeing up floor and bench space.
Here are some benefits of a wooden pegboard tool holder:
-
Easy to install: Attach the pegboard to a wall or a freestanding board, and you're ready to go.
-
Customizable: Add hooks, bins, and other accessories to fit your specific tool collection.
-
Space-saving: Maximize your workshop's vertical space and keep your tools organized.
- Visually appealing: A wooden pegboard adds a touch of rustic charm to your workshop, making it a great DIY organization project.
Overhead Garage Storage Rack
Hang heavy tools and equipment from the ceiling with an overhead garage storage rack, freeing up valuable floor space and keeping your garage organized. This ceiling storage idea is a game-changer for maximizing space in your garage. When choosing an overhead storage rack, consider the weight capacity and adjustability to fit your specific needs. Follow these installation tips to guarantee a secure and sturdy setup: measure your ceiling space carefully, use high-quality mounting hardware, and consult local building codes.
As you design your overhead garage storage rack, think about the types of items you want to store. Bikes, kayaks, and other bulky equipment can be hung from the ceiling, while smaller items like bins and baskets can be attached to the rack's shelves. This space-saving solution will keep your garage floor clear and make it easier to find what you need.
With an overhead garage storage rack, you'll be amazed at how much more organized and efficient your garage can be. Plus, it's a great way to practice some organization hacks and keep your tools and equipment within easy reach.
Modular Toolbox Storage Cubes
Now that you've chosen to incorporate modular toolbox storage cubes into your DIY project, it's time to ponder how you'll organize the interior of each cube and what tool accessibility options you'll need.
You'll want to assess the types of tools you'll be storing and how often you'll need to access them. By planning ahead, you can maximize the efficiency of your storage cubes and make your tool organization system a success.
Cube Organization Ideas
You can maximize your toolbox's storage capacity by using modular storage cubes that can be configured to fit your specific needs and tools. These cubes offer a versatile and efficient way to store your tools and supplies, making it simple to find what you need when you need it.
Here are some creative ways to organize your modular storage cubes:
-
Label and categorize:
Label each cube with its contents and categorize them by type or frequency of use to ensure convenient access. -
Stack and nest:
Stack smaller cubes inside larger ones to maximize vertical storage space and reduce clutter. -
Utilize corners:
Use corner cubes to store small items like screws, nuts, or bolts, keeping them out of the way but still reachable.
-
Designate zones:
Designate specific zones for different types of tools or projects, such as a zone for woodworking or a zone for automotive tools.
Tool Accessibility Options
To optimize tool accessibility, consider configuring your modular storage cubes with easy-to-open drawers, sliding trays, or flip-top compartments that allow you to quickly grab what you need. This will save you time and energy when working on projects.
You can also designate specific cubes for frequently used tools, keeping them within easy reach. For added convenience, consider incorporating tool belt storage or wall-mounted hooks to hang belts, pouches, or accessories.
Additionally, think about incorporating a rolling tool cart or pegboard organization system to further maximize your tool storage capabilities. This will enable you to easily move tools around your workspace or store them on a wall, freeing up floor space.
Frequently Asked Questions
Can I Use a DIY Tool Storage Solution in a Small Garage?
You can definitely use a DIY tool storage solution in a small garage by optimizing space with creative storage solutions and organization tips, and tweaking your garage layout to fit your needs.
Are DIY Tool Storage Solutions Suitable for Heavy Tools?
As you visualize your heavy tools hanging precariously, you wonder if DIY storage solutions can handle the weight. Look for durable materials with a suitable weight capacity, and prioritize safety considerations to guarantee your heavy tools are securely stored.
Can I Customize a DIY Tool Storage Solution to Fit My Needs?
You can customize a DIY tool storage solution to fit your needs by incorporating customizable organization systems and creating personalized storage solutions that cater to your specific tool collection and work style.
Do DIY Tool Storage Solutions Require Special Skills or Tools?
You don't need special skills or tools to create a DIY tool storage solution - just basic DIY knowledge and willingness to get creative! With simple materials, you can design a customized storage system that fits your needs.
Are DIY Tool Storage Solutions Cost-Effective Compared to Store-Bought Options?
You're building a treasure chest of tools, but wondering if DIY storage solutions are a cost-effective gem or a pricey pitfall. Rest confident, with ease of assembly and design flexibility, DIY options often shine brighter than store-bought, while material durability guarantees they won't rust like a forgotten relic.
Related Posts
-
Tool Storage Chests for a More Organized Workspace
You're looking to enhance productivity and reduce stress in your workspace by getting your tools organized, and that'...
-
Bin Garage Storage Ideas for Maximizing Space
You can greatly maximize your garage's storage space by utilizing vertical space with ceiling storage bins, stacking ...
-
Garage Wall Storage Ideas to Boost Productivity
You can enhance your garage's productivity by capitalizing on your ceiling height with overhead racks, storing bulky ...


