10 Budget-Friendly Tips for a Custom Pegboard System
You can create a custom pegboard system on a budget by starting with a blank slate and clearing the area of clutter. Repurpose old materials like wooden doors or metal pipes to create a unique look. Choose affordable hooks and maximize wall space by organizing tools into specific zones. Measure accurately and install your pegboard with precision. Consider DIYing your pegboard backing and shopping for discounted materials. Get creative with accessories and add a personal touch with decorative trim and inspirational quotes. By following these budget-friendly tips, you'll be well on your way to creating a customized pegboard system that boosts your productivity and reflects your personality - and there's more to explore.
Key Takeaways
• Start with a blank slate by clearing the wall or area of clutter to create a clean canvas for your pegboard system.
• Repurpose old materials like wooden doors or shelves as the base to reduce waste and save money.
• Opt for budget-friendly hook options like generic store brands or second-hand choices, and buy in bulk for affordable prices.
• Utilize pegboard real estate efficiently by organizing tools into specific zones and planning a layout that maximizes every inch of wall space.
• Choose cost-effective materials like MDF or OSB for the pegboard backing and customize the size with decorative trim for a finished look.
Start With a Blank Slate
Begin by clearing a wall or area of any clutter, hooks, or existing storage solutions to create a clean canvas for your custom pegboard system. This fresh start is essential in designing a functional and organized space. Think of it as an empty canvas, waiting for your creative touch.
Remove everything, including old hooks, shelves, or storage bins, to give yourself a blank slate. Take this opportunity to assess the area and decide what you want to achieve with your pegboard system. Do you need more storage for tools, accessories, or equipment? Do you want to create a designated zone for a specific task or activity? Having a clear space will help you visualize your goals and prioritize your needs.
As you start from scratch, you'll be able to identify the most efficient use of space and design a system that caters to your specific requirements. Don't worry about what was there before; focus on what you need now. With a clean slate, you'll be able to create a pegboard system that's tailored to your unique needs and preferences, ensuring a more organized and functional space that makes your life easier.
Repurpose Old Materials
When creating your custom pegboard system, don't forget to take stock of what you already have lying around.
You can breathe new life into old materials, giving them a second chance to serve a purpose.
Old Materials Revival
How can you breathe new life into old materials to create a custom pegboard system that's both functional and budget-friendly?
You can start by embracing sustainable renovation and creative salvage. Take a closer look at the materials you have lying around, like old pallets, crates, or wooden planks. With some imagination and elbow grease, you can transform them into a one-of-a-kind pegboard system.
Consider repurposing old wooden doors or shelves as the base for your pegboard. You can also use metal pipes or rods to create a unique and industrial-looking system.
Don't be afraid to get creative and think outside the box. For instance, you can use old mason jars or containers to store small items like screws, nuts, or bolts.
Reuse What You Have
You've got a treasure trove of old materials just waiting to be repurposed into a custom pegboard system that's uniquely yours. Before you start buying new, take a step back and survey what you already have. You might be surprised at what you can reuse, reducing waste and saving cash in the process.
This is your chance to get creative and develop sustainable habits that'll benefit your wallet and the planet.
Take a closer look at these often-overlooked items:
- Old pallets or crates that can be disassembled for wooden slats
- Unused hooks, bins, or baskets that can be repurposed as storage containers
- Scrap wood or MDF that can be cut into custom pegboard dividers
- Old picture frames or molding that can be transformed into decorative trim.
Upcycle Existing Boards
Many old boards lying around your garage or storage room can be transformed into a functional pegboard system with a little creativity and some TLC. You can give new life to an old board through Board Revival, saving you money and reducing waste.
Start by cleaning the board thoroughly, removing any dirt, grime, or old adhesive. Sand it down to smooth out any rough edges, and then apply a fresh coat of paint or stain to match your desired aesthetic.
Next, get creative with your pegboard design. You can use a stencil or freehand the layout, depending on your style. Drill holes for the pegs, and attach them securely. Add some hooks, bins, or other organizational tools to maximize storage space.
With a little Creative Refurbish, your old board is now a functional and customized pegboard system. You'll be amazed at how a little bit of effort can turn trash into treasure.
Choose Affordable Hooks
Selecting the right hooks for your pegboard system doesn't have to break the bank, as there are plenty of affordable options available that can get the job done. You don't need to sacrifice hook quality to stay within your budget. Look for budget brands that offer reliable and durable hooks without the hefty price tag.
Here are some affordable hook options to explore:
-
Generic store brands: Many hardware stores offer their own brand of hooks at a lower price point than name-brand options.
-
Bulk packs: Buying hooks in bulk can be a cost-effective way to stock up on the types you need.
-
Second-hand stores: You can find gently used hooks at a fraction of the cost of new ones.
- Online retailers: Websites like Amazon often offer lower prices on hooks than physical stores.
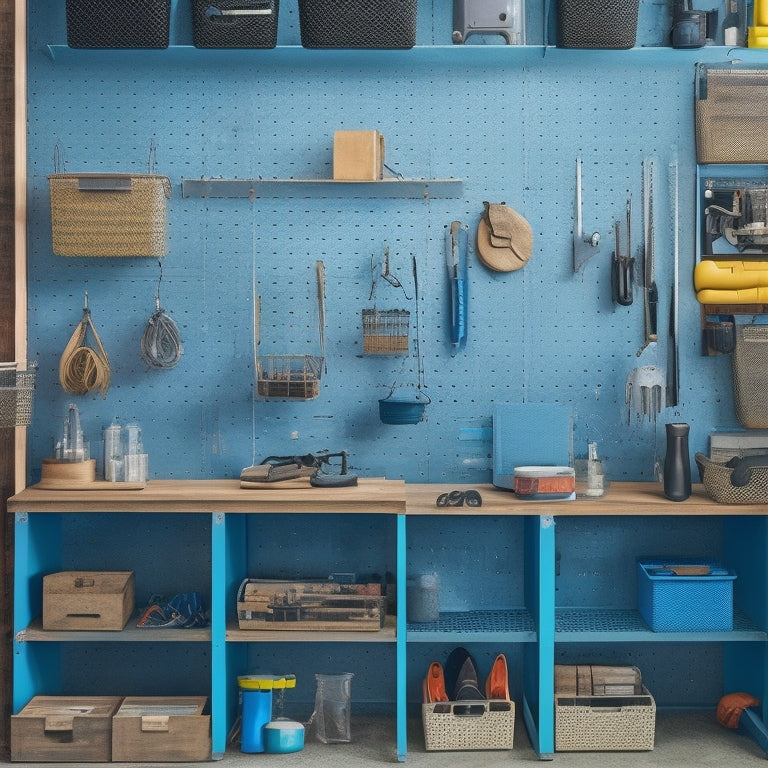
Utilize Wall Space Wisely
Your pegboard's real estate is valuable, so maximize its potential by arranging your tools and accessories in a strategic layout that makes the most of every inch of wall space. A well-planned layout is key to efficient storage and easy access to your tools. Consider dividing your pegboard into zones, dedicating specific areas to particular types of tools or tasks.
Here's an example of how you can organize your pegboard:
| Zone | Tools/Accessories |
|---|---|
| Power Tools | Drill, Saw, Grinder |
| Hand Tools | Hammer, Pliers, Screwdrivers |
| Fasteners | Nails, Screws, Bolts |
| Measuring | Tape Measure, Level, Square |
Measure Twice, Drill Once
When creating your custom pegboard system, you'll want to make sure you're getting the most out of your space and materials. That's why it's important to take the time to measure twice - it's better to double-check your calculations than to end up with a wonky layout or wasted materials.
Precise Measurement Matters
How important is it to double-check your measurements before drilling into your pegboard, given that one small miscalculation can throw off the entire custom organization system? You'd be surprised how often a simple mistake can lead to a costly redo. That's why precise measurement matters. It's not just about getting it close enough; it's about making sure your pegboard is tailored to your specific needs.
When it comes to measurement psychology, it's critical to understand that our brains can play tricks on us. We might think we've measured correctly, but a second glance can reveal a critical error. That's where calibration importance comes in. Take the time to calibrate your tools and double-check your measurements to avoid costly mistakes.
Here are some tips to help you achieve precise measurements:
-
Use a high-quality measuring tape or digital caliper to guarantee accuracy.
-
Measure in multiple spots to account for any material inconsistencies.
-
Take your time and avoid rushing the measurement process.
- Consider creating a mockup or prototype to test your measurements before drilling into your pegboard.
Drill Accurate Holes First
Drill accurate holes first, and you'll avoid the frustration of redoing your entire pegboard organization system. It's crucial to get this step right to guarantee your pegboard is functional and looks great.
To start, use pilot bits to create precise hole patterns. These bits are designed to guide your drill and prevent the material from splitting. When creating your hole pattern, consider the size and type of pegs you'll be using. Make sure to space them evenly and leave enough room for adjustments.
Take your time when drilling, and work in small sections to maintain accuracy. Use a level to ensure your holes are straight and a measuring tape to double-check your spacing. Remember, measure twice, drill once. It's better to take a few extra minutes to get it right than to risk messing up your entire project.
Opt for a Simple Design
Designing a custom pegboard system on a budget means prioritizing functionality over complexity. Strip away unnecessary features and focus on a simple, straightforward layout that meets your storage needs. This design philosophy will help you create a system that's both functional and affordable.
Embracing a minimalist aesthetic will also help you avoid overspending on unnecessary bells and whistles.
Here are some tips to keep your design simple and budget-friendly:
- Keep it rectangular: Avoid intricate shapes or curved lines, which can be expensive to manufacture.
- Use a grid layout: A grid layout makes it easy to add or remove hooks and accessories as needed.
- Choose standard sizes: Standard sizes for pegboard hooks and accessories are often cheaper than custom sizes.
- Avoid custom cuts: Try to design your system using standard pegboard sizes to avoid custom cutting costs.
DIY Your Pegboard Backing
You can save a significant amount of money by creating your own pegboard backing instead of buying a pre-made one. By DIY-ing your pegboard backing, you'll not only save cash but also get to customize it to your specific needs.
Start by selecting a suitable material, such as MDF or plywood alternatives like oriented strand board (OSB) or medium-density fiberboard (MDF). These options are cost-effective and durable enough to hold your pegboard hooks.
Cut your chosen material to the desired size, and then sand it to smooth out any rough edges. To give your pegboard a finished look, add decorative trim around the edges. This won't only hide any rough cuts but also add a touch of style to your custom pegboard system.
Attach the trim using a strong adhesive or nails, and you're good to go! With your DIY pegboard backing ready, you can start arranging your hooks and accessories to create a functional and organized workspace.
Shop for Discounted Materials
Score deals on pegboard materials by scouring local classifieds, online marketplaces, and second-hand stores for discounted or reclaimed wood, which can greatly reduce your overall costs. You'll be surprised at the hidden gems you can find with a little patience and persistence.
When discount hunting, keep an eye out for:
-
Scratched or dented pegboard panels that are still functional but priced lower due to cosmetic imperfections
-
Leftover materials from previous projects or construction sites that can be repurposed for your pegboard
-
Clearance sections in home improvement stores where you can find discounted pegboard accessories
- Online coupons and promo codes that can be used to score discounts on pegboard materials and tools
Get Creative With Accessories
Pegboard accessories can add significant cost to your custom system, but with a little creativity, you can create functional and stylish solutions on a budget. One way to do this is by making Accessory Swaps. Instead of buying expensive custom hooks, use everyday items like 3M adhesive strips, repurposed metal clips, or even old bike hooks to hang your tools and accessories.
You can also get creative with Design Themes to give your pegboard a cohesive look. For example, use a rustic theme by incorporating wooden dowels and twine, or a modern theme with sleek metal accents.
Another budget-friendly tip is to repurpose items you already have at home. Old mason jars can become storage containers, and vintage metal baskets can hold small parts and supplies. By thinking outside the box and getting creative with your accessories, you can save money and still achieve a custom look that reflects your personal style.
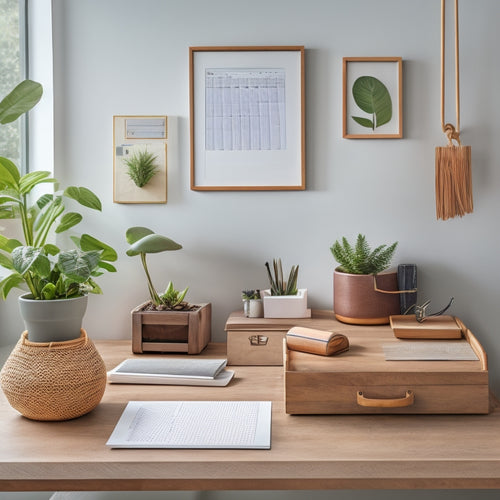
Add a Personal Touch
By incorporating personal elements, such as family photos or inspirational quotes, into your custom pegboard system, you can make the space feel more welcoming and reflective of your individuality. This is your chance to add a touch of personality to your workspace, making it truly unique to you.
Here are some ideas to get you started:
-
Personalized decor: Add framed photos, artwork, or sentimental trinkets that bring a smile to your face. This will create a sense of warmth and coziness, making your workspace feel more inviting.
-
Customized colors: Choose a color scheme that resonates with your personality or brand. This can be as simple as painting the pegboard a bold color or adding colorful hooks and bins.
-
Inspirational quotes: Add motivational quotes or phrases that drive you to be your best self. This can be a great way to stay focused and motivated throughout the day.
- Personal mementos: Display personal items that hold sentimental value, such as a favorite mug or a cherished keepsake. This adds a touch of humanity to your workspace, making it feel more like your own.
Frequently Asked Questions
Can I Use a Pegboard in a Humid Environment Like a Garage?
You can use a pegboard in a humid garage, but be sure to choose a moisture-resistant material and consider climate control measures, like a dehumidifier, to prevent damage and guarantee your board stays functional.
How Do I Protect My Pegboard From Rust and Corrosion?
"You're basically begging for rust and corrosion to destroy your pegboard if you don't protect it! Apply a rust-inhibiting coating, like a rust-resistant spray or silicone-based sealant, to shield your board from humidity and moisture."
Are Pegboards Suitable for Heavy Tools and Equipment?
You're wondering if pegboards can handle your heavy tools and equipment? Check the load capacity and weight limits, and you'll find that most pegboards can support a decent amount of weight, but it's essential to distribute the load evenly to avoid damage.
Can I Add a Pegboard to an Existing Workbench or Cabinet?
You'll be thrilled to know that 80% of DIYers repurpose old workbenches! Now, to answer your question, you can definitely add a pegboard to an existing workbench or cabinet using versatile mounting options, optimizing space for maximum efficiency.
Are Pegboards Easy to Clean and Maintain?
You'll be happy to know that pegboards are a breeze to clean and maintain! Daily wipes will keep them looking sharp, and smart design aesthetics guarantee a clutter-free space that's easy to dust and care for.
Related Posts
-

Best Tool Chests for Home Garage Options
When selecting the best tool chest for your home garage, you'll want to evaluate top brands like DeWalt, Milwaukee, a...
-
Best Organizing Tools for a Clutter-Free Space
You're on a mission to change your cluttered space into a peaceful oasis, and you're looking for the best organizing ...
-

What Are the Advantages of a Wooden Tool Box
You choose a wooden tool box, you're not only getting a reliable storage solution, but also a long list of benefits t...


