10 Best DIY Garage Storage Hacks and Solutions
Share
You're on a mission to tame the garage chaos! Start by repurposing old pallets into customized storage solutions, adding decorative touches and labels for a personalized touch. Next, maximize vertical space with shelves of varying heights and utilize wall anchors and dividers for organization. Sliding storage bins, pegboard tool organizers, and upcycled cabinets will also help keep clutter at bay. Don't forget to maximize corner space with carousel units and angular shelves, and build a custom garage workbench for a functional workspace. With these DIY garage storage hacks, you're just getting started on the path to a clutter-free haven!
Key Takeaways
• Repurpose old pallets to create customized storage solutions that fit unique needs and styles, adding decorative touches and labels for organization.
• Utilize vertical space by installing shelves of varying heights using durable materials, and add wall anchors and dividers for organization.
• Build sliding storage bins with customizable sizes and attach them to wall-mounted tracks for space-saving solutions and easy access.
• Maximize corner space with carousel units and angular shelves, adding protectors and spin carousels for easy access to hidden storage.
• Create a pegboard tool organization system by deciding on a pattern, hanging tools for easy accessibility, and grouping similar items together.
Repurpose Old Pallets for Storage
Transform your cluttered garage into an organized haven by breathing new life into old pallets. They can be repurposed as versatile storage solutions that keep your gear and supplies within easy reach. You can customize your pallet storage to fit your unique needs and style.
Start by giving your pallets a fresh coat of paint or stain to match your garage's aesthetic. Add some decorative touches like ribbons or stencils to give your pallets a personal touch. Next, label each pallet with its contents using a marker or label maker, so you can quickly identify what's inside.
You can also add bins or baskets to store small items like nuts and bolts. Consider adding casters to the bottom of your pallets to make them easy to move around. With a little creativity, you can turn old pallets into functional and stylish storage solutions that keep your garage organized and clutter-free.
Utilize Vertical Space With Shelves
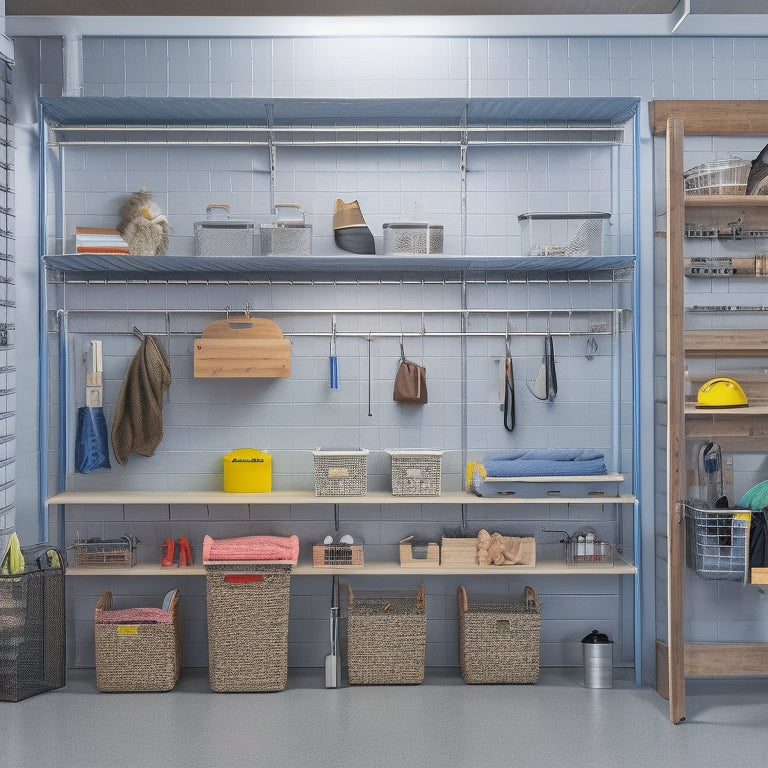
Now that you've harnessed the storage potential of old pallets, it's time to maximize your garage's vertical space by installing shelves that will keep your gear and supplies organized and easily accessible. You can install shelves of varying heights to accommodate different sizes of storage bins, tools, and equipment. To make sure your shelves are sturdy, use wall anchors to secure them to the wall. This will prevent them from tipping over and causing a mess.
Here are some tips to take into account when designing your shelving system:
| Shelving Tip | Description |
|---|---|
| Measure Your Space | Measure your garage walls to determine the maximum shelf size you can fit. |
| Use Shelf Dividers | Use shelf dividers to separate items and keep them organized. |
| Choose the Right Material | Choose a durable material, such as wood or metal, that can hold the weight of your items. |
| Take into Account Adjustable Shelves | Take into account installing adjustable shelves that can be moved up or down as needed. |
| Add a Back Panel | Add a back panel to your shelves to prevent items from falling off the back. |
DIY Sliding Storage Bins
How much clutter can you conceal with a cleverly designed sliding storage bin system that glides effortlessly in and out of your garage's walls?
With a DIY sliding storage bin system, you can store everything from seasonal decorations to tools and equipment, keeping them out of sight and out of mind.
To get started, you'll need some basic materials like wood, metal tracks, and slider hardware. You can customize the size and design of your bins to fit your specific needs, and add labels or dividers to enhance bin organization.
Once you've built your bins, simply attach them to the slider hardware and hang them from the wall-mounted tracks. This will allow you to easily access what you need without having to dig through a cluttered garage.
Plus, the sliding design means you can store more in less space, making the most of your garage's real estate.
With a DIY sliding storage bin system, you'll be amazed at how much clutter you can conceal – and how much more organized your garage will feel.
Maximize Corner Space With Carousels
As you tackle your garage organization project, don't let those corners go to waste!
You'll be amazed at how much more storage you can squeeze out of them with carousels, which can optimize your corner real estate and grant you access to hidden areas.
Optimize Corner Real Estate
You can turn those often-wasted corners into highly functional storage zones by installing carousel units that bring items to you, rather than forcing you to dig through cluttered shelves or bins.
These clever contraptions rotate to reveal hidden storage, keeping frequently used items within easy reach.
To take it to the next level, consider adding corner protectors to prevent scratches and dings on your walls and floors.
For a more customized approach, angular shelves can be installed to fit snugly into the corner, providing additional storage for bins, baskets, or other containers.
By optimizing your corner real estate, you'll be amazed at how much more functional and organized your garage becomes. Plus, with everything easily accessible, you'll save time and energy that would've been spent searching for misplaced items.
With carousel units, corner protectors, and angular shelves, you'll be well on your way to a clutter-free garage that's both efficient and enjoyable to work in.
Access Hidden Storage Areas
By installing a carousel unit in that often-wasted corner space, you'll access a treasure trove of hidden storage areas, effortlessly spinning your way to a more organized garage. This clever hack will reveal the full potential of your garage's corners, exposing secret shelves and hidden compartments that were previously inaccessible.
With a carousel, you can store items like bikes, tools, or seasonal decorations, keeping them out of the way yet easily retrievable.
As you spin the carousel, you'll be amazed at how much storage space you've gained. No more digging through clutter or struggling to find what you need. Instead, you'll enjoy a sense of calm and control, knowing that everything has its designated spot.
Plus, the carousel's rotating design makes it easy to grab what you need without having to navigate tight spaces or awkward angles. By maximizing your corner space with a carousel, you'll create a more functional, efficient, and enjoyable garage experience.
Spin to Save Space
Spin to Save Space
Maximize every inch of your garage's corner space by spinning a carousel into action, and watch as cluttered chaos transforms into a haven of organization and efficiency. You'll be amazed at how much you can store in those hard-to-reach areas with the right carousel system. Install a ceiling spinner, and suddenly, those pesky bikes, bins, or seasonal decorations are easily accessible.
Rotating baskets are another great option, allowing you to store items like tools, sports equipment, or cleaning supplies while keeping them neatly organized and out of the way.
The beauty of carousels lies in their ability to rotate, bringing the items you need to the forefront while keeping the rest hidden from view. This not only saves space but also reduces clutter and makes your garage feel more spacious.
Plus, with a carousel system, you'll no longer have to dig through piles of stuff to find what you're looking for. Simply spin, grab, and go! By spinning your way to organized bliss, you'll be wondering how you ever managed without these genius garage storage hacks.
Create a Pegboard Tool Organizer
How can a few simple pegs and a board transform your garage's cluttered corners into a tidy tool haven? It's easier than you think! Creating a pegboard tool organizer is a DIY garage storage hack that's both functional and visually appealing.
Start by deciding on a pegboard pattern that suits your tool collection. You can choose from various designs online or create your own custom layout. Once you've got your pattern, attach the pegboard to a wall or a freestanding board.
Then, hang your tools from the pegs, grouping similar items together for easy accessibility. This system is perfect for maximizing tool accessibility while keeping your garage floor clear. With a pegboard, you'll be able to find what you need in a snap, and the visual appeal will make you want to show off your organized space to friends and family.
Plus, it's easy to add or remove pegs as your tool collection grows or changes. So, get creative and start pegboarding – your garage (and your sanity) will thank you!
Install a Slatwall Storage System
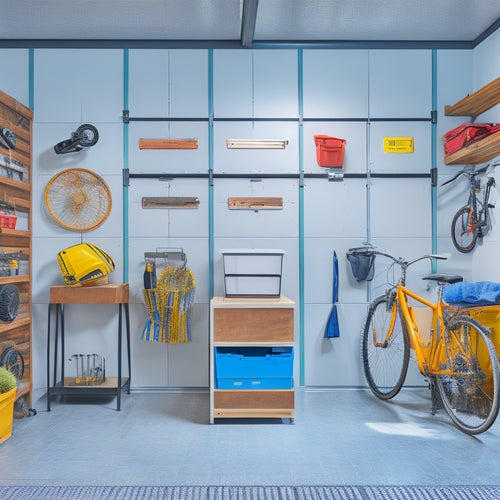
You'll be amazed at the versatility and convenience a slatwall storage system can bring to your garage, providing a customizable and adjustable way to store everything from bikes to bins. With a slatwall, you can maximize your garage's vertical space, keeping your floor clear and organized.
Here are some benefits you can expect from installing a slatwall storage system:
-
Easy installation: Most slatwall systems come with easy-to-follow instructions and require minimal tools.
-
Durability: Slatwall materials are built to last, withstanding the weight of heavy items and withstanding the test of time.
-
Customization: With a slatwall, you can add or remove accessories as needed, making it easy to adapt to your changing storage needs.
- Aesthetics: Slatwall systems come in a variety of styles and colors, allowing you to match your garage's unique decor.
Before you start, make sure to prepare your wall by cleaning it thoroughly and checking for any studs or electrical outlets. Choose the right slatwall materials for your garage, considering factors like durability and weight capacity. With a little planning and effort, you'll be enjoying the benefits of a slatwall storage system in no time!
Upcycle Old Cabinets for Garage
You're probably thinking, 'What can I do with those old cabinets collecting dust in my garage?' Well, it's time to give them a new life!
Cabinet Refurbishment Essentials
With a little creativity and some TLC, those outdated kitchen cabinets collecting dust in your garage can be transformed into functional storage units tailored to your garage's unique needs. You'll be surprised at how a fresh coat of paint and some new cabinet hardware can breathe new life into these old cabinets.
Here are the essentials you'll need to get started:
-
Cabinet hardware: Update the knobs and handles to give your cabinets a modern look. You can choose from a variety of styles and finishes to match your garage's aesthetic.
-
Painting techniques: Learn the best methods for preparing and painting your cabinets to make sure a smooth, durable finish.
-
Sanding tools: Gather the necessary sanding tools to smooth out the surface of your cabinets and remove any imperfections.
- Decorative trim: Add some decorative trim to give your cabinets a finished look and hide any gaps or uneven edges.
Storage Space Maximization
Now that you've given your old kitchen cabinets a fresh new look, it's time to think outside the box and maximize their storage potential in your garage. To do this, you'll need to focus on storage space maximization. This involves strategically planning your floor space and mapping out the most efficient layout for your upcycled cabinets.
Here are some tips to help you get started:
| Zone | Storage Needs | Cabinet Configuration |
|---|---|---|
| Tool Station | Toolboxes, workbenches | Tall, narrow cabinets with adjustable shelves |
| Seasonal Storage | Holiday decorations, out-of-season clothing | Wide, shallow cabinets with slide-out drawers |
| Sports Equipment | Bikes, balls, protective gear | Long, horizontal cabinets with hooks and bins |
| Cleaning Supplies | Mops, brooms, cleaning products | Compact, corner cabinets with spinning carousels |
| Miscellaneous | Luggage, camping gear, etc. | Versatile, modular cabinets with removable bins |
Customization Ideas
Transforming old cabinets into garage storage powerhouses requires imagination, creativity, and a willingness to think beyond their original purpose. You can breathe new life into those old cabinets and give your garage a unique, personalized touch.
Here are some ideas to get you started:
-
Add personalized labels: Identify what's inside each cabinet with custom labels that reflect your personal style.
-
Give it a fresh coat: Paint or stain the cabinets to match your garage's color scheme and create a cohesive look.
-
Incorporate bespoke design: Add custom hardware, molding, or trim to give your cabinets a high-end, tailored feel.
- Get creative with layout: Experiment with different configurations to maximize storage and create a functional workspace.
Build a Custom Garage Workbench
As you envision your ideal garage workspace, you're likely picturing a sturdy, customized workbench that streamlines your projects and boosts productivity. A well-designed workbench is the heart of any garage, providing a comfortable and efficient space to tackle tasks. To build a custom workbench that meets your needs, consider the following essential factors:
| Workbench Component | Description | Tips and Considerations |
|---|---|---|
| Benchtop Materials | Choose durable, easy-to-clean materials like butcher block, stainless steel, or polypropylene. | Consider the type of projects you'll be working on and the level of durability needed. |
| Workbench Ergonomics | Design the workbench to fit your body, with a comfortable height and adequate legroom. | Consider adding a footrest or knee space for added comfort. |
| Storage and Organization | Incorporate storage bins, hooks, and shelves to keep tools and supplies within easy reach. | Consider adding a pegboard or tool organizer to maximize storage. |
| Power and Lighting | Install power outlets and task lighting to illuminate your workspace. | Consider adding USB outlets for charging devices. |
Use Overhead Storage Racks
By installing overhead storage racks, you can effortlessly reclaim valuable floor and wall space in your garage, freeing up room for more important things – like your prized possessions or a sprawling work zone. This is especially true if you have a garage with limited ceiling clearance, where every inch counts.
Here are some benefits to keep in mind:
-
Maximize Vertical Space: Overhead racks make the most of your garage's vertical space, keeping items like bikes, seasonal decorations, or luggage out of the way.
-
Easy Rack Installation: Most overhead racks come with easy-to-follow installation instructions, making it a DIY-friendly project.
-
Durable and Adjustable: Look for racks with sturdy construction and adjustable heights to accommodate items of varying sizes.
- Customize to Your Needs: Choose from a range of materials, such as metal or wood, and configure your racks to fit your specific storage needs.
Designate Zones for Garage Clutter
Divide your garage into distinct zones, each tackling a specific type of clutter, so you can contain chaos and focus on organizing what matters most.
This clutter segregation strategy helps you prioritize your organizing efforts and maintain a sense of control over your garage's contents. Create zones for items like sports equipment, tools, seasonal decorations, and automotive supplies. Label each zone clearly with Zone Labels, so you can quickly identify where items belong.
As you sort items into their designated zones, you'll start to see patterns and categories emerge. This will help you identify what you can donate, sell, or discard, making your garage feel more spacious and organized.
By separating clutter into manageable zones, you'll be able to tackle each area individually, rather than feeling overwhelmed by the entire garage. With clutter segregation, you'll be able to maintain your garage's organization over time, ensuring that your hard work doesn't get undone.
Frequently Asked Questions
How Do I Prevent Pests From Inhabiting My Garage Storage Solutions?
"Ah, you want to avoid turning your garage storage into a pest party? Yeah, that's a real thing. To prevent the unwelcome guests, you'll need to seal the deal – literally – with pest control methods and sealed containers, duh!"
Can I Use DIY Garage Storage Hacks in a Small Garage?
You can totally maximize your small garage's potential! Focus on space optimization by installing shelves and hooks, and make the most of corner utilization with cleverly designed storage units, making every inch count.
Are DIY Garage Storage Solutions Suitable for Renters?
As you weigh the freedom of renting against the constraints of limited space, you'll find solace in rent-friendly designs and portable systems that let you take your storage solutions with you when you move.
How Do I Choose the Right Materials for My DIY Garage Project?
When tackling your DIY project, you'll want to choose materials that fit your budget constraints. Consider durability, functionality, and style, and don't be afraid to repurpose or upcycle items to save cash and reduce waste.
Can I DIY Garage Storage Solutions With Limited Budget and Skills?
"Did you know 75% of homeowners wish they had more storage space? Don't let budget constraints and limited skill levels hold you back - with creativity and resourcefulness, you can still create functional and stylish DIY garage storage solutions that fit your needs."
Related Posts
-

3 Pro Garage Organization Ideas to Try Now
You can alter your garage from cluttered chaos to organized oasis with three pro garage organization ideas. First, op...
-

Wall Mounted Hooks With Shelf for Maximum Storage
You'll find that wall mounted hooks with a shelf are a revolutionary solution for maximizing storage in your home, pr...
-

Top 7 Parts Tray Organizers for Productivity
You can optimize your workspace and enhance productivity with the right parts tray organizer, which can help you cate...


