
Recently, I shared a post all about how to hang a photo. Well, I figured if we were going to talk about hanging art in your home, it was only appropriate to talk about hanging other things. And we’re starting with hanging shelves!
Hanging shelving in your home can be a really intimidating process if you haven’t done it. How do you even know where to start?! There are so many different types of shelves you can have in your home, it’s a difficult topic to cover. Today, I’m going to do my best to give you a complete and thorough guide on hanging shelves in your home. We’ll cover every topic I can think of, and if I miss anything I trust you’ll let me know below in the comments.
Adding shelving in your home is a great way to get some extra space to display books to tchotchkes, and I’m a firm believer they work anywhere. The entryway? Yup. A hallway? Great! The living room? Perfect! Knowing how to hang shelves is one of those skills just about every homeowner will benefit from.
Let’s get to it!
What Options Do I Have for Hanging Shelves?
There are a ton of different styles of shelves you can hang in your home. I can’t possibly cover them all (because there are so many unique options out there), but here are the basics:
- Floating shelves, Floating shelves are shelves that don’t have any visible brackets or supports. They appear to be “floating” on the wall! These shelves are held to the wall using a hidden bracket system. They’re a really great option and one of my go-to’s for shelving in my home.
- Shelves with brackets (wall hanging shelves). Unlike hanging shelves, these have visible brackets. Brackets are the supports that shelves sit on – they’re attached to the wall, and the shelf usually sits right on top. There are an endless amount of options for your bracket style. Here are a few of my favorites:
Shelf Brackets
- Ceiling mounted shelves. This is a more unique option – sometimes you’ll see shelves that are suspended from the ceiling in some way. They can be attached with a metal bracket, or with rope or something else.
- Shelves with supports in wall. I’m sure there’s a more “formal” name for this type of shelving, but this is the sort of thing you might see in a pantry. These shelves have supports on the walls (usually just a piece of 1″ thick lumber), and the shelf sits on top of that.
Examples of Wall Shelves
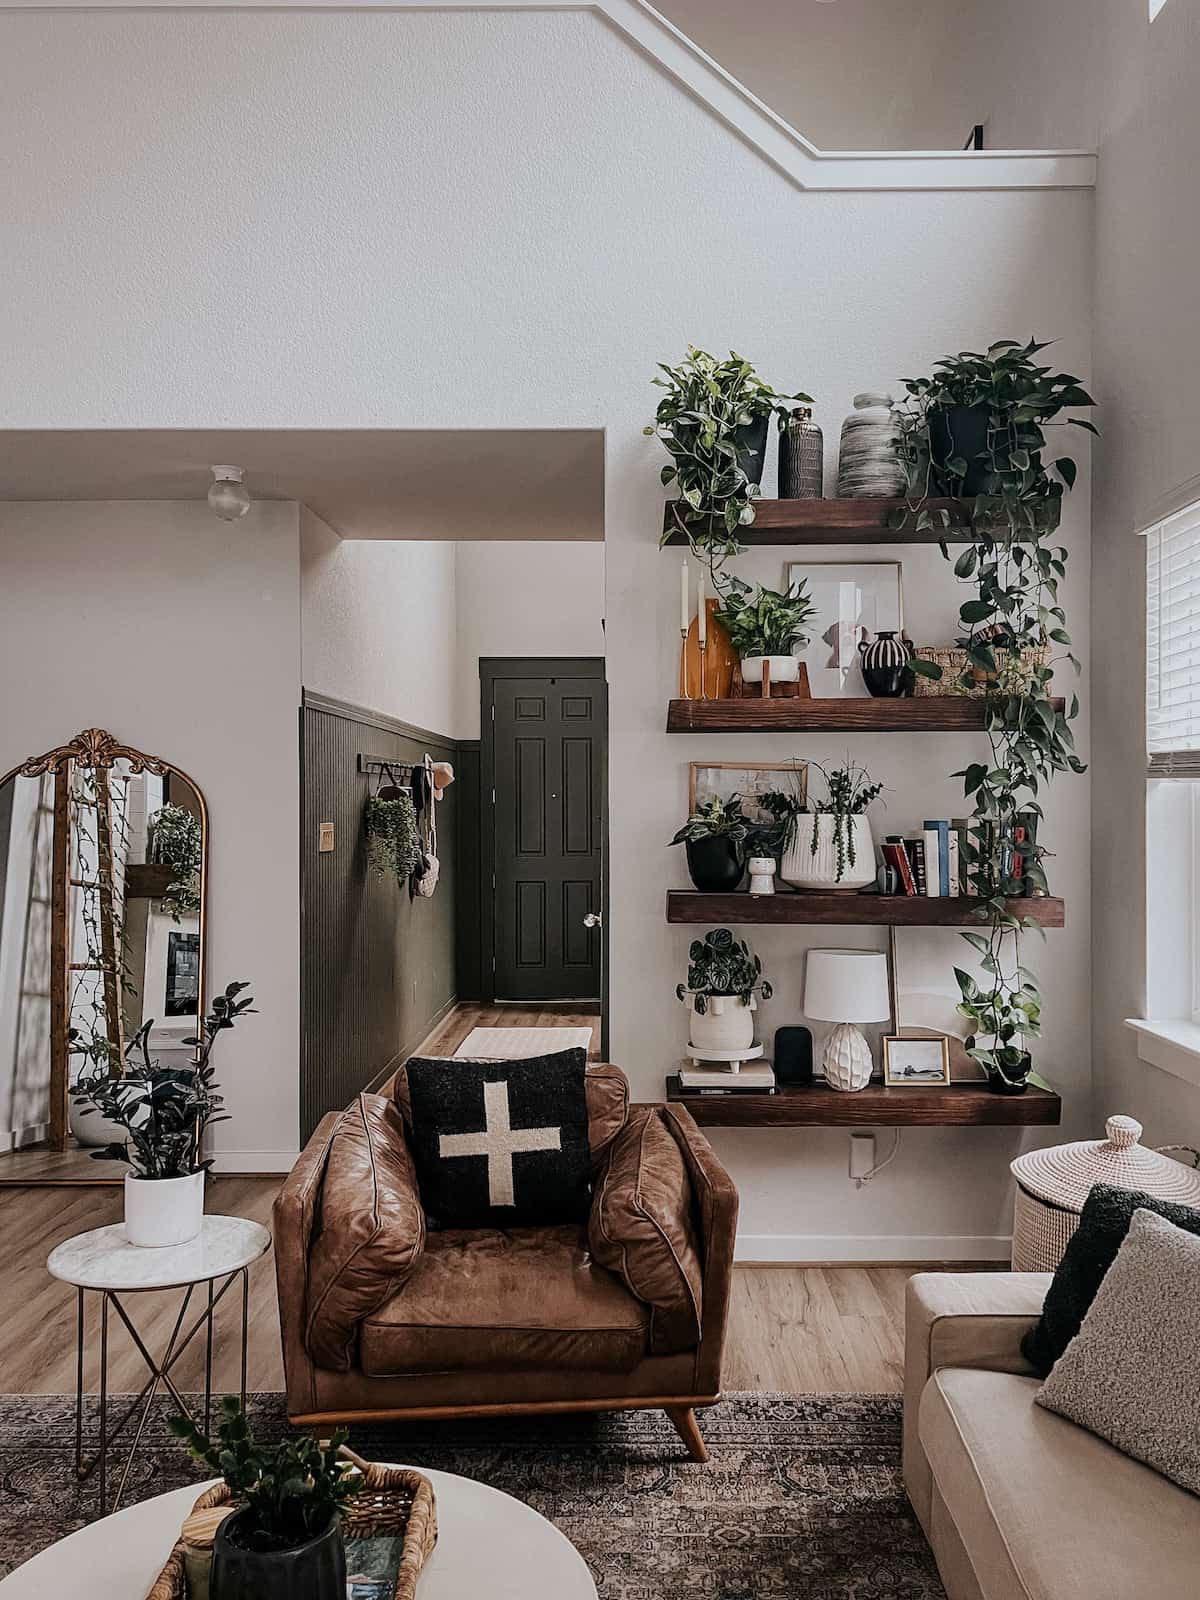
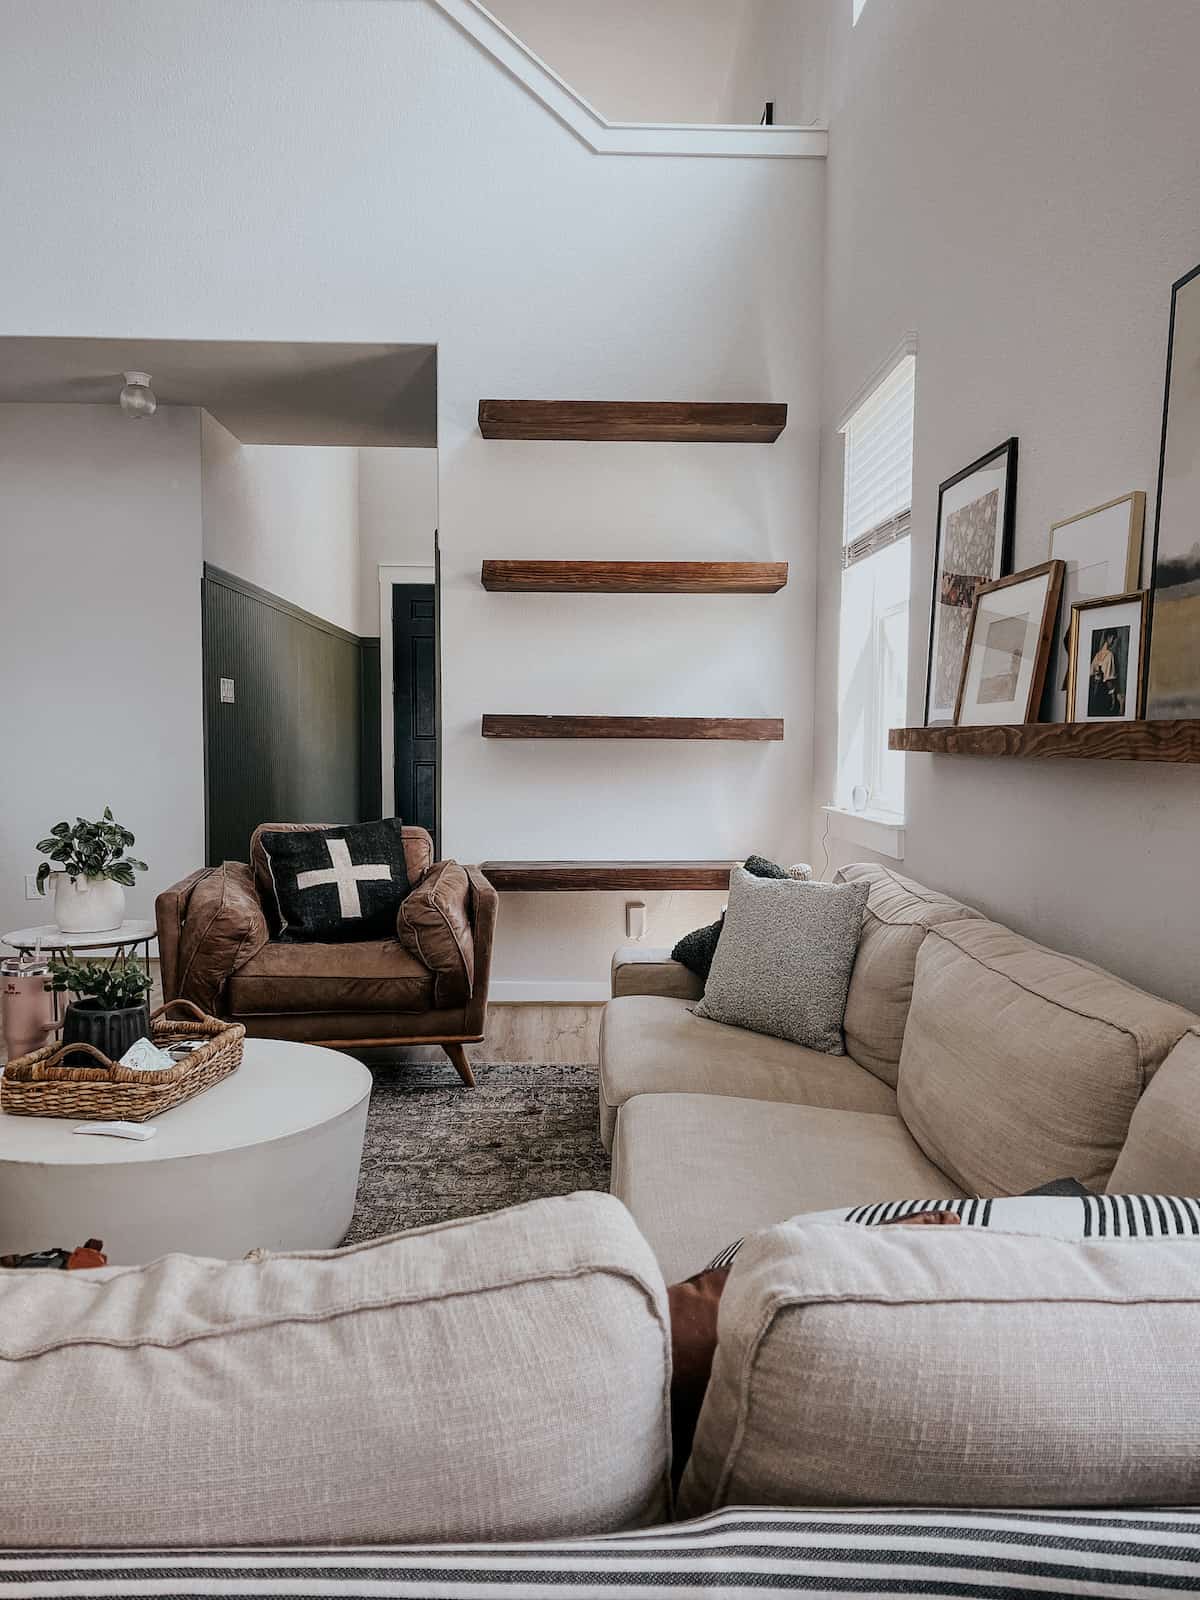
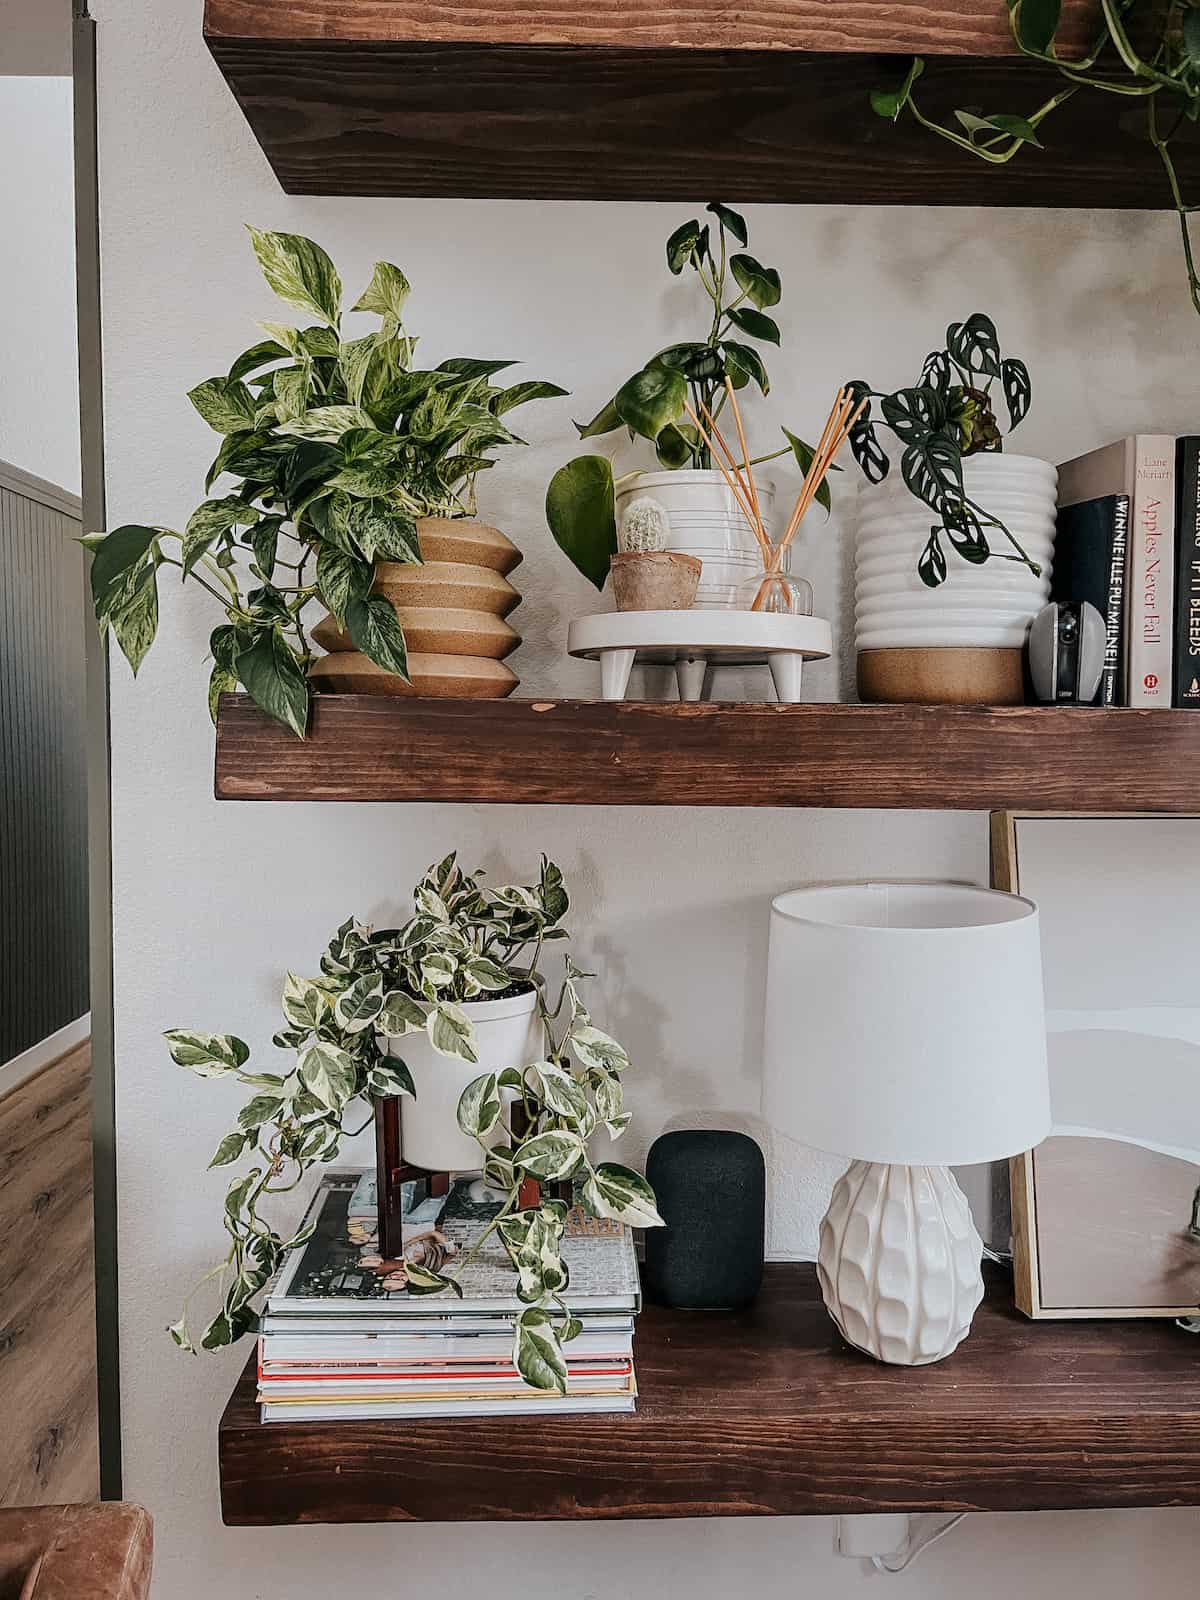
Okay, let’s have some visuals, shall we?
Here are a few of the wall shelves I’ve done in my own homes throughout the year. You’ll see a variety of styles and mounting options – this should give you a good idea of how versatile wall shelves can be!
How to Build Floating Shelves
Over the Toilet Shelves
DIY Closet Shelves
Laundry Room Shelves
Tools + Materials
Here’s a quick rundown of the tools and materials you might need to hang your shelves, aside from the actual shelves and brackets.
- Stud Finder
- Miter or Circular Saw (to cut down shelf)
- Drill + Driver
- Tape Measure
- Wall Anchors
- Level
How to Hang Shelves
Just like with art, your first step is to determine where you’ll hang your shelving. If at all possible, you’ll want the brackets for your shelves to go directly into studs. Heavy duty anchors will work fine if you can’t (just double-check the weight they can hold!), but studs are your best friend when it comes to shelving!
Generally speaking, your shelf should be about 4-5 feet from the ground. If it’s above something, shoot for somewhere in the range of 10-12″ above the piece. Again – these rules are not hard and fast! They’re just there to give you a starting point so you can tweak and adjust as needed.
I’m mostly covering shelving with brackets here today. It’s the most common type of shelf, and also the easiest to hang. If you’re looking for a floating shelf tutorial, click here.
Step One: Measure + Mark for the First Bracket
Once you’ve determined the height of the top of your shelf, subtract the height of the shelf itself from that number to determine where the top of your bracket should be. For example, if you’re hanging the shelf at 4′ and the shelf itself is 3″ thick, you’ll want the top of your bracket at 45″ from the ground.
Find the studs in the area where you’ll be hanging your shelf. Again, if at all possible, I’d recommend installing the brackets in the studs. If it’s just not gonna work, use anchors that can handle a lot of weight.
Hold the bracket up in place, use a small level to make sure it’s straight, and use a pen or sharp pencil to mark the wall through the holes on the bracket.
Step Two: Hang Both Brackets
Pre-drill (and install anchors, if necessary), then screw the first bracket into the wall.
Now, determine the placement for the second bracket. Bracket placement can be complicated depending on the material you’re using for your shelf. This post breaks it down really well! But, generally speaking it’s a good idea to place your brackets no more than 6-ish inches from the outside of your shelves.
Hold your bracket up at the appropriate distance from the first bracket, then place your long level on your first bracket and adjust the second one until they’re level with one another. Mark the holes, pre-drill, and install the bracket!
Step Three: Add the Shelf
Once your brackets are hung, you can place your shelf on top, and attach it! Most brackets have you screw into the shelf from underneath – but if there’s a different method of hanging the shelf, the brackets themselves will probably come with instructions!
And just like that, you’ve got some extra storage space in your home.
FAQs About Hanging Shelves
Most book and storage shelves are about 10-12″ deep. I find that a 12″ wide board (which is actually 11.5″) is a great go-to depth. But, furniture often has shelving that’s a little deeper, so you have a bit of wiggle room!
Typical shelf spacing ranges from 7″ to 15″. Any closer and it might be hard to fit anything on the shelves, and any wider they might feel disconnected! A good “standard” measurement is about 12″.
This depends on a lot of factors, including the brackets you choose, the type of wood you have, and how long the shelf is. More lightweight wood won’t be as sturdy as a heavier wood like oak.
Generally speaking, shelves can hold approximately 50 pounds for every stud they’re attached to. So, if you’ve got your shelves into two studs, you can safely assume it can hold about 100 pounds.
If you’re working with wall anchor bolts, they’ll specify how much weight they can hold.
This depends on if it’s hanging above something or just floating on the wall. But, a good rule of thumb to follow is to hang most shelves around eye level – between 4 and 5 feet from the ground.
Yes! They’re easy to install, sturdy, and a super simple way to get floating shelves in your home. Click here to see how they look in Jackson’s room.
need some help?
Styling Tips
Looking for some inspiration on how to style your hanging shelves? I’ve got you covered! Check out this post for a detailed walk through of how to style shelves in your home.
The post The Complete Guide to Hanging Shelves appeared first on Love & Renovations.